Table of Contents
This guide explains how to create Card Photos in Photoshop, with clear steps, practical tips, and important checks before you begin.
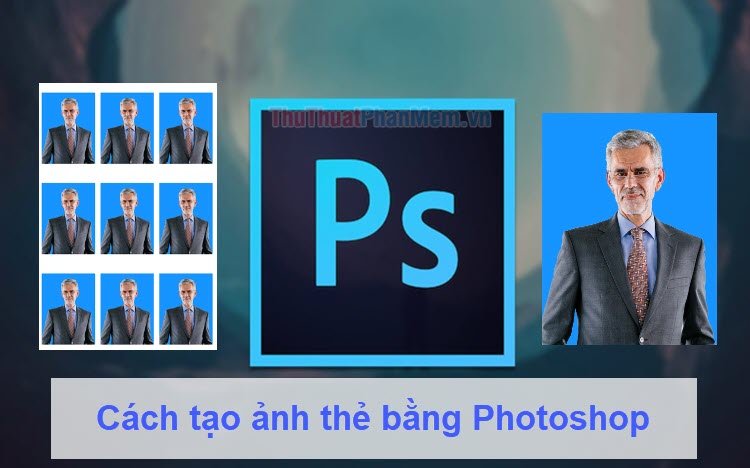
This guide will have 03 main parts as follows:
- Create a green background for the card image (if the photo does not have a blue background)
- Crop card photo according to the ratios (3x4 and 4x6)
- Create photos to print (There are many photos in one sheet to save money when printing)
If your photo has a green background, then you go to Part 2, but if the photo is free, please follow the steps from the beginning.
1. Create a green background for card images
Step 1: You proceed to open the image you want to make a card image and select the Quick Selection tool. Then, you use the Quick Selection tool to select the subject to be separated from the background.
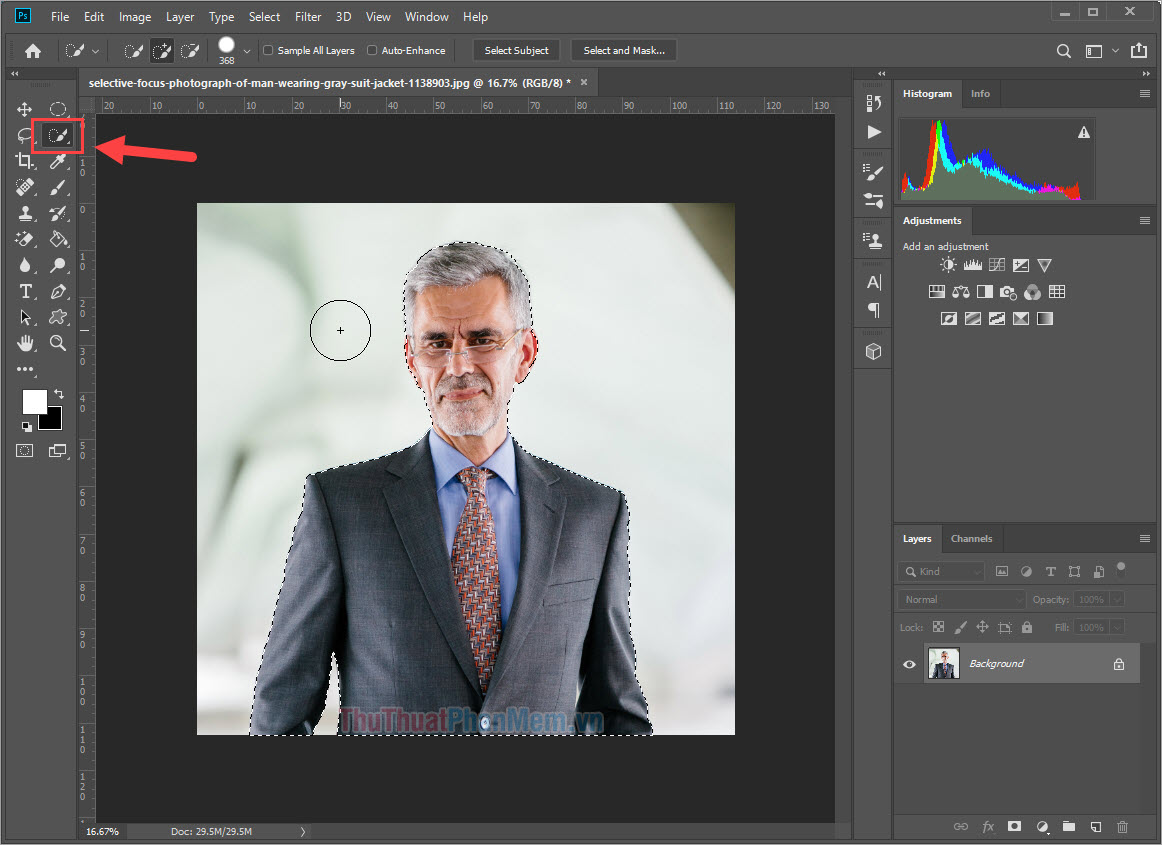
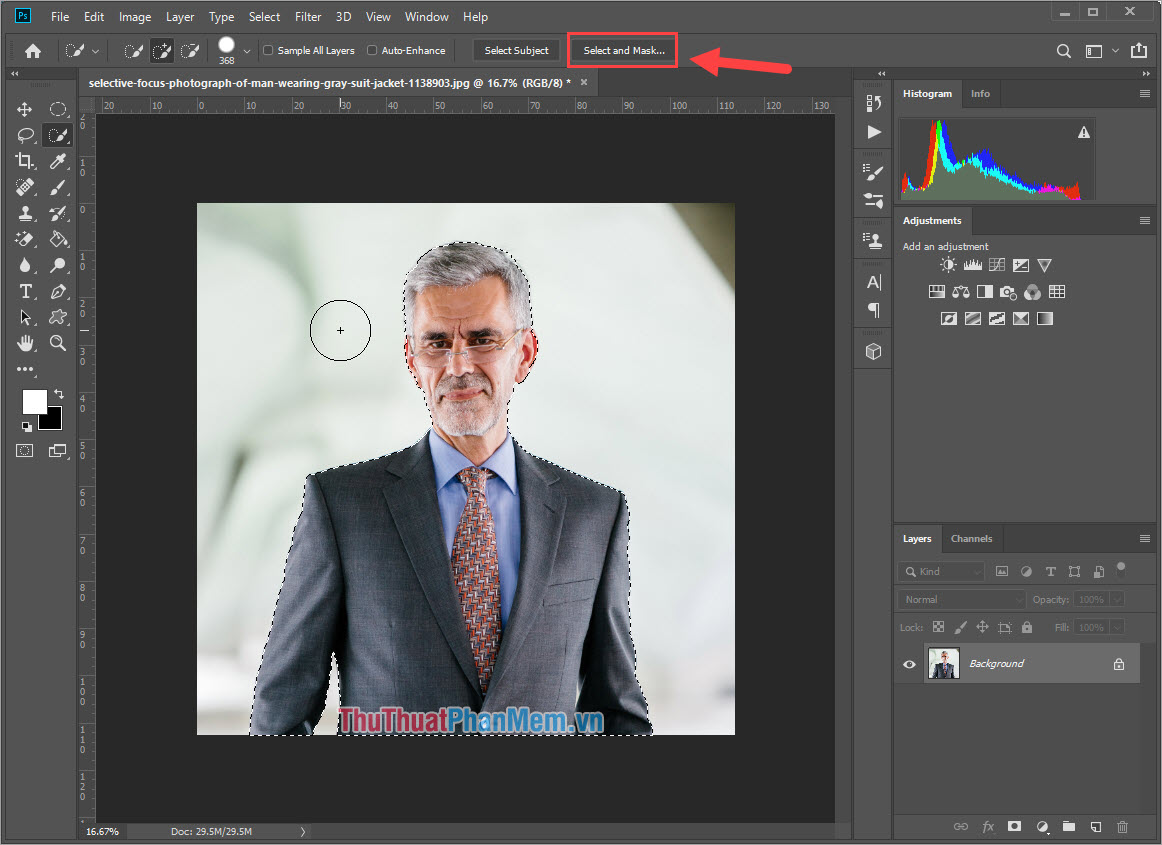
Step 2: Once you've selected the subject to be separated, you select Select and Mask. to edit for softer, smoother strokes.
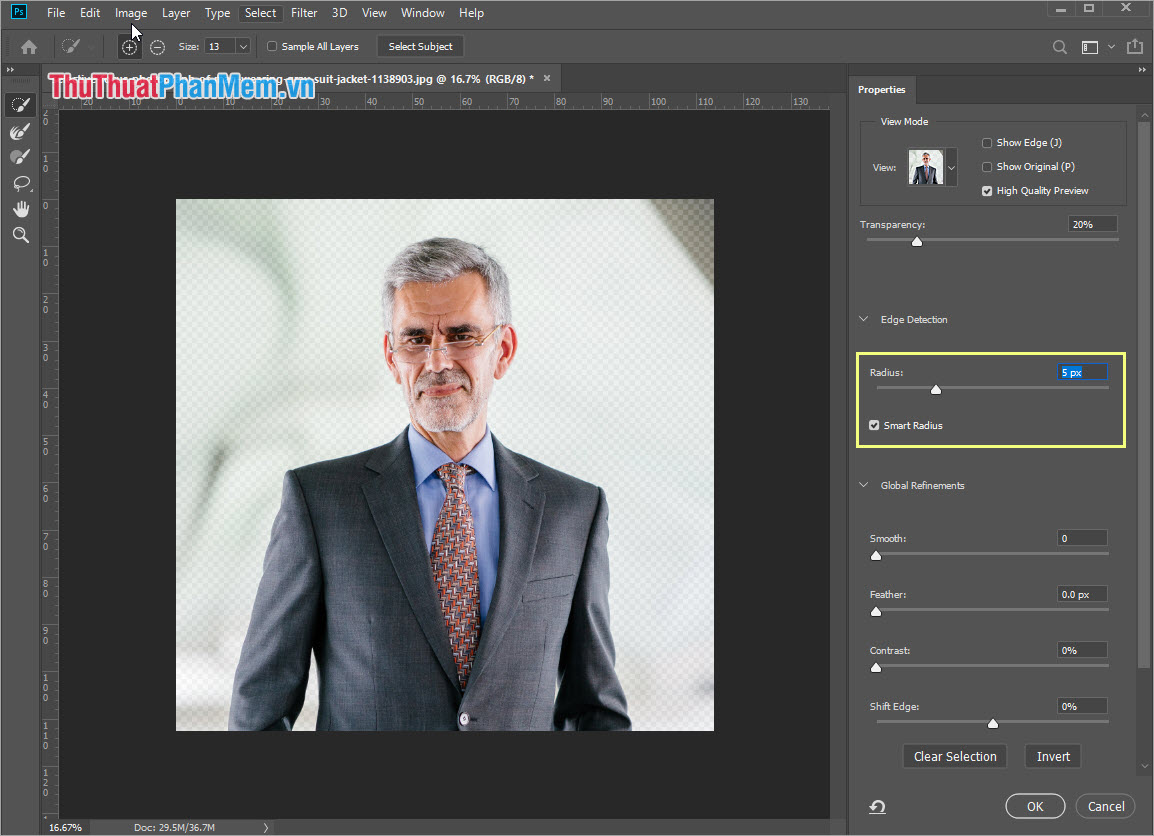
Step 3: After selecting Select and Mask. we will have the Properties window. You proceed to set the parameters as follows:
- Radius: 5 pixels (px)
- Select Smart Radius
Finally, click OK to save.
Step 4: You Right-click on the subject and choose Select Inverse to invert the selection.
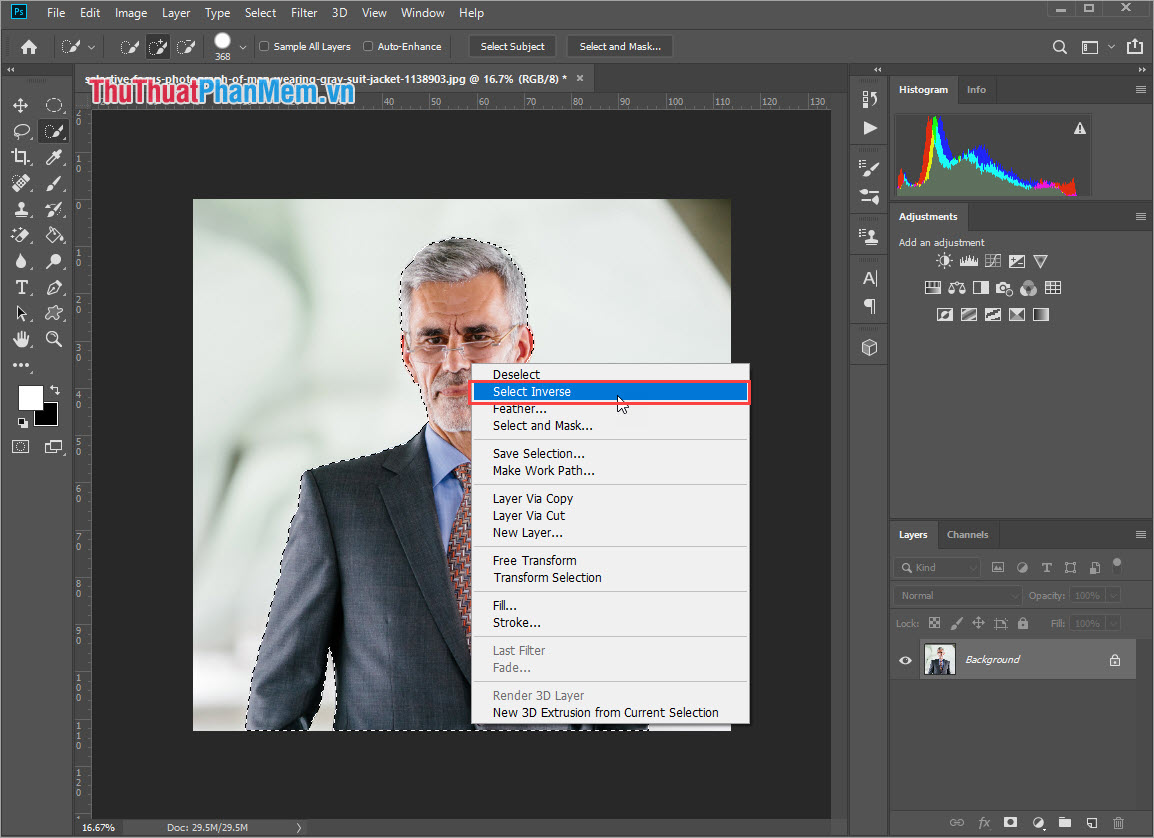
Step 5: Next, select Layer -> New Fill Layer -> Soild Color.

Step 6: Then, you proceed to name it and choose Color Blue to distinguish it. Finally, click OK to move to the color selection step.
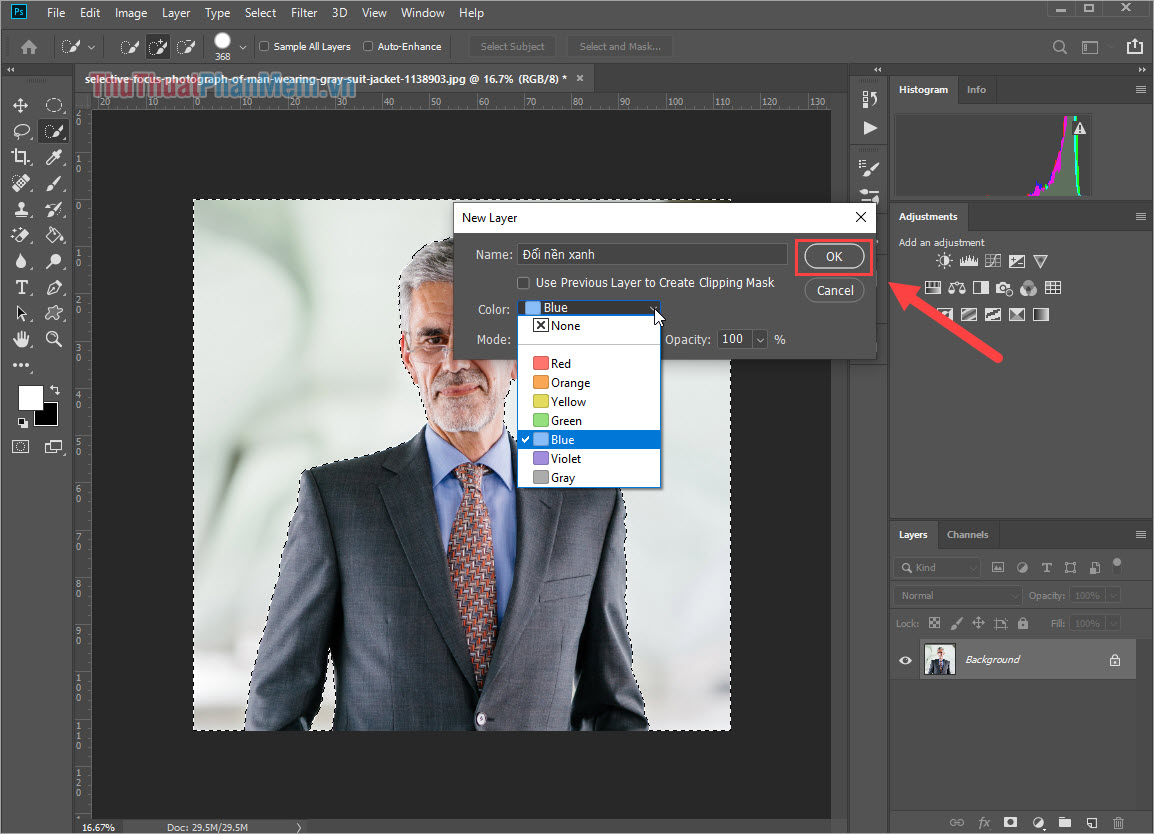
Step 7: The Color Picker window will appear for you to choose the color. Now you need to choose blue to replace the background image. Most people today use blue with the code # 1694ff to tag images. You can enter the code to select the color faster.
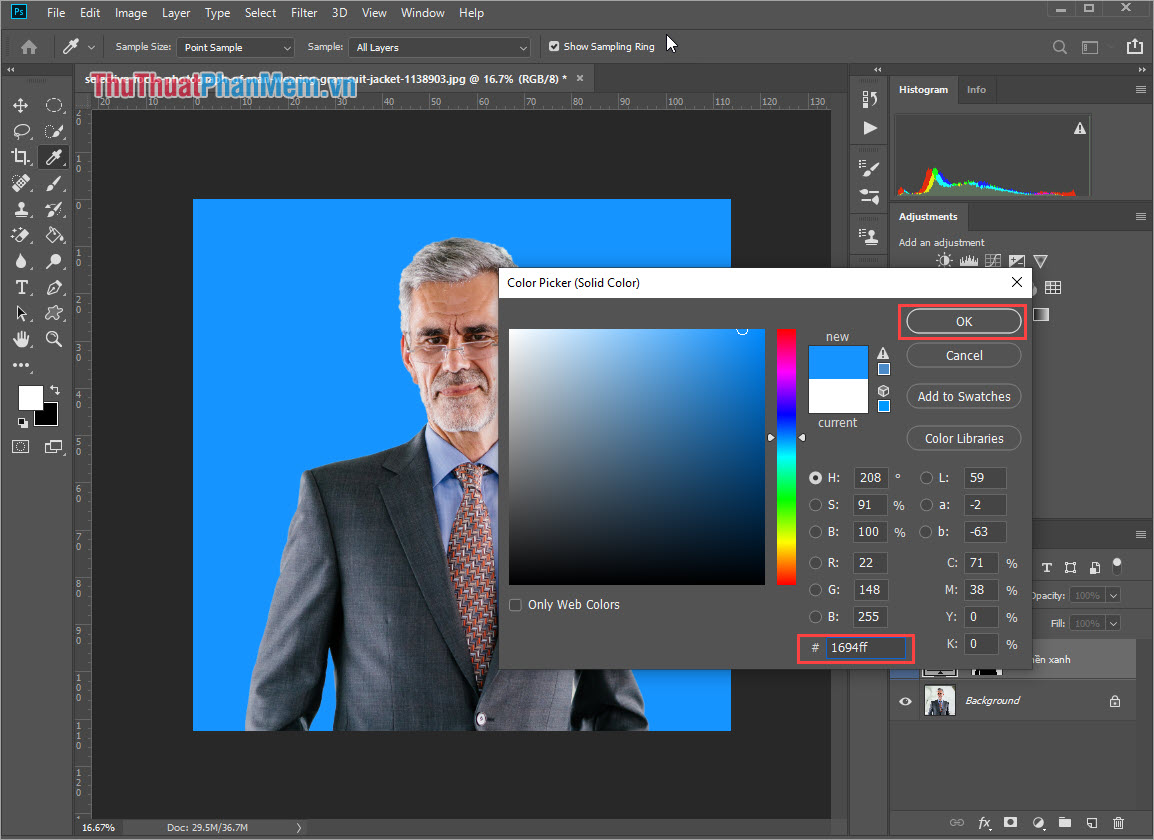
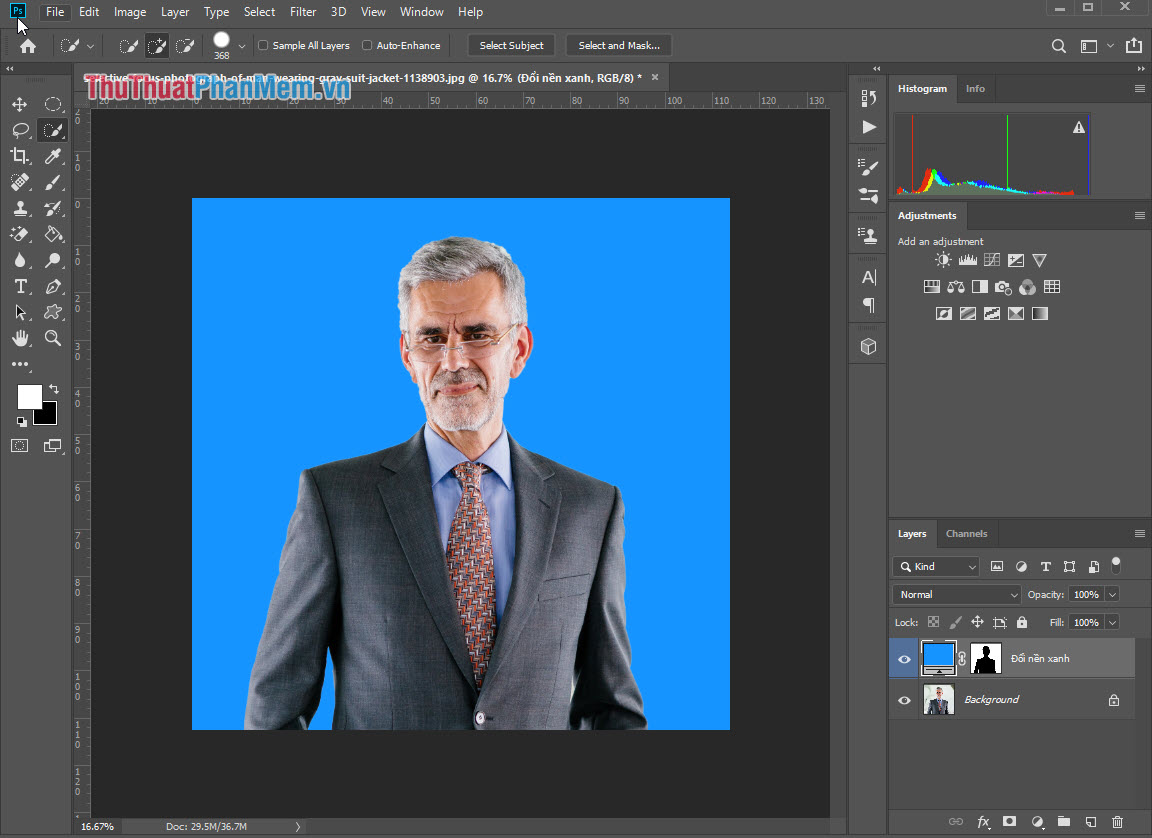
Finally you click OK is finished, so we have replaced the green background image successfully!
2. Cut the card photo to the proportions
Step 1: Select the Crop Tool to crop the image.
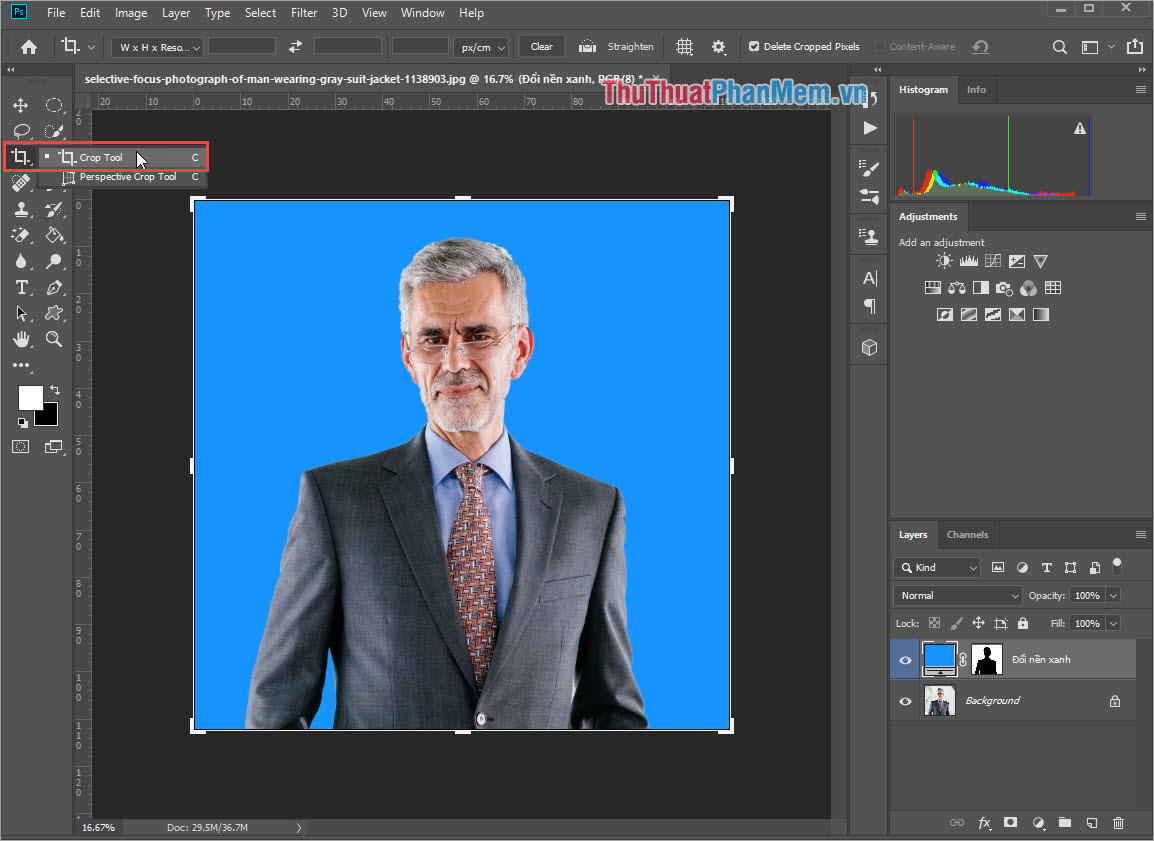
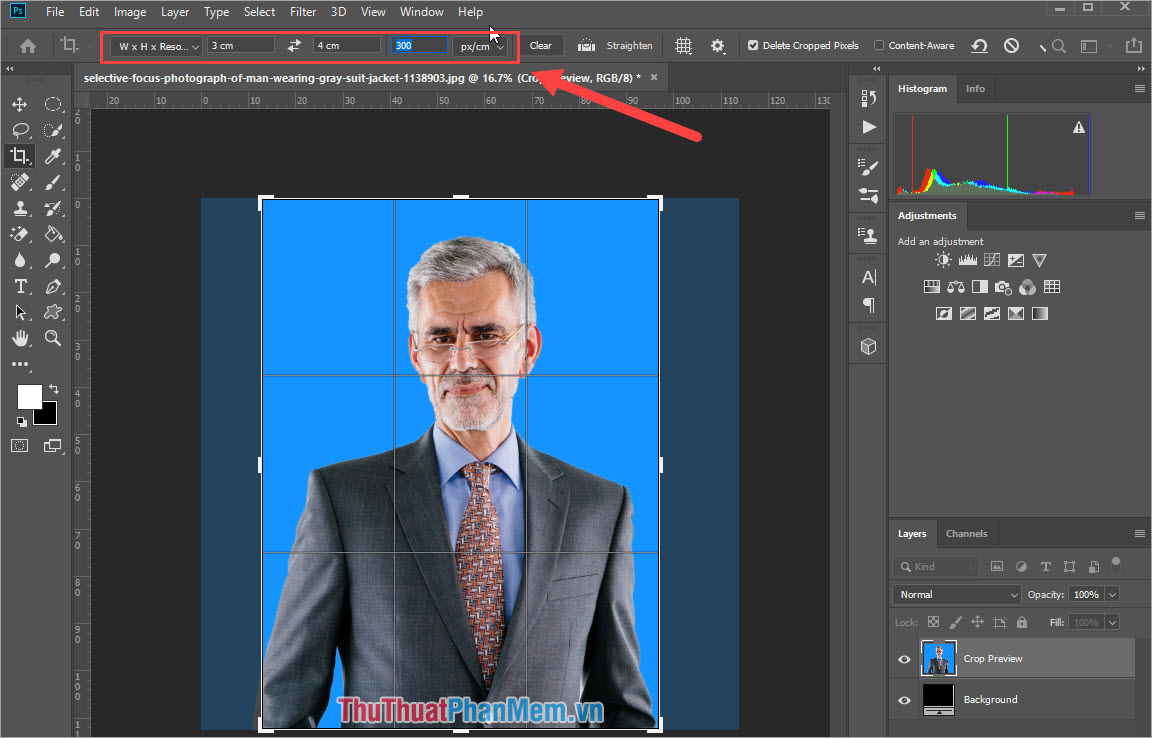
Step 2: After that, you turn to set the following parameters:
- Mode: W x H Resolution
- Width: 3 cm (3x4 photo) or 4 cm (4x6 photo)
- Height: 4 cm (3x4 photo) or 6 cm (4x6 photo)
- Resolution: 300 px / cm
Next, you use the mouse to align the image area to create a card in the center of the Crop frame to make them beautiful. When the calibration is complete, click OK to crop the image.
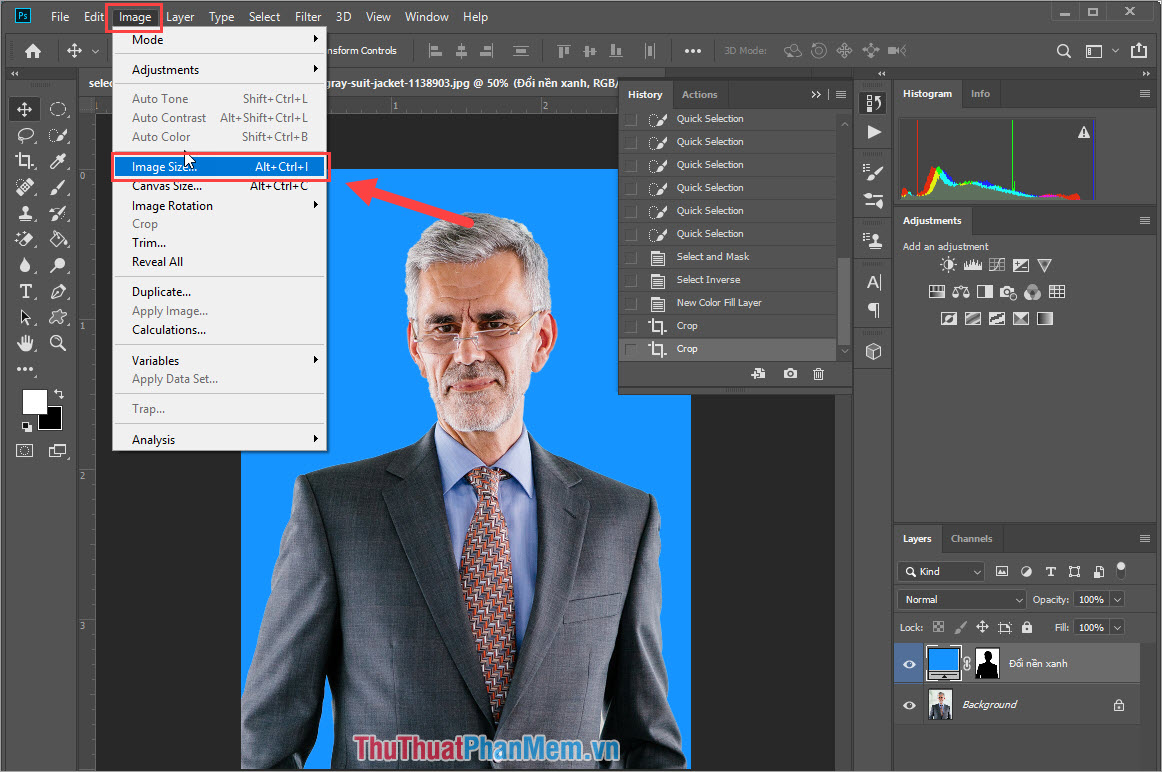
Step 3: Next, you select Image -> Image Size to Resize the image to scale.
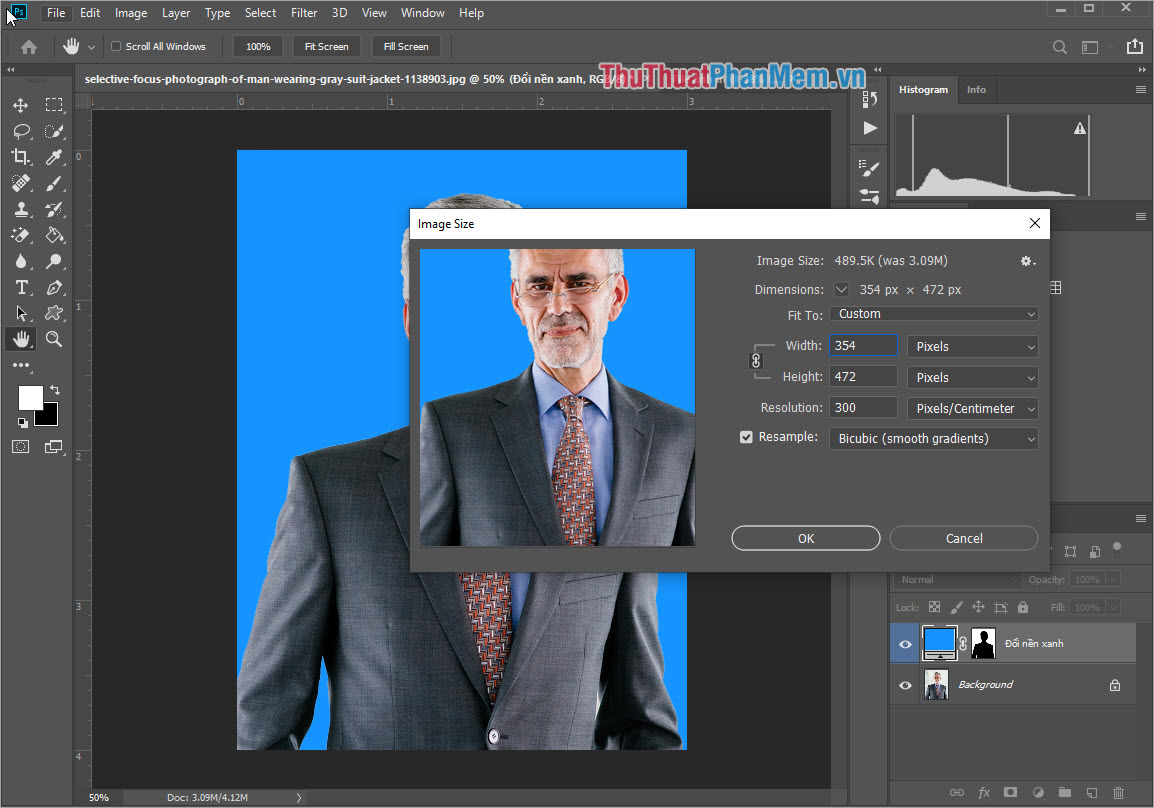
Step 4: You proceed to set the following parameters:
- Photo 3x4cm: 354 x 472 Pixels, Resolution 300 px / cm
- Photo 4x6cm: 472 x 709 Pixel, Resolution 300 px / cm
Then you click OK to save.
Step 5: Next, select Image -> Canvas Size.
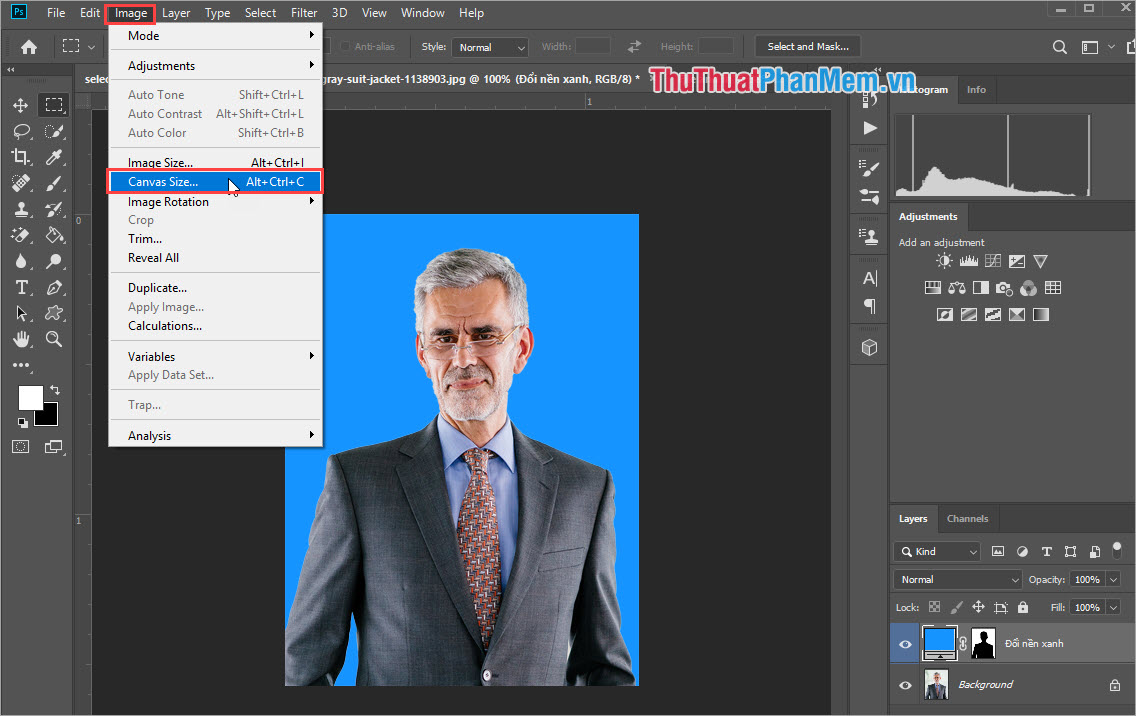
Step 6: Continue setting the parameters as follows:
- Photo 3x4cm: 390 x 600 Pixels
- Photo 4x6cm: 570 x 870 Pixel
- Color White
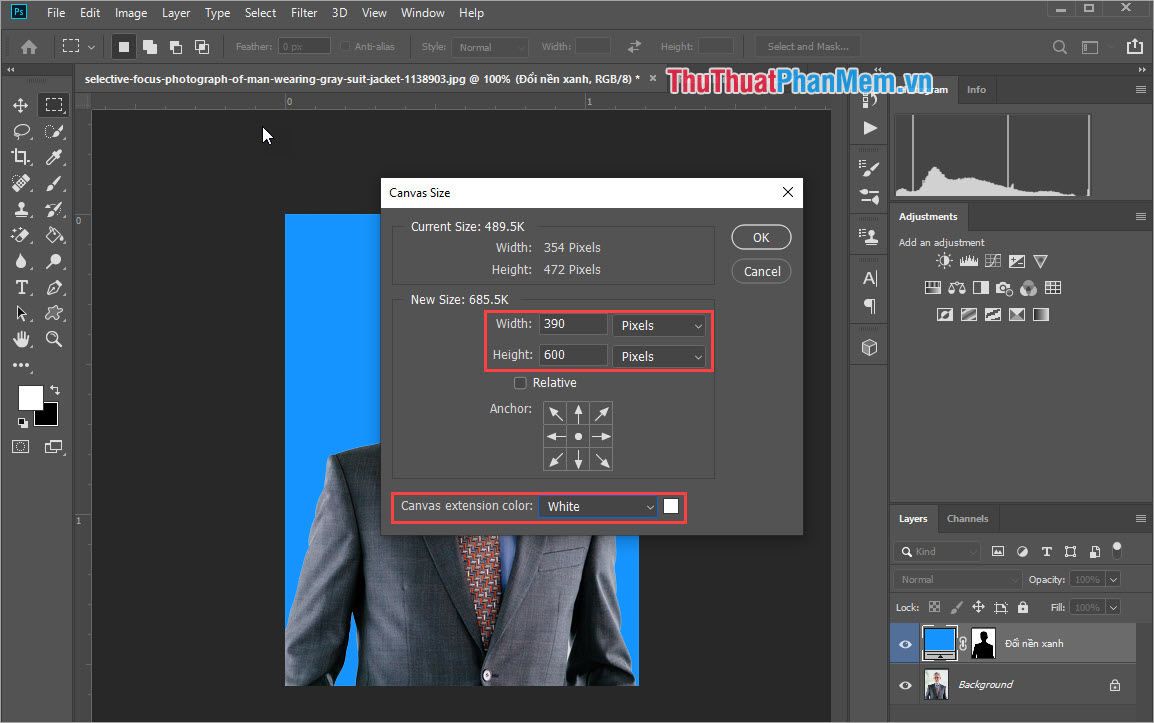
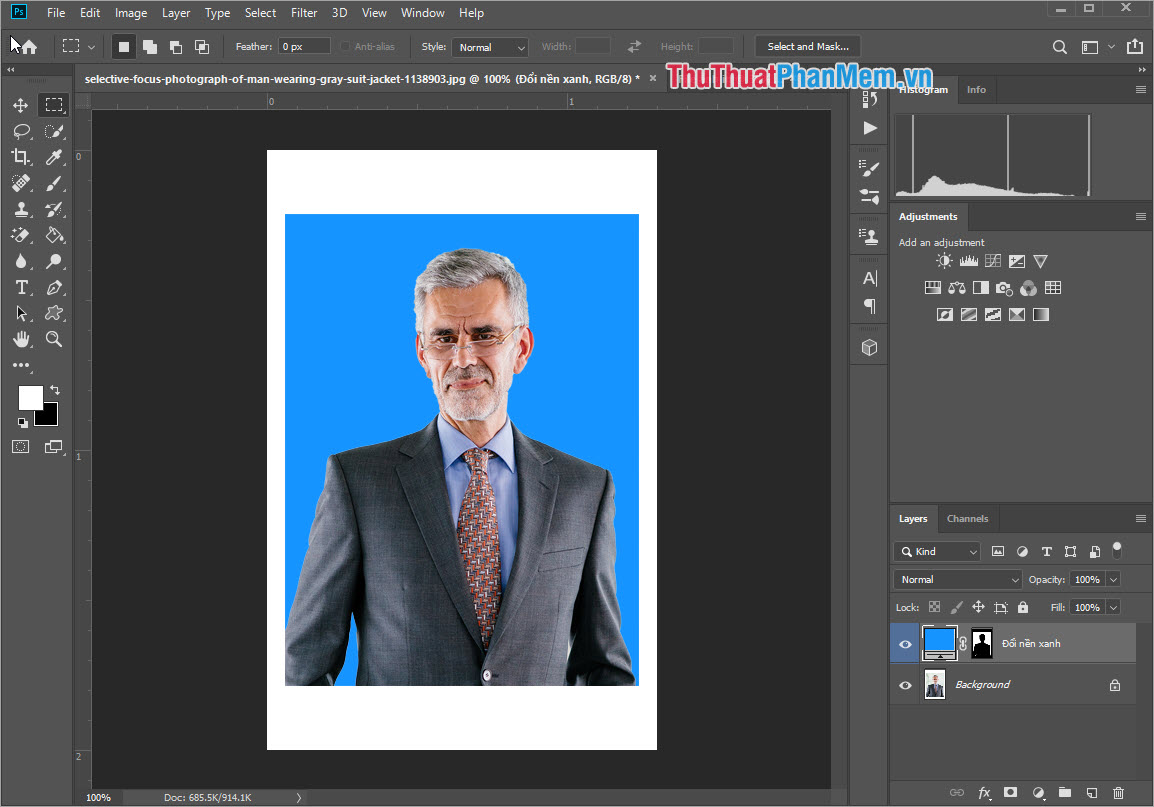
Finally, click OK to finish! So you have finished the photo cropping and resizing according to the ratio of 3x4 and 4x6 images.
3. Create an image to print
To save money on printing, we will create a card photo into a 10 x 15 cm photo frame to print once.
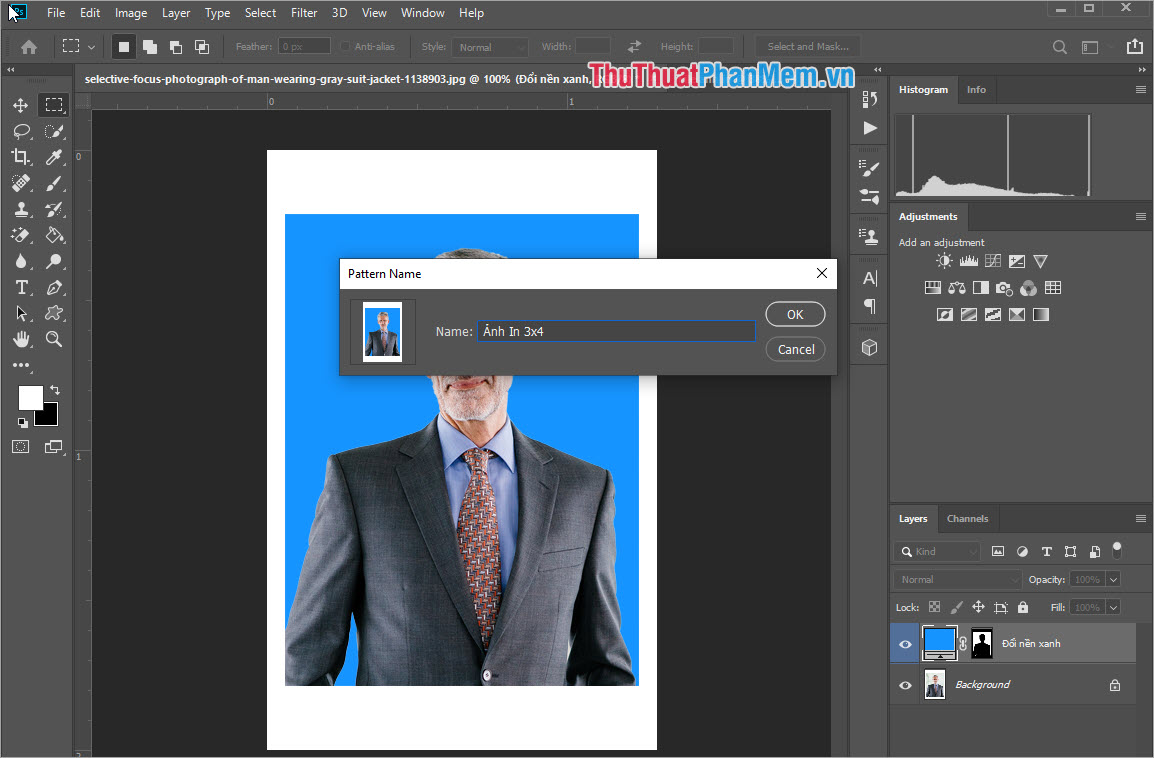
Step 1: Select Edit -> Define Pattern to create a Pattern image.
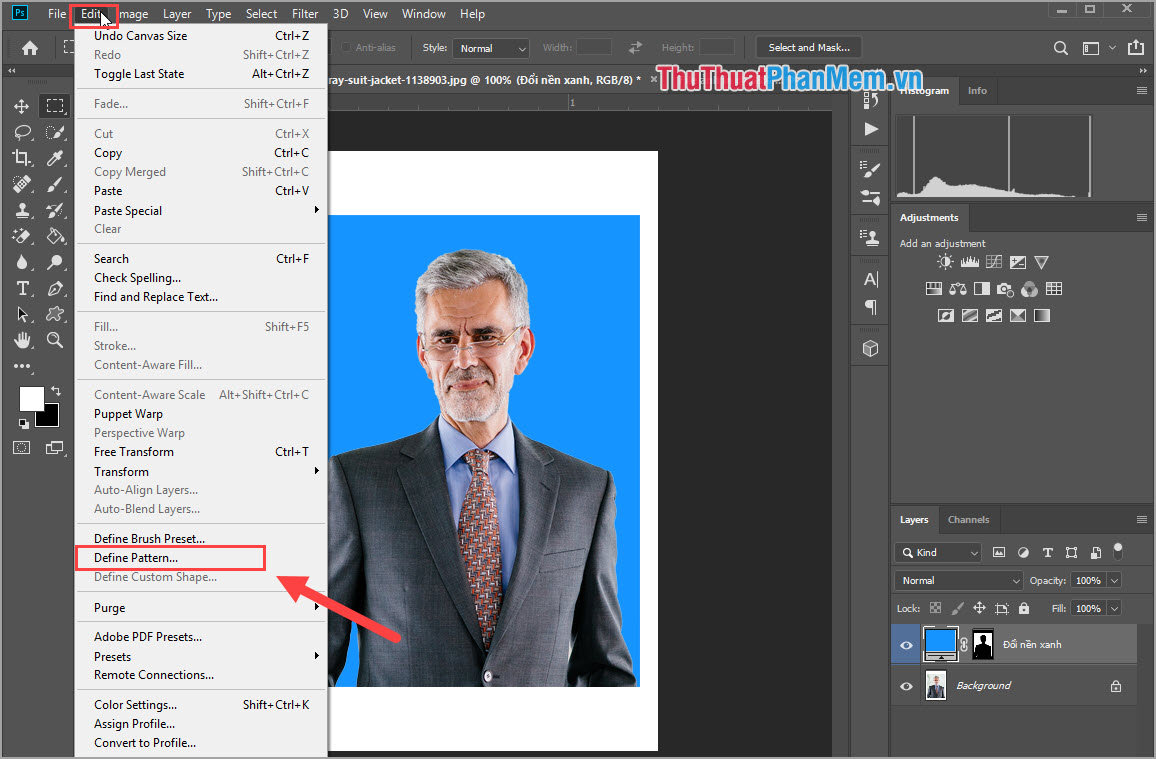
Step 2: You name it arbitrary so that it is easy to remember and click OK .
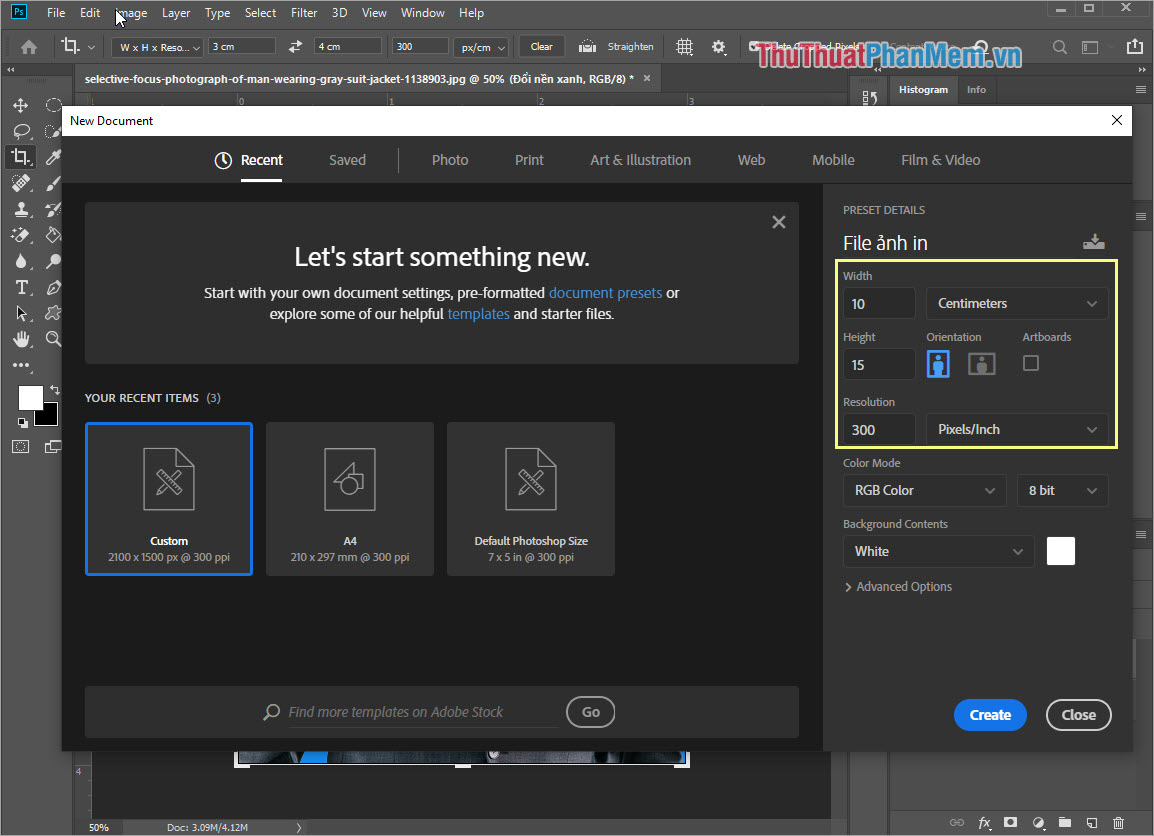
Step 3: Choose File -> New (Ctrl + N) to create a new working file and set the following parameters:
- Width: 10 centimeters
- Height: 10 centimeters
- Resolution: 300 centimeters
Then, click Create to create.
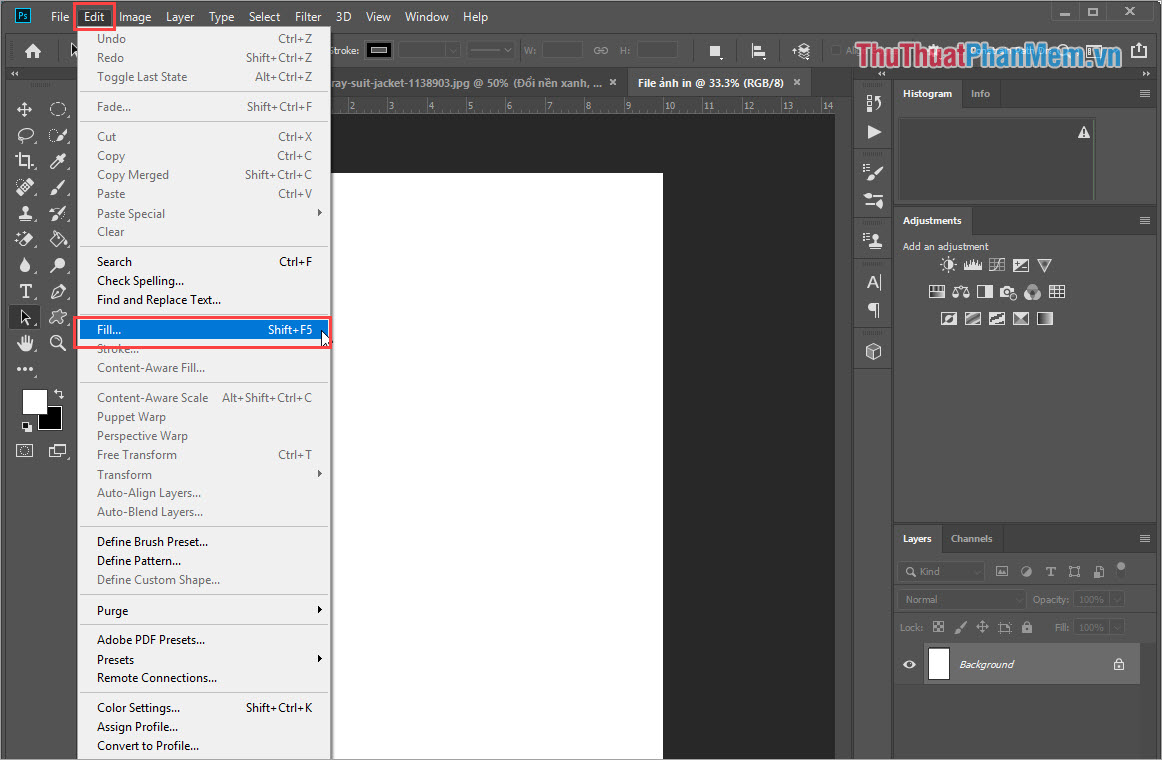
Step 4: Select Edit> Fill to paste the newly created Pattern .
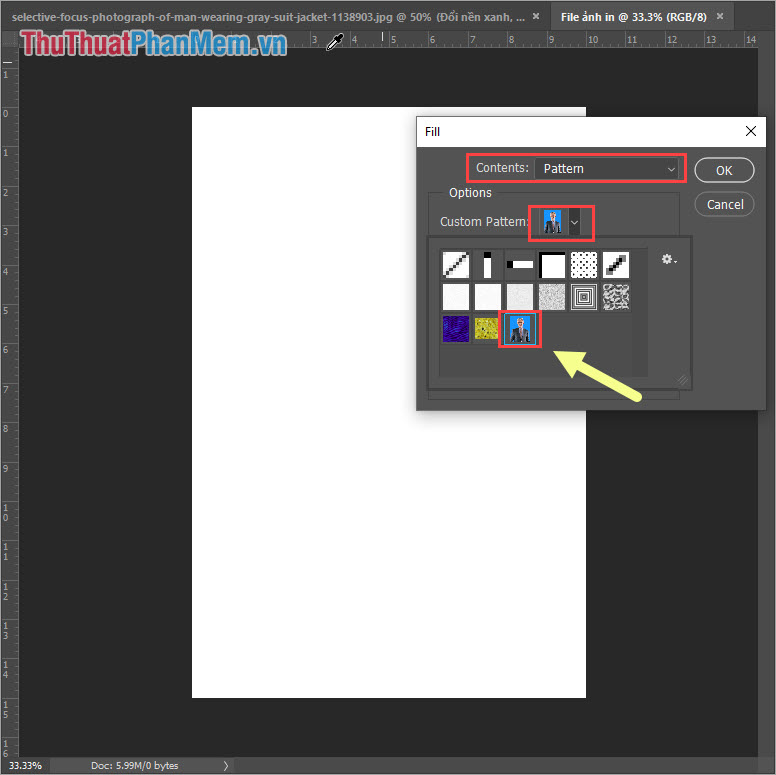
Step 5: Select the newly created image Pattern above the article and click OK .
And this is our result after framing the image for printing.
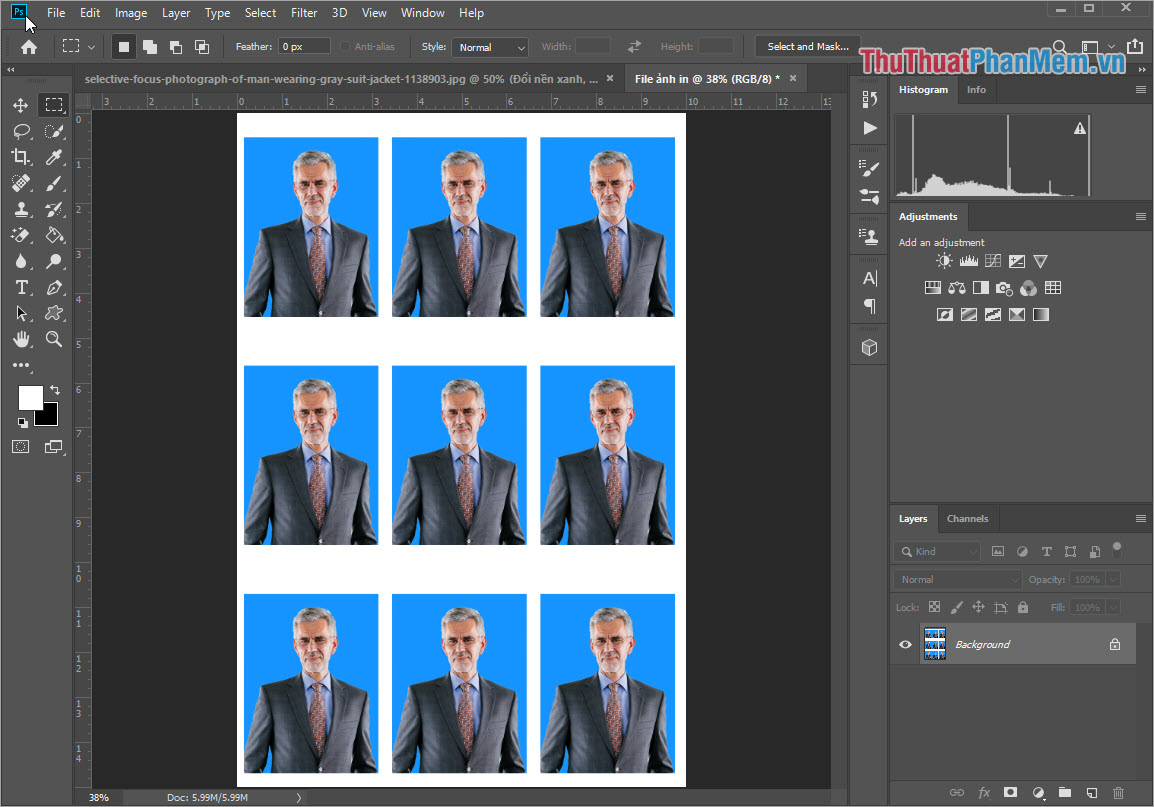
If you want to print always, just select File -> Print. (Ctrl + P) is done.
In this article, Software Tips guide you how to create card images and create multi-card photo frames on Photoshop. Good luck!
FAQ
What should I know about Create Card Photos in Photoshop?
Focus on the key features, requirements, limitations, and practical use cases explained in this guide.
How do I get the best results with Create Card Photos in Photoshop?
Follow the recommended steps, use current software or information, confirm compatibility, and review settings before major changes.
Are there any risks or limitations?
Potential limitations depend on compatibility, data quality, cost, privacy, support, and how the product or method is used.
Related Articles
 How to Use Photoshop CS6 (Part 2): Create Fashion Collage Images17 minutes read
 How to Cut Circular Images in Photoshop: Cut Photos on Photoshop4 minutes read
 How to Create a Border for Photos in Photoshop2 minutes read
 Photoshop: Create Your Own Christmas Cards6 minutes read
 How to Use Photoshop CS6 (Part 1): Create Digital Photos11 minutes read
 How to Transplant Faces in Photoshop4 minutes read
Reader Comments 0
Sign in with email or Google to join the discussion.