How to install, set up and access LAN on Windows 11
On TipsMake, there have been many articles related to LAN of Windows operating system. However, with each new version of Windows, Microsoft updates a little more about the interface.
Therefore, for those who are not familiar with computers, it will take a lot of time to grope.
Although I have shared quite a few articles on my blog, today I still decided to rewrite it a bit so that those who have just upgraded to Windows 11 can easily access other computers in the future. same LAN than.
In general, there is only a slight difference in the access interface, but in general, the way to set up and use it has not changed much.
Okay, back to the main issue, in this article I will show you how to set up to display computers on the LAN, and at the same time you can see other computers on the same LAN.
#first. How to set up LAN on Windows 11
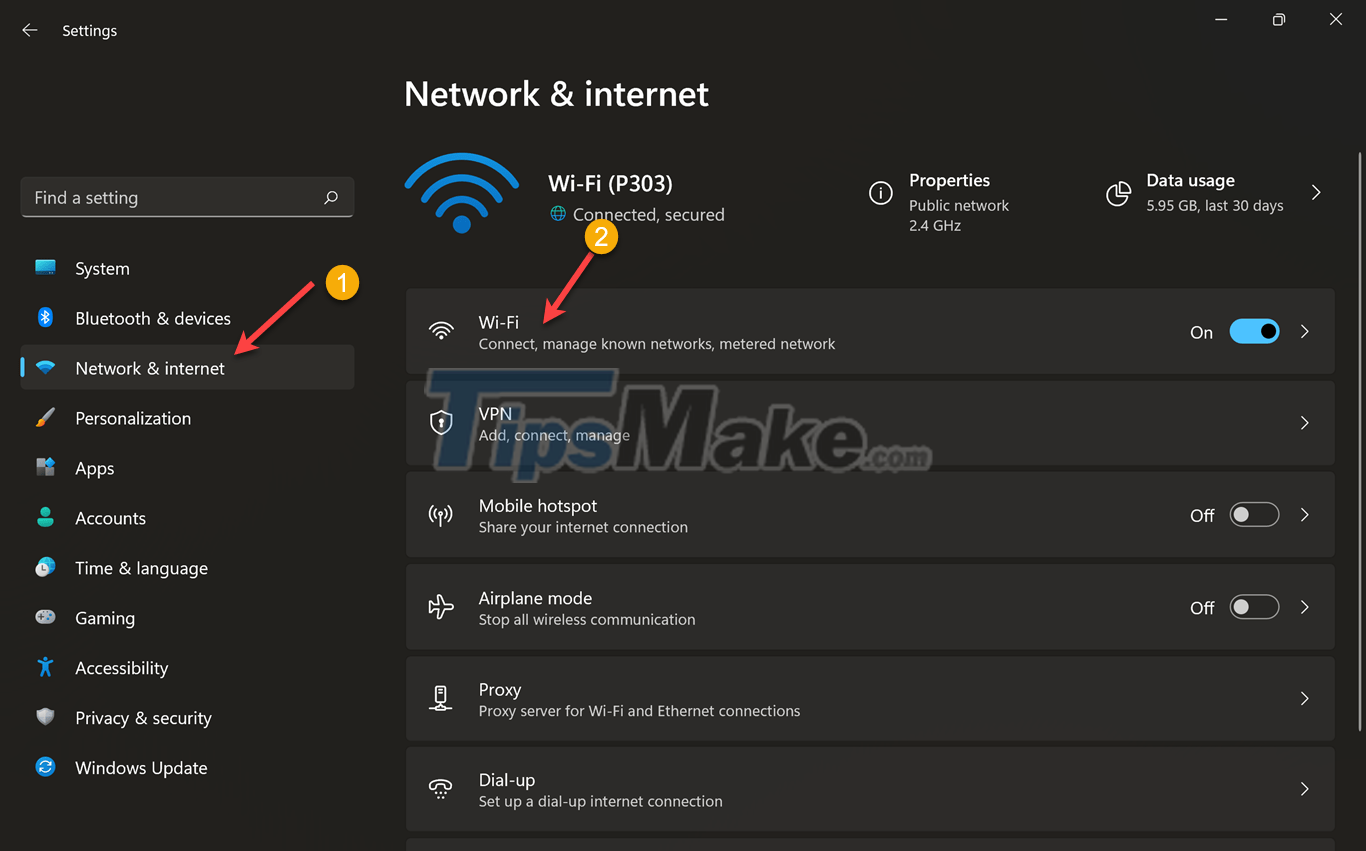
+ Step 1: You press the Windows + I key combination => then select Network & internet => here you can click Properties to quickly access the network you are connecting to.

Or you can access Wi-Fi
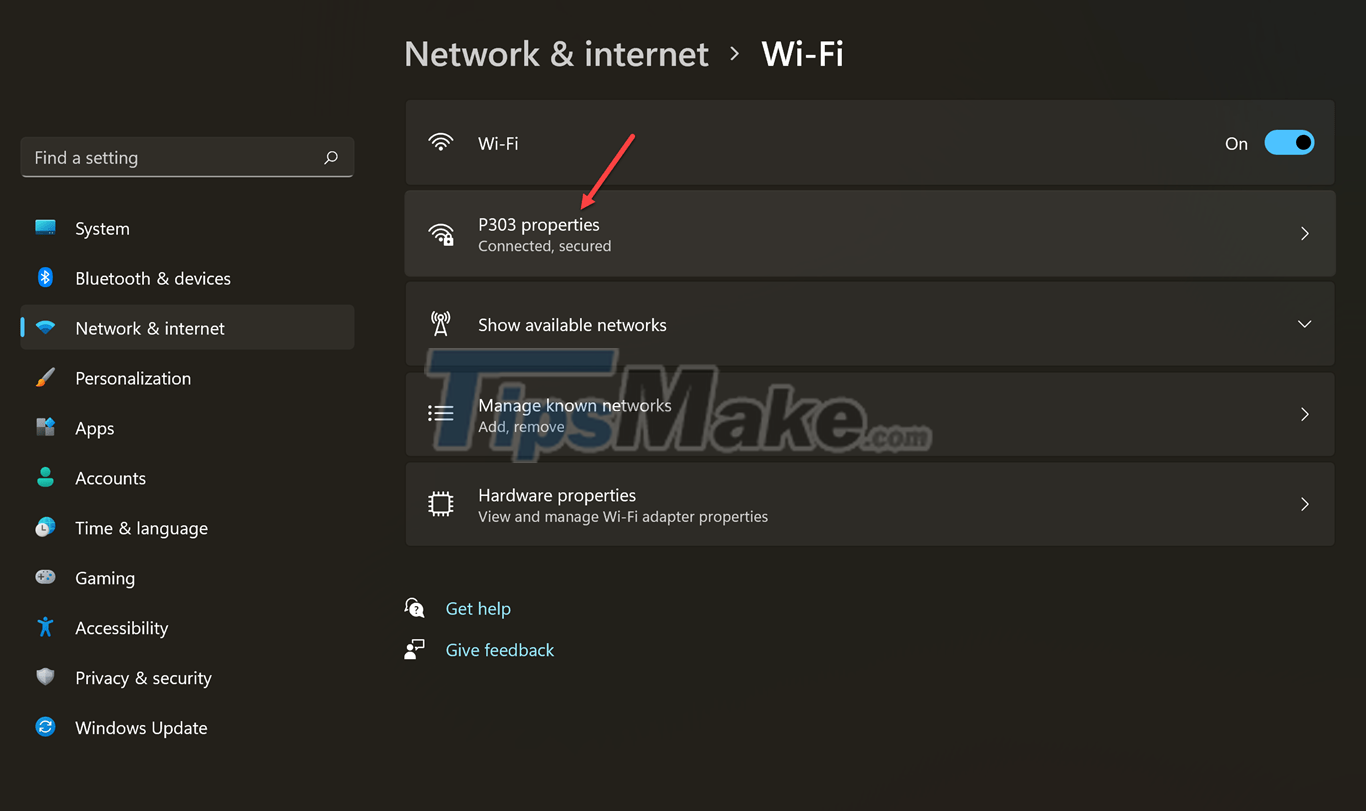
Then select the Internet network you are connecting to, for example in my case here is the network P303 that you guys. You click on it!
+ Step 2: Here, change the Network profile type from Public to Private as shown below.
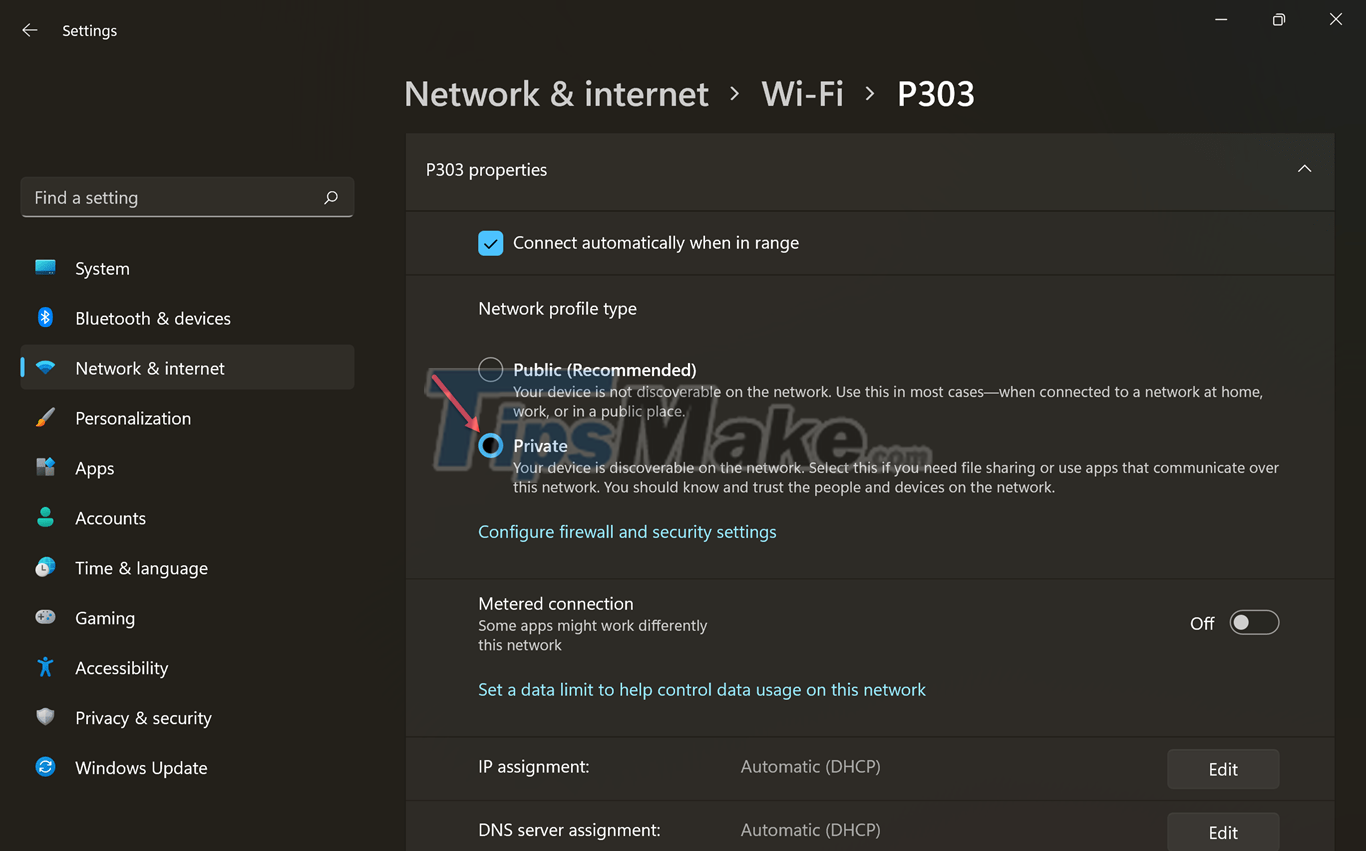
In addition, in the same window, you can scroll down to see a lot of information related to the Internet, such as MAC address, IPv4, IPv6, network speed, connection type.

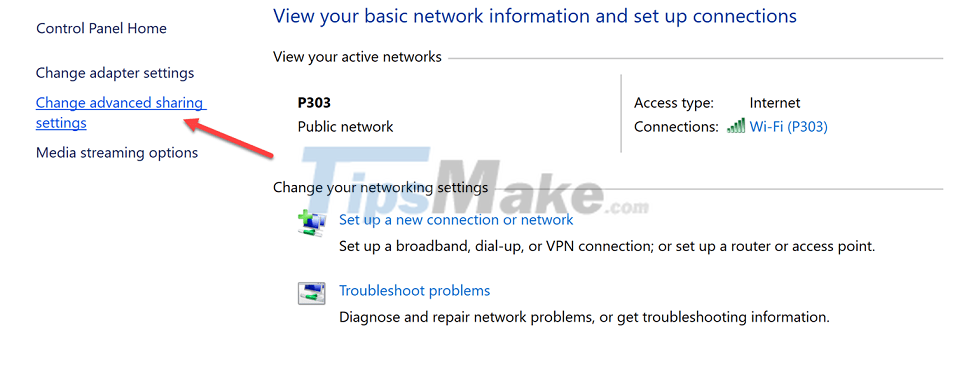
+ Step 3: Okay, next we will have to set up a bit more in the Change advanced shared settings section.
To open Change advanced shared settings, open the Run dialog box (Windows + R) => enter control => and press Enter. Then select View network status and tasks as shown below.
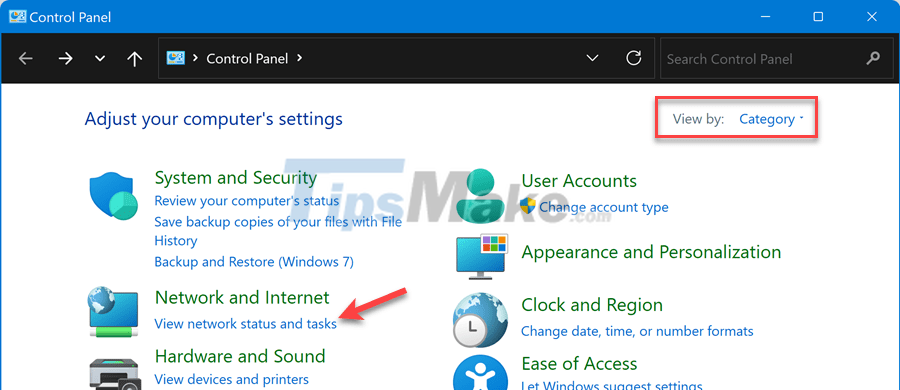
And select Change advanced shared settings to start the setup.
About how to set it up, I have detailed instructions in this article, read it again if you don't know how to do it: The fastest way to share files over LAN on Windows 7/8/10 (see part #3) in section III.)
#2. How to access LAN on Windows 11
To access other computers on the same LAN, press the Windows + E key combination => then select Network in the left hand column => and select the computer you want to enter.
But of course other computers must also be set up as your computer to be able to display in the LAN.

#3. Epilogue
Well, that's it, I've finished showing you how to set up LAN on Windows 11. As you can see, installing LAN on Windows 11, as well as accessing LAN on Windows 11 is not difficult at all.
The steps are completely similar to other versions of Windows, only slightly different in location and interface.
You should read it
- Setting up and connecting Remote Desktop in Windows 7
- Fix 'The current BIOS setting do not fully support the boot device' in Windows 10
- How to enable/disable 'Let's finish setting up your device' screen on Windows 11
- Instructions for setting virtual RAM on Windows 10 to make your computer run faster
- How to fix 'This Setting Is Managed by Your Administrator' error on Windows 10
- How to set up ADB / USB Drivers and Fastboot for Android devices
 How to set up automatic emptying of the recycle bin in Windows 11
 How to change the color of Windows 11 computer screen suitable for the blind
 How to install (and uninstall) fonts on Windows 11
 How to open multiple images side by side for comparison on Windows 11
 How to Uninstall a Windows 11 Update