How to open multiple images side by side for comparison on Windows 11
Sometimes you want to put two or more photos side by side for comparison, to find the difference in quality, content, or anything between them.
Table of Contents
Sometimes you want to put two or more photos side by side for comparison, to find the difference in quality, content, or anything between them. No need for any specialized tools, Windows 11's built-in Photos app can completely help you do it. Find out below.
How to compare photos in the Photos app on Windows 11
First, use File Explorer to put the images you want to compare in a separate folder on your PC. Then right-click one of these photos and choose Open With > Photos.

When the Photos app opens with the image you selected, move your pointer to the bottom of the screen. You will see thumbnails of other photos in this folder. Here, select the photo you want to compare with the photo currently open in the app.

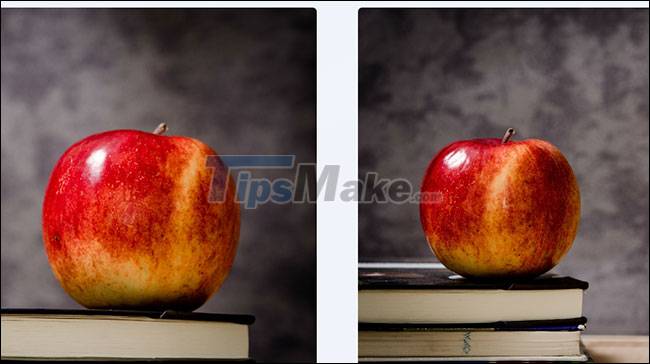
The Photos app will now show both of your images side by side for comparison.
To add more comparison images, simply move your cursor to the bottom of the Photos window and select the photo you want.

You now have a bunch of pictures to compare.

Hope you are succesful.
Was this article helpful?
Your feedback helps us improve.
Related Articles
 How to open multiple spreadsheets side by side in Excel 20133 minutes read
 How to compare future budget forecasts side-by-side in a conversation with Claude.8 minutes read
 Using File Opener Plus opens multiple file formats4 minutes read
 Open multiple folders at once on Windows 10 with just one shortcut3 minutes read
 How to open multiple windows of a software3 minutes read
 How to Print Multiple Photos on One Side of Paper on PC or Mac3 minutes read
Reader Comments 0
Sign in with email or Google to join the discussion.