How to Uninstall a Windows 11 Update
The fact that a new update causes problems or contains vulnerabilities is not strange to the Windows user community..
Therefore, uninstalling an update when it is suspected to be the cause of the problem will be essential for your system to quickly return to stable operation.
On Windows 11, users will receive two basic types of updates: Builds and regular updates. The build is a major update, which comes with new features as well as interface changes. On the other hand, regular updates will patch reported bugs and security holes on the system. You can completely remove both types of updates, as well as undo all the changes that the update has made to your computer, if you think they are causing problems on your system. .
Uninstall an update on Windows 11
Removing a regular update (also known as a cumulative update) is easy in Windows 11.
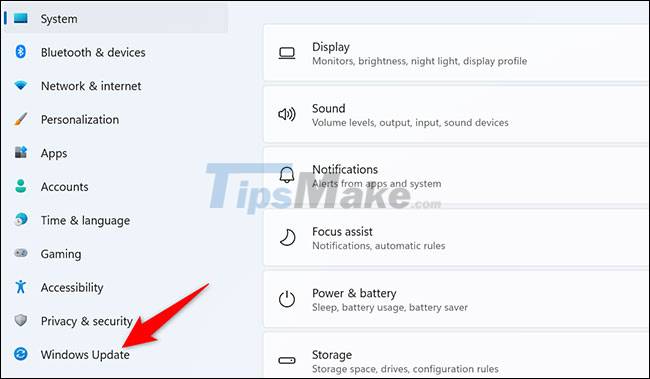
To get started, open the Settings app on your Windows 11 PC by pressing the Windows + i key combination.
In the Settings interface that appears, from the list on the left, click on 'Windows Update'.
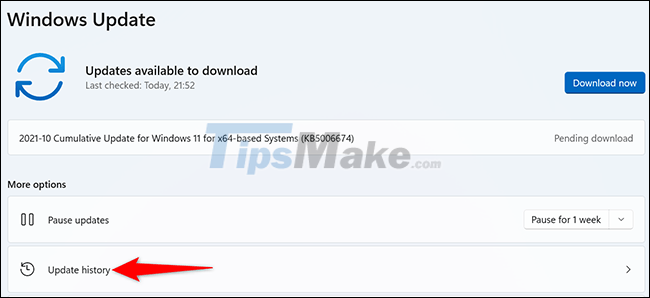
On the 'Windows Update' settings page that appears, click 'Update History'.
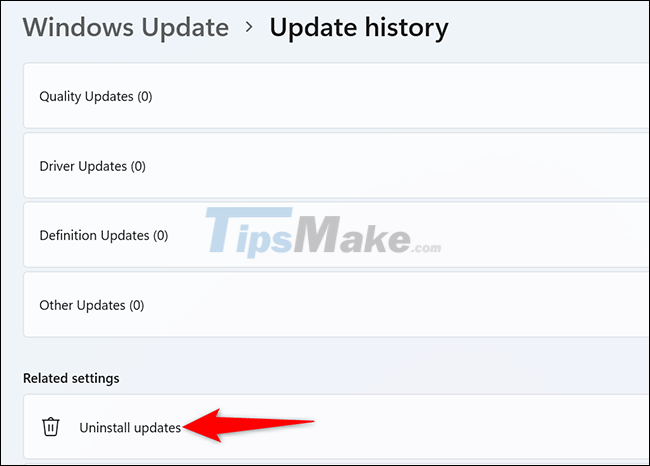
In the 'Update History' menu, from the 'Related Settings' section, select 'Uninstall Updates'.
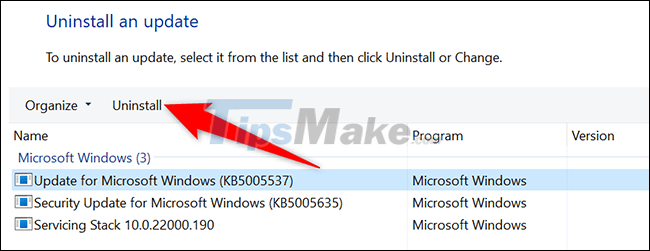
You should now see a list of installed updates on your PC. To remove a specific update, select it from the list, then click the 'Uninstall' button at the top.
The 'Uninstall an Update' prompt will appear. Click 'Yes' to confirm your action.
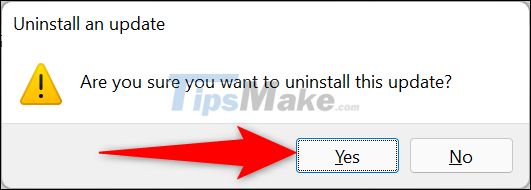
Windows 11 will begin removing the selected update from your PC.
Uninstall a build setting on Windows 11
Basically, you can uninstall builds just like regular updates. However, it should be noted that only a build can be deleted within 10 days of the time it was installed on the system. If it's been more than 10 days, you won't be able to rollback the build. In this case, you will have to reinstall Windows 11, or restore a full system backup on your computer if you still want to remove the build.
(Note: When you uninstall a build, your personal files are not deleted, but any changes made to the application and system settings state since the recent update will be deleted).
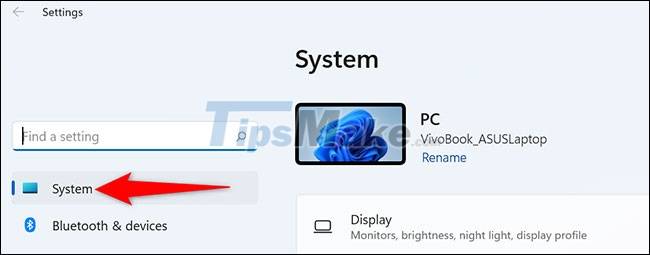
First, open the Settings app on your Windows 11 PC by pressing the Windows + i key combination.
In the Settings interface that appears, from the list on the left, click on 'System'.
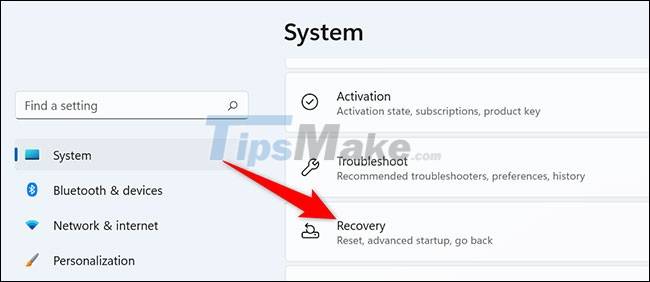
On the 'System' page, scroll down and click on 'Recovery'.
On the 'Recovery' screen, next to 'Advanced Startup', click 'Restart Now'.

You will see a prompt saying 'We'll Restart Your Device So Save Your Work'. Click 'Restart Now' to restart your PC.

When your PC restarts, you'll see the 'Choose an Option' screen. From here, go to Troubleshoot > Advanced Options > Uninstall Updates > Uninstall Latest Feature Update.
There, click 'Uninstall Feature Update', and Windows 11 will remove the latest build installed on your PC!