How to Install phpMyAdmin on Your Windows PC
This wikiHow teaches you how to install the phpMyAdmin program on your Windows computer. You can use phpMyAdmin to control a MySQL server from within a web browser, but to do so you must first have a MySQL server set up on your computer....
Table of Contents
Method 1 of 2:
Using an Existing Apache Server
-
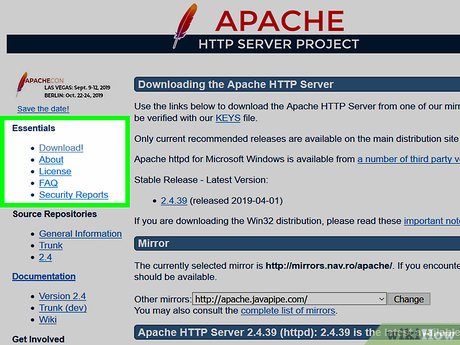 Make sure that you've installed Apache, PHP, and MySQL. Apache, PHP, and MySQL must all be installed and configured on your computer before you can install phpMyAdmin in this way.
 -
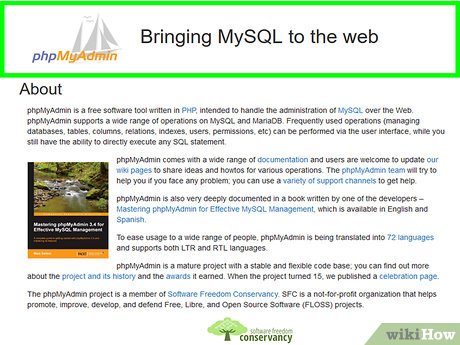 Open the phpMyAdmin download page. Go to https://www.phpmyadmin.net/ in your browser.
 -
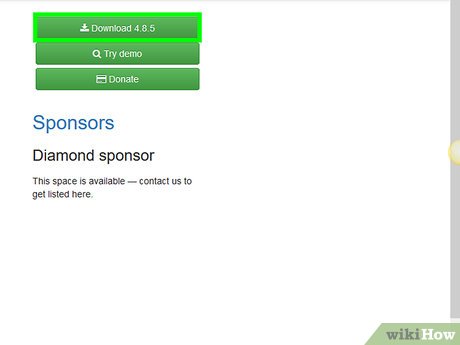 Click Download. It's a green button in the upper-right side of the page. The phpMyAdmin ZIP folder will begin downloading onto your computer.
- You'll also see the version number next to Download (e.g., for the November 2017 version of phpMyAdmin, you'd click Download 4.7.5).
-
 Click Close when prompted. This will return you to the phpMyAdmin webpage.
 -
 Open the phpMyAdmin folder. Double-click the downloaded phpMyAdmin ZIP folder to do so.
 -
 Copy the phpMyAdmin folder's contents. Click the regular phpMyAdmin folder in the ZIP folder's window, then press Ctrl+C.
 -
 Go to your Apache host folder. This is typically a folder named "htdocs" inside of the "Apache" folder, which should be located in the "C:" folder on your hard drive.
- The Apache host folder usually has a text document named "index.php" or something similar.
- The fastest way to get to this folder is by clicking This PC on the left side of the window, double-clicking the Apache folder, and double-clicking the htdocs (or similar) folder.
-
 Paste the copied folder into the host folder. Press Ctrl+V to paste the copied phpMyAdmin folder into the Apache host folder.
 -
 Change the copied folder's name to phpmyadmin. Click the phpMyAdmin folder, click Home, click Rename in the toolbar, type phpmyadmin into the folder's name field, and press ↵ Enter.
 -
 Open the PHP folder. This folder is located in the "C:" folder along with the "Apache" folder. Once you find the PHP folder, double-click it to open it.
 -
 Find the "php.ini-production" file and rename it. You'll change this file's name to php.ini.[1]
 -
 Double-click the "php.ini" file. It will open in your default text editor (e.g., Notepad), though you may first have to select Notepad from a list and click OK.
 -
 Find the "extension=php_mbstring.dll" line of text and remove the semicolon. You'll see the semicolon to the left of this line of text.
- You can press Ctrl+F to bring up a "Find" window where you can enter this line of text to go to it.
-
 Find the "extension=php_mysqli.dll" line of text and remove the semicolon. Once you've done this, your phpMyAdmin server is good to go.
 -
 Save your changes and exit Notepad. Press Ctrl+S to save, then click the X in the top-right corner of the Notepad window to exit Notepad.
 -
 Run your Apache server. Open Command Prompt in Administrator mode by right-clicking Start, clicking Command Prompt (Admin), and clicking Yes when prompted, then do the following:
- Type in cd /Apache24/bin and press ↵ Enter (replace "Apache24" with your Apache folder's name).
- Type in httpd -k restart and press ↵ Enter.
-
 Test your phpMyAdmin program. Open a web browser, then type http://localhost into the address bar and press ↵ Enter. This should take you to the phpMyAdmin login page.
Method 2 of 2:
Using WAMP
-
 Make sure that you have MySQL installed. WAMP allows you to interact with an existing server on your computer, but won't create a server in and of itself.
 -
 Check your computer's bit number. You'll need to know this in order to determine the version of WAMP that you can download.
 -
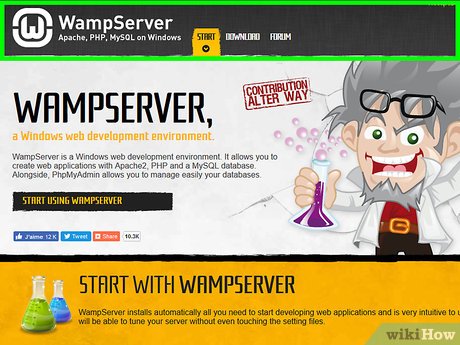 Open the WAMP website. Go to http://www.wampserver.com/en/ in your web browser.
 -
 Scroll down and click either WAMPSERVER 64 BITS or WAMPSERVER 32 BITS. The number that you choose here will depend on your computer's bit number. Clicking either option will prompt a pop-up window.
 -
 Click the download directly link. It's in the upper-right side of the pop-up window. Doing so takes you to a Source Forge page from which you can download your version of WAMP.
 -
 Click Download. This green button is near the top of the page. WAMP will begin downloading onto your computer.
- The download will take several minutes to complete.
-
 Install WAMP. Double-click the downloaded WAMP setup file, then do the following:
- Click Yes when prompted.
- Select a language and click OK
- Check "I accept the agreement" and click Next
- Click Next three times.
- Click Install
-
 Wait for WAMP to finish installing. This will take a few minutes.
 -
 Choose a browser when prompted. Click Yes, then go to your preferred browser's EXE file, click it, and click Open.
- For example: to select Chrome, you would find and click on the Google folder on the left side of File Explorer, then double-click the Chrome folder and select the Chrome icon.
- If you would prefer just to use Internet Explorer, click No instead.
-
 Select a different text editor if needed. If you don't want to use Notepad as your server's text editor, click Yes when prompted, then find the EXE file for the text editor that you want to use, select it, and click Open.
- Click No if you want to keep Notepad as the default text editor.
-
 Finish the setup. Click Next, then click Finish on the final WAMP window. WAMP is now installed on your computer.
 -
 Open WAMP. Double-click the pink "Wampserver" icon on your desktop, then click Yes when prompted. This will prompt your server to start running.
 -
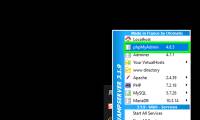
 Click the WAMP icon in the system tray. On the far-right side of the Windows toolbar, you should see an orange or green WAMP icon. Clicking this will prompt a pop-up menu.
- You may first have to click the upward-facing arrow in the toolbar to see the WAMP icon.
-
 Click phpMyAdmin. It should be near the top of the pop-up menu. As long as your server is properly installed, doing so will open the phpMyAdmin login page in your preferred browser.
Was this article helpful?
Your feedback helps us improve.
Related Articles
 How to Install phpMyAdmin on Windows7 minutes read
 How to easily manage databases with phpMyAdmin6 minutes read
 A serious vulnerability on phpMyAdmin allows an attacker to destroy the database3 minutes read
 How to install Windows 8.1 from USB7 minutes read
 How to install Windows 10 from USB with ISO file6 minutes read
 Install Windows 10 with a super fast USB in just a few simple steps4 minutes read
Reader Comments 0
Sign in with email or Google to join the discussion.