How to easily manage databases with phpMyAdmin
Managing SQL databases can be quite challenging for beginners. That's because databases like MySQL and MariaDB need you to be familiar with Structured Query Language (SQL) - the database query language. You also need to know how to use the MySQL shell, the command line interface, and possibly some other complex tools.

If you are new to SQL and the command line, then the phpMyAdmin tool is for you. phpMyAdmin allows you to manage MySQL and MariaDB databases even without knowing how to write SQL or use the command prompt.
What is phpMyAdmin?
phpMyAdmin is a free, open source database management tool. It provides a user interface that makes database administration easy without much experience.
To use this tool, you do not need knowledge of SQL or command prompt. You can complete most tasks with a few clicks.
This tool supports a wide range of servers. However, it is commonly used with MySQL and MariaDB, including a SQL section inside where you can run SQL commands and databases. This feature is useful if you are familiar with SQL and want more flexibility.
How to install phpMyAdmin

The easiest way to install and access phpMyAdmin is via the server stack. The most popular server stacks are WAMP and XAMPP. The WAMPServer software introduces the WAMP stack to your computer. This allows you to run Apache, MySQL, and PHP on Windows computers.
XAMPP is similar. But it includes support for the Perl language and can run on any operating system. While they are perfect for programming, you should avoid using WAMPServer or XAMPP in production.
During setup, remember to install phpAdmin in addition to MySQL, MariaDB…
Login phpMyAdmin
Once you have successfully set up WAMPServer or XAMPP, open the application by double clicking on its icon.
If running XAMPP, start Apache, PHP and MySQL in the admin area. However, if you are running WAMPServer, click the system tray icon and select Start All Services . This action starts the local development server.
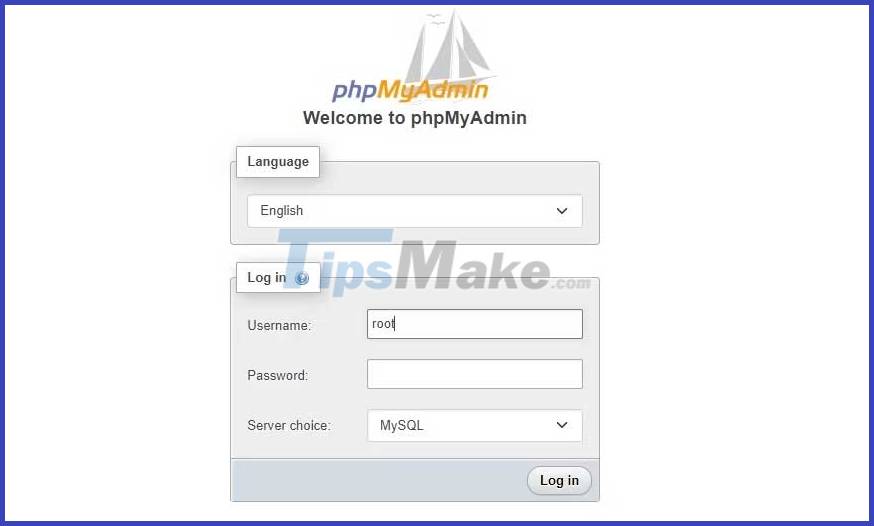
For both WAMP and XAMP, you can access phpMyAdmin by navigating to localhost/phpmyadmin in a web browser. It will prompt you to login to the MySQL or MariaDB server.

After logging in, you will see a database named mysql, performance_schema, information_schema and sys. These databases are automatically created during the installation process.
Create a new database
To create a new database in phpMyAdmin, click New in the sidebar. Then give your database a name and choose a schema type:

When done, click Create to create the database.
Create new table in database
Inside phpMyAdmin, click new database > Create new table . It will prompt you to name the table and choose the number of columns. Give the table a descriptive name. After providing the column names and numbers, click Create to add the table.
Next, set up the table structure, including column names, types, lengths/values, etc.
The following users table has 4 columns named id , name , email and location . Each column has its own type, length, and collation:

Once done, click Save to create a table with specific columns.
Insert new record in phpMyAdmin
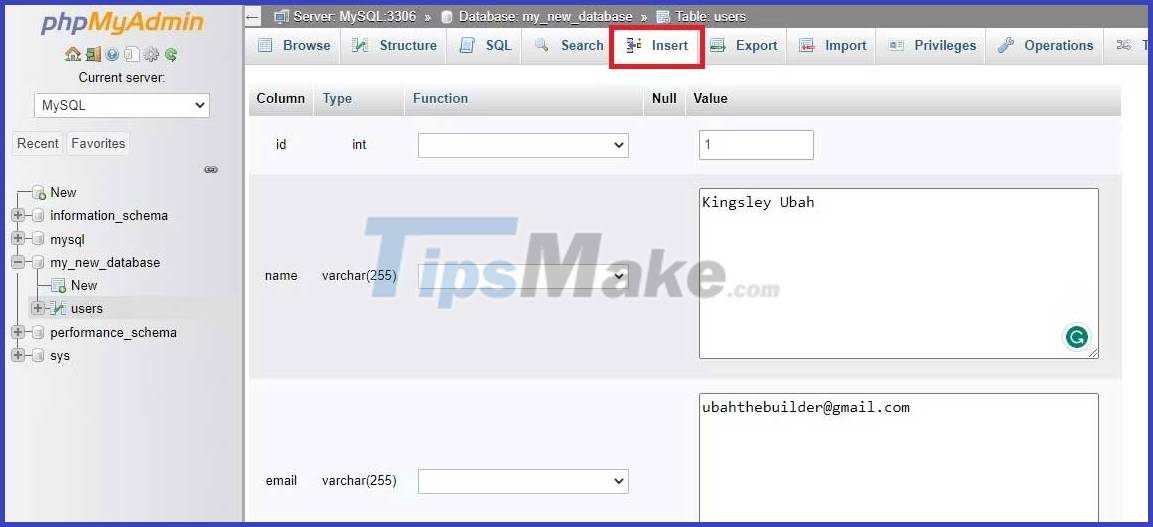
To insert a new record into the table, click the Insert tab at the top. Then fill in the value you want to enter in each column for that particular row. The following image shows the first user added:

Once done, click the Go button to insert the new record into the table. If the id value is already present in the table, you will get an error message: 'id is not unique'.
Delete all records in phpMyAdmin
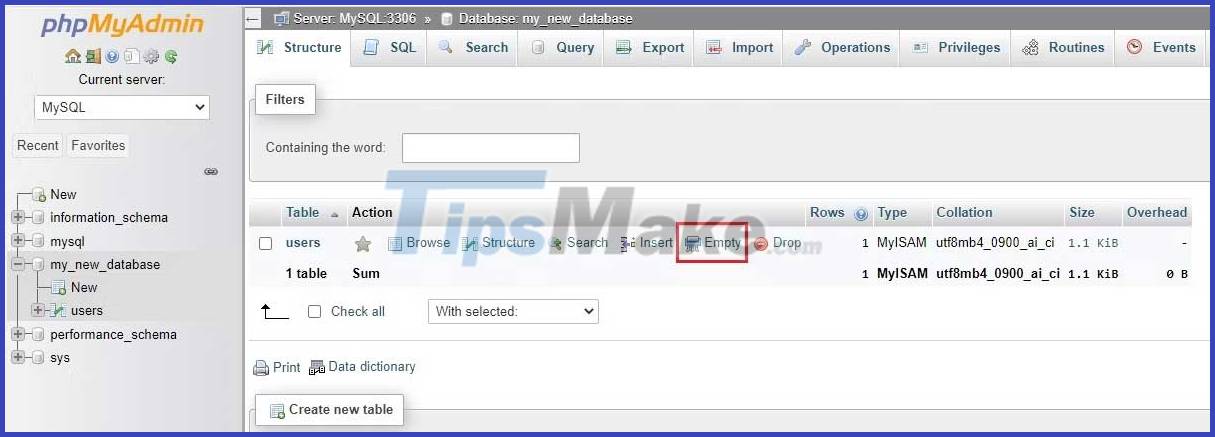
In certain cases, you may want to delete all records in a certain table. For this to work, login to phpMyAdmin. Then, click the database containing the table you want to round. Click the Empty link on the board to delete its contents:

Click OK in the message box to delete all comments.
Write and run SQL commands in phpMyAdmin
You can use the phpMyAdmin UI to perform a variety of tasks. But there is a limit to what you can do from the UI. The SQL tab gives you more control over the database. It allows you to edit the database and its contents by running SQL commands.
You can use SQL queries to:
- Create a new database.
- Add a new table to the database.
- Insert a new row into the table.
- Update existing stock.
- Read and delete specific rows in the table.
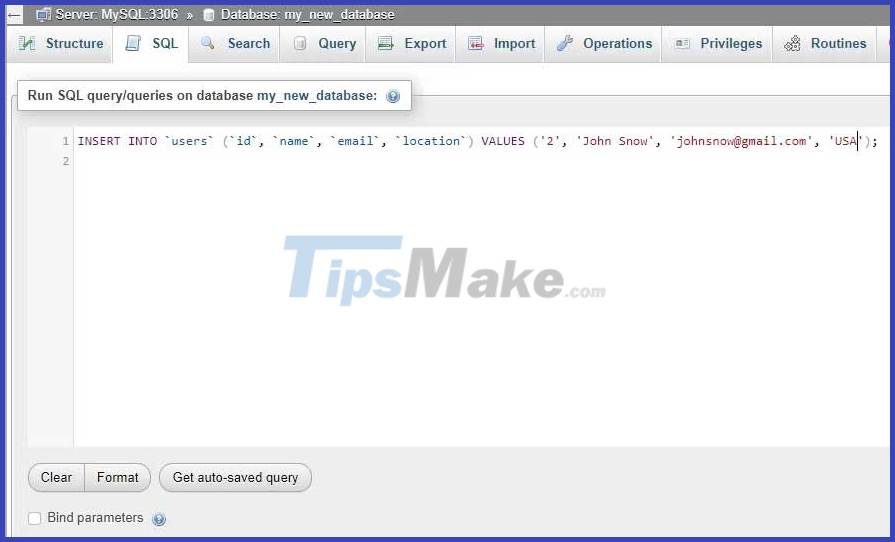
To run the SQL command in phpMyAdmin, click on the SQL tab and write the query there. For example, the following screenshot shows the command to add a second user to the users table.

Here is the command:
INSERT INTO `users` (`id`, `name`, `email`, `location`) VALUES ('2', 'John Snow', 'johnsnow@gmail.com', 'USA');Above is how to manage the database with phpMyAdmin . Hope the article is useful to you.