Table of Contents
This practical guide walks through how to install mariadb on Windows 10 operating system, explains the main requirements, and highlights common issues that may appear along the way.
MariaDB is also a database management system but is a branch of MySQL, so there are a few differences between MariaDB and MySQL.
MariaDB inherits almost all of the properties of MySQL, but it is optimized for storage mechanisms and MariaDB is completely free - 100% Free.
In this article, I will guide you how to install MariaDB on Windows 10 operating system in the most detailed way. Ok, let's get started now!
How to install MariaDB on Windows 10 operating system
+ Step 1: First, download the installation file here. Please note that you choose the correct operating system and corresponding version in item (2).
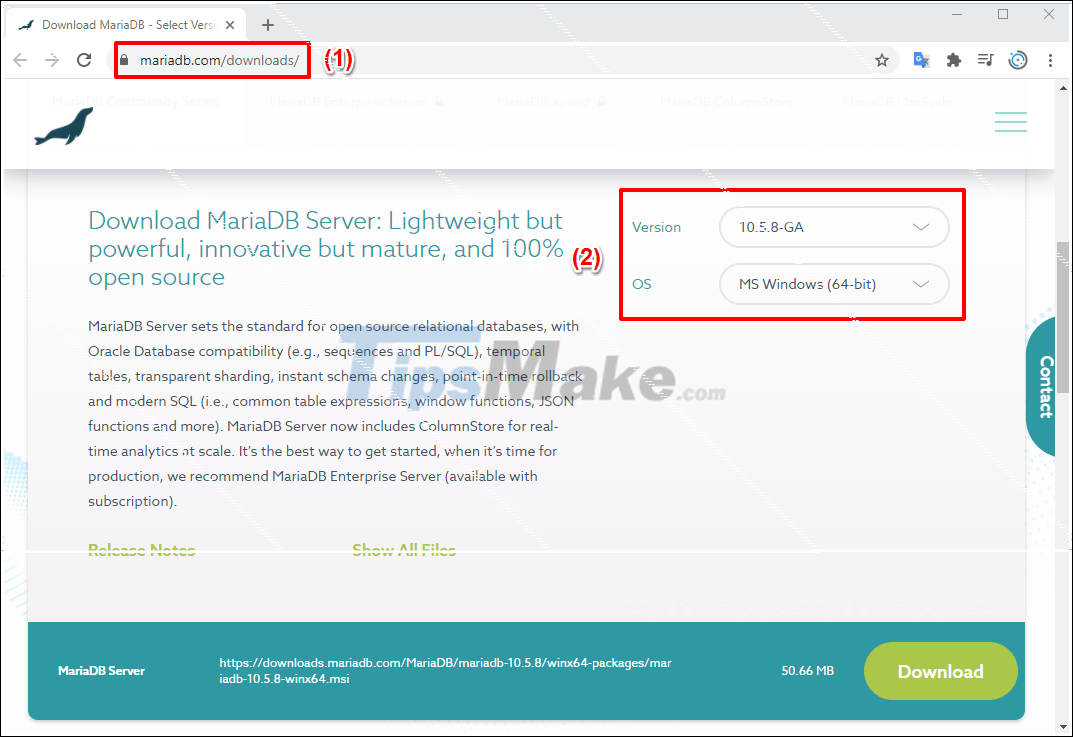

+ Step 2: After the download is complete, double-click the file to start the installation => Click Next to continue.
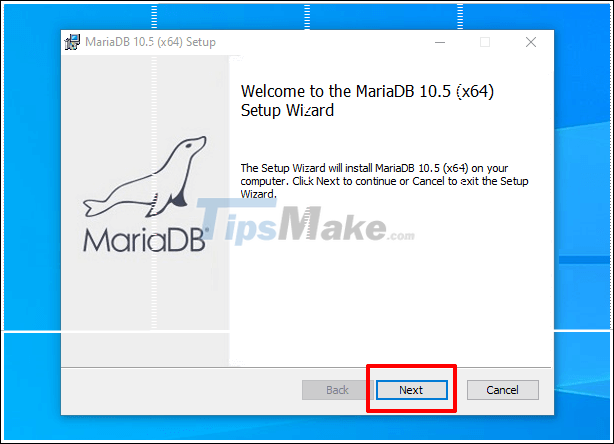
Next, you tick the I accept the terms in the License Agreement => then click Next to continue.

+ Step 3: In this step, there are a lot of notes, if you do leave the default, you can choose Next and continue. And To change, then:
- (1) Components to be installed with MariaDB
- (2) Hard drive space is occupied after installation (depends on what you chose in step 1)
- (3) MariaDB installation default location
- (4) You can click Browse to change the installation location of MariaDB

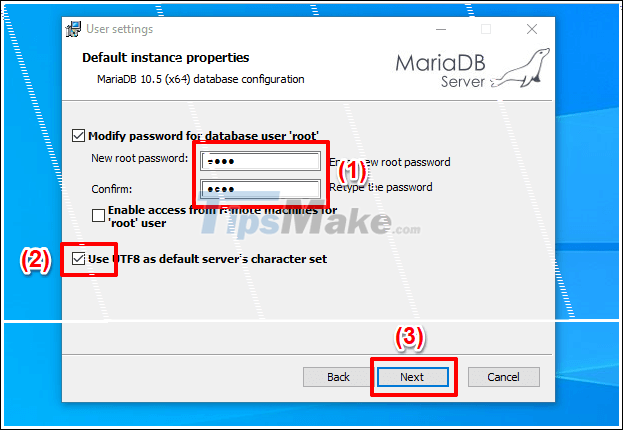
+ Step 4: In this next step, you will configure MariaDB, mainly choosing a password. You can leave strong or weak passwords depending on your desire as well as convenience level.
=> Then click Next to continue.
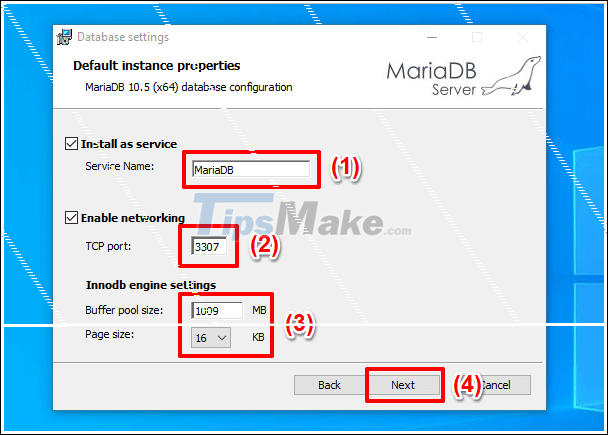
+ Step 5: Next, we still continue to configure the components such as: Server Name, TCP port, Buffer pool size and Size.
Here I only pay attention to the TCP port because if you do install MySQL, for example, the TCP port of MySQL is 3306.
If you do not change to 3307 (or another port, as long as it is not used) as shown below, you will not be able to run MariaDB, because MariaDB also runs port 3306 by default.
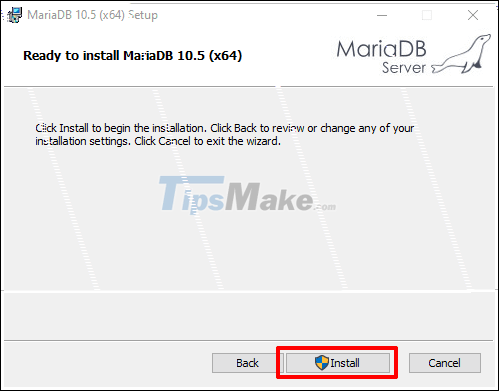
+ Step 6: After the configuration is complete, click Next to go to the next step which is the installation step, the installation process may take 2-4 minutes depending on your computer configuration and Internet speed.
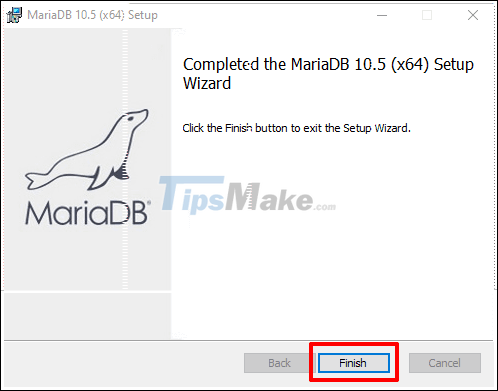
+ Step 7: After the configuration is successful, confirm it by pressing the Finish button to complete the installation.
+ Step 8: There are also many steps in this step, you are interested in steps 1, 2, 3 used to create a connection to the application. Note the information about username and Password, Port then click Open.
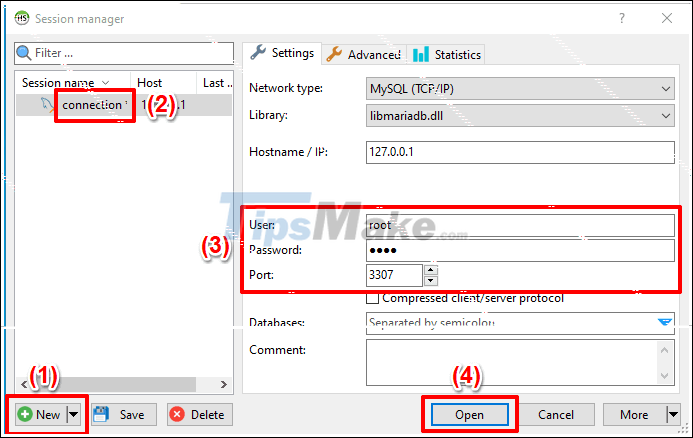
In some cases you have not saved the changes in the newly created connection, then click Yes to confirm saving and continue as shown below.
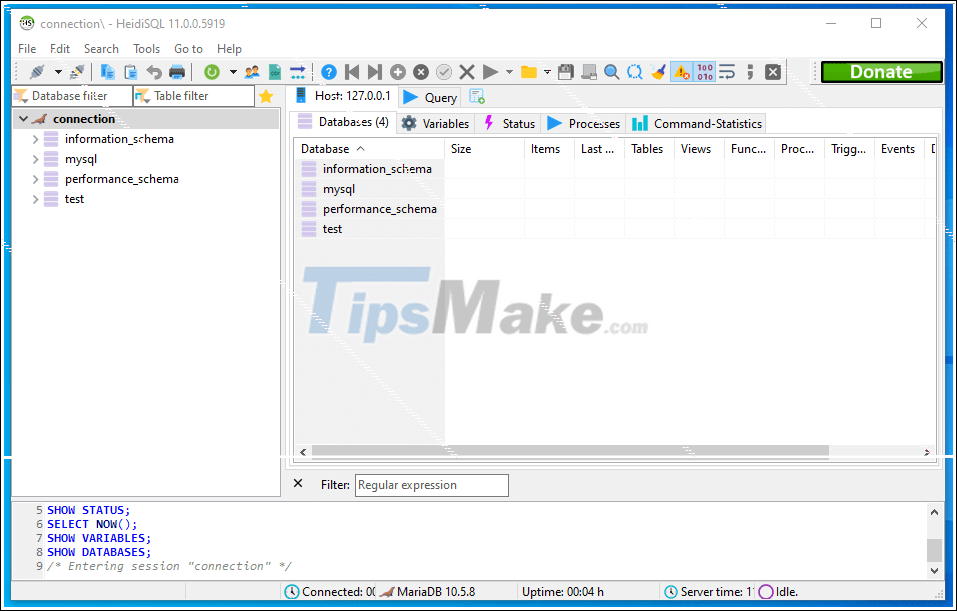
=> Then click Open to run HeidiSQL (this is similar to MySQL Workbench in this MySQL).

And this is the interface of HeidiSQL.
Conclude
So in this article I showed you how to install MariaDB on Windows 10 - a fairly powerful and convenient database management system today.
MariaDB is a free solution and it is being used by many businesses and companies. Okay, see you in the following posts!
Key Takeaways
Use the information above as a practical reference for how to install mariadb on Windows 10 operating system. Review each step carefully, confirm any requirements, and choose the option that best fits your situation.
FAQ
What does this guide explain about Install Mariadb on Windows 10 Operating System?
It explains the main concepts, practical considerations, and useful steps related to install mariadb on Windows 10 operating system without requiring advanced knowledge.
Who can benefit from learning about Install Mariadb on Windows 10 Operating System?
This information is useful for readers who want a clear overview, practical guidance, and reliable steps related to install mariadb on Windows 10 operating system.
What should I check before applying this information?
Review the requirements, confirm that your device, software, or situation matches the instructions, and back up important data before making major changes.
Related Articles
 How to Install an Operating System on a New Computer: Practical Guide19 minutes read
 How to Install a New Operating System on a Computer: Step-by-Step Guide11 minutes read
 Should I Install or Upgrade the Operating System?8 minutes read
 How to Install Linux Mint Operating System: Practical Guide15 minutes read
 How to Install Ubuntu Supported Operating Systems in Parallel with Windows9 minutes read
 Reinstall Operating System: Experience After Installing Windows 76 minutes read
Reader Comments 0
Sign in with email or Google to join the discussion.