How to Install an Operating System on a New Computer
Install Windows 10
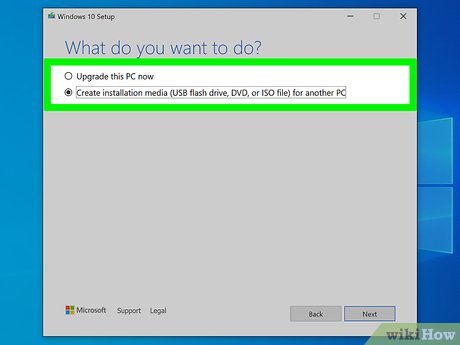
Create Windows installation media. If you order Windows 10 for a new computer, the vendor will send you installation media. If you don't have Windows installation media, you can create your own. You need a computer with an internet connection and a USB with 8GB capacity (preferably 16GB). You also need to know whether the computer about to install Windows 10 has a 32-bit or 64-bit configuration. Additionally, you also need to purchase Windows to receive a product key. This can be done before or after the installation process. Use the following steps to create Windows installation media:
Insert a USB with at least 8GB capacity into any computer with an internet connection. This will erase any data stored on the USB; So, back up any data you want to keep.
Go to https://www.microsoft.com/en-us/software-download/windows10 using a web browser.
Click Download Tool Now .
Open the file "MediaCreationTool.exe" in your browser or Downloads folder.
Click Accept .
Select "Create Installation Media (USB drive, DVD, ISO file) for another PC" and click Next .
Select your language, Windows version, and computer configuration, then click Next .
Select "USB flash drive" and click Next .
Select your USB and click Next .
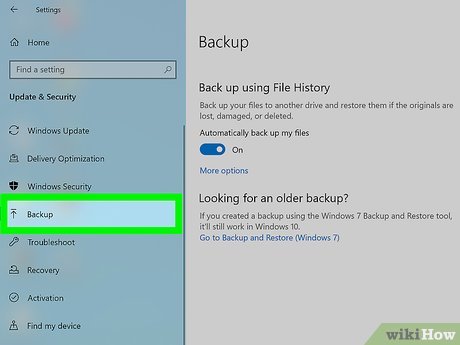
Back up files (optional). If you already have Windows installed on your computer, the new Windows installation will overwrite your files. Back up any data you want to keep before starting a new Windows installation. You can back up files to OneDrive, Google Drive, Dropbox, or an external hard drive or USB.
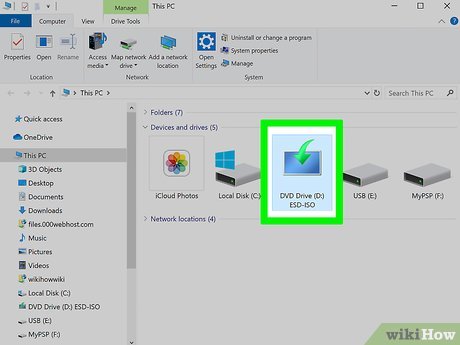
Insert the Windows installation media into the computer where you want to install Windows. You can attach the Windows installation media to any available USB port.
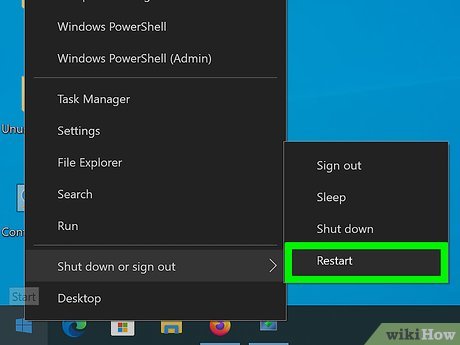
Start the computer. If you turned on the computer, restart it according to the operating system installed on the computer. If you haven't turned on the computer yet, just press the power button to start it.
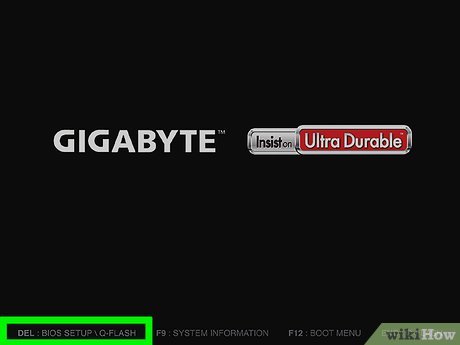
Access the Boot menu. Most newer computers have a Boot menu that you can access while the computer is starting up. However, the access method will vary depending on the motherboard. The most common way to access the Boot menu is to press the F10 , F11 , F12 , F2 or Esc key while the computer boots. The Boot menu will display a list of drives from which you can boot.
If you use an older computer that doesn't have a Boot menu, access the BIOS while the computer boots. The keys used to access the BIOS will vary depending on the computer manufacturer. The screen will display information about the keys that need to be pressed while the computer boots. Commonly used keys to access BIOS are F1 F2 , F3 , Esc or Delete . You need to act quickly at this step. You can also boot your computer into BIOS using the Windows Settings menu.

Select USB. This is the drive that contains the Windows installation media. The computer will boot from the Windows installation media. When the computer boots from USB, you need to press any key to start the Windows installation process.
If you're opening BIOS setup, look for "Boot", "Boot order", "Priorities" or something similar. You need to change the boot order so that the computer boots from USB first, then select save and exit. This will boot the computer from the USB.
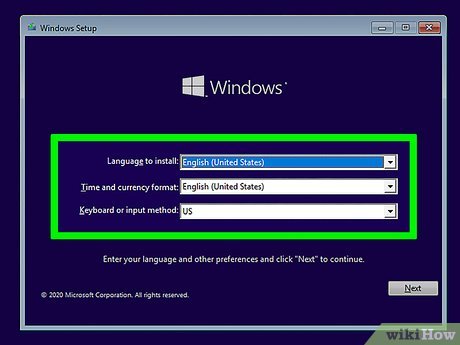
Select language, time, currency, and keyboard and click Next . First, you can select the language from the selection list. Next, select the country or region, and keyboard, then click Next .
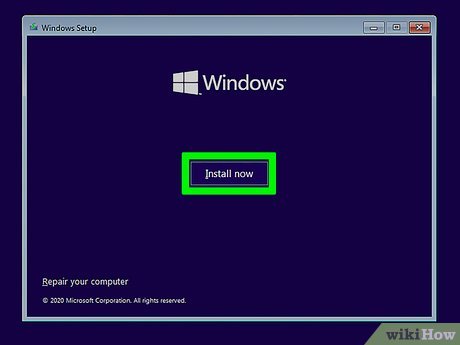
Click Install Now . It's the button in the middle of the screen.
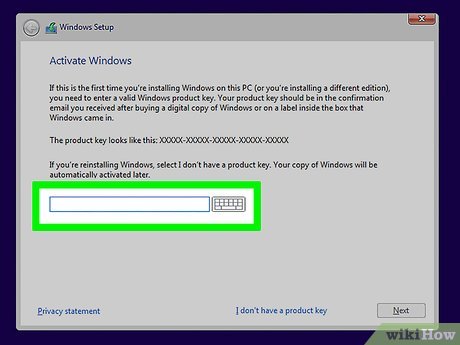
Enter your Windows product key and click Next . If you purchased Windows, you can find your product key in your confirmation email. If you haven't purchased Windows yet, you'll click I don't have a product key . You still have to buy Windows and activate it later.
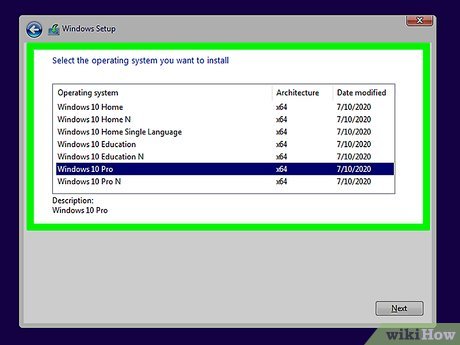
Select the version of Windows you want to install and click Next . If you purchased Windows, check the version of Windows purchased and click on the appropriate version. If you haven't purchased Windows yet, you should find out which version you need to install. Each version of Windows has a different price.
If you're not sure which version of Windows to install, Windows Home Edition is the most popular version of Windows.
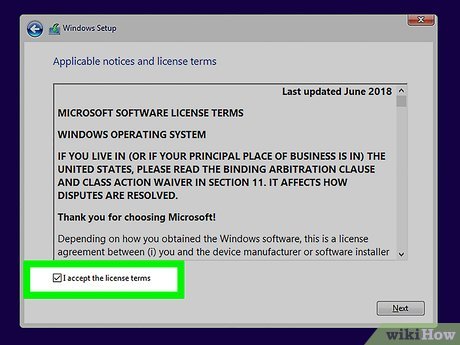
Click the check box next to "I accept the license terms" and click Next . You can read the license terms in the middle window. Click Next when you're ready to continue.
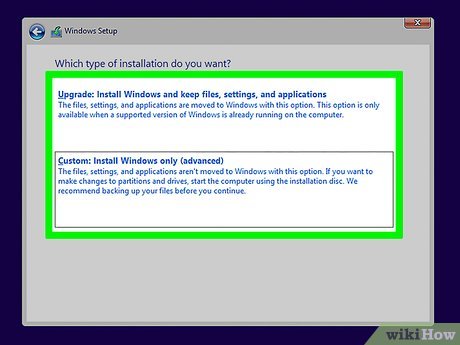
Click Custom: Install Windows only or Upgrade: Install Windows and keep files, settings, and applications. If your computer already has Windows installed, click Upgrade: Install Windows and keep files, settings, and applications . If your computer does not have Windows installed or you need to reinstall Windows, you will select Custom: Install Windows only .
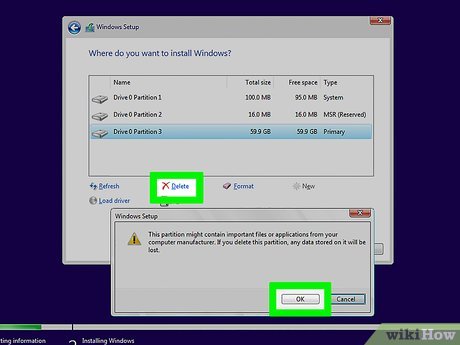
Select the drive or partition where you want to install Windows and click Delete . If the computer has multiple hard drives or the hard drive has multiple partitions, select the partition where you want to install Windows and click Delete . You should note that this operation will erase all data on the hard drive. Make sure you have backed up all important data before continuing. You will have an unpartitioned hard drive after this operation.
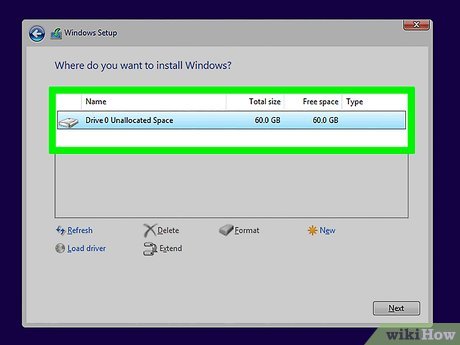
Select the unpartitioned hard drive and click Next . Windows installation will begin on the drive you selected. Installation time depends on the computer's hard drive.
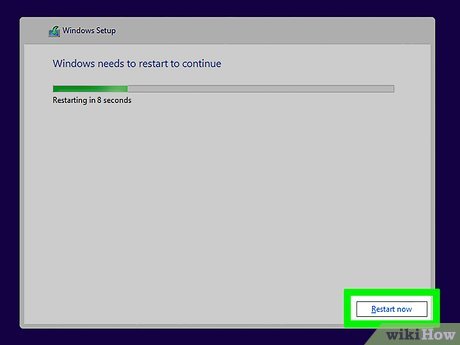
Remove the USB and restart the computer. When Windows completes the installation, the computer will automatically restart. Please remove the USB so the computer will no longer boot from the USB. The first time Windows starts, you need to go through the setup process.
Set up Windows 10
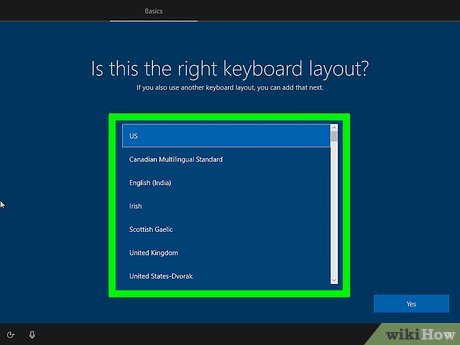
Verify the region and keyboard. When the computer restarts, Windows will ask you to verify the region and keyboard. If this information is correct, click Yes in the lower right corner. Otherwise, you will select the appropriate region and keyboard.
You can also choose another keyboard. If you want to choose another keyboard, click Add Input and select another keyboard. If not, select Skip .
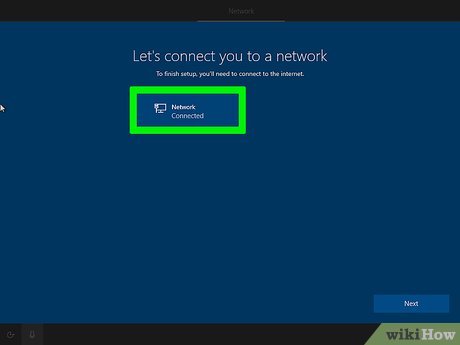
Connect to a Wi-Fi network. Select the Wi-Fi network and click Connect . Enter the Wi-Fi network password and click Next .
If you want to use a wired network connection, make sure your computer is connected to the modem (modem) with an Ethernet cable. Windows will automatically find a wired network connection.
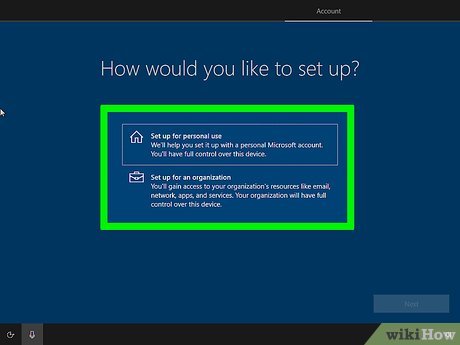
Select Set up for personal use and click Next . This option allows you to sign in to your Microsoft account and use your computer for personal purposes.
If you're setting up your computer for a business or organization, select Set up for an organization and click Next . You need technical support to set up Windows with your corporate email system.
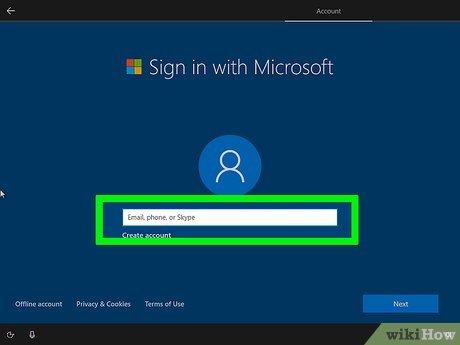
Sign in to Windows. If you already have a Microsoft account, you can sign in with your Microsoft account to import your digital license from your old Windows computer. Enter your email address, phone number or Skype username and password to sign in to your Microsoft account.
If you don't have a Microsoft account, you'll click Create account and follow the instructions to create a new Microsoft account.
Or, you can click Offline account in the bottom right corner to create a new Windows local user account that isn't linked to a Microsoft account.
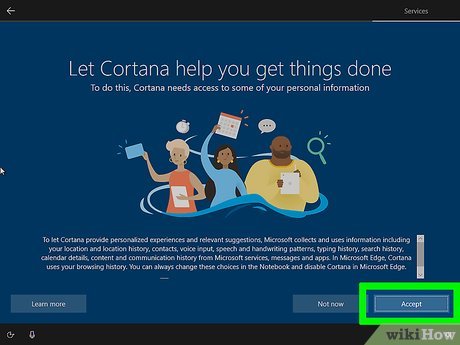
Click Accept to set up Cortana. This is a built-in voice assistant for Windows. If you want to set up Cortana, click Accept and follow the instructions. If you don't want to set up right now, you'll click Decline .
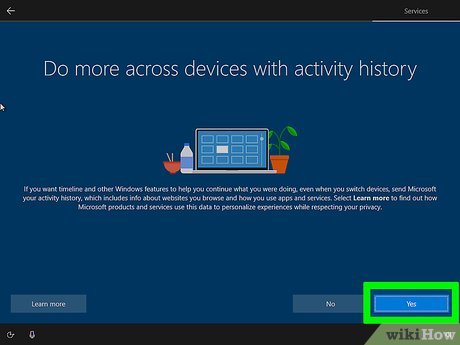
Click Yes and follow the instructions to set up Windows timeline. This feature allows you to continue what you were doing on another Windows device. Click Yes and follow the instructions to set up the feature. On the contrary, if you do not want to use this feature, you will select No to move to the next step.
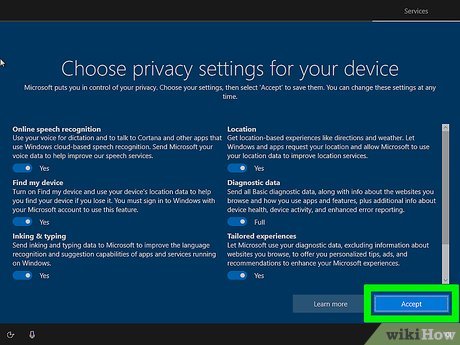
Select privacy settings and click Accept . By default, Windows turns on GPS, voice recognition, diagnostics, device discovery, writing/drawing, and typing to help Microsoft improve language recognition and related advertising. Click the slider button to turn off the features you don't want to use, then click Accept . Windows will further set up and display the computer's main screen.
Install MacOS
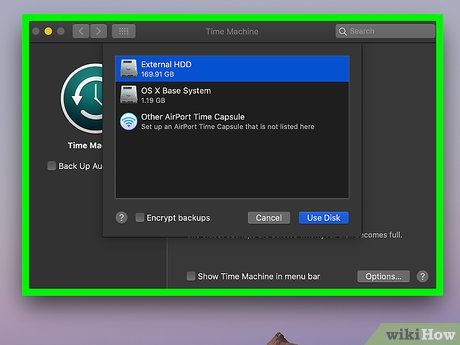
Backup files. It's a good idea to back up all files and data you need to keep before installing or reinstalling macOS on your Mac computer. You can back up data to iCloud, Google Drive, Dropbox, or an external hard drive or USB.
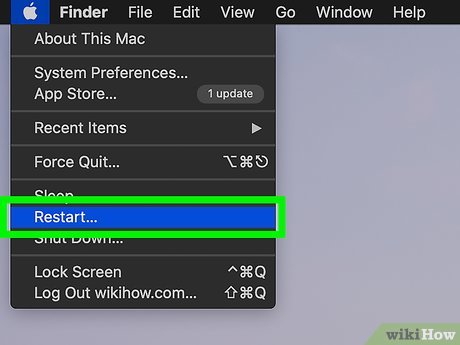
Restart your Mac computer. To do this, you'll click the Apple logo in the top right corner and click Restart .
If you haven't turned on your Mac yet, just press the power button to start it.
You need Internet access to reinstall macOS on Mac.
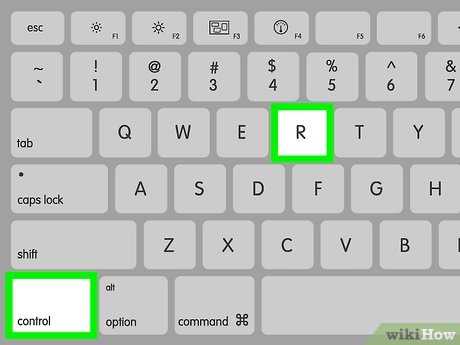
Press and hold ⌘ Command+R immediately. You need to do this before your Mac plays the startup sound. Continue holding the keys until the Mac's recovery screen appears.
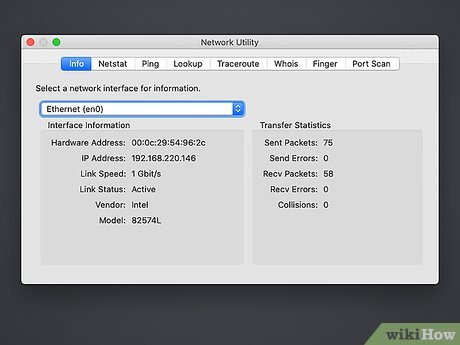
Connect to a wireless network. To connect to a wireless network, you need to click on the dot and three curved lines icon in the upper right corner. Click to select the wireless network, then enter the password and click Join .
If you want to use a wired network connection, make sure your computer is connected to the modem (modem) with an Ethernet cable.
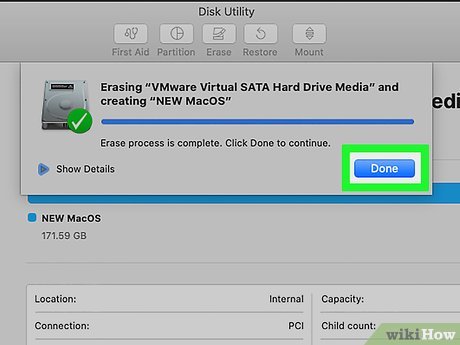
Reformat the hard drive (optional). Depending on your needs, you may need to erase all data on the hard drive where macOS is installed and perform a fresh installation. After deleting a hard drive, you cannot restore the data on it. Make sure you back up important data before erasing your hard drive. If you don't want to erase your hard drive, you can skip this step to reinstall macOS with all the data currently on the hard drive. Follow these steps to reformat your hard drive:
Click Disk Utility and click Continue .
Click on the hard drive to erase in the right pane. Remember to choose the correct drive.
Click Erase at the top.
Enter a new name for the hard drive (optional).
Select "Mac OS Extended (Journaled)" or "APFS" format.
Click Erase .
Close the Disk Utility window.
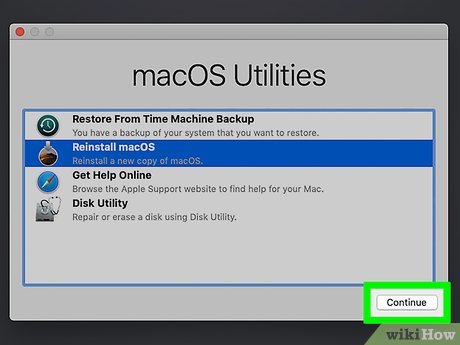
Select Reinstall macOS and click Continue . This begins the process of reinstalling macOS.
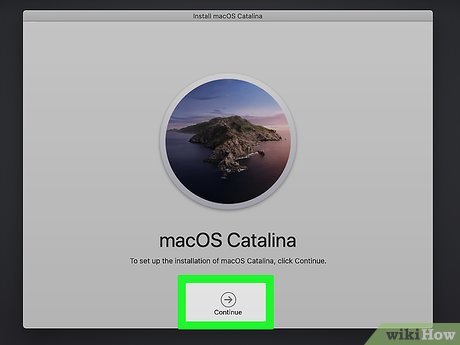
Click Continue . It's the arrow icon in the bottom middle of the screen.
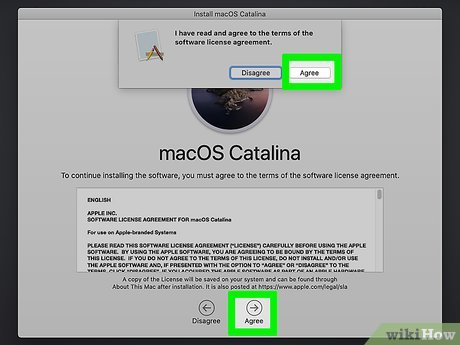
Agree to the terms and license agreement. To agree to the terms and license agreement, you will read the content and click Agree below. Click Agree again in the displayed message.
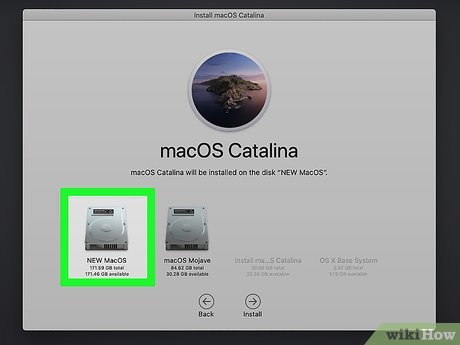
Select the hard drive where you want to install macOS and click Install . The process of installing macOS on your hard drive will begin immediately after this operation. Installation time will depend on your Mac's hard drive and internet speed. Your Mac will restart when the installation is complete.
Set up MacOS
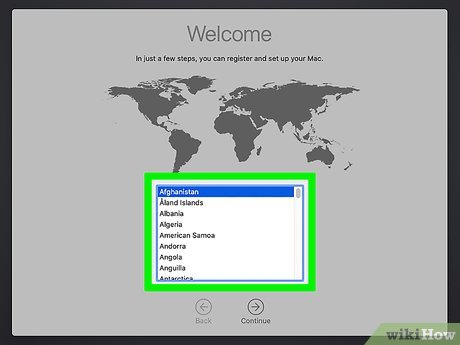
Select your country and click Continue . Use the menu to select your language and click Continue at the bottom of the screen.
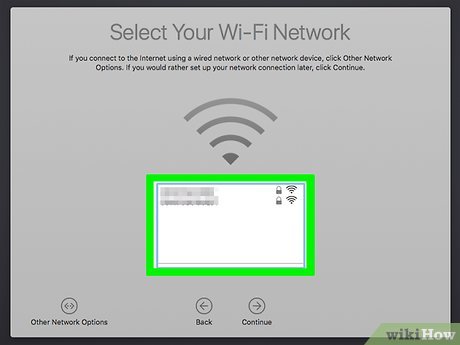
Login to Wi-Fi. To log in to Wi-Fi, you need to select the wireless network and enter the password, then click Continue at the bottom of the screen.
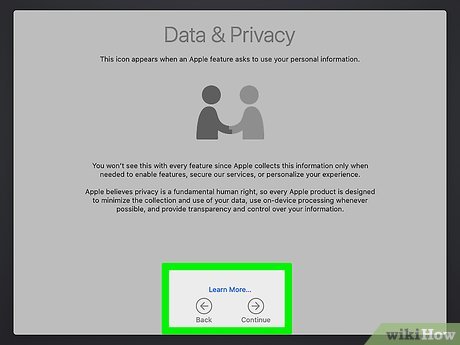
Click Continue . This screen provides a little information about privacy and data. You can read the content for better understanding or click Continue to move to the next step.
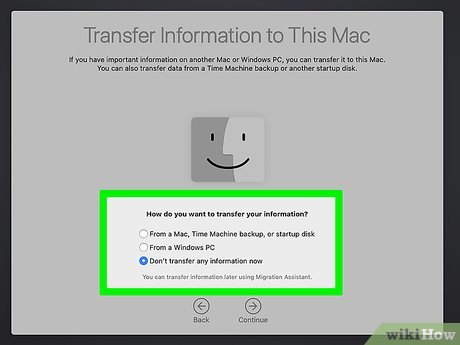
Choose a method to transfer data to your Mac and click Continue . If you have important data to transfer from another Mac or Time Machine, or Windows computer to your Mac, select the appropriate option and click Continue . Otherwise, you will select "Don't transfer any information now" and click Continue .
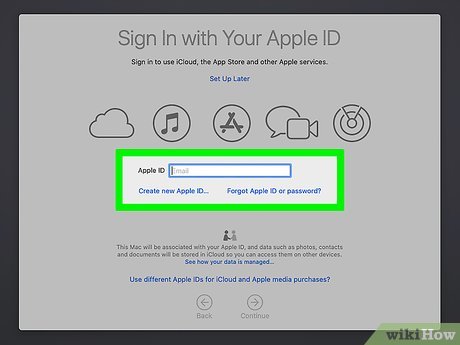
Sign in to Apple ID. To sign in to your Apple ID, you'll enter your Apple ID registered email address and click Continue , then enter your password and click Continue .
If you don't have an Apple ID, you can click Create New Apple ID and follow the instructions to create a new Apple ID.
Or, you can click Set up later and click Skip to temporarily skip this step.
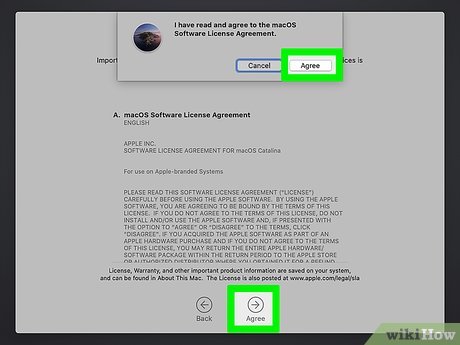
Agree to the terms and conditions. To agree to the terms and conditions, read the content on the page and click Agree below. Click Agree again in the displayed notification window.
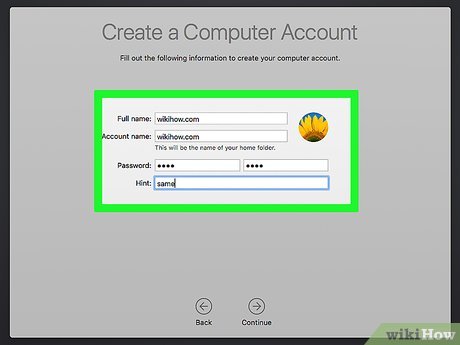
Create a new user account. You need to create a user account to log in to your Mac. Follow these steps to create a new user account.
Enter the full name in the first two fields above.
Enter the user account name.
Enter the password in the next two fields.
Enter a password hint.
Click Continue .
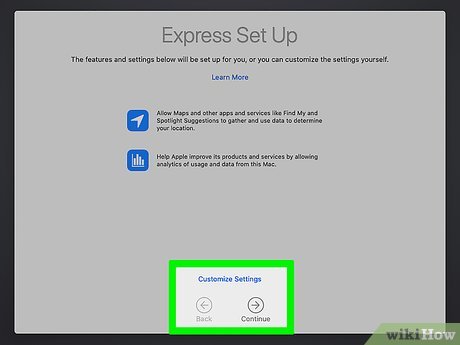
Confirm setup and click Continue . Check the information on the Express Setup screen to make sure everything is okay and click Continue to move to the next step.
If you want to set up options, click Custom setup at the bottom of the screen.
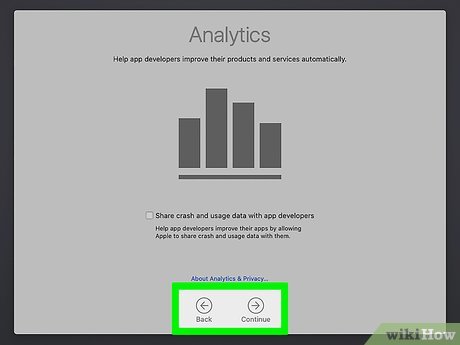
Decide whether you want to share metrics with the app publisher and click Continue . If you want to share metrics with app publishers to help them improve their products, click the checkbox next to "Share crash and usage data with app developers". app publisher) to move to the next step.
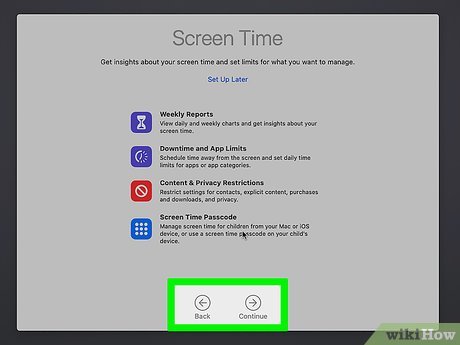
Set up screen usage settings (optional). Screen usage settings let you set limits on the amount of time users are allowed to use the computer, set content limits, and receive usage reports. If you want to set up these features, click the on-screen options and follow the instructions to set up your screen usage settings. Click Continue when you're ready to move on to the next step.
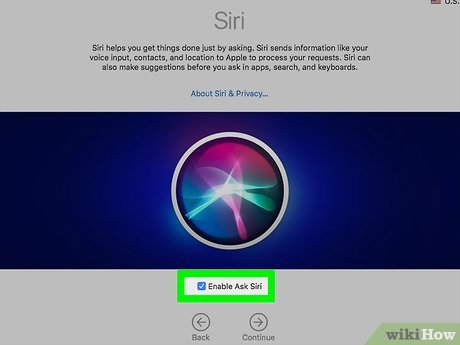
Turn on Siri. This is Apple's voice assistant. If you want to set up Siri, click the box next to "Enable Ask Siri" and click Continue .
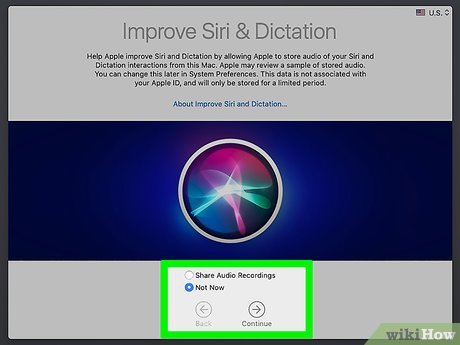
Help improve Siri (optional). If you have recordings that can be used to improve Siri, select "Share audio recordings." If not, just click "Not now". Click Continue to move to the next step.
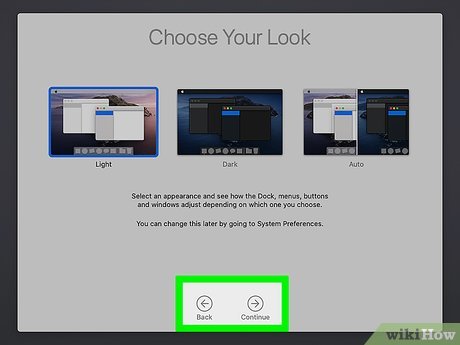
Select the interface and click Continue . You will click on one of the three interface options, then click Continue to move to the next step. The macOS operating system takes a few minutes to set up and you will be taken to the login screen to your Mac computer.