Instructions on how to connect to MySQL Database in Eclipse
Instructions for connecting to MySQL Database in Eclipse, helping you to connect to the MySQL Server database to manipulate data directly on the IDE instead of using the MySQL Workbench tool
Table of Contents
Hi guys, today there are a lot of tools to support very good programming. Typical of which are JetBrains products with superior features. But that doesn't mean the free tools lose their place. In this article, I will show you how to connect to MySQL database in Eclipse - a completely free tool.
How to connect to MySQL Database in Eclipse?
+ Step 1: First, open Eclipse, here I use Eclipse 2019 JavaEE version. Then we have to open the Database Development Perspective as follows:
Window => select Perspective => select Open Perspective => select Other (corresponding to steps 1 -> 2 -> 3 -> 4) as shown below. Or click on the icon at position 5 as shown in the picture.

+ Step 2: After opening Perspective, choose Database Development as shown below. Then click Open to continue.

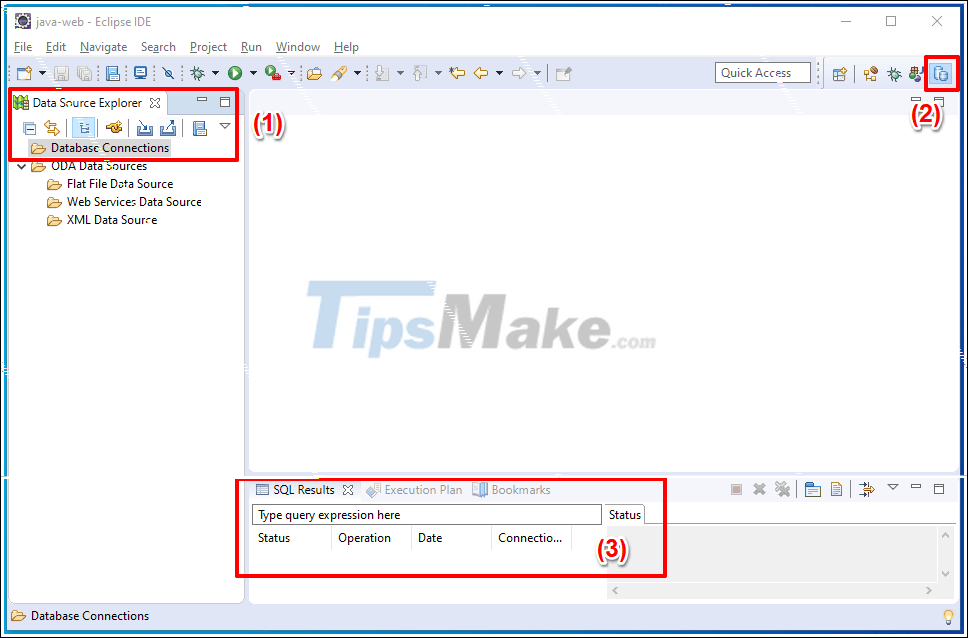
+ Step 3: This is the framework of Database Development in Eclipse.
- (1) Data Source Exploer: Displays information related to database connection (Create new connection, view database information after connection .)
- (2) Icon shows we are in Database Development Perspective.
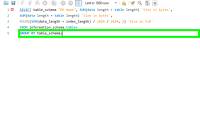
- (3) Area we can write the query or see the results of the query and related information.
Step 4: Now we will create a new connection to an existing database with the MySQL Server database management system.
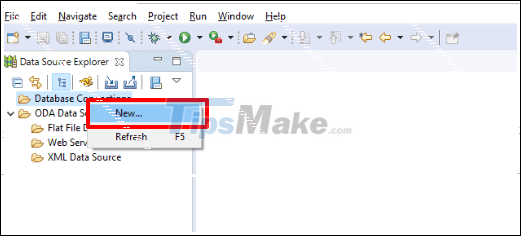
Right-click Database Connection in the tab Data Source Explorer => and select New as shown below.
+ Step 5: A Connection Profile dialog box will open as follows:
- (1) You choose the corresponding database management system, here I choose MySQL
- (2) You fill in the connection name (required) and description (optional)
- (3) Click Next to continue.

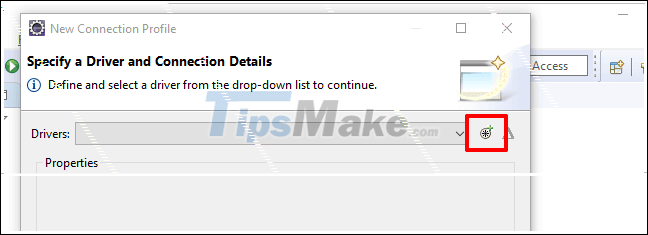
+ Step 5: In this step we will go into details for the database management system connection.
You click the symbol (+) as shown below to add a driver (is a library that supports connecting to the database)
Note: Here I use Java and MySQL Server version 8.0.15, so I have to download the appropriate version. You can download the appropriate version of the library with MySQL Server here.
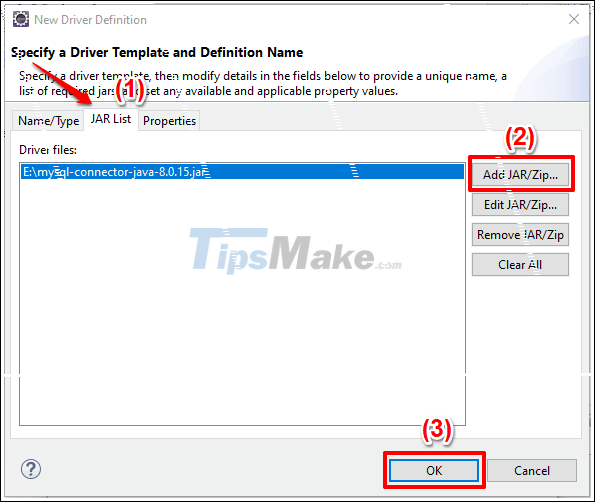
+ Step 6: After downloading the library file, in this step you go to the JAR list tab => Add Jar / zip to point to the downloaded file.
=> Then click OK to complete adding MySQL Driver.
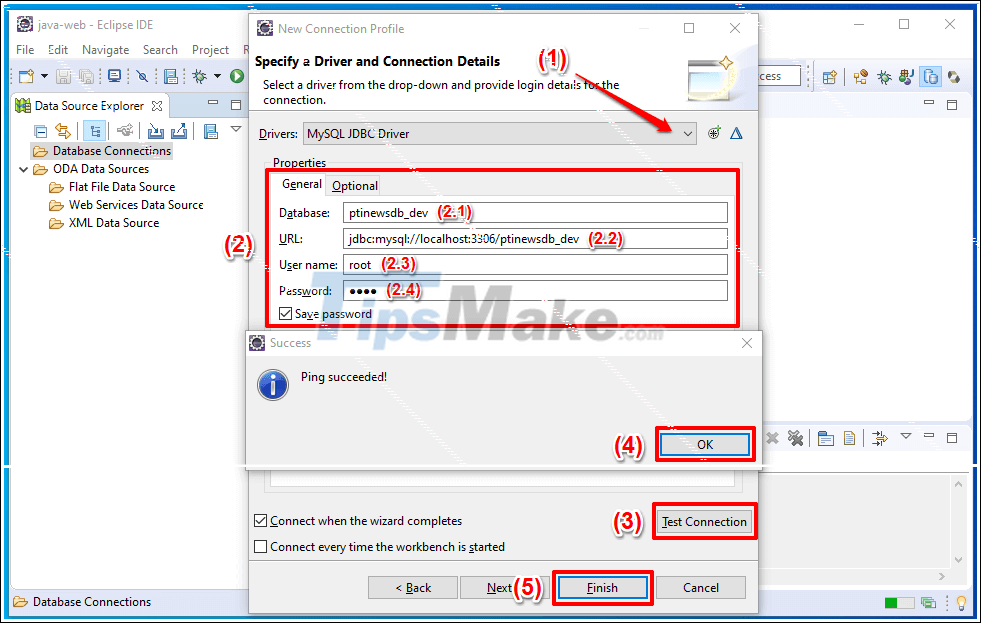
- (1) In this step, click the down arrow to select the MySQL JDBC Driver that was installed in the previous step.
- (2) Information about the database you want to connect.
- (2.1) Database Name
- (2.2) URL to connect to database in format: jdbc: mysql: //: /
- (2.3) Username when you install MySQL Server
- (2.4) Password corresponding to the username above.
You can click on save password so that you don't have to enter your password next time.
- (3) Click Test Connection to test the connection to the database.
- (4) If it says Ping Succeeded! connection is successful.
- (5) Click Finish to complete the connection.
+ Step 7: After connecting, suppose you want to see the data of the tbl_user table, you can right-click the table: Data => Edit.
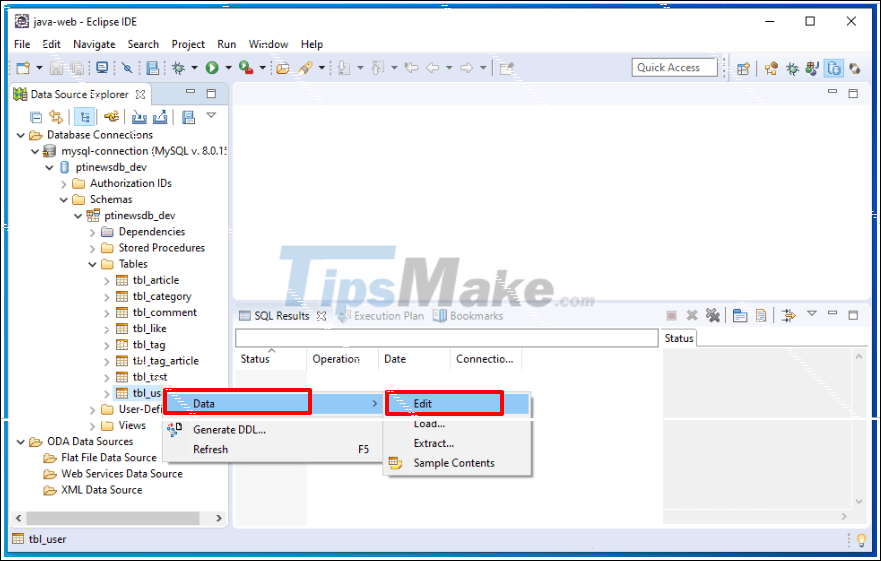
And this is the data in the tbl_user table. You can learn more operations with tables and databases.

Above are the steps to help you connect to MySQL Database in Eclipse, it is quite simple, right!
So in this article, I showed you how to connect to the MySQL Server database so that we can manipulate data directly on the IDE instead of using the MySQL Workbench tool. ha.
Actually manipulating the bases directly on IDEs like these will have some limitations compared to specialized tools. However, it will help us more convenient in many cases. Thank you and see you in the next post.!
Was this article helpful?
Your feedback helps us improve.
Related Articles
 Instructions for installing MySQL on Windows and remote access8 minutes read
 How to Connect to MySQL Using PHP5 minutes read
 How to create a database in MySQL6 minutes read
 How to Check Database Size in MySQL4 minutes read
 Backup and restore MySQL with mysql-zrm on Debian Sarge23 minutes read
 A serious vulnerability on phpMyAdmin allows an attacker to destroy the database3 minutes read
Reader Comments 0
Sign in with email or Google to join the discussion.