Clear, practical technology insights BSOD Code Lookup · Windows Error Code Lookup · Wi-Fi Troubleshooting · PC Troubleshooting Checklist

How to Install iTunes on Windows 11—and What to Use Instead

Install iTunes safely on Windows 11, understand Apple's newer Music, TV, and Devices apps, sign in, import media, sync an iPhone, and create an encrypted backup.

Table of Contents

You can install iTunes on Windows 11 from the Microsoft Store, but Apple now recommends its separate Apple Music, Apple TV, and Apple Devices apps for most current workflows. Apple Devices handles iPhone and iPad syncing, backups, updates, and restores; iTunes remains useful for podcasts, audiobooks, and legacy libraries.
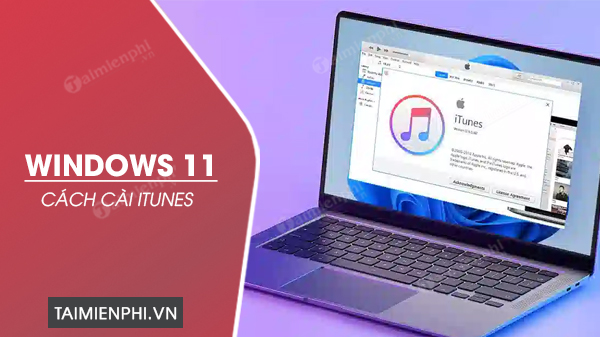
iTunes running on a Windows 11 computer

There is no 32-bit edition of Windows 11

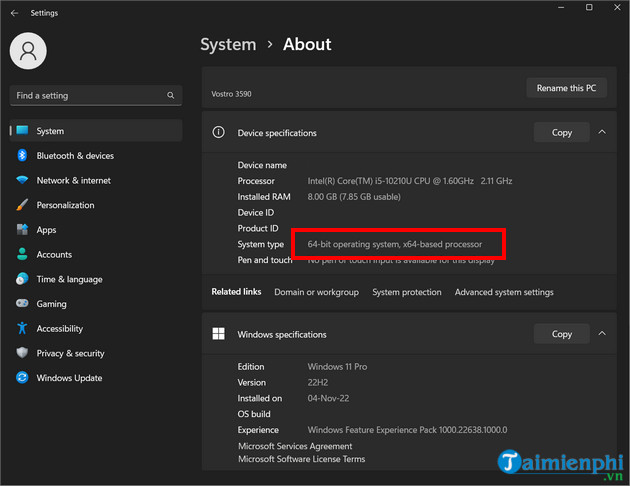
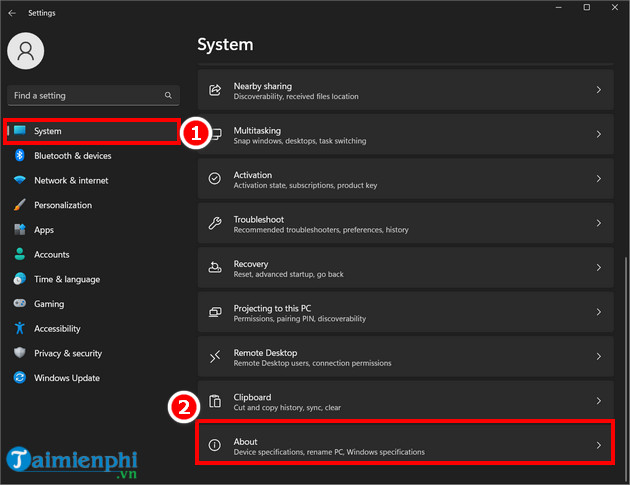
Windows 11 itself is 64-bit, so an article offering a “Windows 11 32-bit” installer is misleading. To check the PC architecture, open Settings > System > About and read System type. ARM-based PCs should install Store apps that declare ARM compatibility.
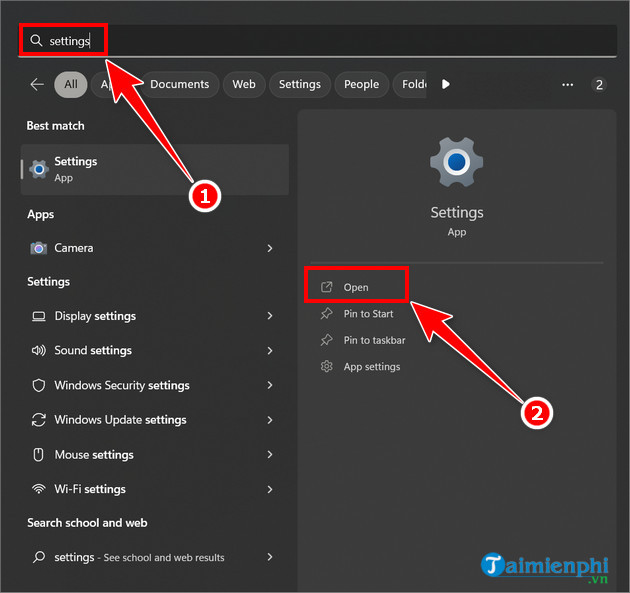
Opening Settings from Windows search

System About page in Windows Settings

System type displayed on a Windows computer

Choose the right Apple apps

  • Apple Music: manage local music, Apple Music, and iTunes Store purchases.
  • Apple TV: manage movies and TV shows.
  • Apple Devices: sync, update, restore, and back up an iPhone, iPad, or iPod.
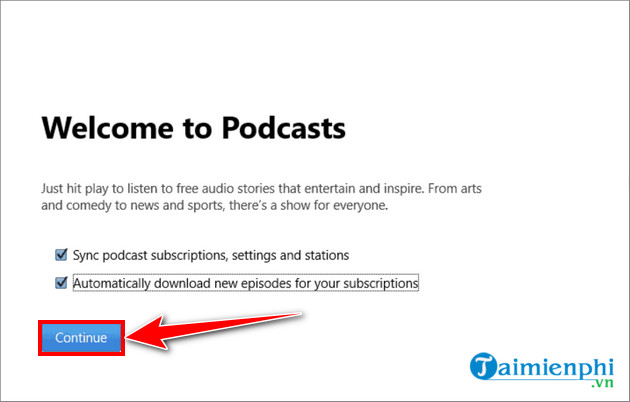
  • iTunes: use when you need its podcast or audiobook features, support an older iPod workflow, or have not installed the newer apps.

Apple explains the split on its Windows app download page. Installing Apple Music or Apple TV changes which media remain available in iTunes, so back up the library before switching.

Install from the Microsoft Store

  1. Open Microsoft Store.
  2. Search for iTunes—or Apple Music, Apple TV, and Apple Devices.
  3. Confirm that Apple Inc. is the publisher, select Get or Install, and wait for completion.
  4. Open the app and allow Microsoft Store to keep it updated.

Avoid unofficial repacks and old standalone download links. See how to update iTunes if it is already installed.

Sign in and import local media

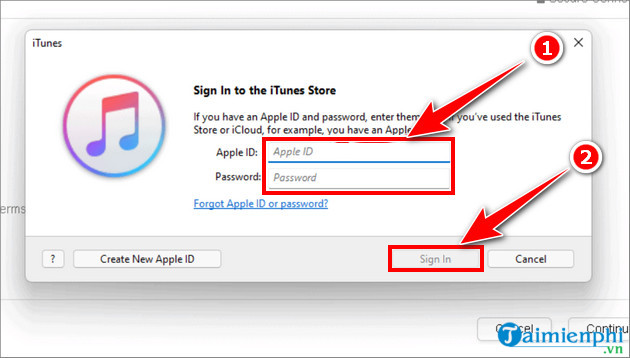
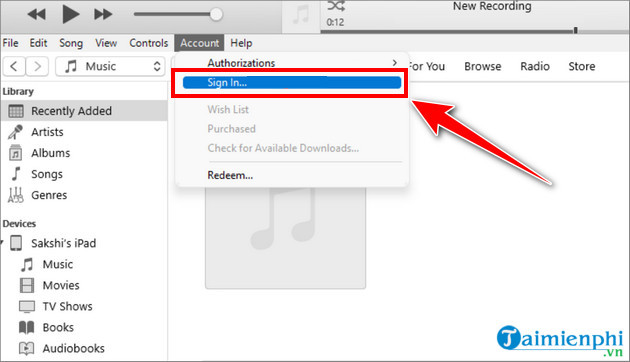
In classic iTunes, choose Account > Sign In and enter the Apple Account used for purchases. Do not sign in on a shared PC unless you control the Windows account.
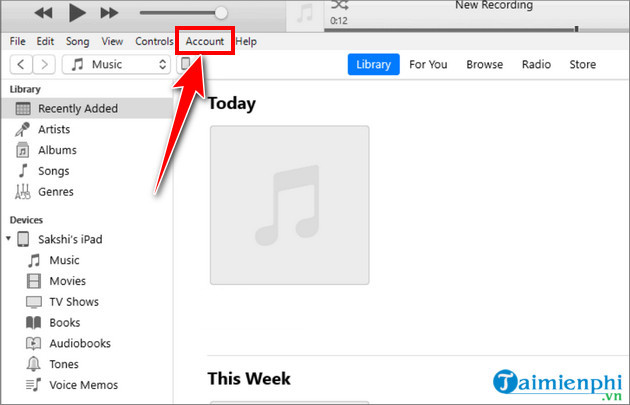
Signing in to iTunes screenshot 5
Signing in to iTunes: legacy iTunes screenshot 5
Signing in to iTunes screenshot 6
Signing in to iTunes: legacy iTunes screenshot 6
Signing in to iTunes screenshot 7
Signing in to iTunes: legacy iTunes screenshot 7

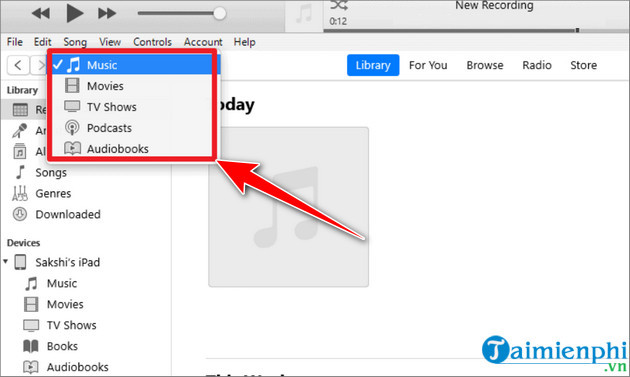
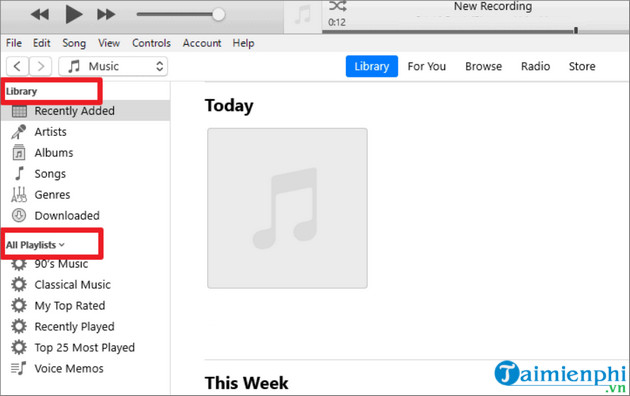
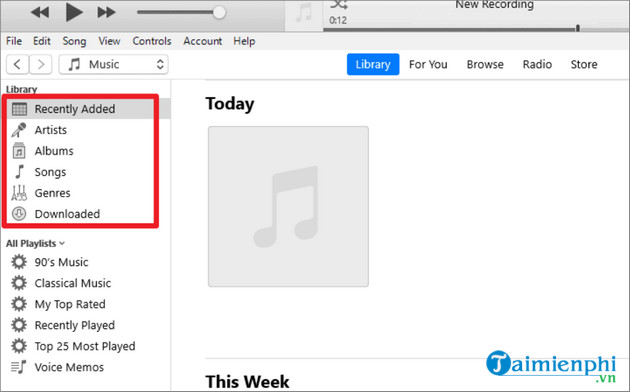
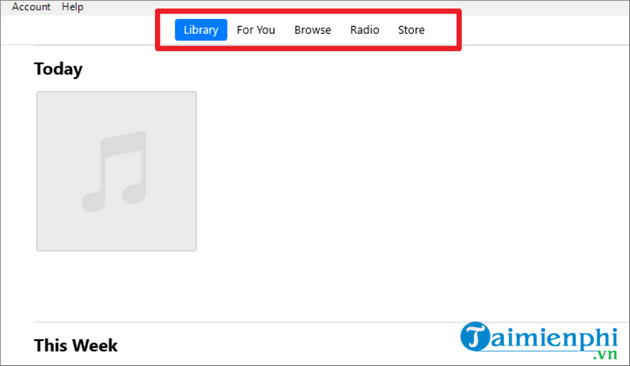
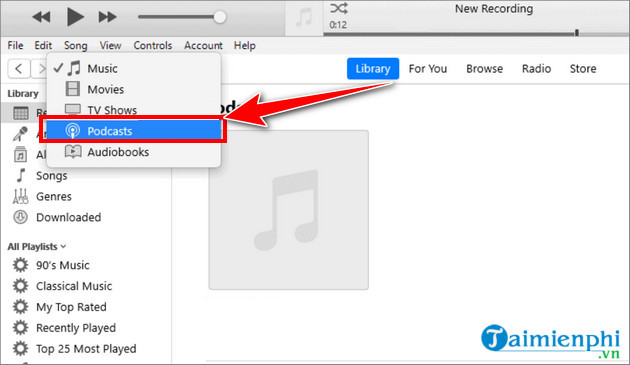
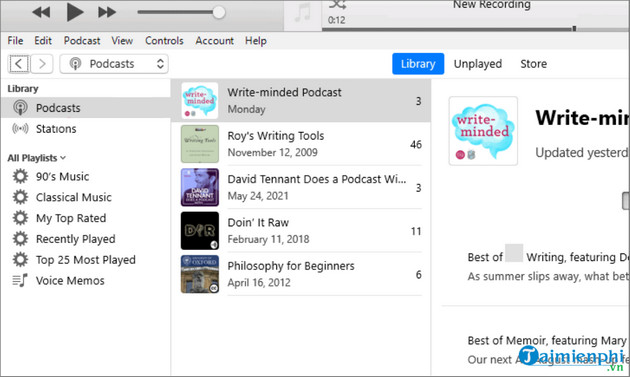
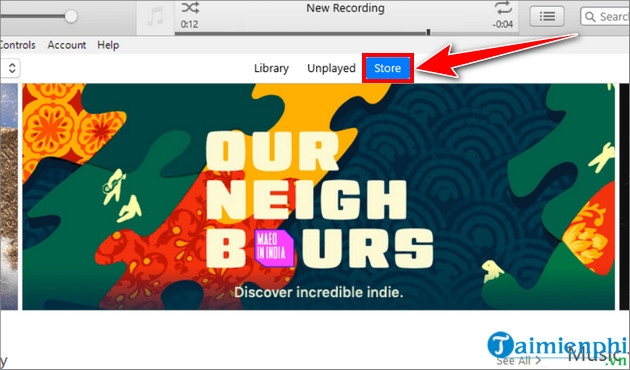
Choose the media type from the selector. In current Windows apps, music and video are separated; classic iTunes keeps music, movies, TV shows, podcasts, and audiobooks in one interface.

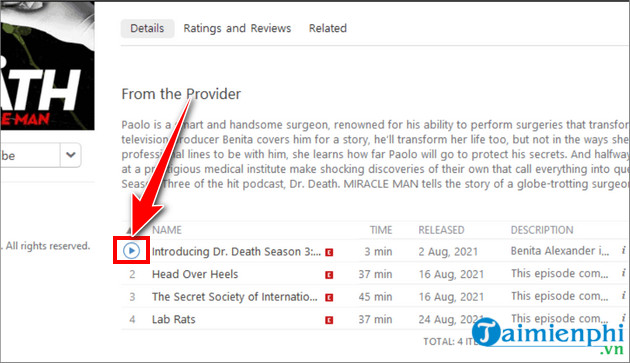
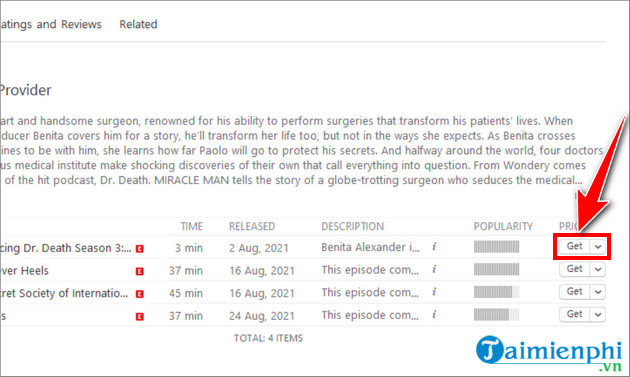
Show legacy iTunes library and podcast screens
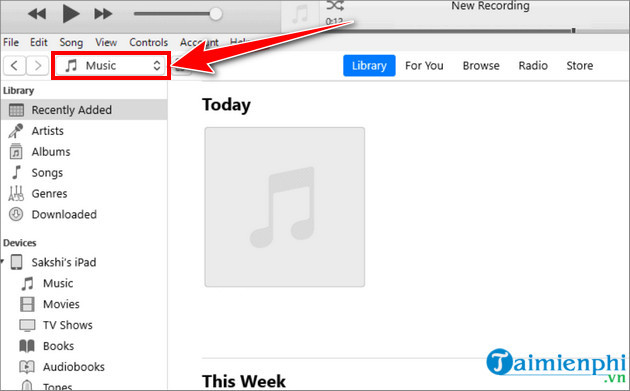
Browsing the iTunes library and podcasts screenshot 8
Browsing the iTunes library and podcasts: legacy iTunes screenshot 8
Browsing the iTunes library and podcasts screenshot 9
Browsing the iTunes library and podcasts: legacy iTunes screenshot 9
Browsing the iTunes library and podcasts screenshot 10
Browsing the iTunes library and podcasts: legacy iTunes screenshot 10
Browsing the iTunes library and podcasts screenshot 11
Browsing the iTunes library and podcasts: legacy iTunes screenshot 11
Browsing the iTunes library and podcasts screenshot 12
Browsing the iTunes library and podcasts: legacy iTunes screenshot 12
Browsing the iTunes library and podcasts screenshot 13
Browsing the iTunes library and podcasts: legacy iTunes screenshot 13
Browsing the iTunes library and podcasts screenshot 14
Browsing the iTunes library and podcasts: legacy iTunes screenshot 14
Browsing the iTunes library and podcasts screenshot 15
Browsing the iTunes library and podcasts: legacy iTunes screenshot 15
Browsing the iTunes library and podcasts screenshot 16
Browsing the iTunes library and podcasts: legacy iTunes screenshot 16
Browsing the iTunes library and podcasts screenshot 17
Browsing the iTunes library and podcasts: legacy iTunes screenshot 17
Browsing the iTunes library and podcasts screenshot 18
Browsing the iTunes library and podcasts: legacy iTunes screenshot 18

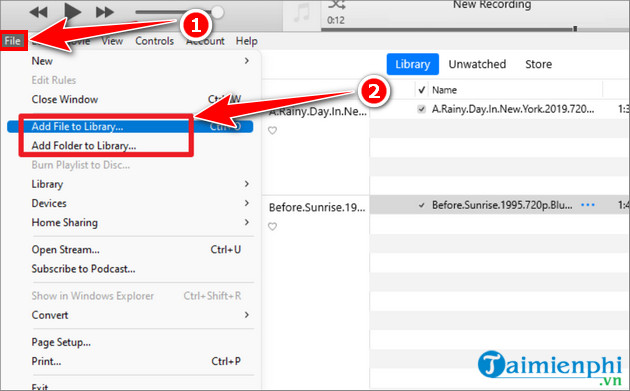
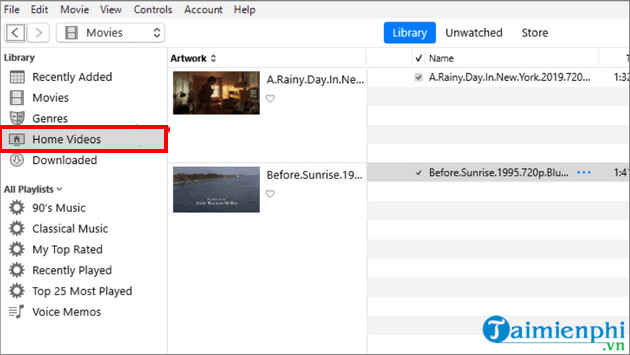
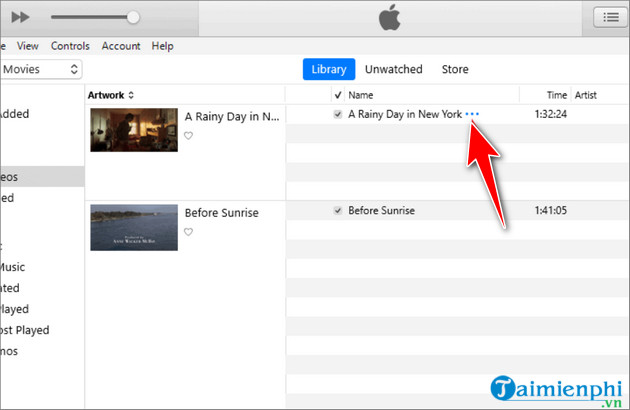
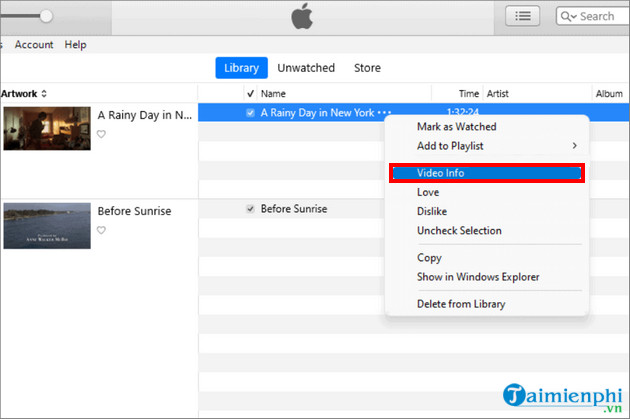
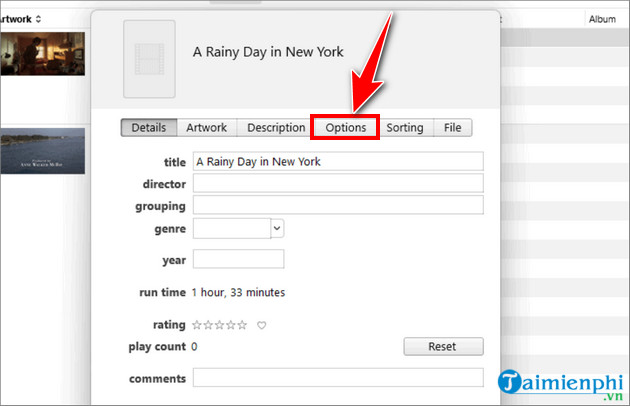
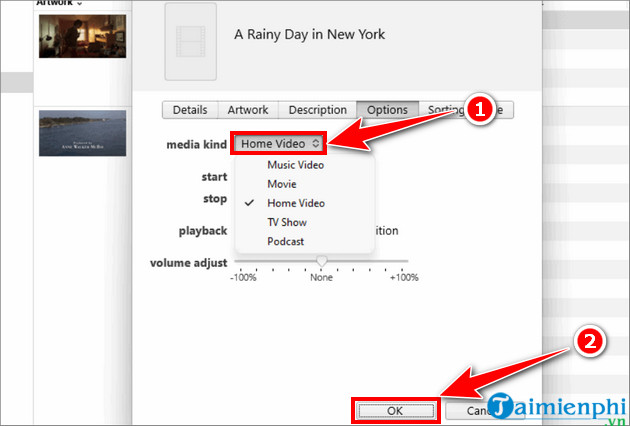
To import local audio in iTunes, use File > Add File to Library or Add Folder to Library. Import only supported, unprotected files. For current setups, import music through Apple Music and manage video through Apple TV.

Show legacy music and video import screens
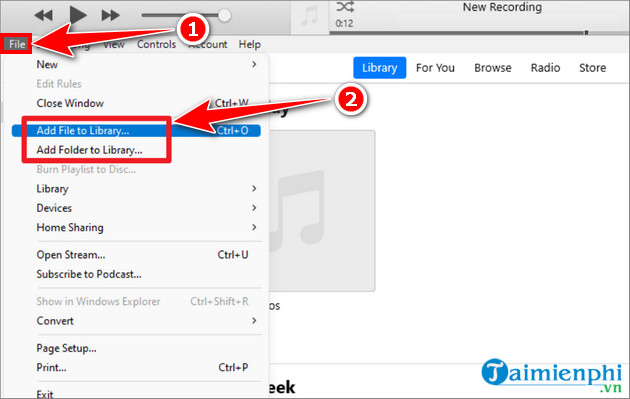
Importing music and video into iTunes screenshot 19
Importing music and video into iTunes: legacy iTunes screenshot 19
Importing music and video into iTunes screenshot 20
Importing music and video into iTunes: legacy iTunes screenshot 20
Importing music and video into iTunes screenshot 21
Importing music and video into iTunes: legacy iTunes screenshot 21
Importing music and video into iTunes screenshot 22
Importing music and video into iTunes: legacy iTunes screenshot 22
Importing music and video into iTunes screenshot 23
Importing music and video into iTunes: legacy iTunes screenshot 23
Importing music and video into iTunes screenshot 24
Importing music and video into iTunes: legacy iTunes screenshot 24
Importing music and video into iTunes screenshot 25
Importing music and video into iTunes: legacy iTunes screenshot 25

Import a CD in classic iTunes

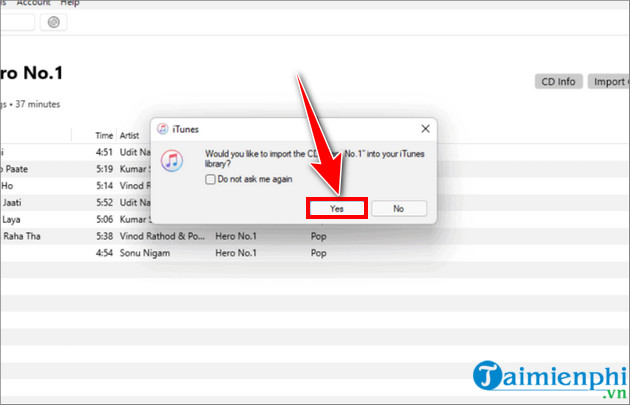
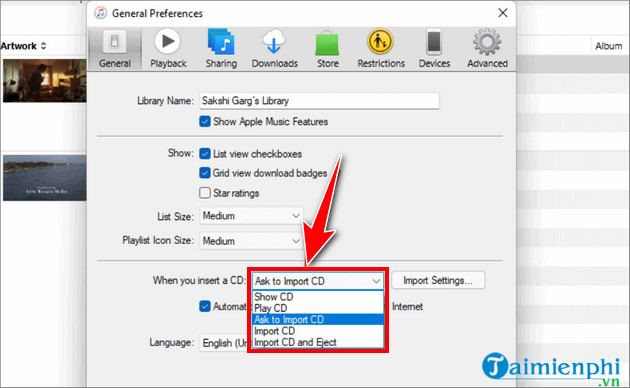
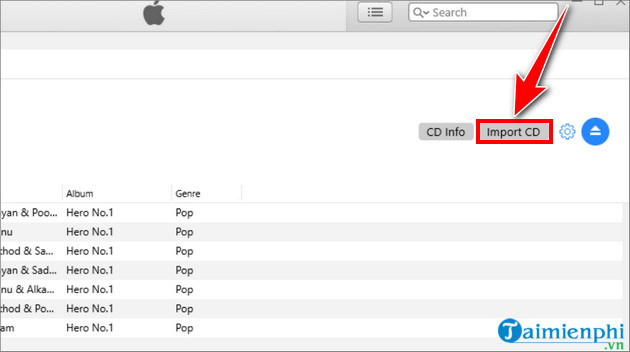
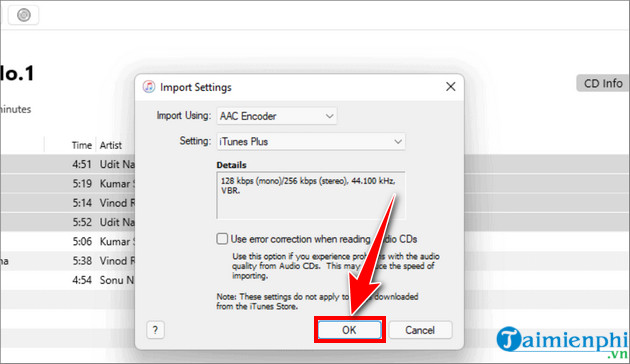
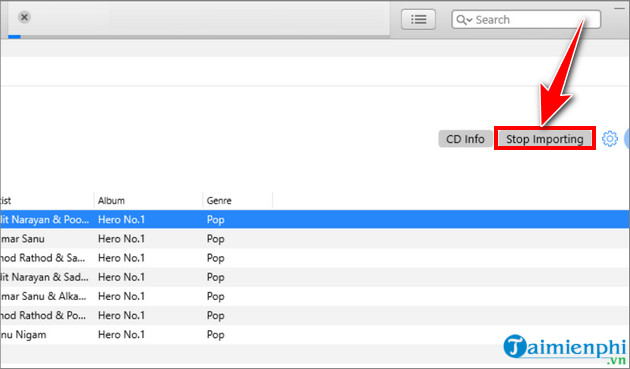
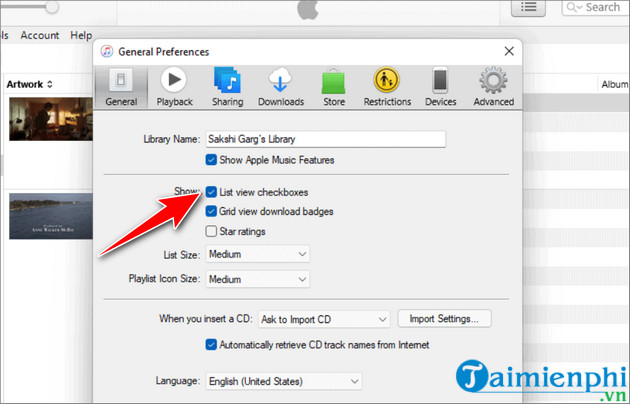
Insert an audio CD, choose the CD button, review Import Settings, select the tracks, and click Import CD. Use a format and quality appropriate for your library, and keep the original disc or another backup.

Show the CD import workflow
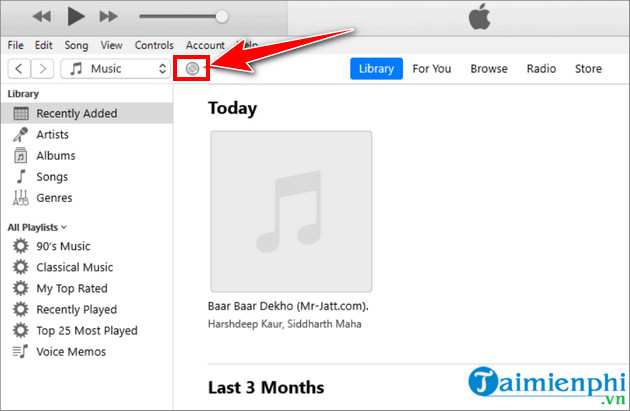
Importing an audio CD in iTunes screenshot 26
Importing an audio CD in iTunes: legacy iTunes screenshot 26
Importing an audio CD in iTunes screenshot 27
Importing an audio CD in iTunes: legacy iTunes screenshot 27
Importing an audio CD in iTunes screenshot 28
Importing an audio CD in iTunes: legacy iTunes screenshot 28
Importing an audio CD in iTunes screenshot 29
Importing an audio CD in iTunes: legacy iTunes screenshot 29
Importing an audio CD in iTunes screenshot 30
Importing an audio CD in iTunes: legacy iTunes screenshot 30
Importing an audio CD in iTunes screenshot 31
Importing an audio CD in iTunes: legacy iTunes screenshot 31
Importing an audio CD in iTunes screenshot 32
Importing an audio CD in iTunes: legacy iTunes screenshot 32
Importing an audio CD in iTunes screenshot 33
Importing an audio CD in iTunes: legacy iTunes screenshot 33

Sync an iPhone or iPad

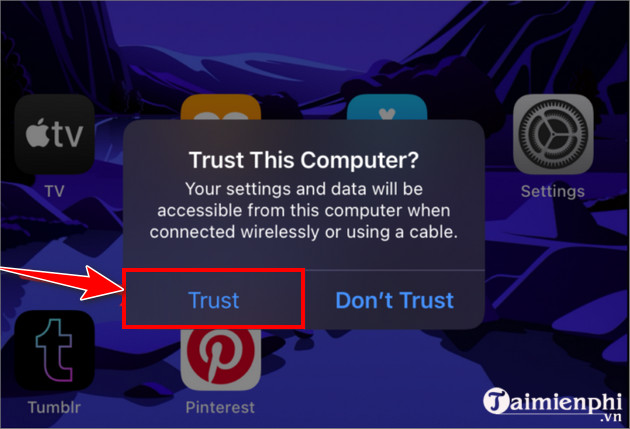
  1. Connect the unlocked device with a data-capable cable and tap Trust if prompted.
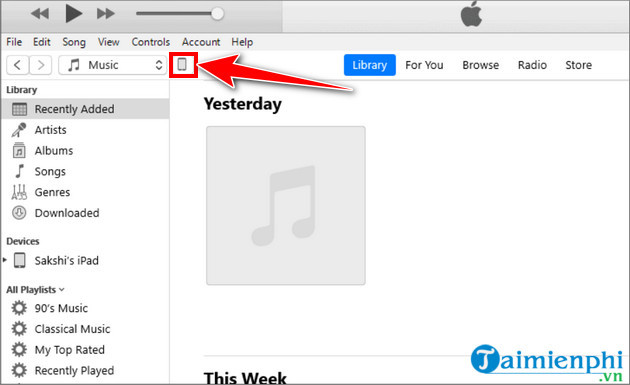
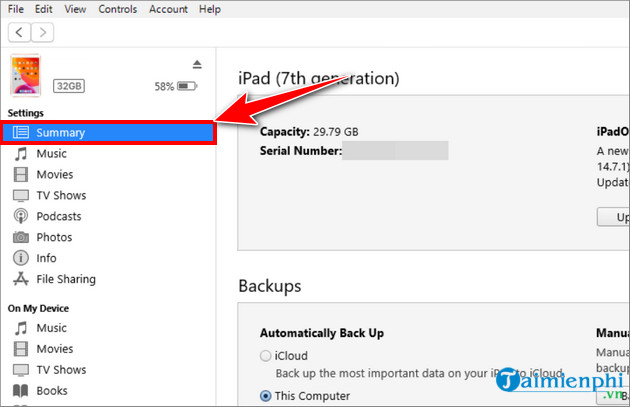
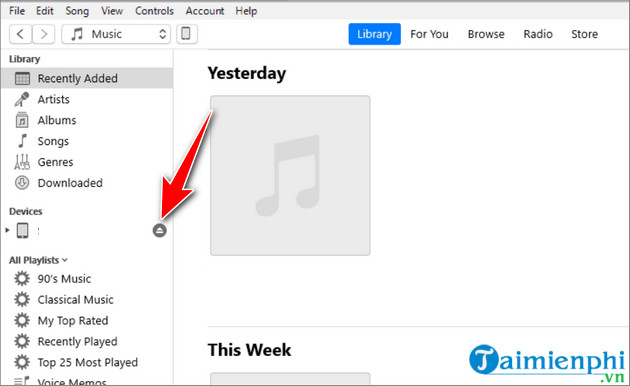
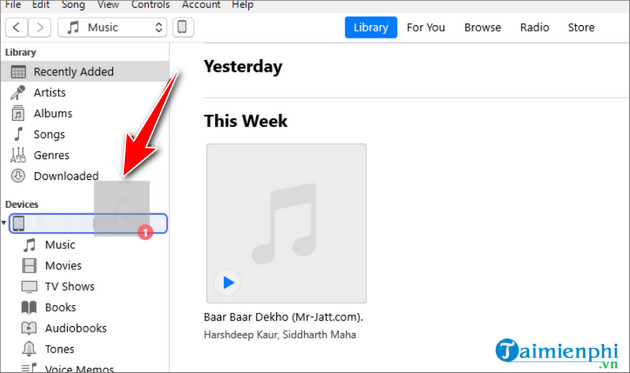
  2. In Apple Devices, select the device in the sidebar. In iTunes, click the small device icon.
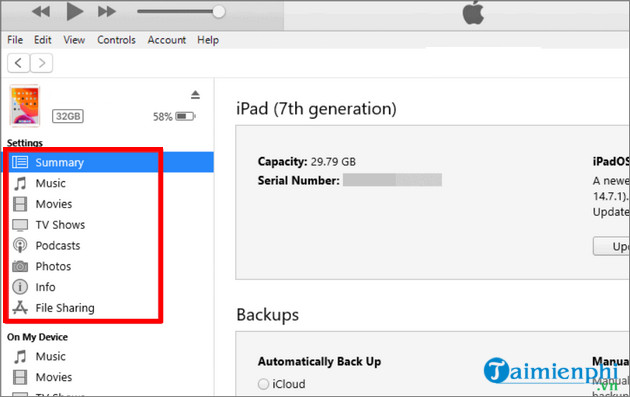
  3. Choose Music, Movies, Photos, Files, or another available category.
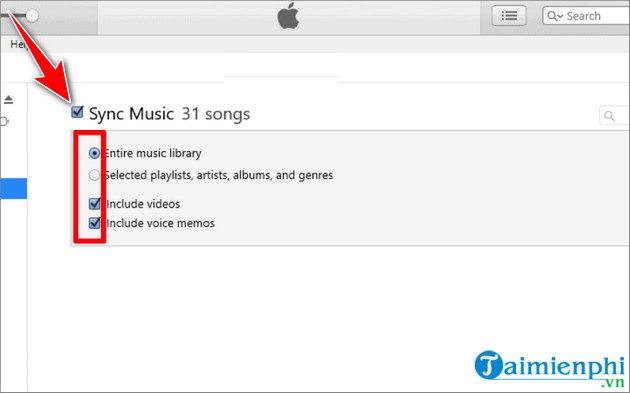
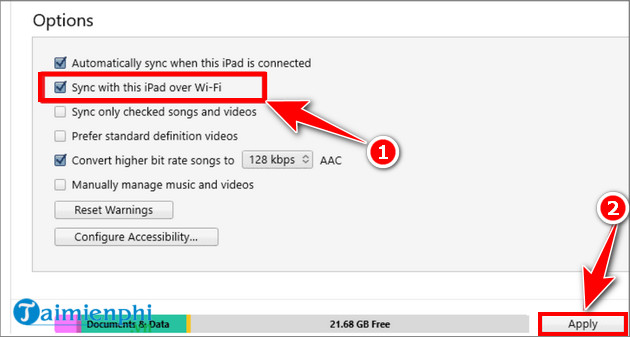
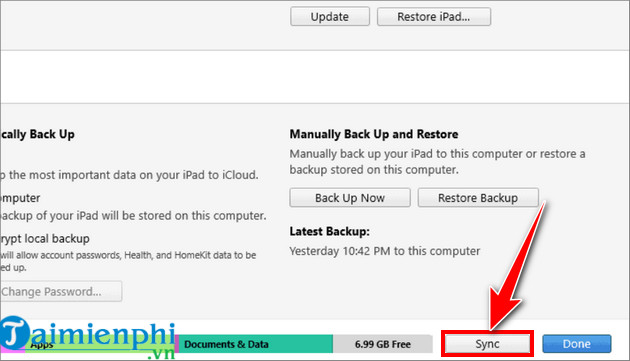
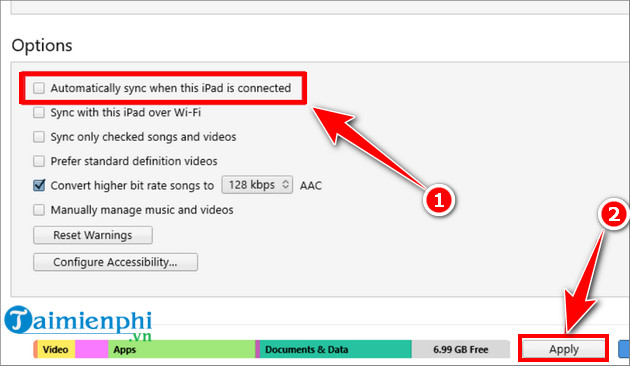
  4. Enable syncing, choose the required items, and click Apply.

Read any replacement warning carefully: syncing from a different computer or library can remove media previously synced from elsewhere. Apple's iTunes sync guide covers the legacy interface.

Show USB, Wi-Fi, and manual sync screens
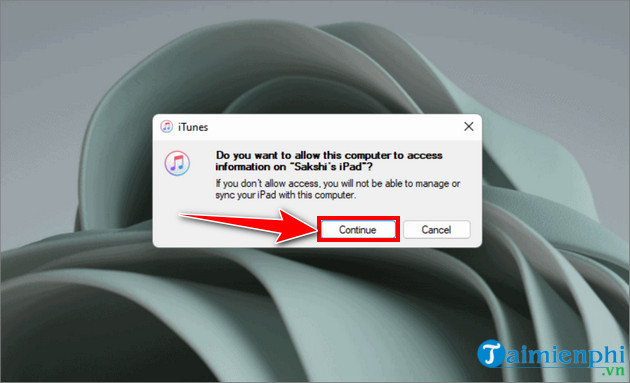
Syncing an Apple device with iTunes screenshot 34
Syncing an Apple device with iTunes: legacy iTunes screenshot 34
Syncing an Apple device with iTunes screenshot 35
Syncing an Apple device with iTunes: legacy iTunes screenshot 35
Syncing an Apple device with iTunes screenshot 36
Syncing an Apple device with iTunes: legacy iTunes screenshot 36
Syncing an Apple device with iTunes screenshot 37
Syncing an Apple device with iTunes: legacy iTunes screenshot 37
Syncing an Apple device with iTunes screenshot 38
Syncing an Apple device with iTunes: legacy iTunes screenshot 38
Syncing an Apple device with iTunes screenshot 39
Syncing an Apple device with iTunes: legacy iTunes screenshot 39
Syncing an Apple device with iTunes screenshot 40
Syncing an Apple device with iTunes: legacy iTunes screenshot 40
Syncing an Apple device with iTunes screenshot 41
Syncing an Apple device with iTunes: legacy iTunes screenshot 41
Syncing an Apple device with iTunes screenshot 42
Syncing an Apple device with iTunes: legacy iTunes screenshot 42
Syncing an Apple device with iTunes screenshot 43
Syncing an Apple device with iTunes: legacy iTunes screenshot 43
Syncing an Apple device with iTunes screenshot 44
Syncing an Apple device with iTunes: legacy iTunes screenshot 44
Syncing an Apple device with iTunes screenshot 45
Syncing an Apple device with iTunes: legacy iTunes screenshot 45

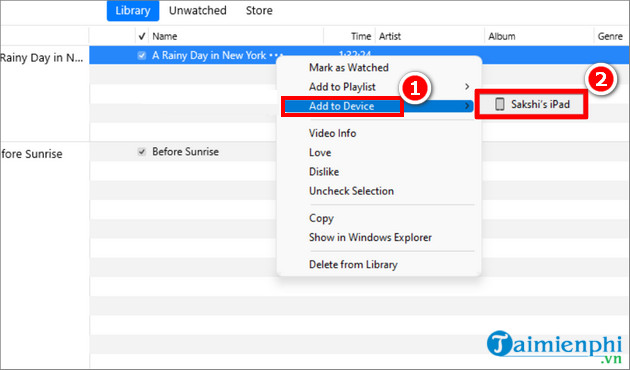
Wi-Fi sync must first be enabled while the device is connected by cable. Both devices then need to be on the same network, with the PC and app available. A manual sync gives more control but does not itself protect files from replacement by another library.

Back up the device to Windows

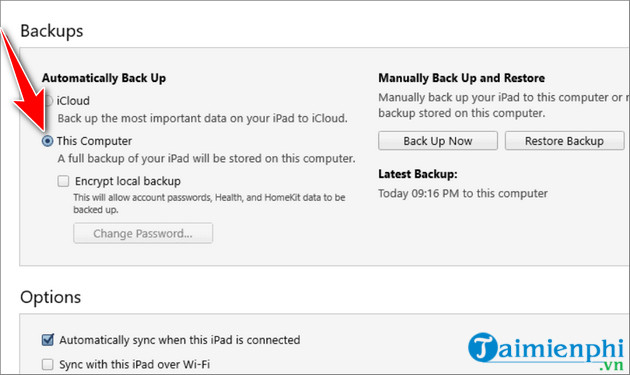
  1. Select the device and open General in Apple Devices or Summary in iTunes.
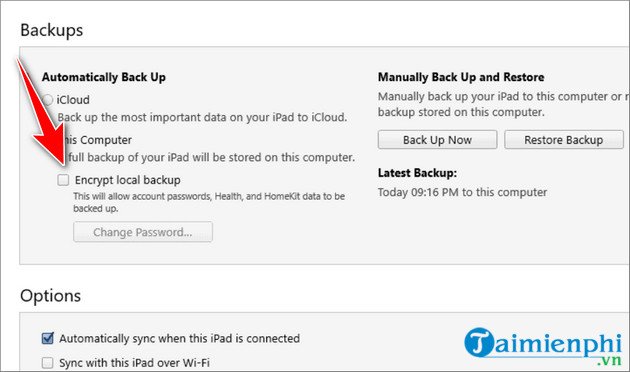
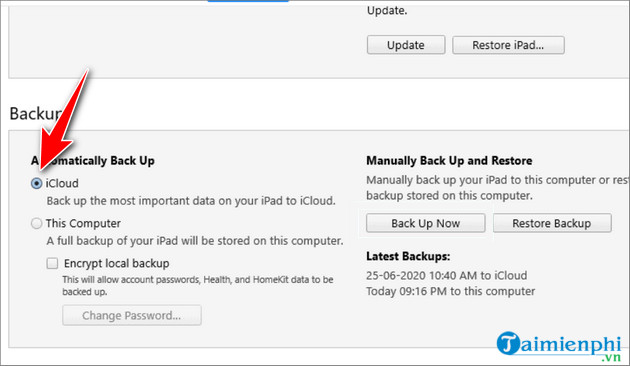
  2. Choose to back up the device to this computer.
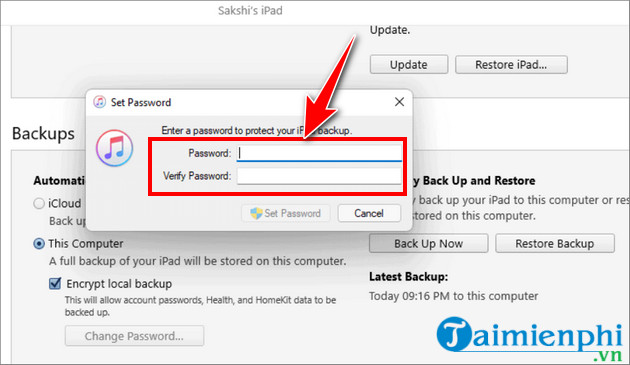
  3. Enable Encrypt local backup if the backup must include saved passwords, Wi-Fi settings, Health data, and call history.
  4. Create a strong password and store it safely; Apple cannot restore an encrypted backup without that password.
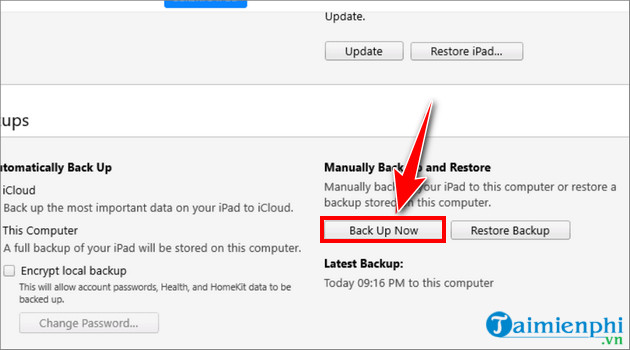
  5. Click Back Up Now, wait for completion, and verify the latest backup date.

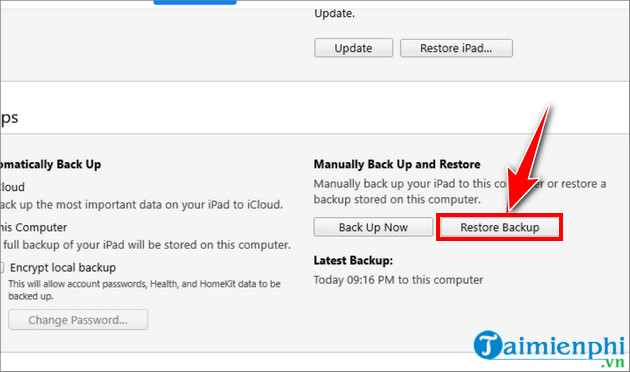
Apple's current Windows backup instructions cover both Apple Devices and iTunes.

Show legacy iTunes backup and restore screens
Backing up and restoring with iTunes screenshot 46
Backing up and restoring with iTunes: legacy iTunes screenshot 46
Backing up and restoring with iTunes screenshot 47
Backing up and restoring with iTunes: legacy iTunes screenshot 47
Backing up and restoring with iTunes screenshot 48
Backing up and restoring with iTunes: legacy iTunes screenshot 48
Backing up and restoring with iTunes screenshot 49
Backing up and restoring with iTunes: legacy iTunes screenshot 49
Backing up and restoring with iTunes screenshot 50
Backing up and restoring with iTunes: legacy iTunes screenshot 50
Backing up and restoring with iTunes screenshot 51
Backing up and restoring with iTunes: legacy iTunes screenshot 51

What to do after installation

Update the app, authorize the computer only if purchased media requires it, and make a verified backup before changing sync settings. For basic menus and library controls, see the iTunes beginner guide. For a media transfer walkthrough, use the music, video, and photo transfer guide.

Discussion

Reader Comments 0

Sign in with email or Google to join the discussion.