Table of Contents
To move music, videos, or photo folders from a computer to an iPhone or iPad, use Apple Devices on current Windows PCs or Finder on a current Mac. iTunes remains relevant on older Windows setups and older versions of macOS. The basic workflow is the same: add or organize the files on the computer, connect the device, select what to sync, and apply the changes.
Before you start
- Use a cable that supports data, unlock the device, and tap Trust if prompted.
- Back up important data before changing sync settings.
- Music and video files must use formats supported by the device. A file that plays on the PC is not automatically iPhone-compatible.
- Syncing from a new computer can replace media previously synced from another library. Read the confirmation message before continuing.
- When iCloud Photos is enabled, computer-based photo-folder syncing may be unavailable. Do not disable iCloud Photos without confirming that the originals are safely stored.
Current method on Windows: Apple Music and Apple Devices
- Install Apple Music and Apple Devices from the Microsoft Store.
- Open Apple Music. Use its import command or drag local audio files into the library.
- Connect the iPhone or iPad and open Apple Devices.
- Select the device, choose Music, Movies, or Photos in the sidebar, enable syncing, and choose the playlists, videos, albums, or folders you want.
- Click Apply. Leave the device connected until the sync finishes, then eject it.
Apple provides separate current instructions for syncing music and syncing photos in Apple Devices.
Current method on a Mac: Music and Finder
Import local audio into the Music app. Then connect the device, open Finder, select the iPhone or iPad under Locations, and use the Music, Movies, TV Shows, Photos, or Files tabs. Select the content, click Apply, and wait for syncing to finish.
Legacy iTunes method
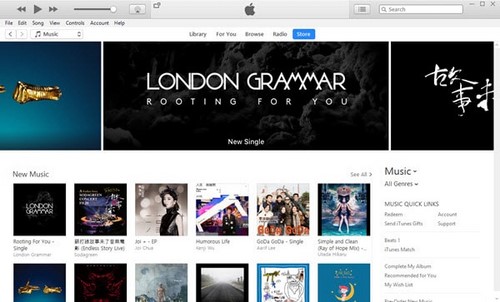
The screenshots below show an older iTunes interface. Menu positions may differ, but they remain useful if your computer still uses iTunes.
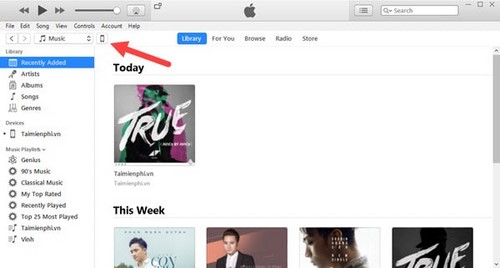
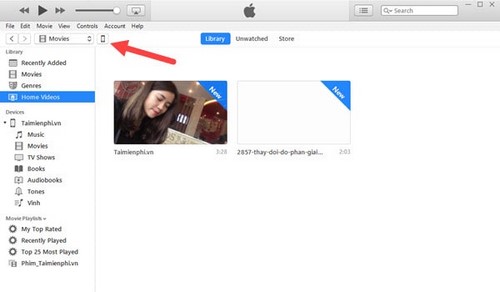
Connect the device, approve the trust prompt, and select the small device icon in iTunes.
Transfer music with iTunes
- Add songs to the iTunes library with File > Add File to Library, or drag supported audio files into the Music library.
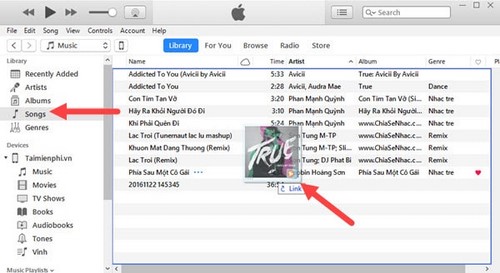
- Optionally create a playlist to make the selection easier. A playlist is useful, but it is not required for all sync configurations.
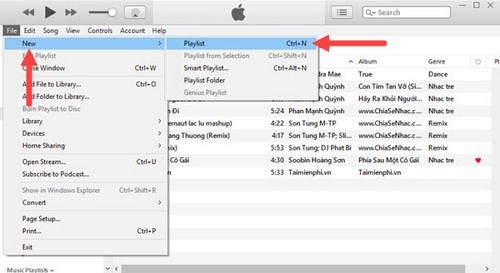
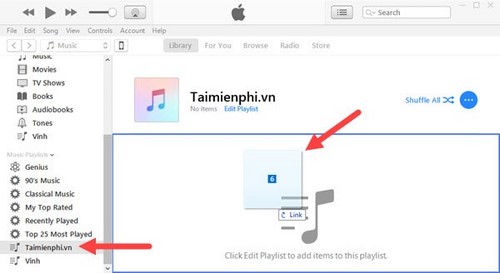
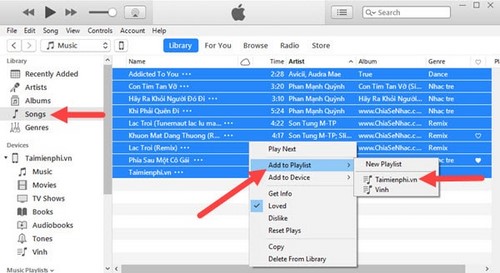
- Select the device icon, then open Music.
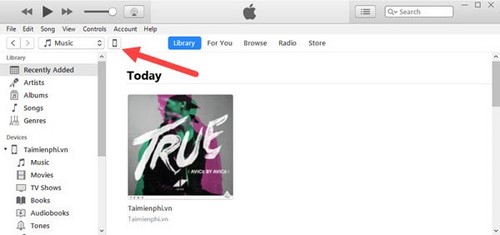
- Enable Sync Music, choose the entire library or selected playlists, artists, albums, and genres, then click Apply.
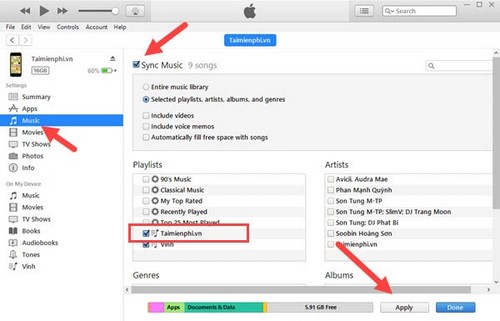
For a more focused explanation, see how to transfer music to an iPhone or iPad.
Transfer compatible videos with iTunes
- Open the Movies section and add a compatible video to the library.
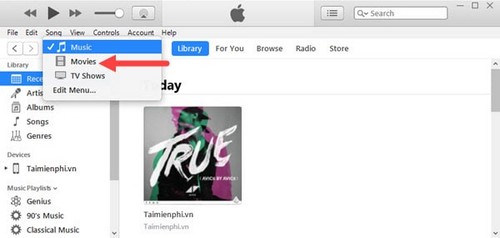
Older iTunes versions let users organize video items or playlists before syncing.
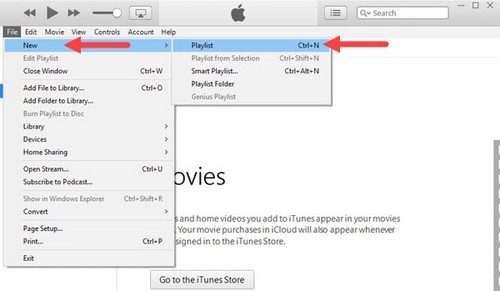
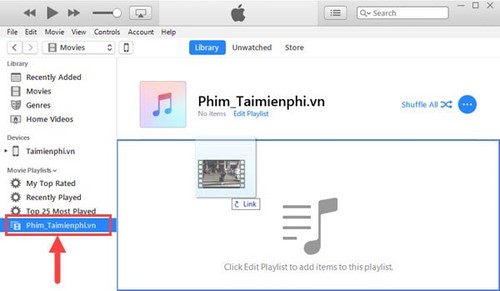
- Select the connected device.
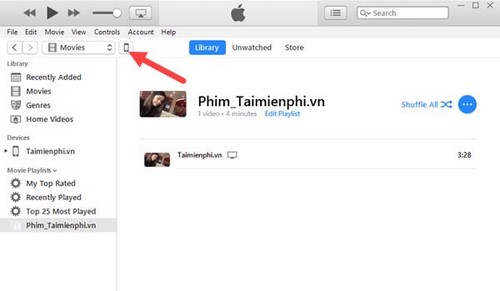
- Open Movies, enable Sync Movies, select the required items, and click Apply.
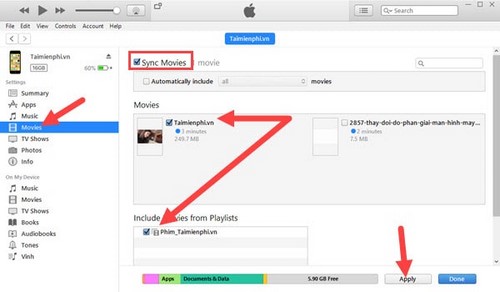
If a video will not sync, convert it to a supported format rather than repeatedly reconnecting the device. See the separate video-transfer guide for additional troubleshooting.
Sync a photo folder with iTunes
- Select the device, then open Photos.
- Enable Sync Photos and choose the folder containing the pictures.
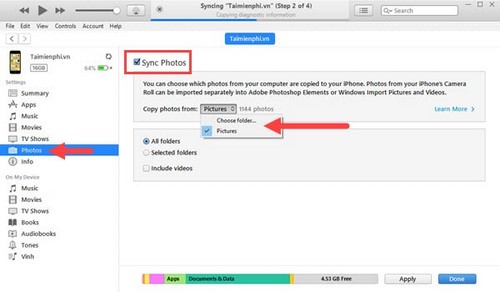
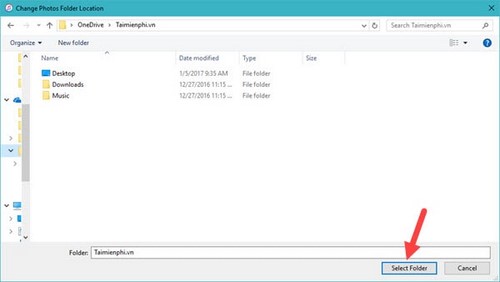
- Select any required subfolders and click Apply.
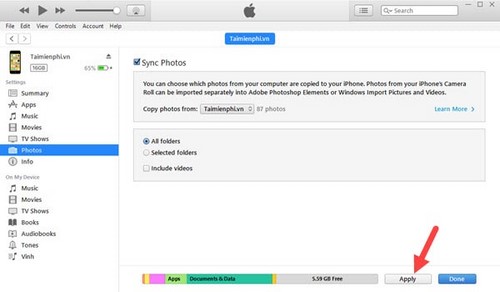
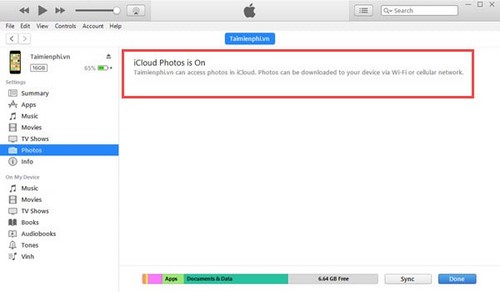
If iTunes reports that iCloud Photos is on, the folder-sync controls will not be available.
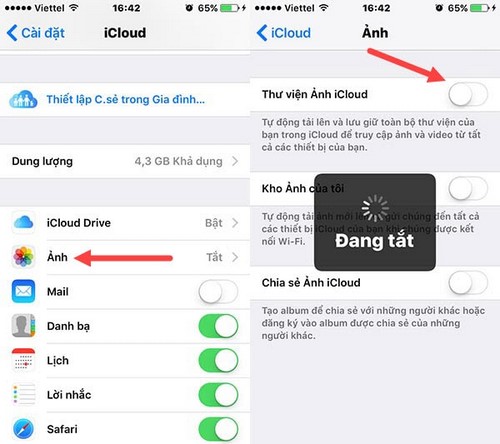
On older iOS versions, iCloud photo settings appeared under Settings > iCloud > Photos; current versions place them under Settings > [your name] > iCloud > Photos.
Check the result before disconnecting
Open Music, TV, or Photos on the device and confirm that the expected items are present. Synced photo folders and manually synced media are managed from the computer that supplied them, so deleting or deselecting them in a later sync can remove them from the device. If your goal is to copy photos in the opposite direction, use the guide to transfer iPhone photos to a computer.
Related Articles
 How to Convert Videos from Computer to iPhone with Itunes5 minutes read
 Copy the Image to Your iPhone Using Send Anywhere4 minutes read
 How to Copy Music to iPhone Without Itunes8 minutes read
 How to Copy, Transfer, and Move Music from Your PC to Your iPhone or iPad Using iTunes4 minutes read
 How to Copy Music to iPhone, iPad from Computer?8 minutes read
 How to Copy Music, Images, and Movies from Your Computer to an7 minutes read
Reader Comments 0
Sign in with email or Google to join the discussion.