Table of Contents
This guide explains how to insert Page Numbers and Page Numbers in Word, with clear steps, practical tips, and important checks before you begin.
Number the page for the text
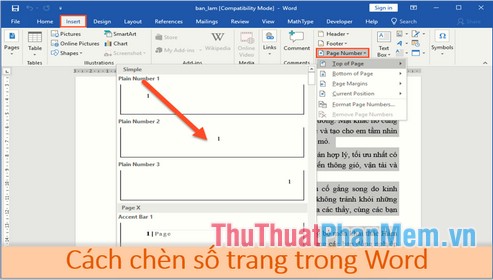
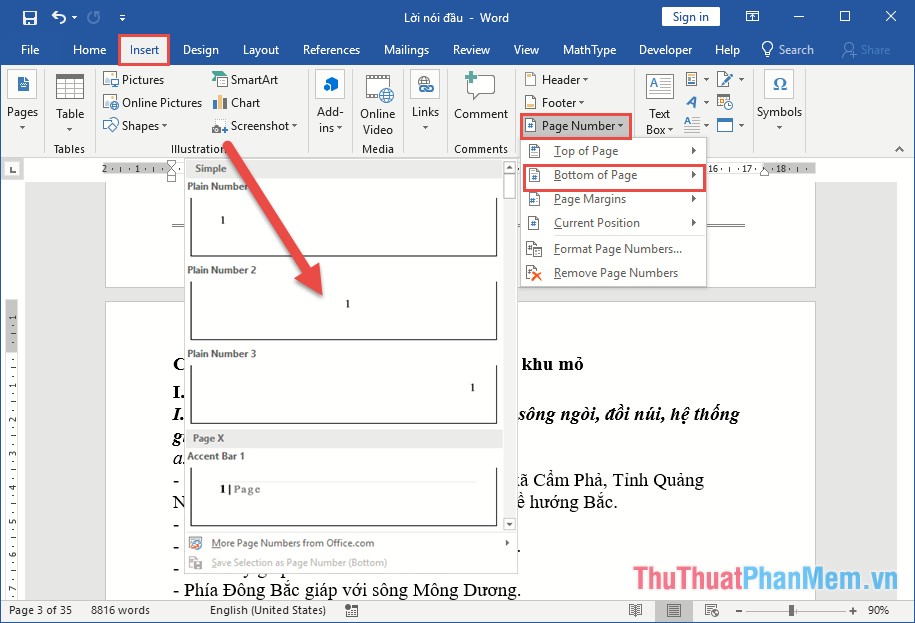
Number the page for the text starting on the first page. You just need to go to the Insert tab -> Page Number -> select the page numbering style:
- Top of Page: Number the page at the top of the page.
- Bottom of Page: Number the page at the bottom of the page.
- Page Margins: Number the page on the page margin.
- Current Position: Numbering the page at the position where the mouse cursor is positioned.
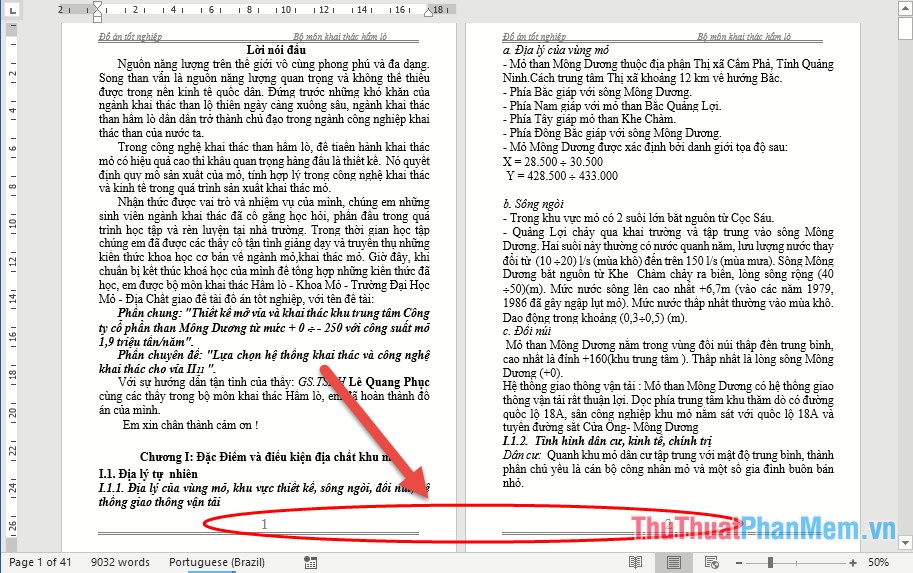
For example, here is the page numbering option at the bottom of the page:

Numbered results for page text:
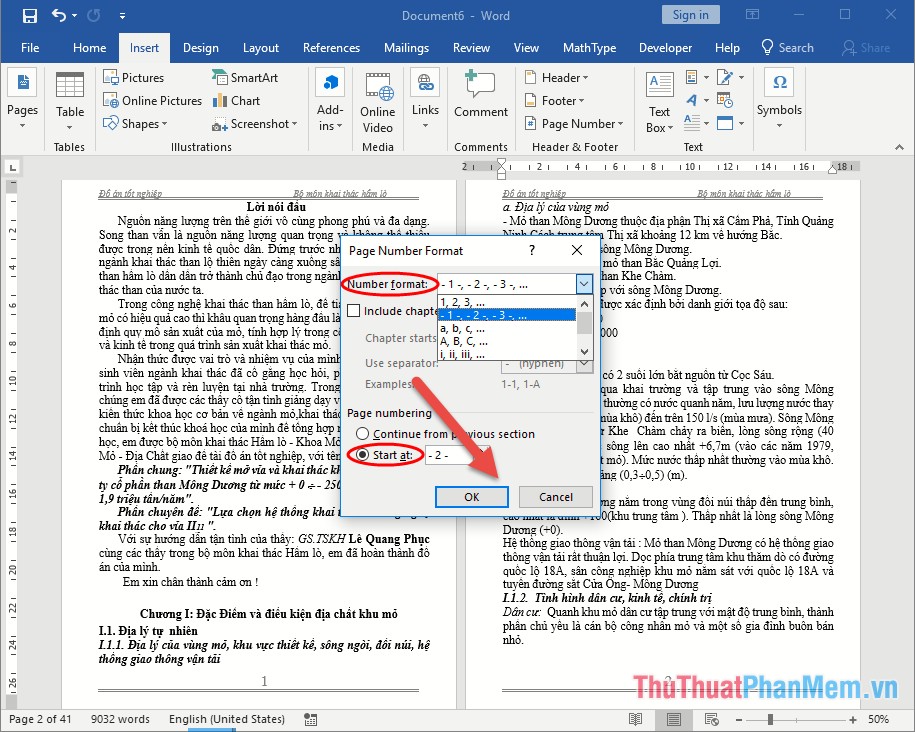
In addition, if you want to format the displayed page number or page number value from any number, click Format Page Numbers..

The dialog box displays the selection of the display style in the Number of Format section, the page number starts typing in the Start at section:
Insert page numbers from any page, from any number in the text
In some cases, if you need page numbering from any chapter or paragraph in the text, you can do the following:
For example, the page numbering starts from chapter 2.
Perform page breaks
Step 1: Place the cursor at the beginning of the page to be numbered -> on the Layout tab -> Breaks -> Next Page:
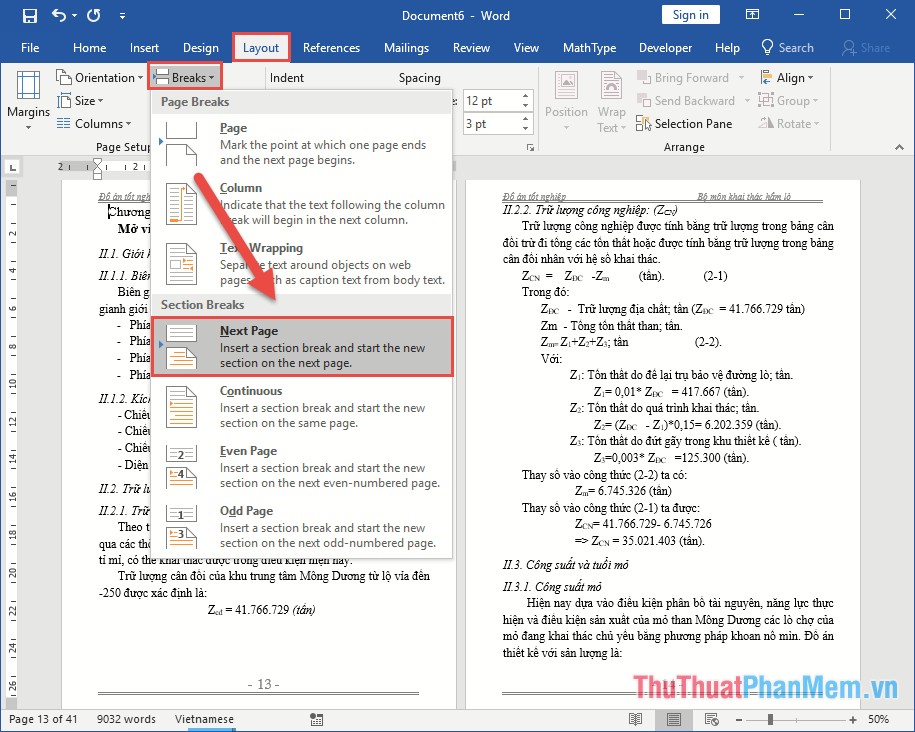
The bookmark page is broken into 2 parts, part 1 from the beginning to the page numbering, part 2 starts from the page numbering to the end of the page:
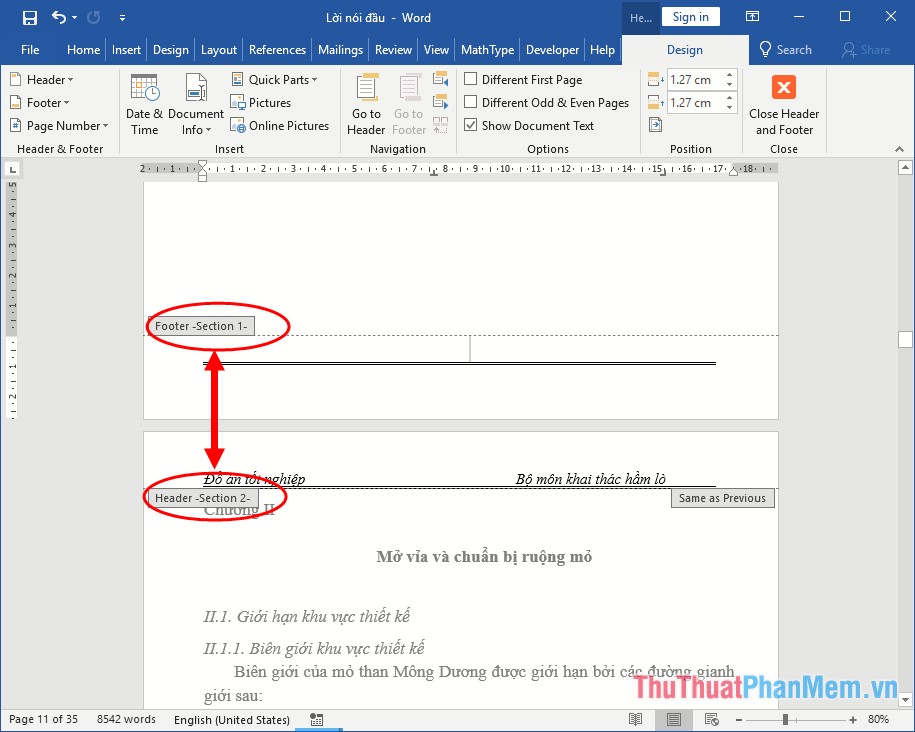
Note that during the page break if Word creates a blank page, put the cursor on the page before the white page -> press and hold Delete key )
Page
Step 2: Go to the Insert tab -> Format Page Number to format the display and the starting value of the bookmark:
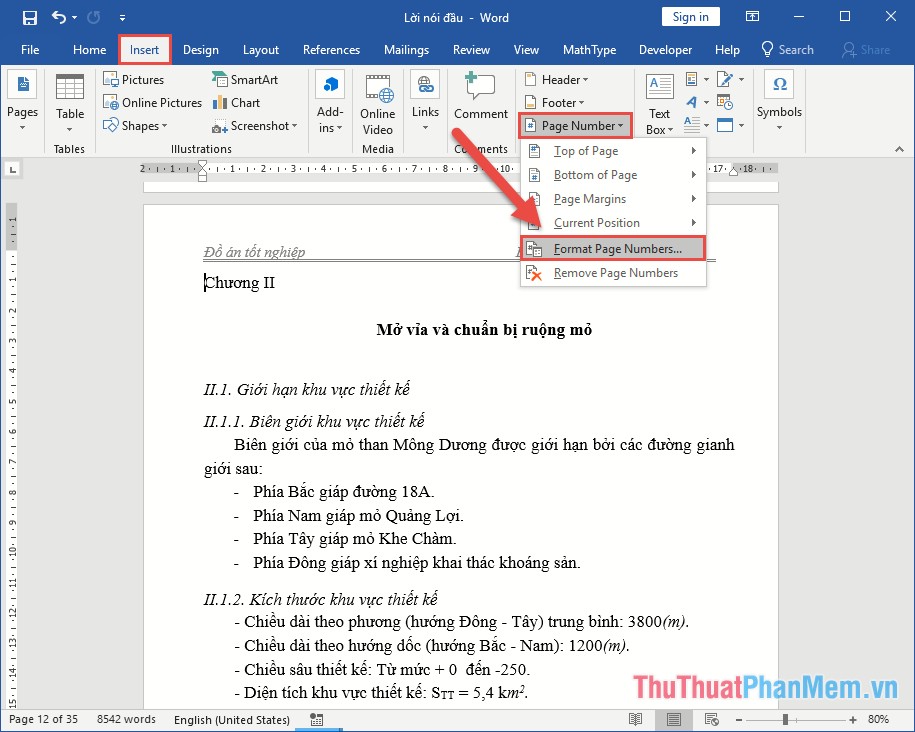
Step 3: Dialog box shows how to select bookmarks and start bookmarking values -> click OK:

Step 4: On the card Insert -> Page Number -> select the type of pagination:
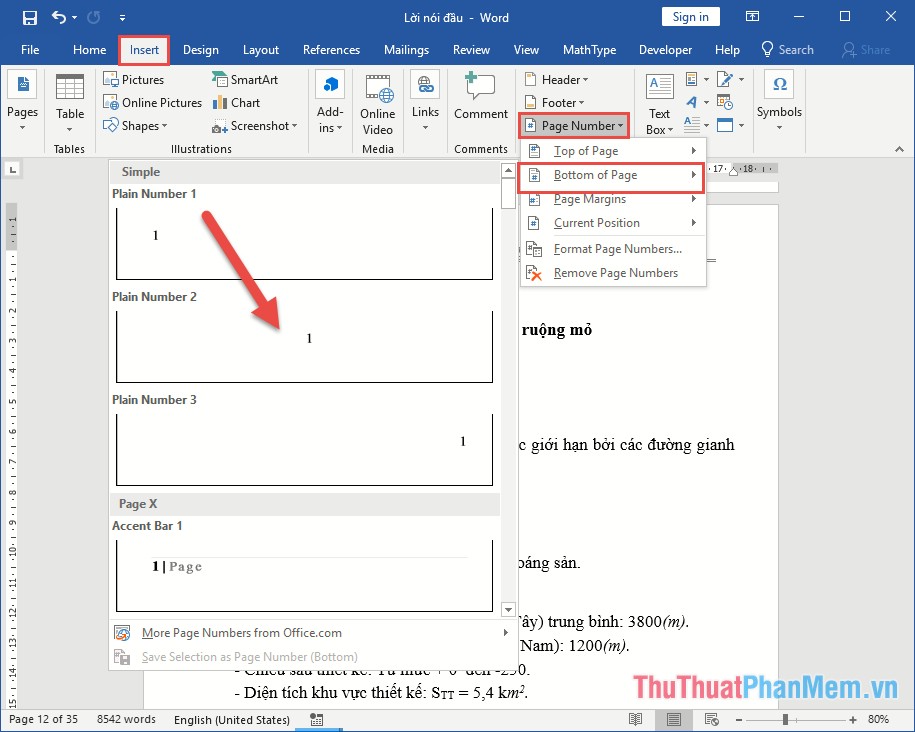
The result you have paginated from any one page:

Delete the page number in the section above
However, in the Word page numbering process, the page numbering for the above section is automatically included but there is a value different from the page number we need to type. You should delete the page number in secsion first to avoid confusion. Go to the Insert tab - > select Edit Header in the Design tab, click the Link to Previous icon to remove the link between section 2 and section 1:
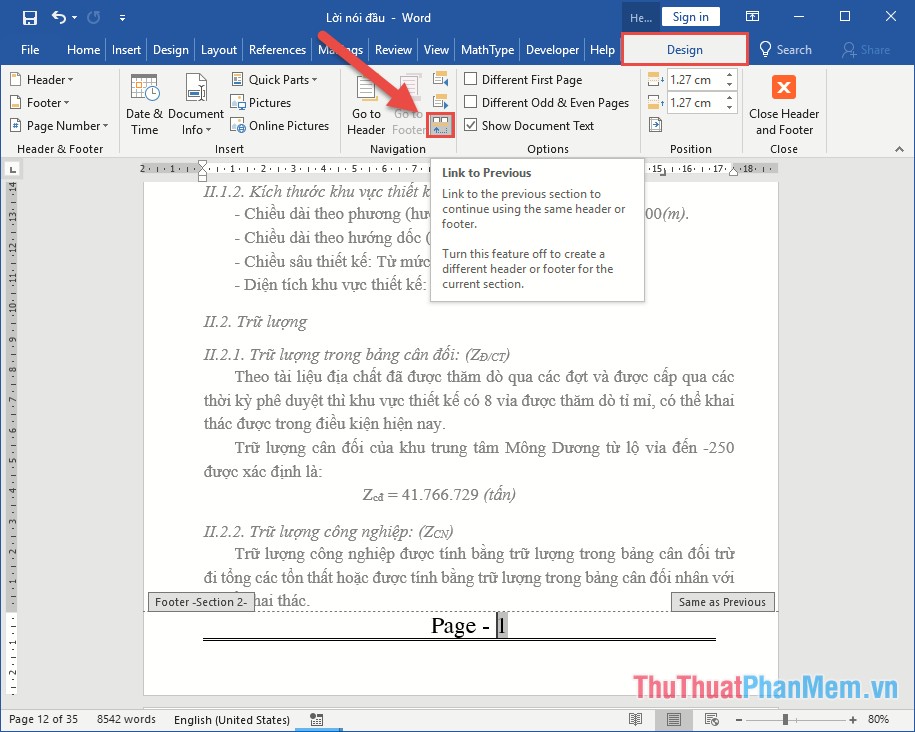
You delete the page number in section 1 by highlighting the page number in section 1 -> press the Delete key, the result has deleted the page number that section 2 is not affected:
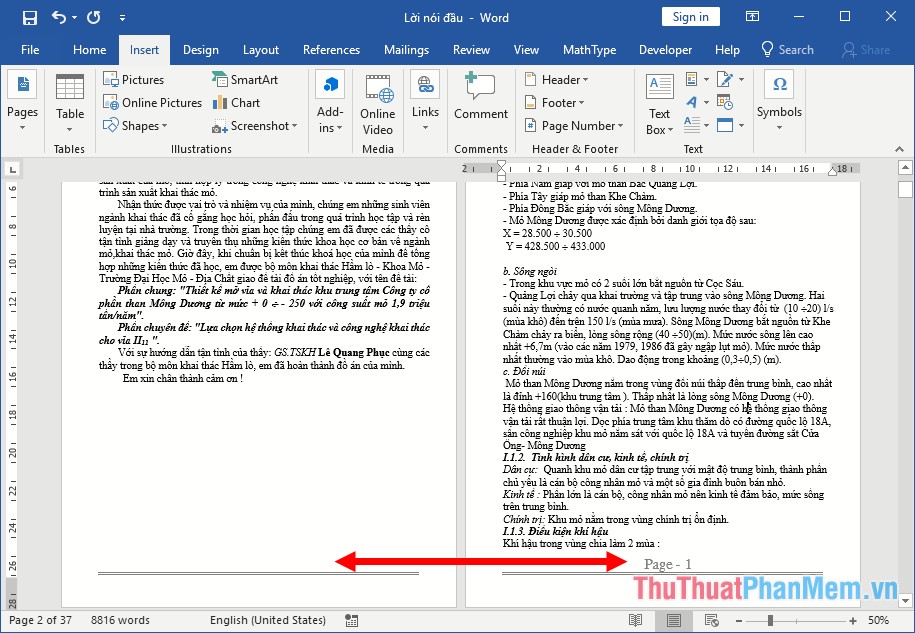
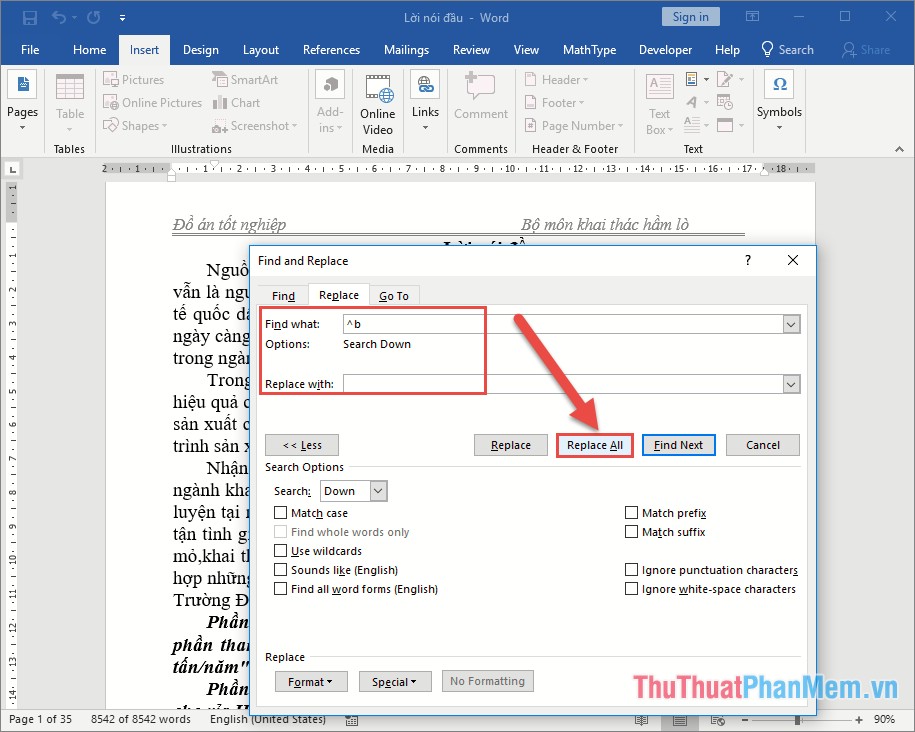
In case you want to delete sections to create another page number, you select the whole document -> press Ctrl + H key combination in Replace section, enter ^ b With blank entry -> click Replace All
Insert page numbers ignoring the first and last pages of text
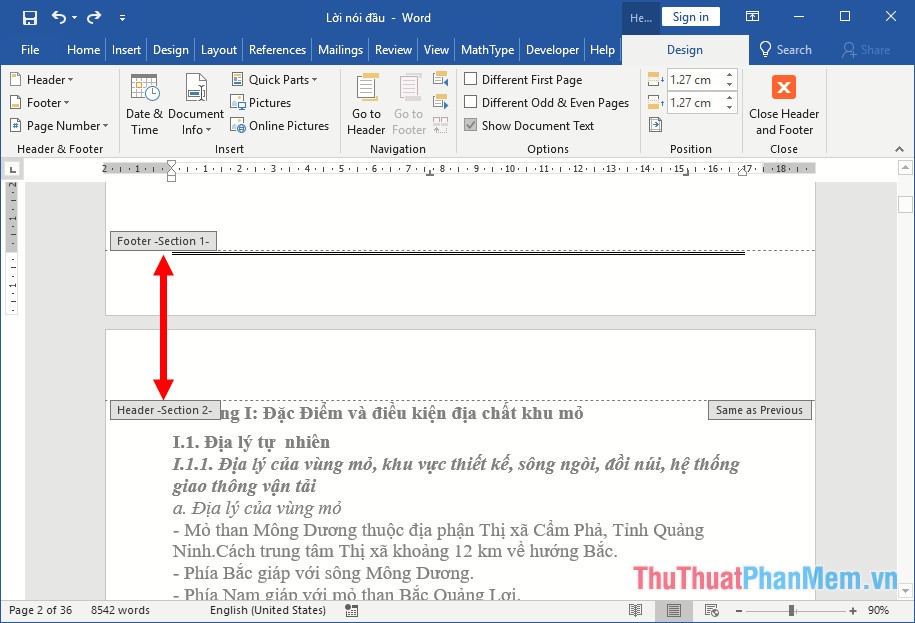
Similar to page numbering from any page, you create a section between the first and the second page of the text that calls for sections 1 and 2:
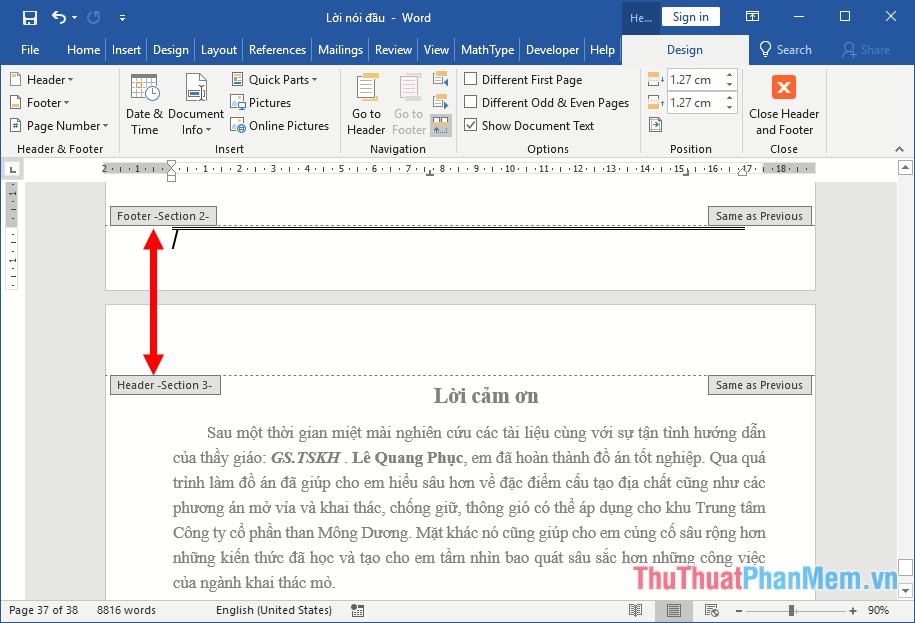
Next create section 3 between section 2 and the last page of the text:
Place the cursor at the beginning of section 2 to do page numbering for the entire text:
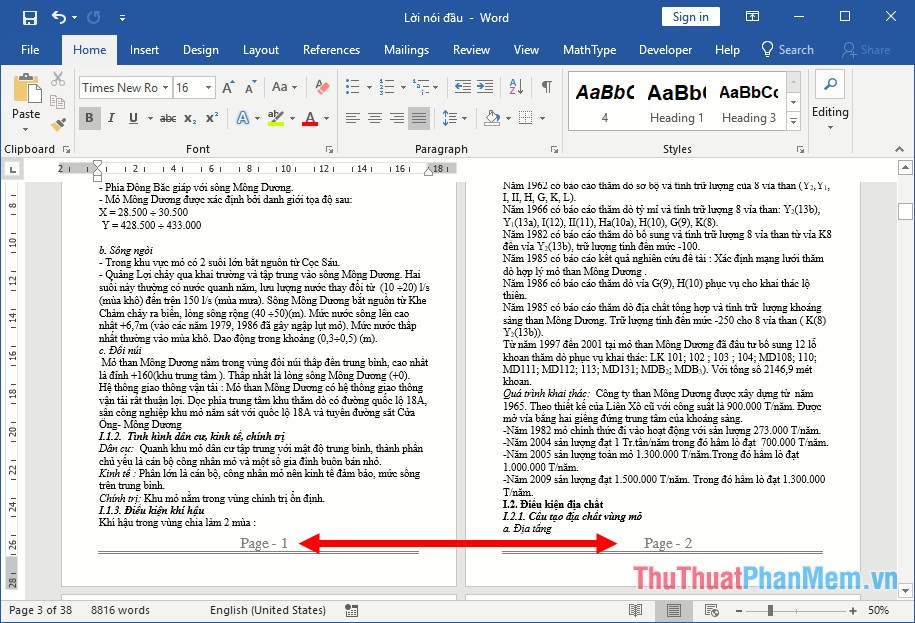
The main content results except the first and last pages are numbered consecutively from 1:
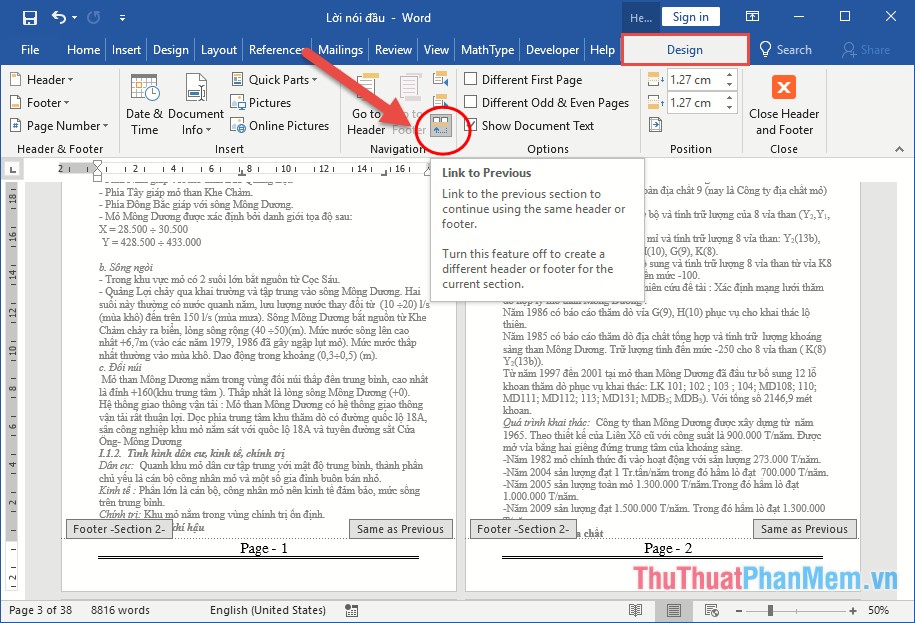
Place the cursor at the beginning of section 2 -> remove the link between sections 1 and 2 by clicking Link Previous:
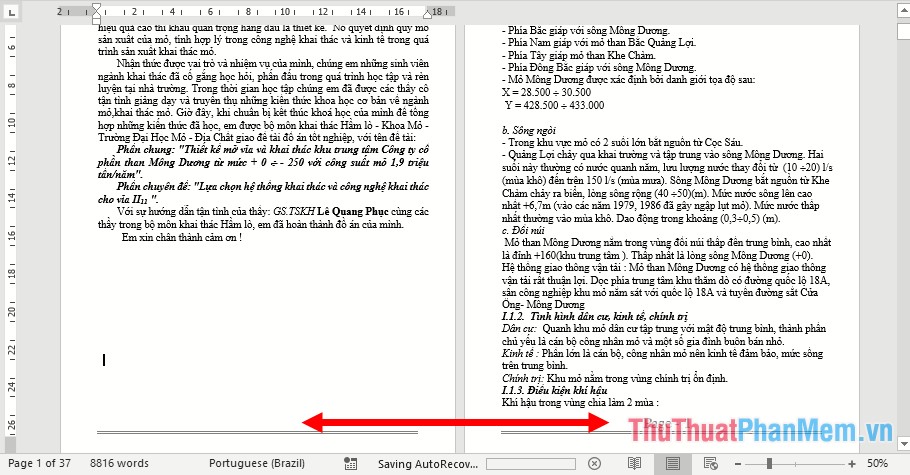
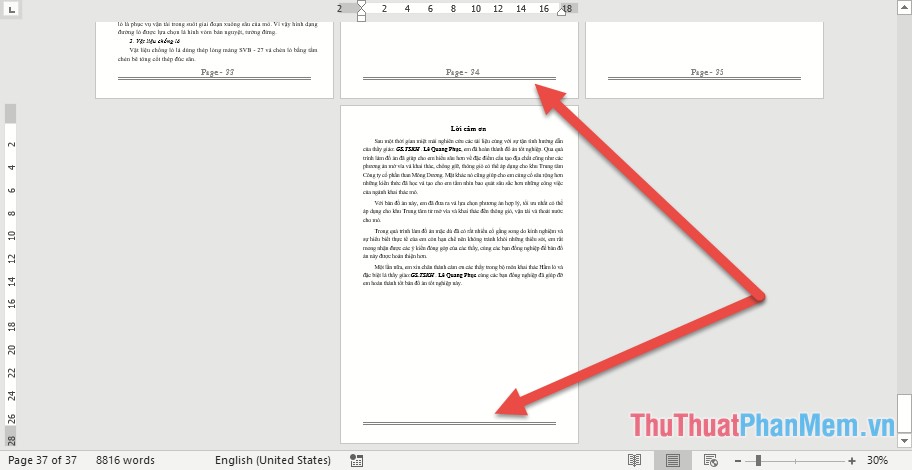
Do delete page number on the first page:
Similar to the last page you remove section 2 and link 3 -> remove the page number in the last page that results:
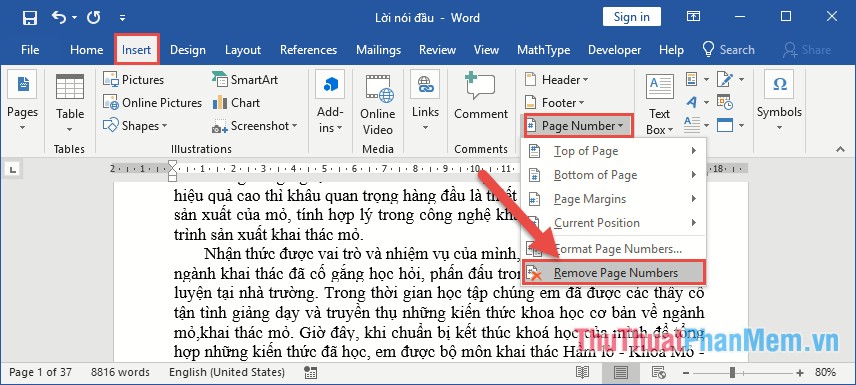
In case you do not want the page number -> click Remove Page Number:
Above are some ways to help you number the page in Word. Good luck!
FAQ
What should I know about Insert Page Numbers and Page Numbers in Word?
Focus on the key features, requirements, limitations, and practical use cases explained in this guide.
How do I get the best results with Insert Page Numbers and Page Numbers in Word?
Follow the recommended steps, use current software or information, confirm compatibility, and review settings before major changes.
Are there any risks or limitations?
Potential limitations depend on compatibility, data quality, cost, privacy, support, and how the product or method is used.
Related Articles
 How to Insert Page Numbers in Word: Clear Instructions7 minutes read
 How to Insert Page Numbers in Excel: Create Excel Page Numbers5 minutes read
 Number of Pages in Word: Page Numbering in Word6 minutes read
 How to Insert Page Numbers in Word6 minutes read
 Insert PDF Pages: How to Number a PDF Page6 minutes read
 How to Style Pages Symmetrically on Word: Number Word Pages4 minutes read
Reader Comments 0
Sign in with email or Google to join the discussion.