Table of Contents
This guide explains how to draw a Table in Excel, with clear steps, practical tips, and important checks before you begin.

Step 1: After creating the data table to draw the table, you just need to select the data area you want to draw the table -> go to the Home tab, click the Border icon -> click All Border:
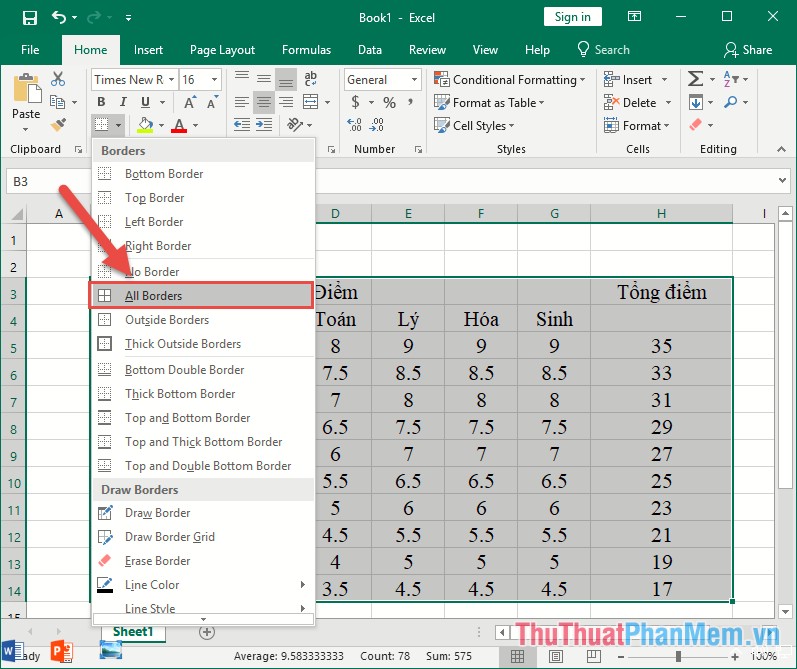
The results of the data are plotted as shown below:

Step 3: Edit the content of the data table with the title to merge cells (if you do During creating data, skip this step). Here, the headings of columns No., First and last name, Points, Sum of points need to be drawn, for example, the points of the Column cells:
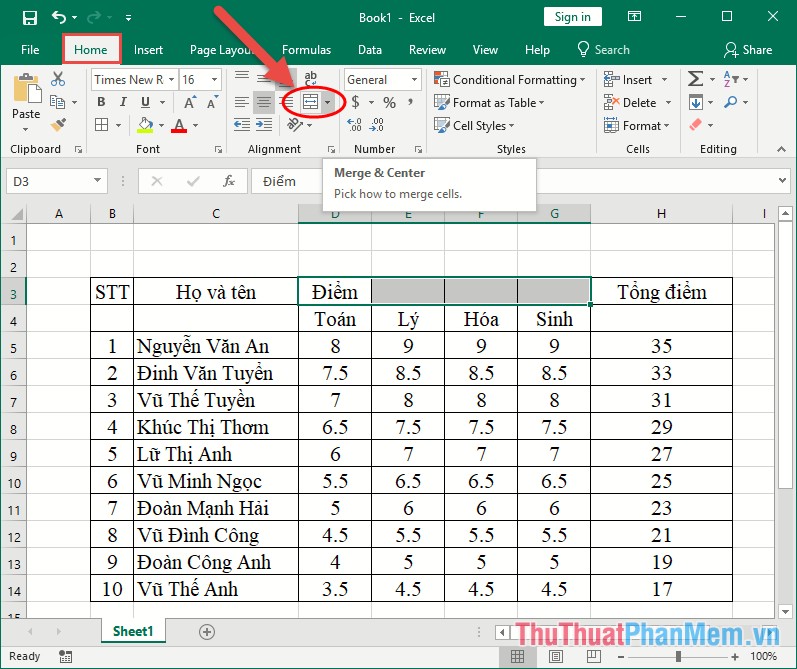
Step 4: After joining the cell, you need to adjust the position of the text in the middle of the cell by selecting the cell to format -> right-click and choose Format Cell:

Step 5: A dialog box appears and select the Alignment tab in the Alignment section to change the values of Horizontal, Vertical to Center -> click OK:
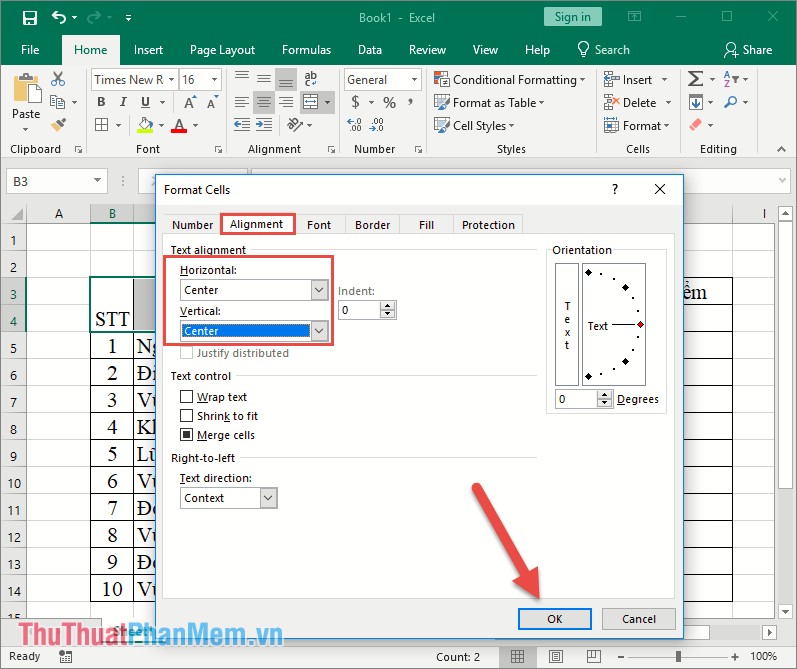
As a result, you have formatted the table:
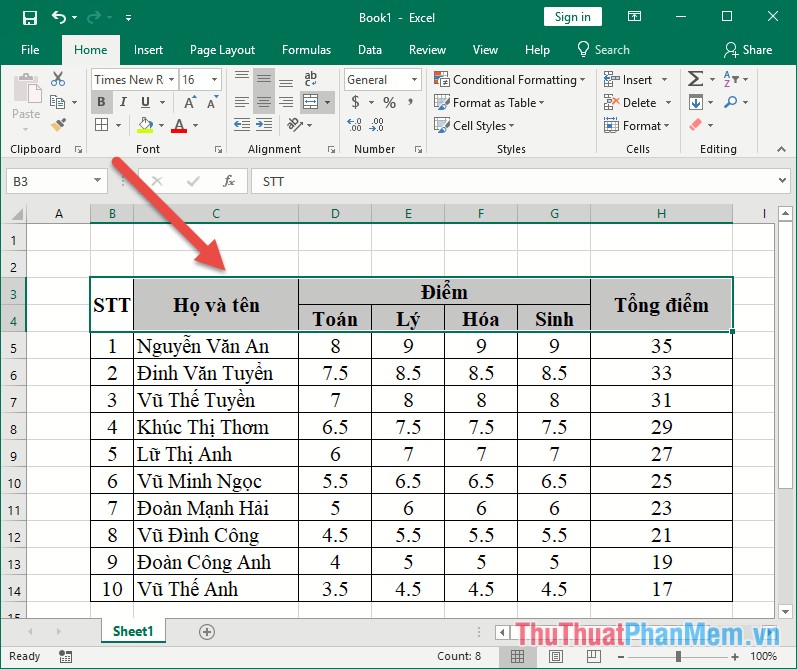
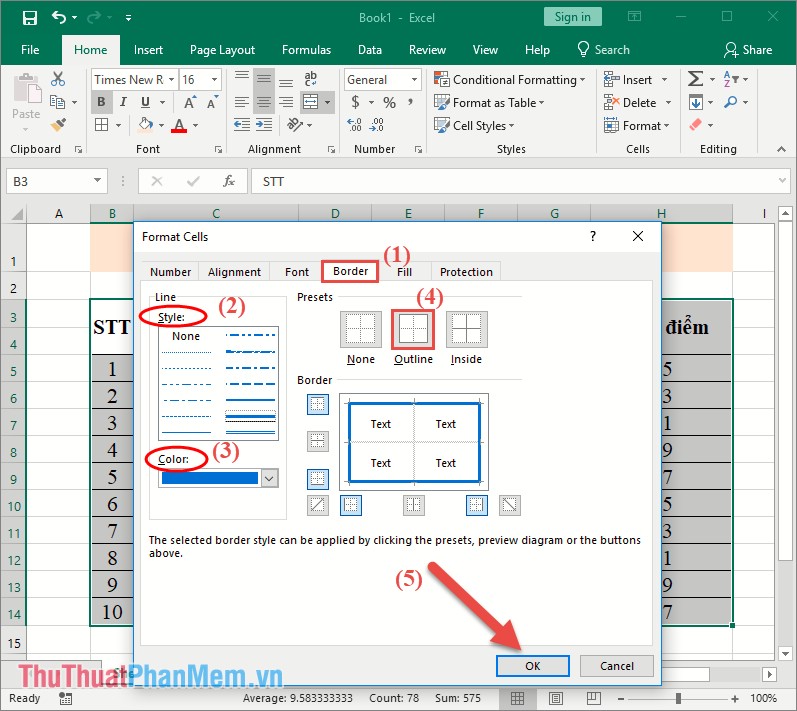
Step 6: The last thing you need to do is adjust the outer border of the table beautifully and distinguish it from the inside border. Select the table -> right-click Format Cells -> dialog box appears Border selection, select the border style for the border outside the table in Style -> select the border color in Color -> click Outline - > click OK:
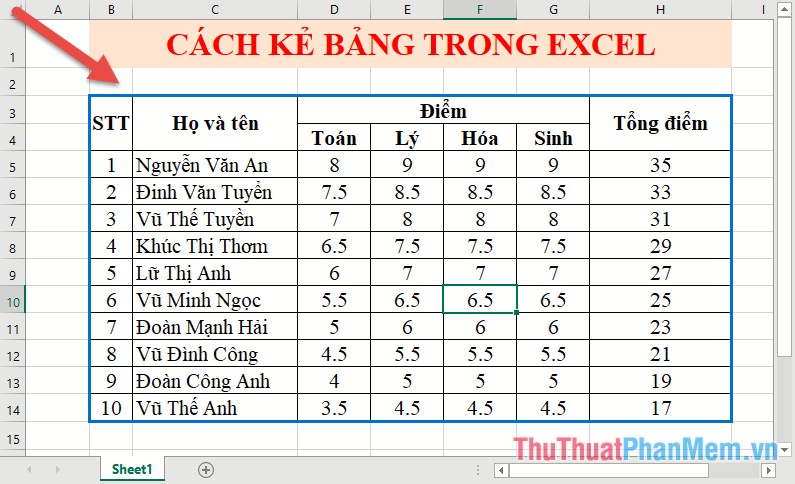
As a result, you can draw tables and edit them as you want, in addition, after drawing tables you can fill the background color for each row and column as you like:
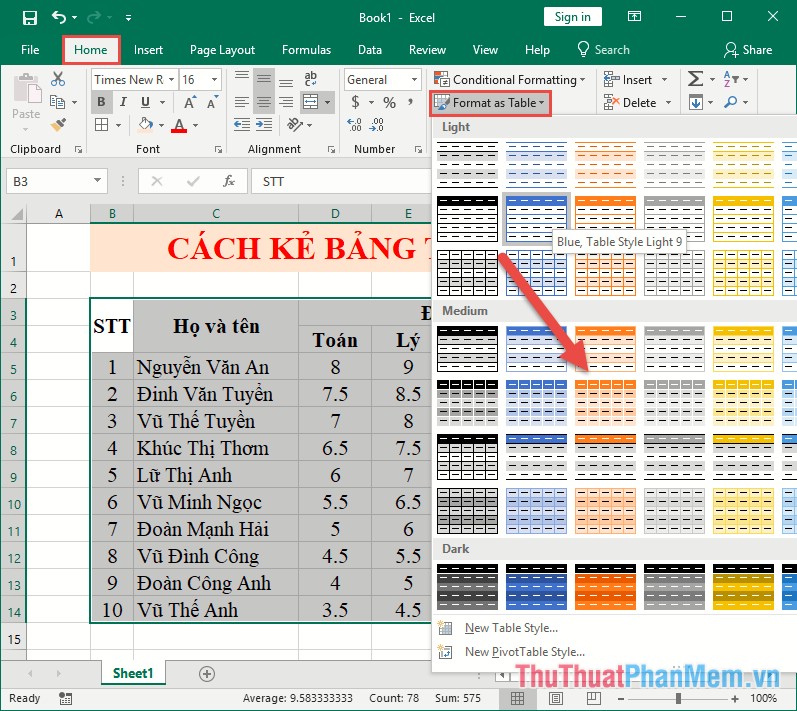
In case you do not want to draw the table, but use the formats available in Excel that apply to the table, simply select the data area you want to create the table -> go to the Home tab -> Format as Table -> select the type of table to create:
A dialog box appears, select the My Table has Header box if the table creation content already includes the title, otherwise deselect if the selected area does not contain a title -> click OK:

The result is plotted, but if the title contains content that needs to be merged in this way, Merge Cell cannot be merged :
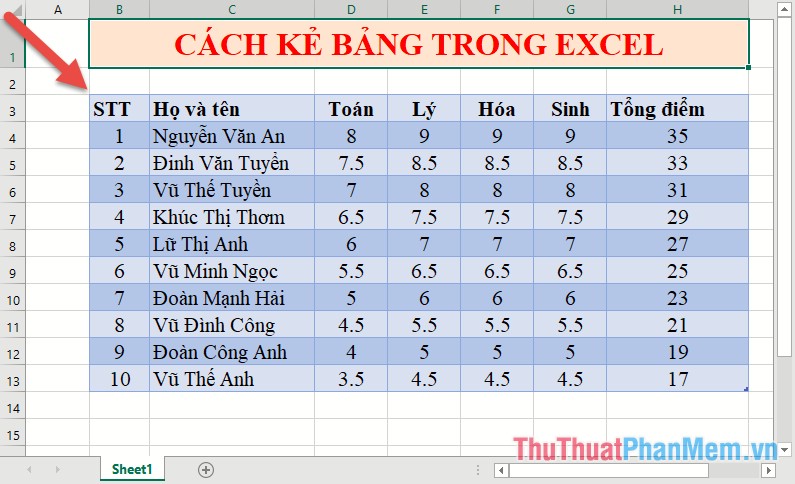
So depending on the table content you can draw the table in many ways as you like. Good luck!
FAQ
What should I know about Draw a Table?
Focus on the key features, requirements, limitations, and practical use cases explained in this guide.
How do I get the best results with Draw a Table?
Follow the recommended steps, use current software or information, confirm compatibility, and review settings before major changes.
Are there any risks or limitations?
Potential limitations depend on compatibility, data quality, cost, privacy, support, and how the product or method is used.
Related Articles
 How to Draw a Table - Add, Edit, and Delete Column Rows in a Table in Excel5 minutes read
 Steps to Use the Draw Table Feature in Microsoft Word5 minutes read
 How to Draw a Straight LINE, Draw an Arrow in Excel7 minutes read
 How to Naming Excel Tables4 minutes read
 How to Remove Table Formatting in Excel7 minutes read
 How to Create a Table in Photoshop3 minutes read
Reader Comments 0
Sign in with email or Google to join the discussion.