Table of Contents
This guide explains how to resolve the Error of Not Receiving an SSD, starting with the most likely causes and moving through practical troubleshooting steps.
1. Verify the hard drive connection cable

When encountering the error of not receiving the SSD, the first thing we should check is that the cable connecting the hard drive to the motherboard has any problem? You have to remove and reinstall the connection cable, make sure the cable is tight and not loose, you can hear the "tick" when connecting the cable to the SSD, mainboard. If you suspect a cable is broken, you can replace a new one and try again. Next is the power cable, you also need to check by shaking the cable and check the connection is tight or not.
2. Set in BIOS
With some older motherboards, the compatibility with SSD is not as good as on the new main series. You can find out in the computer's BIOS and go to Storage Configuration Configure SATA as (1) => IDE (2) .

If you are unsure how to access the BIOS, please refer to the article How to access the BIOS on computers and laptops.
3. Unpartitioned SSD hard drive
In case you connect an SSD to a computer to make a secondary hard drive install software, games, the first time you connect will not be able to display the drive because you have not partitioned and set up the drive installation. Please set the following to partition the drive.
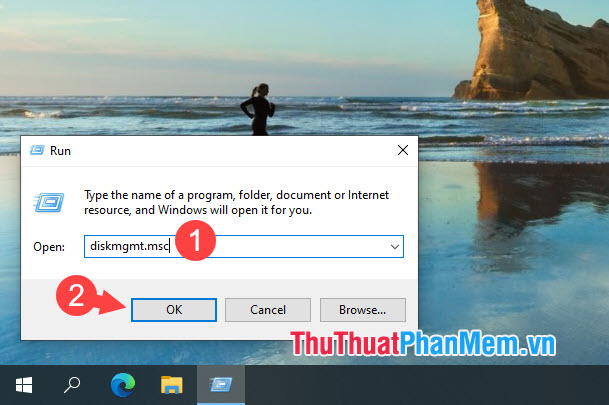
Step 1: You press Windows + R key combination to open the Run tool. Next, enter the commands diskmgmt. msc (1) and OK (2) .
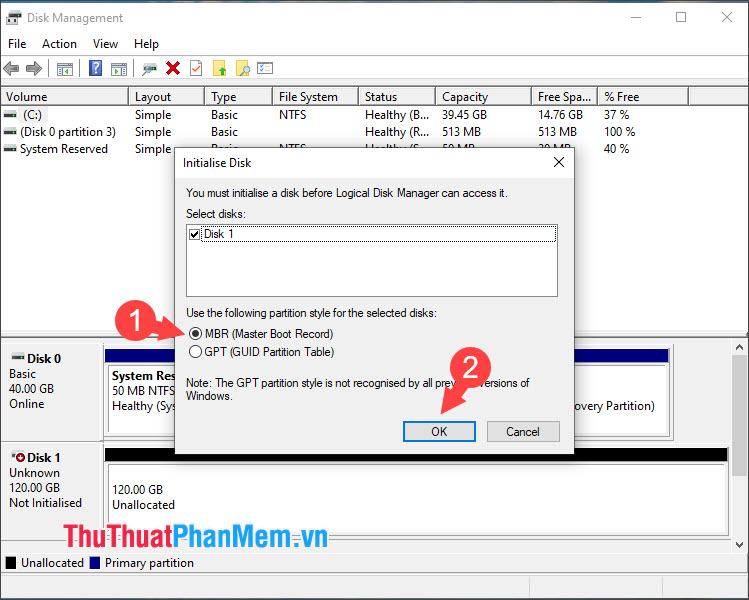
Step 2: At the first installation, the computer will ask you to set the standard MBR or GPT. If your computer uses an old Supported operating systems (Windows 7 and earlier), the MBR standard (1) is a reasonable choice, and if your computer uses Windows 8, 10, you can choose the GPT standard. Next, click OK (2) to continue.
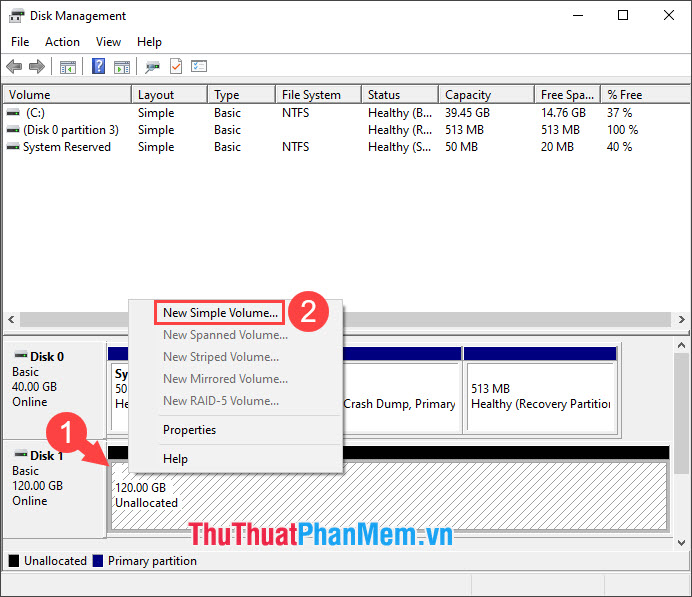
Step 3: Right-click the Unallocated drive partition (1) => New Simple Volume. (2) .
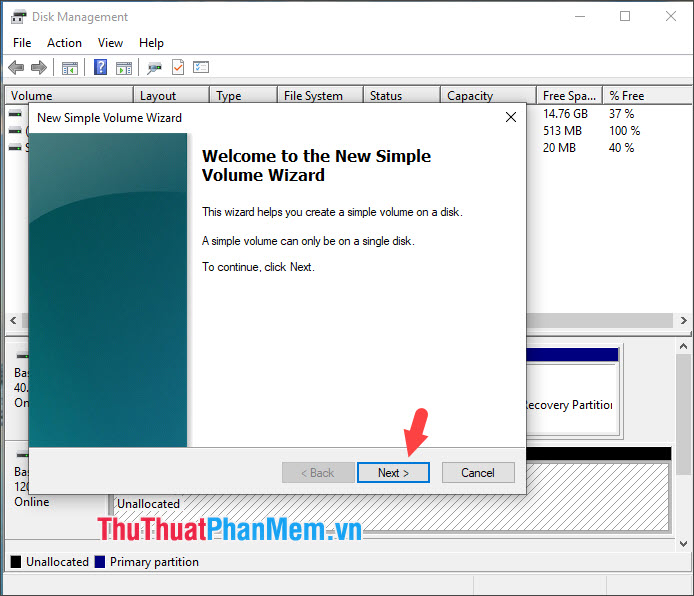
Step 4: Click Next to continue.
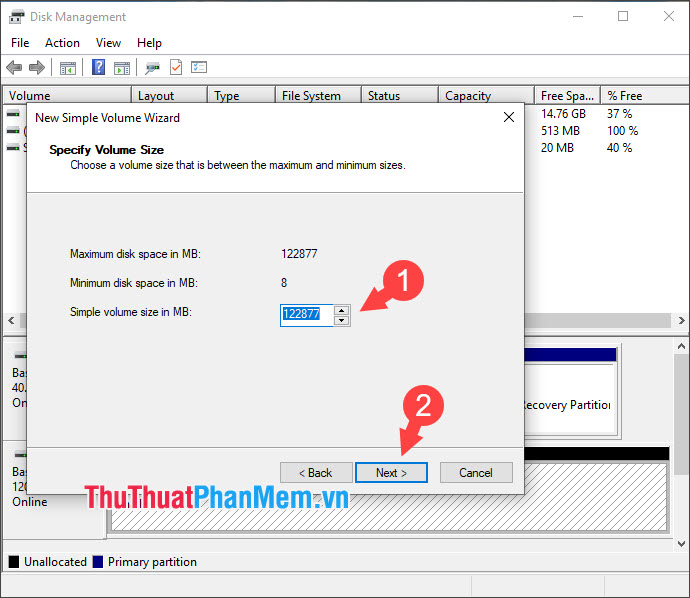
Step 5: You set the appropriate number of MB (1) => Next (2) .
Step 6: Select a character for the new drive (1) => Next (2) .
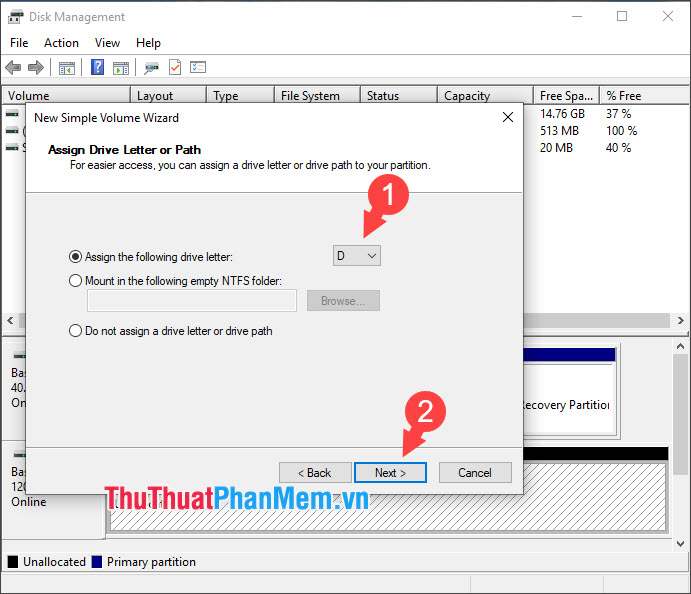
Note: You should avoid setting the letter for another drive as drive C because drive C is the default drive for installing the Supported operating systems.
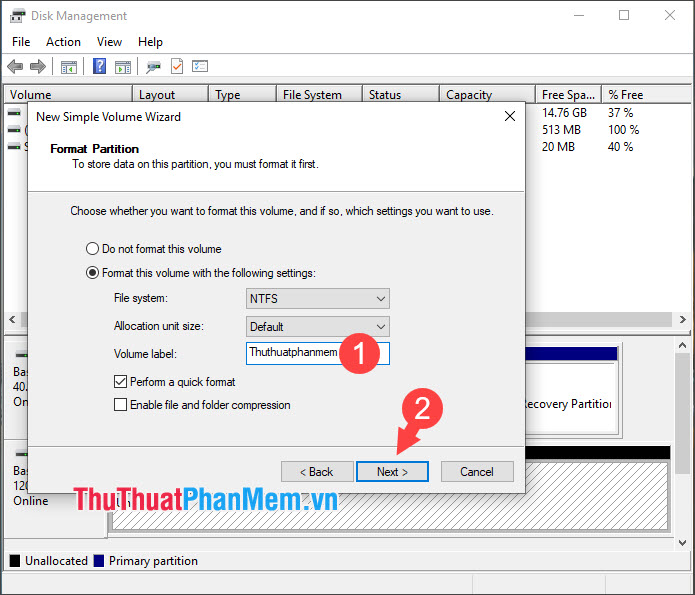
Step 7: You name the new drive (1) => Next (2) .
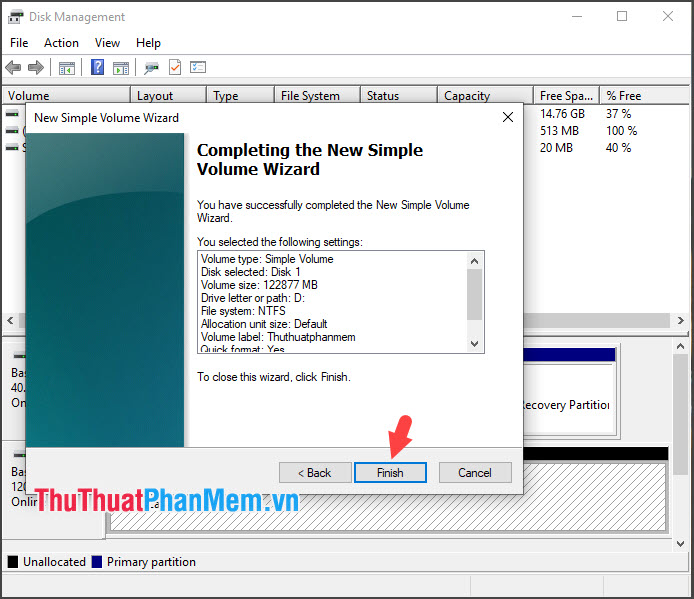
Step 8: Click Finish to complete.
After setup, your computer will display and receive a new drive as shown below.
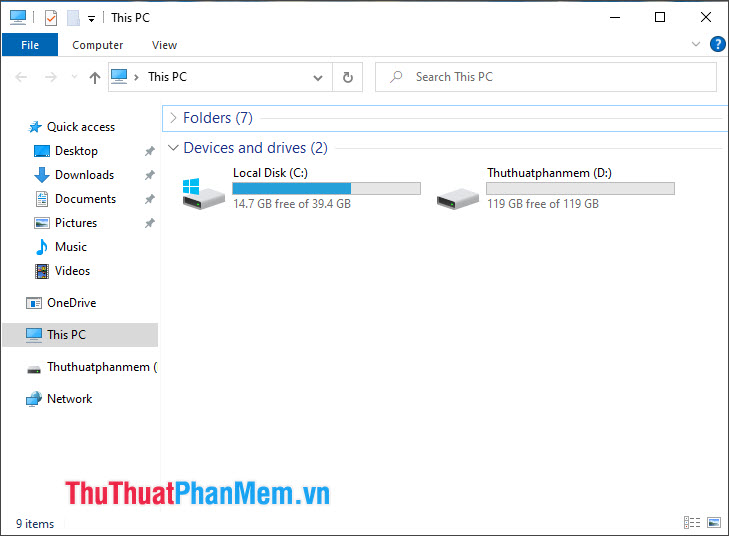
With the solutions in the article, hope readers can overcome the error of not receiving SSD hard drive on the computer. Good luck!
FAQ
What usually causes the Error of Not Receiving an SSD?
The cause may involve incorrect settings, outdated software, damaged files, permission problems, device compatibility, or a temporary system issue.
What should I try first to resolve the Error of Not Receiving an SSD?
Restart the affected app or device, install pending updates, verify settings and connections, and follow the troubleshooting steps in order.
How can I prevent the issue from returning?
Keep software updated, maintain backups, avoid interrupted installations, and review system or device settings after major changes.
Related Articles
 How to Fix 'Obtaining IP Address' Error on Android5 minutes read
 How to Fix Outlook Error Not Receiving Mail3 minutes read
 Printer Error Not Receiving Print Job - Cause and Effective6 minutes read
 How to Fix the Printer Not Receiving Print Job on the9 minutes read
 How to Fix A20 Error When Starting the Computer4 minutes read
 The Printer Does Not Recognize the Ink Cartridge - Causes5 minutes read
Reader Comments 0
Sign in with email or Google to join the discussion.