Table of Contents
This guide explains how to use SpeedFan to Check and Adjust CPU Fan Speed, with clear steps, practical tips, and important checks before you begin.
Use SpeedFan to check and adjust CPU fan speed
Step 1: The first thing you need to do is open the case and check the connectors, dusting to make sure the connection between the computer hardware is stable. After making sure everything, we will come to the next step.
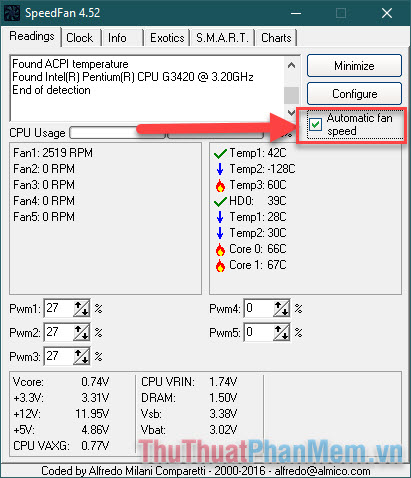
Step 2: Open SpeedFan, now at the main interface you will see the temperature parameters of different hardware such as CPU, GPU and hard drive.

You will easily see the temperature of the CPU through the core (core). If it appears next to the fire symbol equivalent to a temperature above 60 degrees C means the CPU is quite hot. This is an acceptable level when you are using a computer to work. If the temperature is up to 80-90 degrees, you should check the thermal paste as well as see if the fan has a problem. To learn more, Thuthuatphanmem. vn invites you to refer to the article: How much CPU temperature is normal.
Step 3: You pay attention to the fan speed display frame on the left, because I have a fan, so I only need to care about Fan 1, which is approximately 2500 RPM .

In a normal way, you only need to check the Automatic fan speed box, the software will automatically adjust the fan speed to suit the CPU temperature.
Alternatively, you can manually adjust the fan speed to your liking by following the steps below.
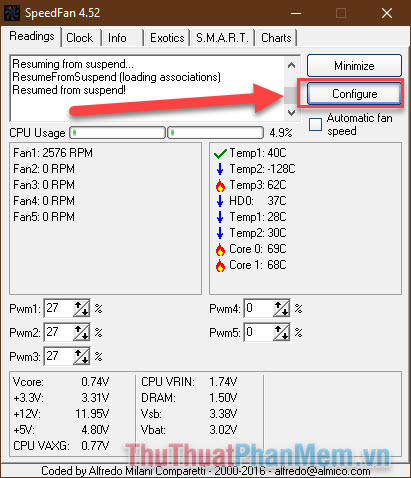
Step 4: Click Configure .
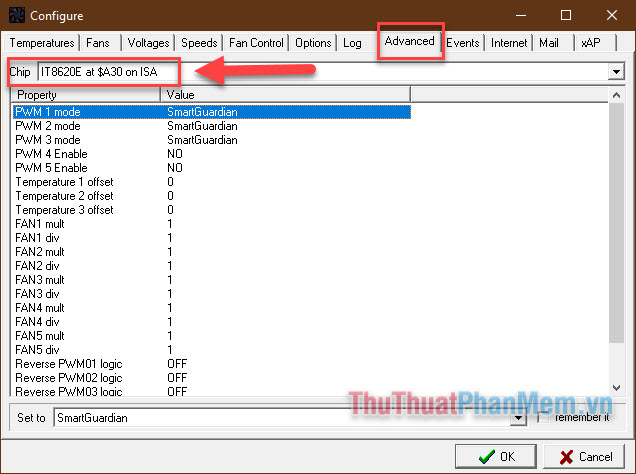
Switch to the Advanced tab, in the Chip section you select the line starting with "IT." (the number will vary depending on your machine configuration.
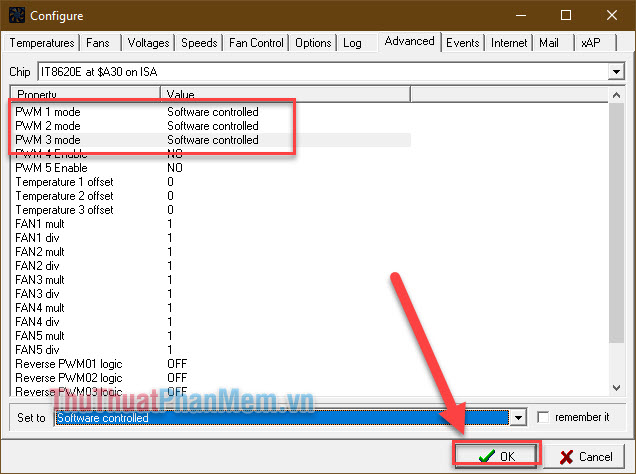
Step 5: Pay attention to the PWM parameters 1, 2 and 3 . For each parameter you change to Software controlled mode.

When all 3 have been changed click OK .
Step 6 : Return to the main screen, you proceed to increase or decrease the number of items PWM 1, 2 and 3 in accordance with demand. The more the number increases, the higher the fan productivity will be, and often will cause the fan to make more noise. Here when I increased the parameters, my fan ran at approximately 3000 RPM .

Thus, Thuthuaphanmem. vn has just taught you how to use SpeedFan to check and adjust fan speed. Wishing you a successful practice!
FAQ
What should I know about SpeedFan to Check and Adjust CPU Fan Speed?
Focus on the key features, requirements, limitations, and practical use cases explained in this guide.
How do I get the best results with SpeedFan to Check and Adjust CPU Fan Speed?
Follow the recommended steps, use current software or information, confirm compatibility, and review settings before major changes.
Are there any risks or limitations?
Potential limitations depend on compatibility, data quality, cost, privacy, support, and how the product or method is used.
Related Articles
 SpeedFan - PC Hardware Monitoring Utility6 minutes read
 How to Use SpeedFan to Check CPU Temperature and Fan Speed5 minutes read
 How to Use Speedfan to Check CPU Temperature, Fan Speed, Computer3 minutes read
 Steps to Adjust Mouse Speed on Windows 115 minutes read
 Measure Your Internet Speed Online, No Software Required19 minutes read
 How to Check Your Website Speed Fast or Slow5 minutes read
Reader Comments 0
Sign in with email or Google to join the discussion.