Table of Contents
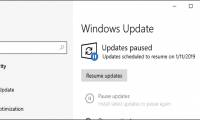
Updates can be postponed for up to 35 days
This guide explains how to enable / Disable the Pause Updates Feature for Windows Update in, with clear steps, practical tips, and important checks before you begin.
Starting with Windows 10 build 15002, you can temporarily delay installing updates for up to 7 days (for Insiders users) or 35 days (for those who are not Insiders users). Some updates, like the Windows Defender definition update, will continue to be installed.
Starting with Windows 10 version 1809, you can use a new group policy to remove access to the "Pause updates" feature.
Starting with Windows 10 version 1903, Windows 10 Home edition may pause the update.
Note : You must be logged in as an administrator to enable or disable the Pause updates feature.
Turn on / off the Pause updates feature using the Local Group Policy Editor
Local Group Policy Editor is only available in Windows 10 Pro, Enterprise and Education editions.
Step 1 . Open Local Group Policy Editor.
Step 2 . On the left side of the Local Group Policy Editor, navigate to the location below.
Computer Configuration/Administrative Templates/Windows Components/Windows Update Navigate to the above location in the Local Group Policy Editor
Step 3 . On the right side of Windows Update in the Local Group Policy Editor, double-click the policy Remove access to "Pause updates" feature to edit.
Step 4 . Follow step 6 (to turn on) or step 7 (to turn off) below, depending on what you want to do.
Step 5 . To turn on Pause Updates, select Not Configured or Disabled , click OK and go to step 7 below. Not Configured is the default setting.
Step 6 . To turn off Pause Updates, select Enabled , click OK and go to step 7 below.
 To turn off Pause Updates, select Enabled
Step 7 . Close Local Group Policy Editor.
Step 8 . Restart the computer to apply the changes.
FAQ
What should I know about Enable / Disable the Pause Updates Feature for Windows Update in?
Focus on the key features, requirements, limitations, and practical use cases explained in this guide.
How do I get the best results with Enable / Disable the Pause Updates Feature for Windows Update in?
Follow the recommended steps, use current software or information, confirm compatibility, and review settings before major changes.
Are there any risks or limitations?
Potential limitations depend on compatibility, data quality, cost, privacy, support, and how the product or method is used.
Related Articles
 Pause Windows Updates: Complete Guide6 minutes read
 Trick to Enable // Disable Windows Updates on Windows 10 Quickly4 minutes read
 How to Pause Updates on Windows 113 minutes read
 Tips to Increase the Number of Days to Pause Updates in: Key Takeaways3 minutes read
 How to Stop Windows Updates on Your PC10 minutes read
 How to Pause Updates on Windows 10 Home3 minutes read
Reader Comments 0
Sign in with email or Google to join the discussion.