How to Enable Automatic Logon in Windows XP
You can enable automatic logon on any personal Windows XP computer by disabling your password under your personal user account or by editing the registry directly. Enabling automatic logon bypasses your Welcome screen and takes you...
Table of Contents
Method 1 of 2:
Disabling Your Password
-
 Open the Start menu. It's located in the lower left-hand corner of the screen.
 -
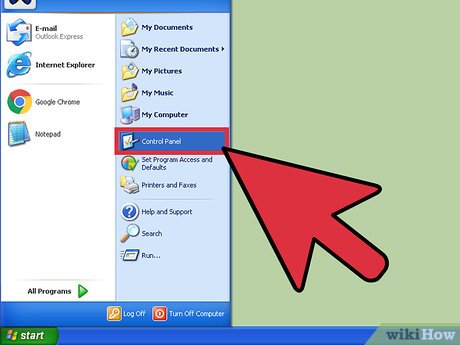 Select "Settings", then open "Control Panel". The Control Panel program lets you make changes to your system settings.
 -
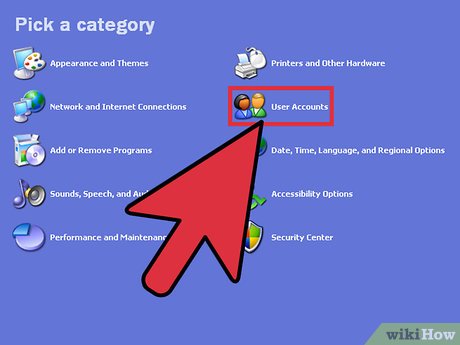 Double-click the "User Accounts" folder. You'll be able to edit your account settings from here.
 -
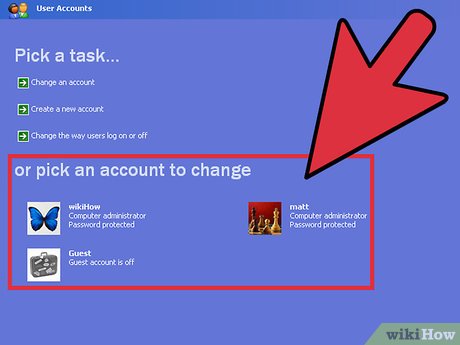 Click on the "pick an account to change" option. Choose your default account name when it comes up. Your "default account name" will reflect the name on the account you are trying to edit.
- You should refrain from editing other accounts when on a shared computer.
-
 Click on the "Remove my Password" link. When the computer prompts you to enter your password, do so. When prompted, click "Remove Password" to finalize the process.
 -
 Go back to "User Accounts" and click on "choose the way users log on or off". In this menu, find the check box next to "Use the Welcome Screen" and click it once to uncheck it.
 -
 Reboot your computer. Go to the Start menu again, click on "Power", and select "Restart". Your computer will shut down, pause, and start back up. It should logon automatically this time!
Method 2 of 2:
Using Registry Editor
-
 Open the Run program. Select "Run" from the list of default programs on the right-hand side of your Start menu.
- You can also hold down the ⊞ Win key and tap R to bring up the Run program without touching the Start menu.
-
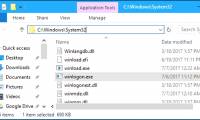
 Use Run to open the Registry Editor. Registry editor lets you edit system values--in this case, the logon values. Type in "regedit" without the quotations into Run and click OK to bring up the Registry Editor.[1]
- Type in "regedt32.exe" without the quotation marks if the first version you type in doesn't work.
-
 Locate the "HKEY_LOCAL_MACHINE" folder. Click on this folder, but do not double-click. This will expand the folder to show you its contents. Scroll through this folder until you find the "SOFTWARE" folder.
 -
 Expand the "SOFTWARE" folder. Scroll through "SOFTWARE" until you find the "Microsoft" folder.
 -
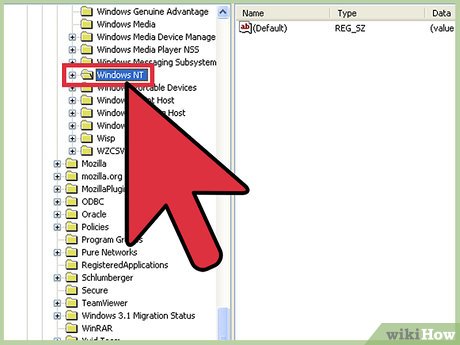 Expand the "Microsoft" folder. Scroll through "Microsoft" until you find the "Windows NT" folder.
 -
 Expand the "Windows NT" folder. Scroll through "Windows NT" until you find the "Current Version" folder.
 -
 Expand the "Current Version" folder. Scroll through "Current Version" until you find the "Winlogon" folder.
 -
 Double-click the "Winlogon" folder in "Current Version". Within this folder, find the "DefaultUserName", "DefaultPasswordType", and "AutoAdminLogon" values.[2]
 -
 Double-click on "DefaultUserName". Check to make sure that the value in the properties box matches your username.
 -
 Double-click on "DefaultPasswordType". When it opens, enter your password as you normally do to log in.
 -
 Double-click on "AutoAdminLogon". When it opens, type "1" into the value box (without quotation marks).
 -
 Restart your computer. Close all of your programs and restart by going to the Start menu, selecting "Power", and clicking "Restart". Your computer should boot up straight to the desktop!
Was this article helpful?
Your feedback helps us improve.
Related Articles
 Change logon command in Windows3 minutes read
 How to enable automatic HTTPS on Edge2 minutes read
 What is Windows Logon Application and why is it running on the system?4 minutes read
 Change Logon screen on Windows 74 minutes read
 Change the Windows 7 and 10 Logon screen backgrounds5 minutes read
 How to enable / disable automatic login in Debian 105 minutes read
Reader Comments 0
Sign in with email or Google to join the discussion.