How to create a folder and hide the Start menu application list Windows 10 Creators
On Windows 10 Mobile devices with the Live folder feature, group apps into a folder right on the Start screen. And on Windows 10 computers, we can also create folders containing software on the Start menu, via the Live Ties bar. We can choose which software to put in the folder on the Start menu. Besides, users can also adjust to hide any application that wants on the Start screen.
In the article below, we will guide you how to create application group folders, hide the application list on the Start menu Windows 10 Creators.
- How to optimize the system Windows 10 Creators Update
- Some tips to customize Taskbar on Windows 10 effectively
- How to automatically switch dark backgrounds on Windows 10
1. How to create an application folder on the Start menu:
Step 1:
First, click on the Start icon on the computer to appear applications. Then, drag an application into the middle of another application on the Start interface. So the folder containing that application on the Start menu has been created
Next click on the arrow icon to exit the newly created application folder.

Step 2:
To change the size of the application folder on the Start menu, right-click the folder and select Resize .
Appears folder sizes for users to choose, including Small, Medium, Wide, and Large. We choose 1 of these sizes to apply to the directory.

Step 3:
In case the user wants to remove the application added to the application folder on the Start menu, we just need to drag the application out of the created folder and finish.
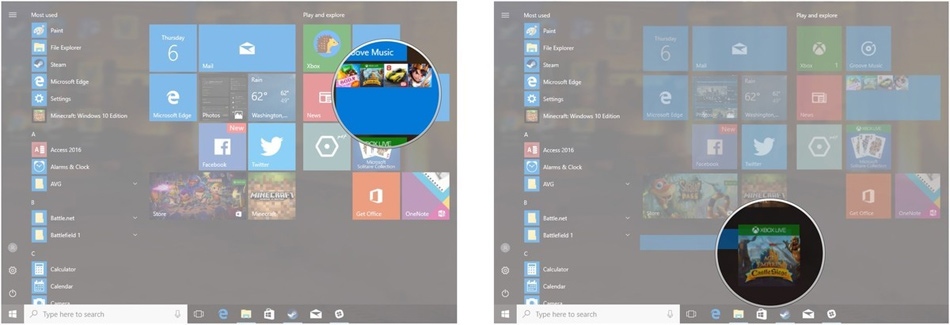
2. Hide the list of applications on Windows 10 Creators:
The interface on the Start menu on Windows 10 will help users access the application, or the software right there. However, if you want to simplify the Start menu interface on a Windows 10 computer like Windows 10 Mobile device, you can also customize it according to your needs.
Step 1:
First, right-click on the Start icon on the interface and select Settings . Then access Personalization setup options.
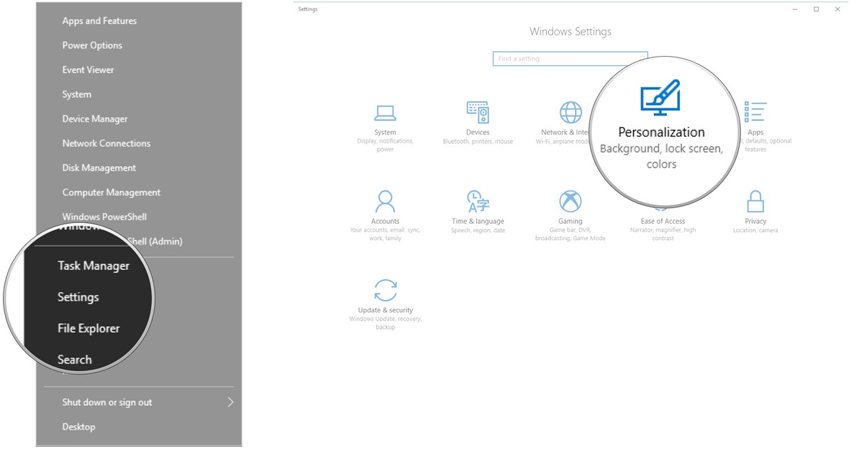
Step 2:
In the options list on the left of the interface, users click on the Start item. Look to the right to turn off Show app list mode by swiping the horizontal bar to the left.
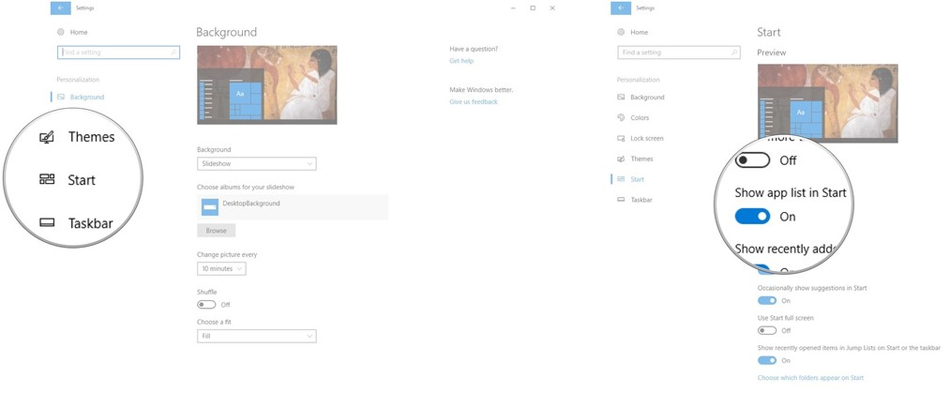
Step 3:
Thus the list of applications is completely hidden in the Start interface. In case the user wants to display the list again, click on the Start icon, then select the icon of All app s dashes as shown below.
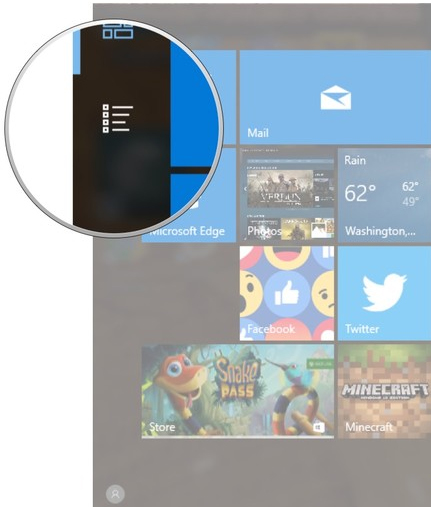
To hide the application, click the Pinned tiles icon as shown below.
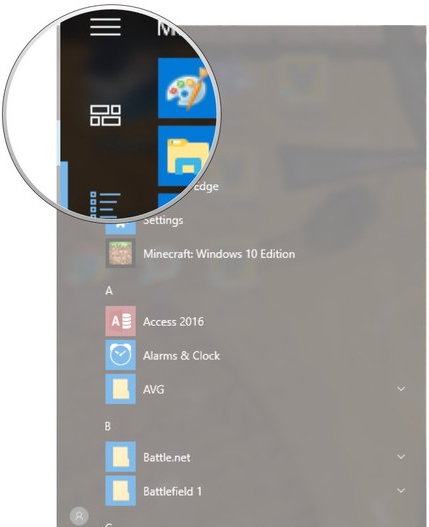
Above are 2 customizable Start menu interface on Windows 10 Creators operating system. Creating a software folder on the Start menu will help the Start interface look cleaner. Besides, users can also hide or display the list of applications on the Start menu according to their needs.
I wish you all success!
You should read it
- ★ Instructions to pin web pages to Start Menu in Windows 10
- ★ How to add tile column on Windows Start menu
- ★ Back up Start Menu settings on Windows 10
- ★ How to use Open-Shell to create your own Start menu on Windows 10
- ★ Reveal the first image of the improved Start Menu, remove Live Tiles on Windows 10