Table of Contents
Follow the instructions below to edit online videos with kapwing efficiently and safely. Each section focuses on the actions, settings, and troubleshooting details that matter most.
Besides video editing software, online video editing sites are also chosen by many people due to their useful features. You do not need to install the app but the editing features of website to edit online videos are also diverse and rich. In this article, readers will know more about Kapwing, which offers 13 different video editing tools.
Kapwing will synthesize 13 video editing tools such as inserting effects, inserting subtitles, inserting sound, changing the frame rate according to each website to upload videos,. Videos after being created can be uploaded to Facebook or YouTube easy.
- How to edit videos online
- How to cut videos on Windows 10 without software?
- Web sites watching movies online
Instructions for editing online videos on Kapwing
First click the link below to access Kapwing's homepage. Then click All tools And you will see separate video editing tools.
- Https://www. kapwing. com/
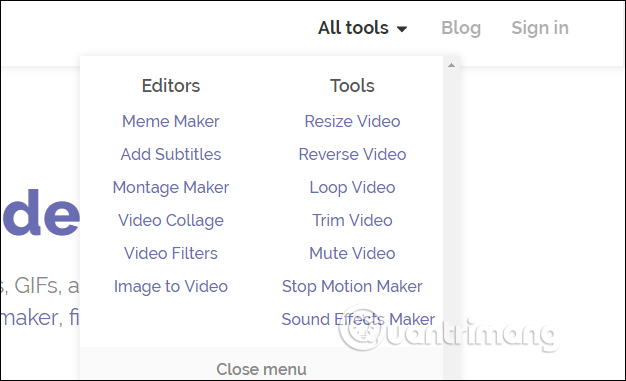
1. Meme Maker
This tool will create videos created from still images, animations, and individual videos and then merge them into complete videos.
Step 1:
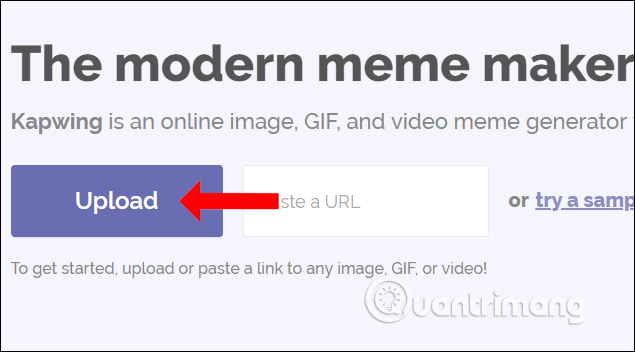
Click Upload To download the file on your computer or paste the video URL into the frame.
Step 2:
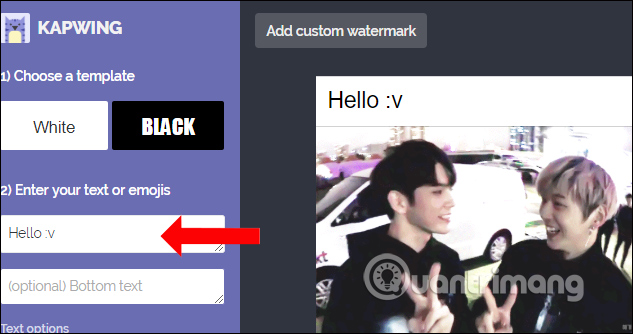
At the content editing interface, we can Enter content Into frame 2, select the color for the text area in Choose a template .
Step 3:
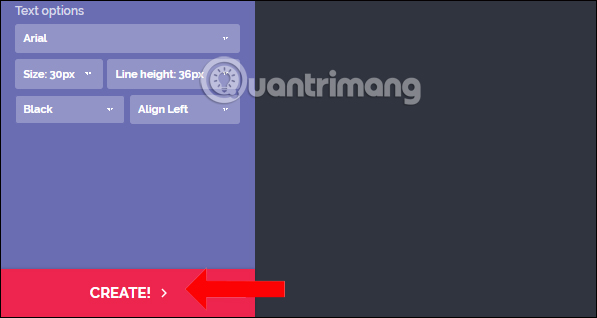
When needed to customize the text in the Text options Section, select the font type, size, color, position for the text and the height of the two rows above / below (Line height) display the text.

Step 4:
When needed to add a logo, the watermark ticks the video and press Add custom watermark . Users can enter text, image and then edit position, size, color. Finally click the Create Button below to create a video.
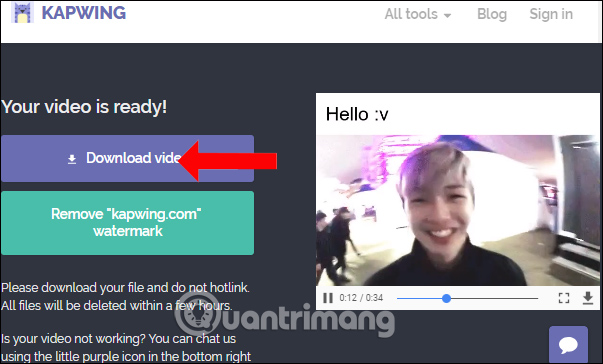
Wait for the process to complete and click Download video To download it to your computer.
2. Add Subtitles
This feature will help users insert subtitles into videos. We also click the Add Subtitles tool, then wait for the video to be uploaded. Uploaded videos will be in mp4, mov, webm, ogg, mpeg formats.
Step 1:
In the edit interface, drag the white dot button at Add sustitles to your video To video to the location where you want to insert subtitles.
At My first subtitle!Click to edit , drag the two round buttons to select the subtitle display segment. click My first subtitle! Click to edit to enter text for the first caption content.
To add another subtitle content, click Add another subtitle below.
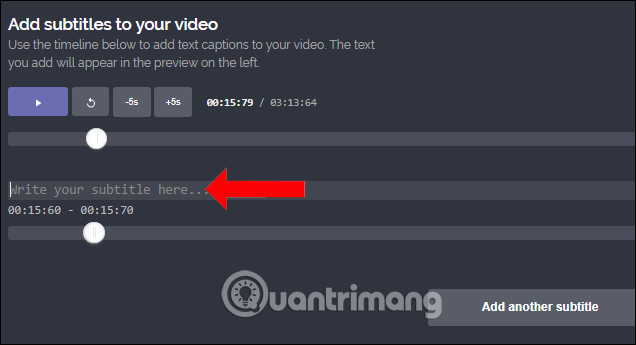
We then insert subtitles for videos at the right time
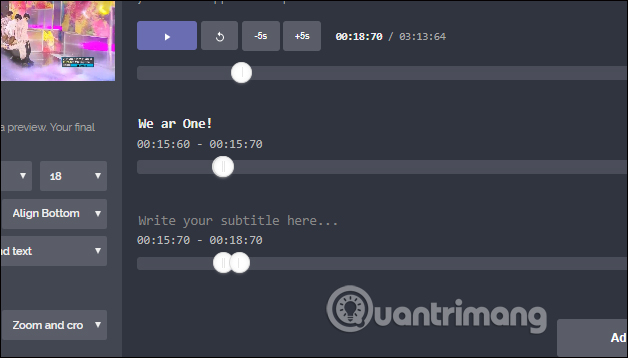
Step 2:
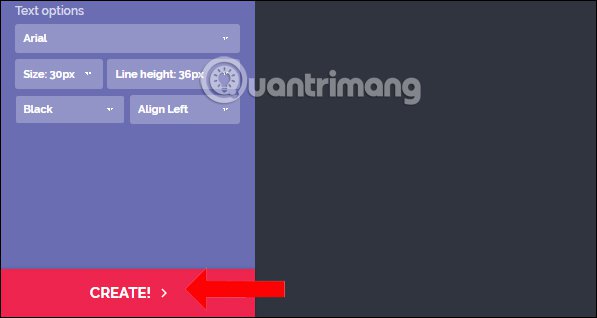
We then insert other subtitles for videos as shown above. Next to adjust the font, size, color, position, background for subtitles and video ratio when creating. Finally click Create To download the subtitle insert video.
3. Montage Maker
This feature will create slideshow clips of images, GIFs and videos. click Get Started To start.
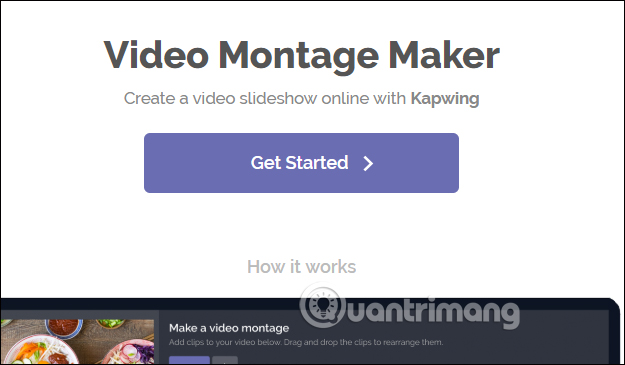
Step 1:
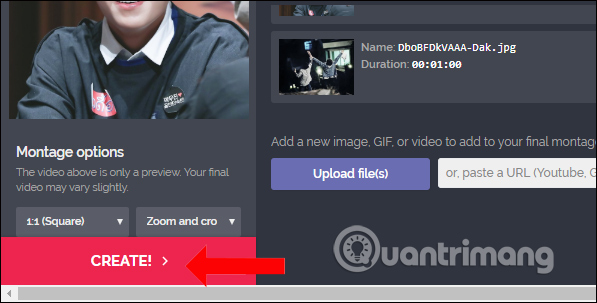
We also upload content to the service or paste the video URL. When downloading the service, it will display in the order of the file you selected. when needed to swap places, you can drag and drop the file or click remove to remove the file from the list.

Step 2:
In the Montage options Section, users selects the aspect ratio of the output video, with support for Facebook video, Instagram Story,. the duration of each file (Image Duration). Finally click Create To create.
4. video Collage
Step 1:
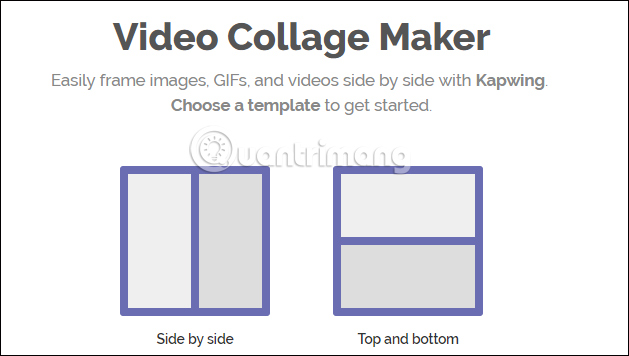
We can cut videos with 2 Side by side , Top and bottom Patterns (top and bottom).
Step 2:
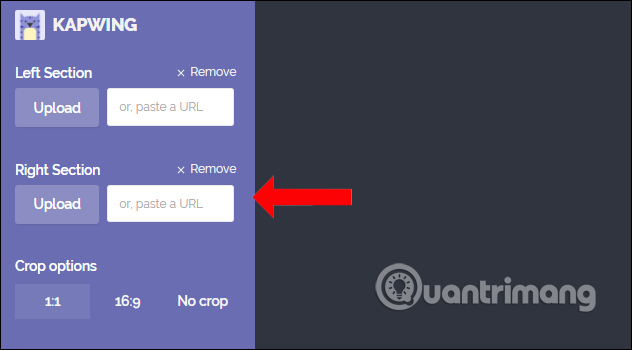
Next, after selecting the cut form, we choose the content to upload to the animation service or video, in turn at the left, right or top or bottom frame.
Then select the ratio (1: 1, 16: 9) or No crop when needed to stay the same. Finally click Create Below to create the video.
5. video Filters
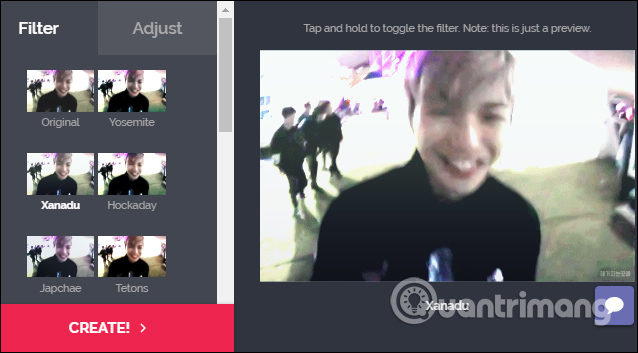
With this tool, users can add color effects to videos with different filters, along with deeper customization. After uploading the video, we will see the interface as shown.
In this interface, there will be 2 different items including Filter With 18 different color filters and Adjust To customize brightness, contrast, saturation, brightness reduction, external edging saturation video, fade effect.
When needed to restore the status of pressing Reset.
Finally click Create Below.
6. Image to video
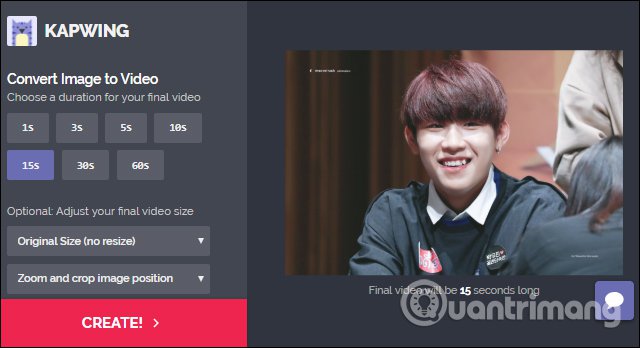
This feature will allow creating videos from images and optional video duration. We can download images or animations, then choose a maximum duration of 60 seconds and the rate depending on each service like Facebook, Instagram, and Co also press Create to create.
7. Resize videos
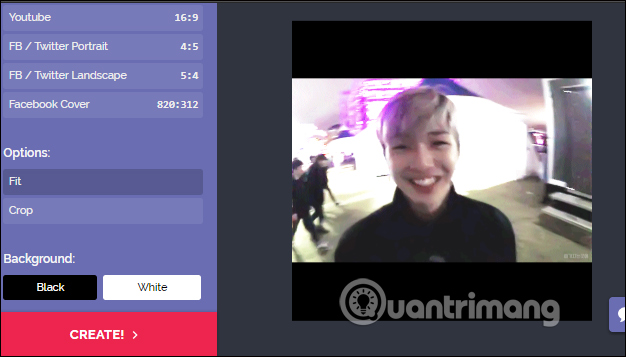
We can customize the video size according to the scale like video on Facebook, YouTube, Instagram. After downloading the video for editing, users will have the following options:
- The Resize video section selects the rate that the service supports.
- Background to insert background color if the video has space on both sides.
- Options to default Fit video to frame or select Crop to crop video.
Finally click Create To create the video.
8. Reverse video
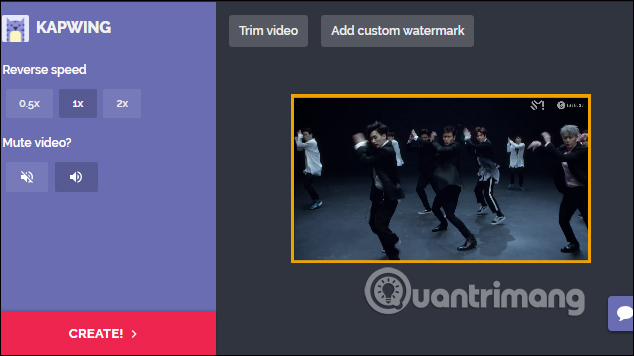
This tool will create video with rewind effect, project video in reverse sequence from beginning to end.
When uploading videos and in the editing interface, you select the reverse playback speed at Reverse speed. when needed to turn off the audio in the video, click the cross volume icon.
Users can insert watermark or cut video as they like and finally press Create to create.
9. Loop video
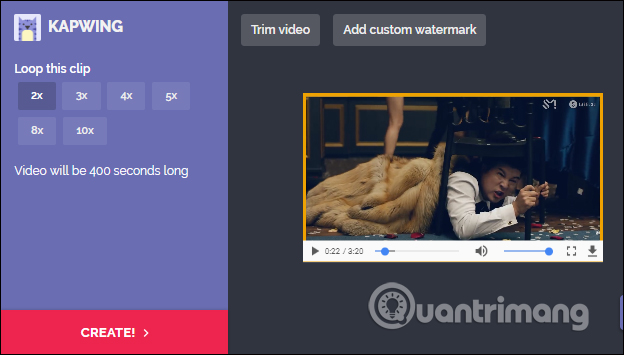
The feature will create repeating video type with a duration of 10 times. In the edit interface, users selects the number of repetitions at Loop this clip. Up to 10 repetitions and 10 times the duration.
10. Trim video
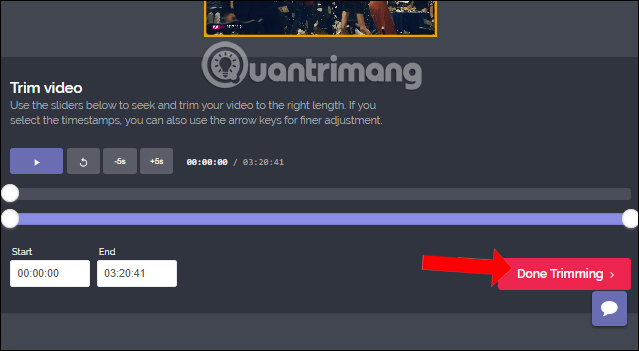
To cut the video on the service, users enters the cutting time at Start and ends at End. You drag the white dot button to select the duration to use for the video. Finally click Done Trimming To cut.
11. Mute video
You can turn off the video sound with a very simple way. When uploading videos to the interface, the video has been muted by default, so we don't need to edit much. Click Create To create the video.

12. Stop Motion Maker
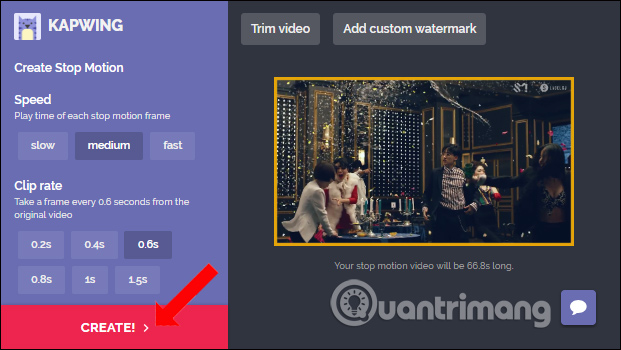
Users can insert slow motion effects for videos. After uploading the video, users proceeds to set up the following:
- Speed: Select the Stop motion effect type including: Slow (slow), Medium (normal), Fast (fast).
- Clip rate: Select the speed for the effect.
- Play back in reverse: when needed to rewind the video, check the box.
13. Sound Effects Maker
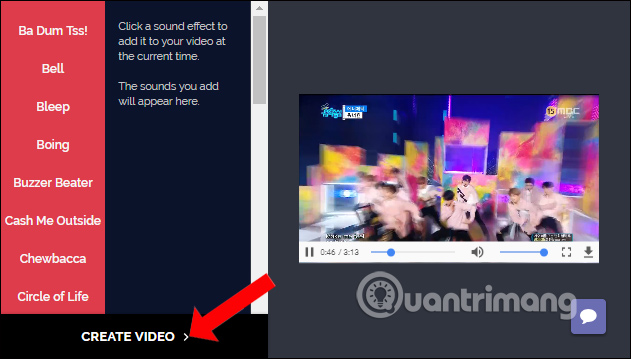
In addition to the original audio video, users can add special sound effects to the video. There will be 31 different effects to insert into the video. You can use many effects on video. To add an effect, click the effect in the list.
Finally click Create video Below.
Videos after creating on Kapwing are in MP4 format. With a free account the video will be limited and all watermarked. If the account is registered on Kapwing, we can manage the video after it has been created.
With only Kapwing website, we have 13 rich, rich video editing tools with lots of useful features. In particular, Kapwing also provides sizes to match when you want to upload videos to Facebok, please make other video sites.
- Instructions for cutting videos with VLC Media Player software
- Instructions for cutting online video using online video Cutter tool
- Instructions for cutting audio files with Mp3splt software
I wish you all success!
FAQ
What should I prepare before I edit online videos with kapwing?
Review the requirements in the guide, confirm that your device or software is compatible, and save important work before changing settings related to edit online videos with kapwing.
Why might edit online videos with kapwing not work as expected?
The most common causes are incompatible versions, missing permissions, incorrect settings, or an interrupted internet connection. Recheck each step and restart the app or device when appropriate.
Can beginners follow these edit online videos with kapwing steps?
Yes. Follow the steps in order, avoid skipping confirmation screens, and compare your interface with the screenshots because labels may differ slightly between versions.
Related Articles
 How to Edit Videos on Edit Videos Online Without an Account4 minutes read
 Top Online Video Editing Websites, Making Online Videos7 minutes read
 How to Edit Videos on Capcut Online5 minutes read
 How to Edit Videos on Invideo Online4 minutes read
 How to Edit Videos on YouTube?10 minutes read
 How to Compare 2 Videos at the Same Time Without Software3 minutes read
Reader Comments 0
Sign in with email or Google to join the discussion.