How to Edit Music on Mac
This wikiHow teaches how to edit music on Mac using GarageBand. GarageBand is a free music editing app that generally comes pre-installed on Mac. It's also available in the App Store. Open GarageBand. It's the app that has an image of a...
Table of Contents
Part 1 of 9:
Getting Started
-
 Open GarageBand. It's the app that has an image of a guitar and amp. The first time you open GarageBand, it may need to download a collection of sounds and loops. It may take up to an hour to download on a typical broadband connection.
- Download GarageBand from the App Store, if it's not already installed on your Mac.
-
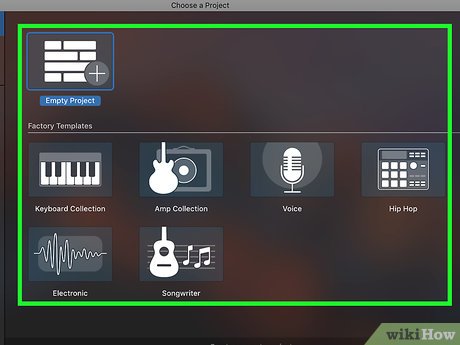 Select a project type. There are seven options under "Choose a Project" in the New Project tab in the left sidebar. The options are as follows:
- Empty Project: This option opens a blank project. When you select this option, you will be asked to choose a track type.
- Click the keyboard icon to select a Software Instrument track. This allows you to record with a USB midi-keyboard.
- Click the microphone icon to create a basic audio track. You can record to this track using a microphone or line input.
- Click the guitar and amp icon to create a guitar or bass track. This will allow you to connect an electric guitar or bass to your Mac and record with a virtual amp.
- Click the drummer icon to create a drum track that plays along with your song automatically.
- Keyboard Collection: This option has a variety of keyboard tracks. You can record on these tracks using a midi-keyboard.
- Amp Collection: This option has a variety of tracks with virtual amps. You can connect an electric guitar or bass to your Mac using the line-in input, or an external audio interface.
- Voice: This option has a variety of tracks that are optimized for singing. You can connect a microphone to your Mac using the line-in input, or an external audio interface, or just use your computer's microphone.
- Hip Hop has a variety of hip hop beats you can choose from as well as instrument tracks that are commonly used in hip-hop.
- Electronic has a variety of electronic beats and instrument tracks for creating electronic music.
- Songwriter has a basic drum beat, a vocal track, guitar, bass, and a keyboard track. This option is optimized for general songwriting.
- Empty Project: This option opens a blank project. When you select this option, you will be asked to choose a track type.
-
 Click Choose. It's in the lower-right corner of the "Choose a Project"
- Click "Open an existing Project" to open a pre-existing project.
Part 2 of 9:
Recording Audio
-
 Select a track. The project window contains all the tracks in your project. It takes up most of the screen in the center of GarageBand. The track names, volume, and left-right pant controls are to the left. The wave files are in the center of the project window. When you select a track, it will be highlighted in grey to the left.
- Make sure you select the proper track type. If you are recording with a keyboard, you need to select a midi-keyboard track. If you are recording audio or guitar, you need to select a track with a virtual guitar amp.
-
 Drag the playhead to the desired section. The playhead is the white line that moves along the wave files in the project window as you play and record. You can drag the playhead to any part of the wave file.
 -
 Click the Record button. The record button is the button with the red circle above the audio tracks. You will hear four clicks and then the track will start recording.
 -
 Click the Stop button. To stop recording, click the button with the white square.
Part 3 of 9:
Adding an Additional Track
-
 Click +. It's in the upper-left corner above the track list to the left.
 -
 Select a track type. There are four types of tracks you can choose from.
- Software Instrument allows you to record using a USB midi-keyboard.
- Audio Mic allows you to record with a microphone, or drag and drop audio files into the track.
- Audio Guitar allows you to connect an electric guitar or bass to your Mac and record with simulated guitar amps.
- Drummer creates a drum track that automatically plays along with your song.
-
 Click Create. It's in the lower-right corner of the "Choose a track type" window. This will add an additional track. Additional tracks allow you to record multiple instruments and audio files on top of one another.
- To delete a track, click on the track and then press Delete twice. The first time will delete the audio file from the track. The second time will delete the track.
Part 4 of 9:
Importing Audio
-
 Right-click a blank audio track. All the audio tracks are in the project window in the center screen. A blank audio track is an audio track that has no wave files in it.
- If you are using a magic mouse or trackpad, you can right-click by clicking with two fingers.
-
 Click Add Audio File. It's the first option in the menu when you right-click on a track. This will open a file browser menu.
 -
 Select an audio file. Use the sidebar to the left, and the pulldown menu at the top of the file browser window to navigate your Mac. Click an audio file. This could be an mp3, .wav, m3u, acc, or other audio file formats.
 -
 Click Open. It's in the lower-right corner of the file browser menu. This will import the audio file into the blank track in GarageBand. Once the audio file is imported, you can click and drag it to any point in the project window. You may need to drag it back to the start of the song.
- You can also add audio to a project by click and dragging media files from the media browser to the project window. To show the media browser, click the icon with the music notes, filmstrip, and camera in the upper-right corner.
Part 5 of 9:
Adjusting Volume, Balance and EQ
-
 Click a track. Each instrument or virtual amp will have different effects and controls, but there are a few options that remain the same on all tracks. You can adjust the following options on any track:
 -
 Adjust the volume. The clear slider bar next to the audio track adjusts the volume of the track.
 -
 Adjust the speaker balance. The L/R knob next to the volume slider adjusts the balance of the track from the left to right speakers.
 -
 Adjust the Equalizer. The EQ button is above the controls at the bottom of the screen. This will give you access to a graphic EQ that you can use to adjust the lows, mids, and highs on the track. You may also be able to adjust the lows, mids, and highs using the controls, depending on what instrument or amp you are using for that track.
Part 6 of 9:
Changing Between Instrument or Amp
-
 Select an instrument or guitar track. The instrument and guitar tracks will have an image of a piano, synthesizer, guitar, or amp next to the track.
 -
 Click the library icon. It's located in the upper-left corner of GarageBand. It has an icon that looks like a file cabinet drawer. This will display the library in a sidebar to the left.
 -
 Click a new instrument. When you click an instrument in the library, you will see the controls change at the bottom of the screen.
- To browse the library, click the categories at the bottom of the library sidebar. You can also type the name of an instrument in the search bar to go directly to that instrument or virtual amp.
Part 7 of 9:
Adding Effects
-
 Select a track. Audio tracks are going to have different effects options depending on what type of track it is, and what instrument or virtual amp is assigned to the track.
 -
 Adjust effects using the controls. The controls are at the bottom of the screen. A variety of effects will be available depending on what instrument or amp you have selected. The following are some common effects that you may encounter:
- Reverb and Ambiance: Both of these effects create a reverberation effect that creates the illusion that the track was recorded in a different room-type, such as a concert hall, wooden room, or a room with padded walls.
- Delay and Echo: Delay and echo create a repeating echo effect. You can adjust the speed, frequency, and strength of the repeats.
- Compressor: Compress balances the quiet sounds and the loud sounds.
- Gain: Gain amplifies the audio track, giving it a thicker and louder sound. Too much gain can cause the sound to break up.
- Distortion: Distortion is a high-gain effect mostly used on electric guitars. Turn the distortion all the way up for a hard rock/heavy metal tone.
- Chorus: This effect doubles the audio track and varies the pitch just slightly. It creates a fuller, more colorful tone.
- Phase: This effect continually shifts the highs and lows of the audio track, simulating a rotary speaker effect.
Part 8 of 9:
Splitting a Track
-
 Click an audio track with recorded audio. You will a wave file displayed in any track that has recorded audio.
 -
 Drag the playhead to where you want to split. The playhead is the white line that moves along the audio tracks in the project window as you play and record.
 -
 Right-click the audio file. This will display a small track menu.
- If you are using a magic mouse or trackpad, you can right-click by clicking with two fingers.
-
 Click Split at Playhead. This will cut the wave file into two separate wave files at the playhead. You can delete one wave file and record a new one at the point where you split the track.
Part 9 of 9:
Mixing a Song
-
 Finish a GarageBand project. Once you are finished recording a song, and all the parts are exactly as you want them, you are ready to mix the song.
 -
 Click File. It's in the menu bar at the top of the screen.
 -
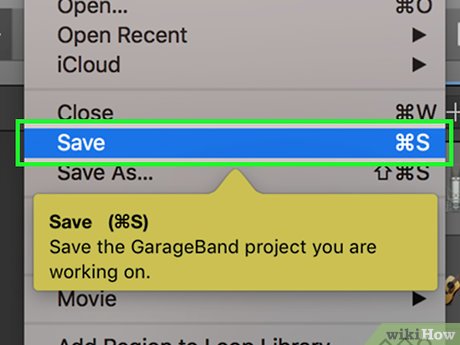 Click Save. This will save the GarageBand project.
 -
 Click Share. It's in the menu bar at the top of the screen. The share button has a number of ways you can export your song.
- Song to iTunes: This will mix down the song and export it to your iTunes library.
- Ringtone to iTunes: This will mix down the song and export it to your ringtones library.
- Song to Media Browser: This will mix down the song and save it to your GarageBand media browser. Then you can use the mixed down track in a different project.
- Song to SoundCloud: This will mix down the song and upload it to SoundCloud. Then you can share it online.
- AirDrop: This will mix down the song and send it to another Apple device.
- Mail: This will mix down the song and send it via email.
- Burn Song to CD: This will mix down the song and burn it to a CD.
- Export Song to Disk: This will mix down the song and save it to your Mac harddrive.
- Project to Garageband for iOS: This will export the GarageBand file for use on GarageBand for iPhone or iPad.
Was this article helpful?
Your feedback helps us improve.
Related Articles
 How to edit and cut MP3 music using Free MP3 Cutter and Editor4 minutes read
 Edit music file information, add Album ... with Mp3Tag3 minutes read
 Edit music file information with TagScanner3 minutes read
 6 small tricks with Apple Music10 minutes read
 How to pin music in Apple Music2 minutes read
 Top software for making music on computers3 minutes read
Reader Comments 0
Sign in with email or Google to join the discussion.