How to disable the built-in laptop keyboard in Windows
Sometimes you don't want your laptop keyboard to accept input. This is usually because you have an external keyboard plugged in, the built-in keyboard is broken, or you just want a better typing space with a full-size keyboard.
Table of Contents
However, since the keyboard is an integral part of your laptop, disabling its primary input method can be a bit tricky. Here, we will show you how to temporarily and permanently disable the laptop keyboard on Windows 10 and 11.
How to find laptop keyboard in Device Manager
Whether you want to disable your laptop keyboard temporarily or permanently, you'll need to uninstall the input device from Device Manager.
To do this, you will need to identify the built-in keyboard in Device Manager. Since Device Manager will list all recognized keyboards, including external keyboards, here is how you can identify your laptop keyboard from the list.
To identify the built-in keyboard in Device Manager:
1. Press Win + R to open Run.
2. Type devmgmt.msc and click OK to open Device Manager.
3. In Device Manager , expand the Keyboards section .

4. Right-click the first keyboard entry (HID/Standard) and select Properties.
5. In the General tab , select the General section . If the message says Location 1 or Plugged into keyboard port , it's probably your laptop's internal keyboard.
6. The Bluetooth and USB keyboards will display On Bluetooth Low Energy and On US Input Device respectively in their respective positions.
If you don't see your keyboard listed, make sure you have Device Manager set to show hidden devices.
How to temporarily disable laptop keyboard
To temporarily disable your laptop keyboard:
1. Right-click all HID and PS/2 Keyboard entries with Properties Location set to Location 1 or Plugged into keyboard .

2. Next, select Uninstall Device from the context menu.
3. Click Yes to confirm the action.
That's it! You have successfully disabled the keyboard inside your laptop.
However, this is a temporary solution. As soon as you restart your system, Windows will search for devices that are connected but not recognized and install the necessary drivers to make them work.
How to disable laptop keyboard permanently

If you want to permanently disable your laptop keyboard, you can disable the PS/2 i8042prt keyboard driver service built into your laptop using Command Prompt. We will use the sc command line utility to configure the service and set its start parameter to disabled.
To disable laptop keyboard permanently:
- Press the Win key and type cmd in the Windows search bar.
- Right-click Command Prompt and select Run as Administrator . Click Yes when the UAC prompt appears.
- In the Command Prompt window, type the following command and press Enter :
sc config i8042prt start= disabled - Once the success message appears, close Command Prompt and restart your PC. After restarting, your laptop keyboard should stop registering any input.
Note that, for this feature to work, you need to uninstall the keyboard from Device Manager as shown above and restart your PC.
If you change your mind and want to re-enable the keyboard, you can use the following command in Command Prompt with admin rights.
sc config i8042prt start= autoOnce you see the success message, restart your PC to apply the changes.
Disable built-in keyboard with incompatible driver
Another odd solution to disabling the built-in keyboard is to install an incompatible driver for the input device. Here's how to do it.
1. Open Device Manager and expand the Keyboard section .
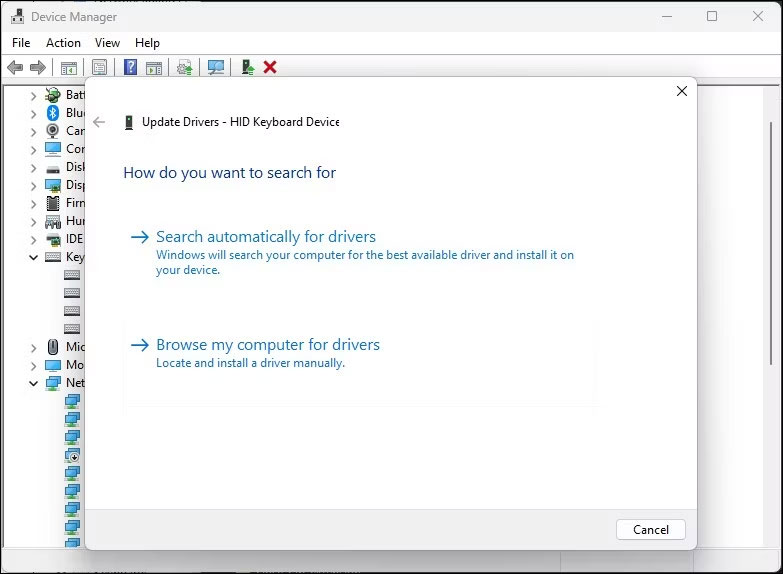
2. Right-click on your laptop keyboard device and select Update driver .

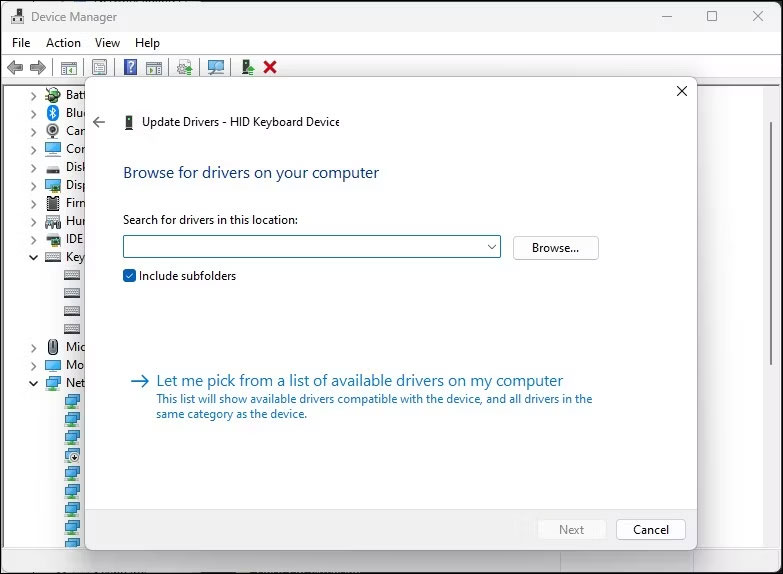
3. Select Browse my computer for drivers .

4. Next, select Let me pick from a list of available drivers on my computer .
5. Uncheck the Show compatible hardware option .
6. Select a random manufacturer in the Manufacturer column .

7. Click Next . Click Yes if the Update Driver Warning dialog box appears.
8. After installation, close Device Manager and restart your computer.
After restarting, your laptop keyboard will stop working. If you need to reinstall the correct driver to enable the keyboard, right-click on the keyboard device and select Update driver . Next, select Search automatically for drivers . Windows will find a compatible driver and install it.
Alternatively, select Browse my computer for drivers in the Update Drivers dialog box . Next, select Let me pick from a list of available drivers on my computer . Make sure the Show compatible hardware option is enabled. Select the HID Keyboard Device driver from the list and click Next .

Wait for the driver to install. Once complete, restart your computer and the keyboard should start working again.
Good luck!
Was this article helpful?
Your feedback helps us improve.
Related Articles
 Disable Windows 10 keyboard in 5 simple ways5 minutes read
 How to lock the Laptop keyboard, how to disable the Laptop keyboard3 minutes read
 Instructions for cleaning laptop keyboard without turning off the computer (safe & effective)6 minutes read
 How to fix laptop keyboard not working error on Windows 104 minutes read
 How to disable 1 or more any key on Windows 10 keyboard?4 minutes read
 Steps to disable the virtual keyboard on Windows 103 minutes read
Reader Comments 0
Sign in with email or Google to join the discussion.