How to turn off the Laptop keyboard to use an external keyboard
Laptop keyboards have the disadvantage of being quite small and laptops with screens of 14 inches or less do not have numeric keypads like conventional external keyboard models. In addition, if your integrated keyboard fails, it will cause a short-circuit and affect your computer. But how to turn off the integrated keyboard of Laptop? Please look forward to the tutorial below.

In the instructions below, Thuthuatphanmem will use the way to install the driver error so that the computer does not recognize the keyboard, if in case you want to use the laptop keyboard, you can reinstall the original driver. The article is divided into two parts, how to turn off and turn on the integrated keyboard.
1. How to turn off the keyboard on the Laptop to use external keyboard external plug.
Step 1: Right-click on the Computer icon => Manage.

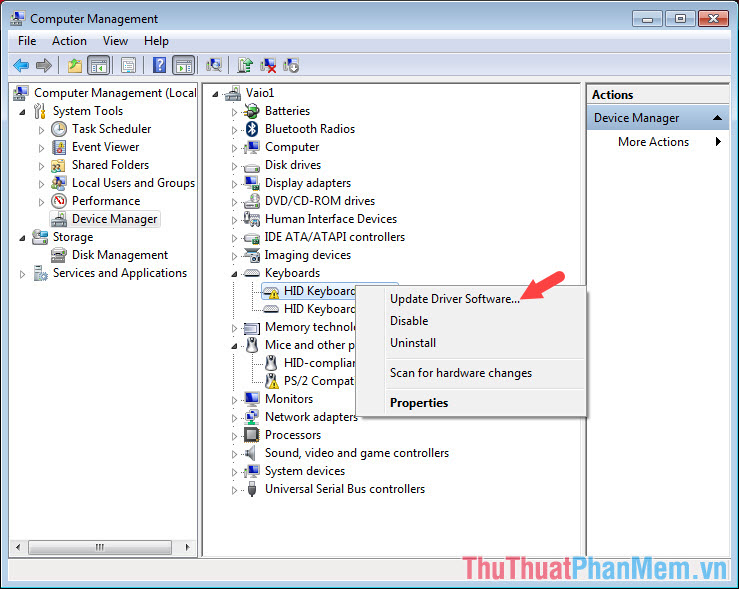
Step 2: Go to Device Manager => Keyboard => Right-click Standard PS / 2 Keyboard => Update Driver Software .
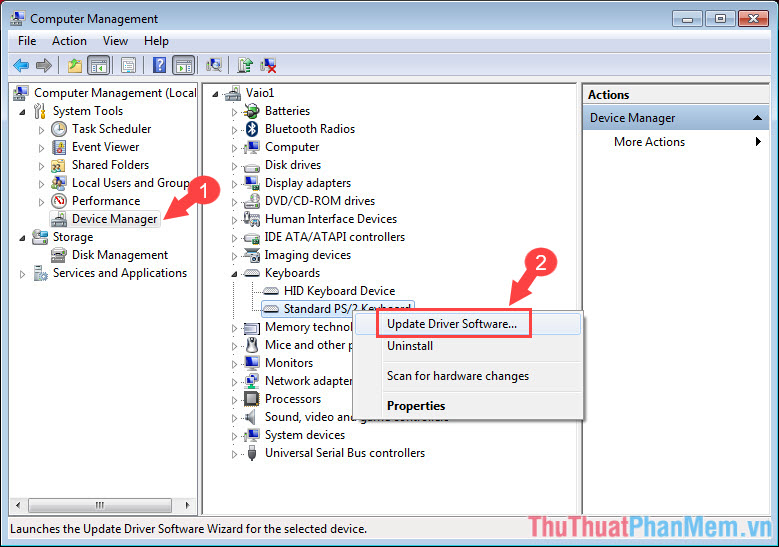
Step 3: Select Browse my computer for driver software .

Step 4: Select the item Let me pick . on my computer .

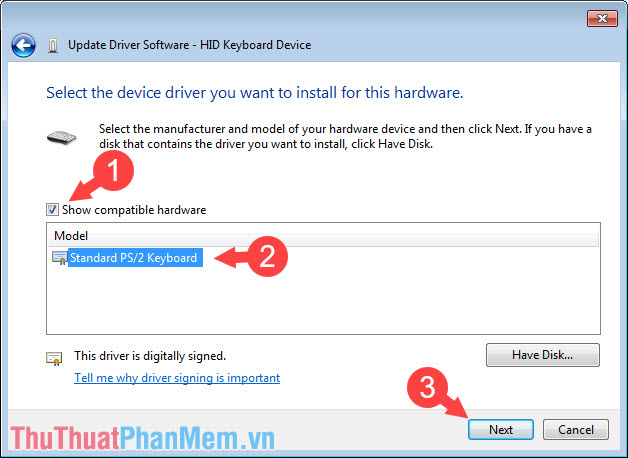
Step 5: First, remove the Show compatible hardware option to display the different keyboard drivers. Then, select (Standard keyboard) => HID Keyboard Device and click Next .
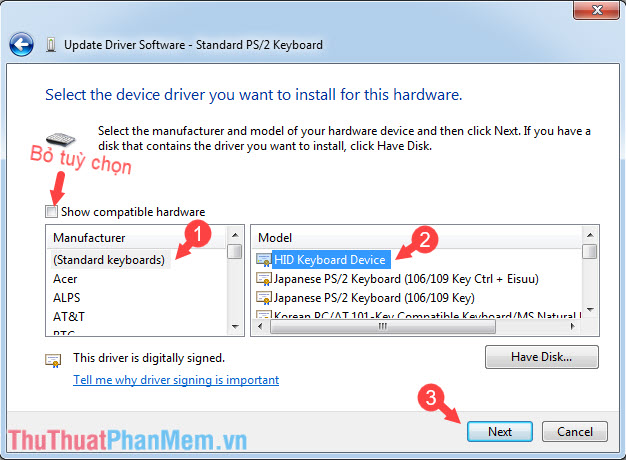
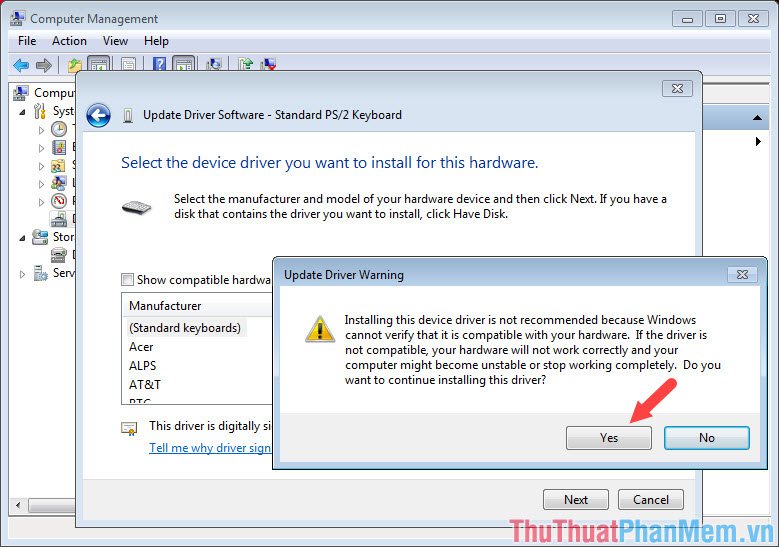
Step 6: Click Yes to agree with the Windows warning.
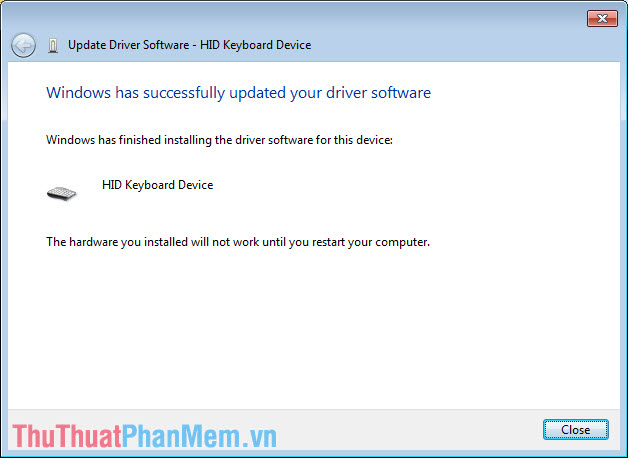
Notice Windows has successfully . displayed the same device name as HID Keyboard Device is finished, you restart the computer and enjoy the results.
Step 7: After you restart the computer and go to the Keyboards section in Computer Management, you will see the keyboard driver shows an exclamation icon, meaning that the faulty driver cannot work. Congratulations on turning off the keyboard on the Laptop successfully! You can try to type text on the laptop keyboard to see if it works and the keystroke phenomenon remains or not.

2. How to turn on the Laptop keyboard
If you only want to turn off the Laptop keyboard because it is useless and prevent accidental pressing, we can turn it back on by performing the following steps:
Step 1: You manipulate the same as part 1 to open Computer Manager and right click on the laptop driver with exclamation icon to select Update Driver Software…
Step 2: You again manipulate steps 3 and 4 on part 1, but this time select Show compatible hardware and select the original driver and click Next .
Successful notice that you have completed reinstalling the Laptop keyboard driver. Now you can use a normal laptop keyboard without any problems.

With the guide in the article, you can easily turn off the Laptop keyboard when not in use without having to remove the keyboard driver or remove the keyboard. If the article is good and useful, please post your comments and reviews about the article in the comment section below!