Table of Contents
This guide explains how to create Rules (Rules) in Outlook, with clear steps, practical tips, and important checks before you begin.
1. What are Rules rules in Outlook?
Rules in Outlook help you manage emails in your mailbox more effectively. It lets you move mail from one folder to another, attach different flags to classify messages and even help you reply to emails automatically. etc.
The most common rule used by users by Outlook is to automatically move the message to the appropriate folder when the message arrives.
2. How to create Rules in Outlook
To be able to create a new Rules in Outlook you can follow the following steps. First you click on a mail related to the rules you want to be expensive (for example, you want to perform automated actions related to the sender, the subject sent. etc. of that email).
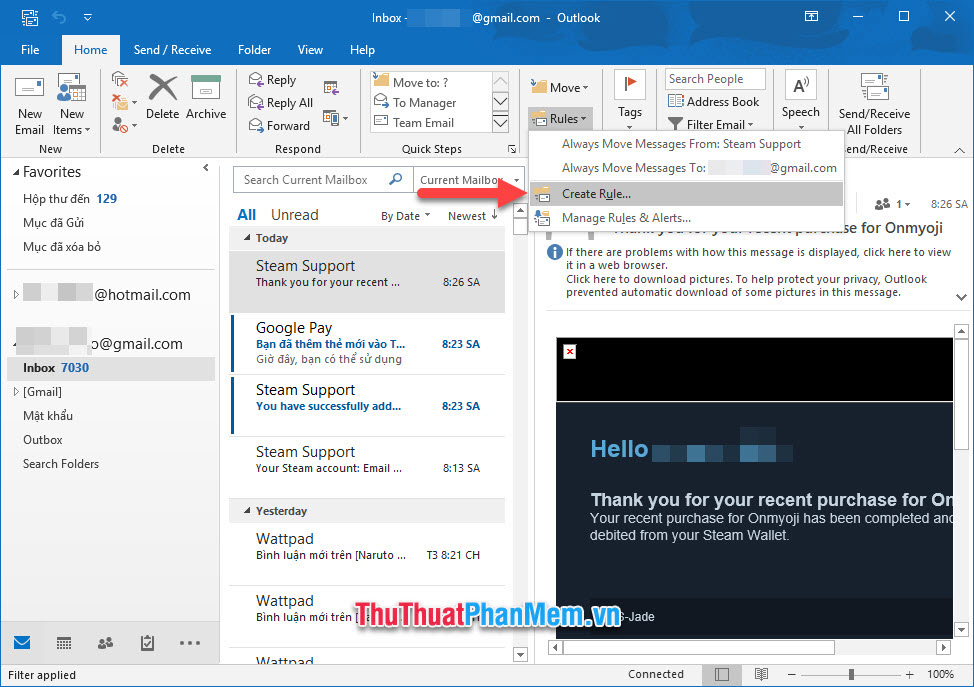
Next you Home ribbon on the toolbar, then click on Rules in the Moves group and select Create Rule .
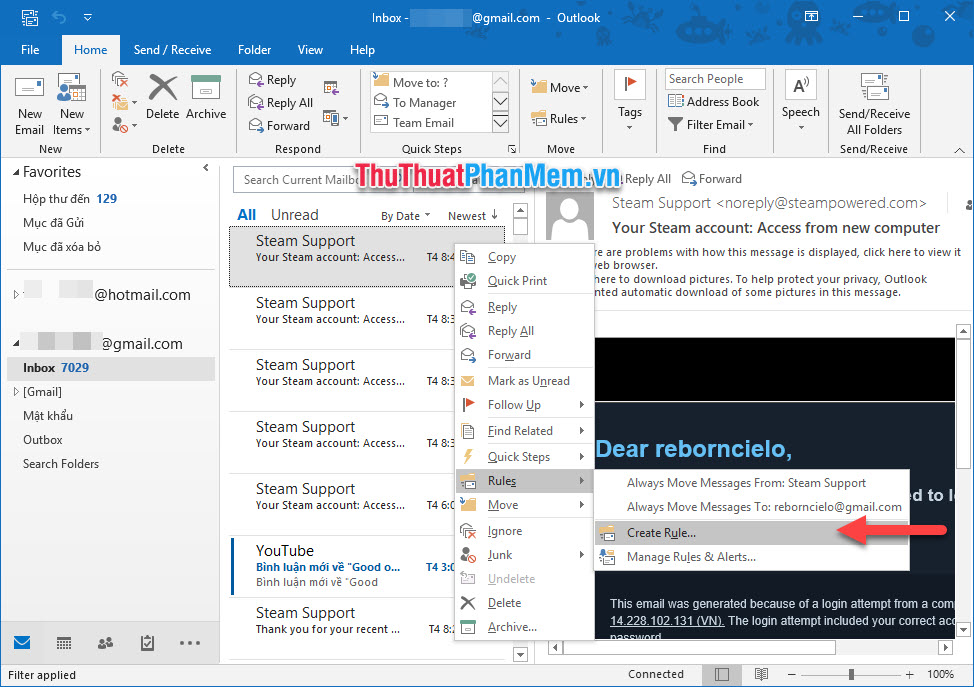
Or you can choose to right-click on the email and select Rules in the displayed list and select Create Rule here.
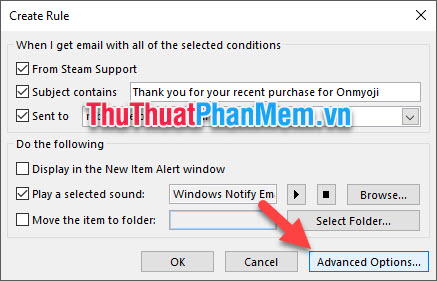
The Create Rule function window will appear on the screen, where you can create settings related to the Rules you want to set.
In the When I get email with all of the selected conditions section , you can set the relevant rules to filter the types of mail you need. You can filter mail based on the following three criteria:
- From
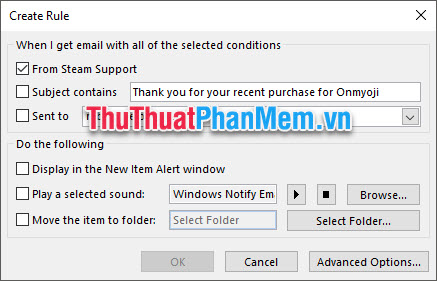
- Subject contains : Subject of the letter, can perform operations with the same letter.

- Sent to : Because Outlook lets you manage multiple emails at the same time, you can set restrictions on emails sent to certain email addresses that you are managing.
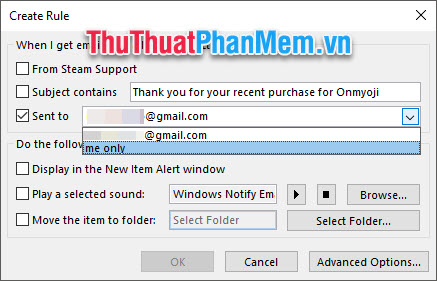
Note that you can also create multiple selections at once with all three of the above filter conditions.
Next you create the settings for Do the following .
After you have filtered the mail in accordance with the above conditions, you can perform the following automated actions:
- Display in the New Item Alert window : With this operation, you can display a notification window when new mail arrives.
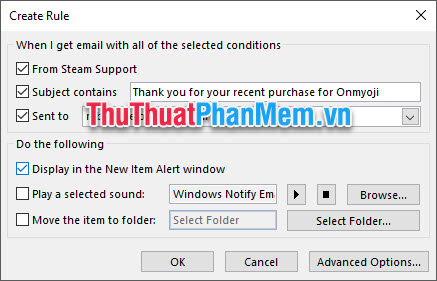
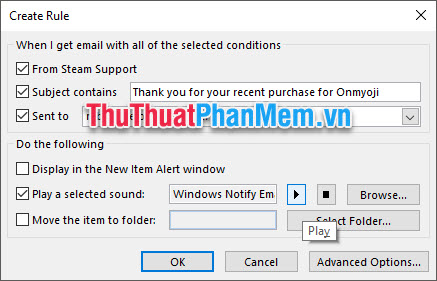
- Play a selected sound : Emit a notification sound that you have installed. You can listen to the notification sound by clicking the Play button triangle. To change the notification sound, click Browse and select the audio file.
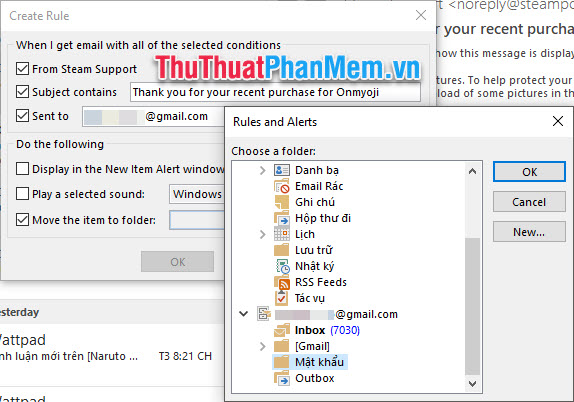
- Move the item to folder : Perhaps this is the most commonly used Rules function. It will help you send messages to your chosen folder in Outlook. You just need to select a folder you want to move the message to and click OK .
In addition to the simple Rules mentioned above, you can perform more complex operations in Advanced Options .
In this, there are many rules to create Rules that have been set up with Step 1 as the filtering step and Step 2 are the operations performed with that message.

After all you need to click OK or Finish to complete the installation of Rules rules for Outlook. The software will take some time to execute the rule you have just installed.
Thank you for reading our article How to create rules (Rules) in Outlook of TipsMake. com us. This article is about creating Rules in Outlook so that you can successfully perform this trick.
FAQ
What should I know about Create Rules (Rules) in Outlook?
Focus on the key features, requirements, limitations, and practical use cases explained in this guide.
How do I get the best results with Create Rules (Rules) in Outlook?
Follow the recommended steps, use current software or information, confirm compatibility, and review settings before major changes.
Are there any risks or limitations?
Potential limitations depend on compatibility, data quality, cost, privacy, support, and how the product or method is used.
Related Articles
 How to Use Rules in Outlook to Manage Your Inbox7 minutes read
 Move Daily Email to a Folder in Outlook2 minutes read
 Steps to Create a New Folder in Microsoft Outlook4 minutes read
 How to Turn Off the Delete Confirmation Dialog in Outlook3 minutes read
 How to Create AI Theme for Outlook3 minutes read
 How to Create a Signature in Outlook to Make Your Emails Look11 minutes read
Reader Comments 0
Sign in with email or Google to join the discussion.