How to create Intro in PowerPoint like Star Wars movie
Creating your PowerPoint presentation by running the word like in Star Wars is a great way to engage your audience, make them more interested and participate in your presentation.
Creating your PowerPoint presentation by running the word like in Star Wars is a great way to engage your audience, make them more interested and participate in your presentation.
- Create text effects like Star Wars movie Poster in Photoshop
- How to create effects for photos on PowerPoint
- How to create handwritting PowerPoint effects
How to create an introduction like in Star Wars movie
First, you need to add a clear, starry night sky image as the background for the slide. You can find this image online or take a picture yourself if you want.
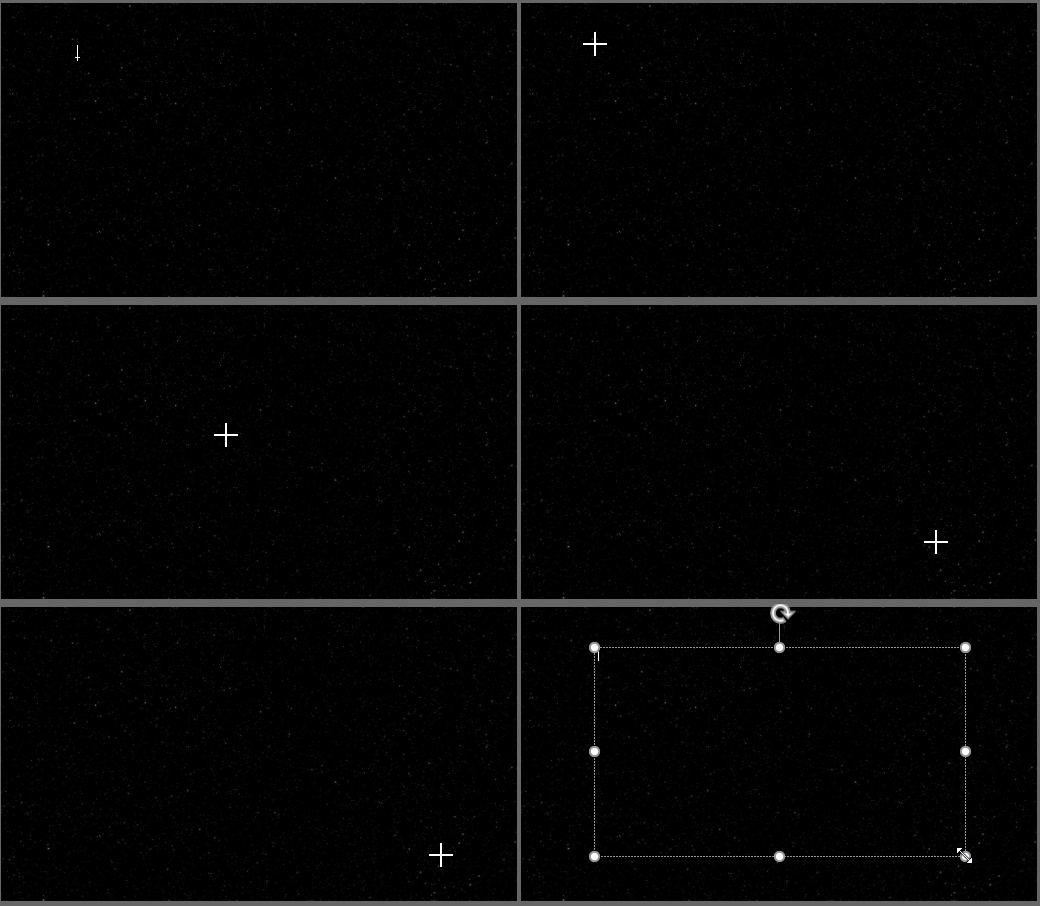
When placing an image into PowerPoint, you will need to insert a text box to enter the introduction. To add a text box, click the Insert tab.

Next, click on the Text Box button.

Click and drag to draw the text box, ensuring enough space for your introduction.
You need to make sure the image is placed behind the text. Type the introduction you want to display. In recent Star Wars movies, the font style has changed a bit. If you want the font type in 1997 version, you need to set the following parameters:
- Color : Yellow (Red 250, Blue 190, Green 0)
- Typeface : News Gothic MT; bold
- Font size : 44 pt.
- Typeface : Justify (spread both sides)
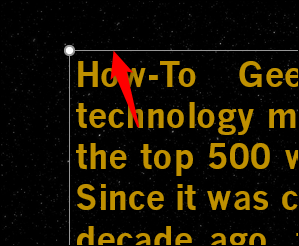
After adjusting your settings, you will get an introduction similar to this one.

Now it's time to create the effect for the text. First, select the text box.
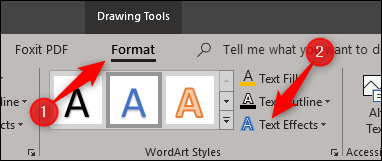
Next, switch to the Format tab and click the Text Effects button.
From the drop-down menu that appears, select 3-D Rotation .
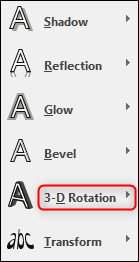
Another menu will appear, select the Relaxed Perspective Moderately option from the Perspective group.
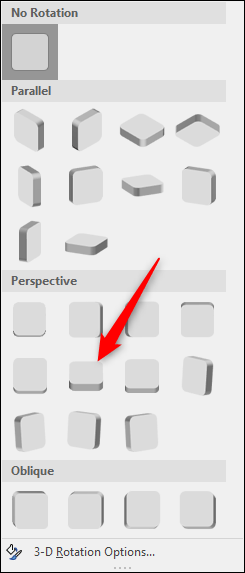
Next, go back to the menu select perspective, but this time, choose 3-D Rotation Options at the bottom.
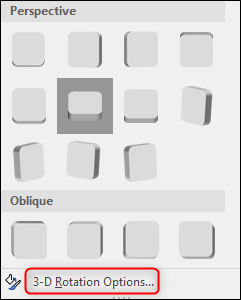
You'll see the Format Shape pane appear on the right. At the bottom of the pane, change the Y Rotation value to 320 degrees and the Perspective to 80 degrees.

Next, you need to position the text box so that the top part of the text is at the bottom of the slide. Also, make sure the text is in the middle of the slide. To do this, click and drag the text box, adjust the text box width to make sure the top line of the text has the same width (or nearly the width) of the slide.
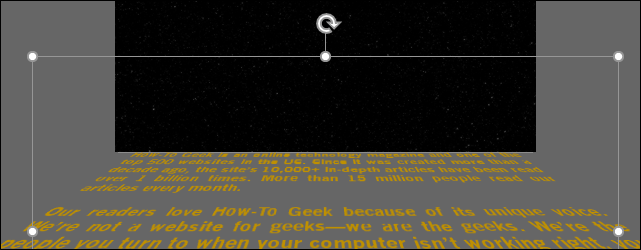
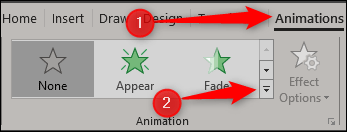
Next, go to the Animations tab and select the down arrow at the bottom right of the Animation group.
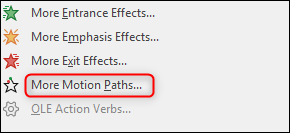
At the bottom of the menu that appears, select More Motion Paths .
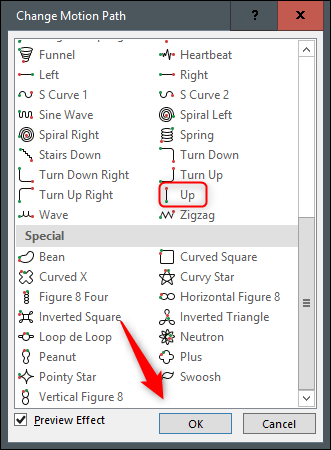
On the Change Motion Path menu that appears, select Up and then click OK .
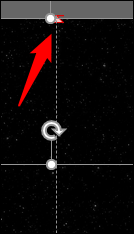
You will see a red and green arrow appear, indicating the end and start of the animation. Click and drag the red arrow to the top of the slide. Hold Shift while dragging to keep the line straight.
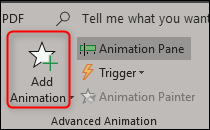
Now go to Advanced Animations group and select the Add Animation option.
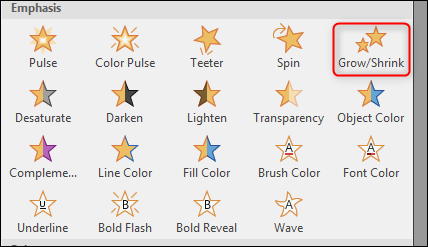
Choose Grow / Shrink from the Emphasis group.
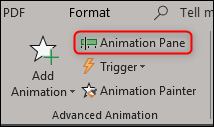
Return to the Advanced Animation group and select Animation Pane .
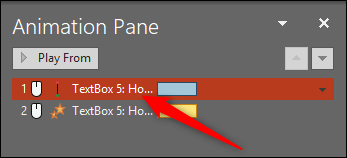
You will see a frame showing the effects selected on the right side of the window. Here, double-click the Up effect.
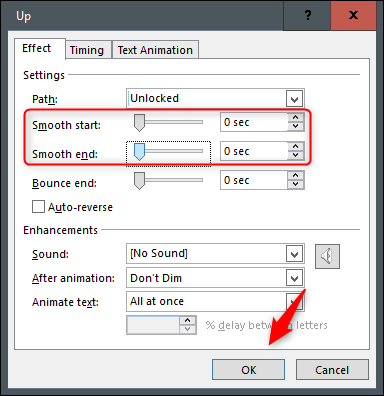
A window appears, showing some options for the Up effect. Here, change the settings of Smooth start and Smooth end to 0 and then click OK .
Next, double-click the Grow / Shrink effect from the list to open its installation window. In the Settings section, click the arrow next to the Size option. In the drop down menu, enter 10% in the Custom option and press Enter .

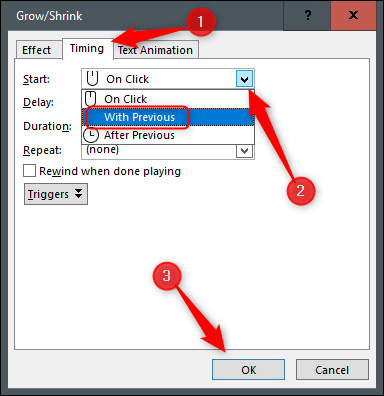
Go to the Timing tab and select the arrow next to the Start option. Select With Previous and then click OK .
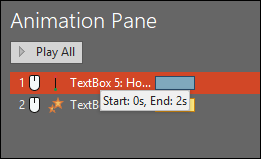
Now, you need to adjust the length of the Up effect. By default, the effect length is two seconds, this time is so fast that you need to change it.
To adjust the time, click and drag the end of the color bar next to the effect. Time depends on the amount of text you have. Here we set it to 30 seconds.
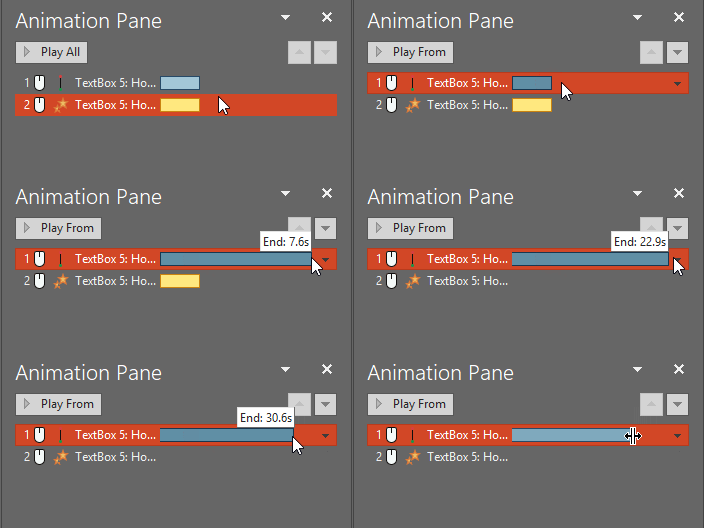
Do the same for the Grow / Shrink effect . Now, we need to add a shape using the same image as the background. Go to the Insert tab and select the Shapes option from the Illustrations group.

On the drop-down menu that appears, select Rectangle from the Rectangles group.
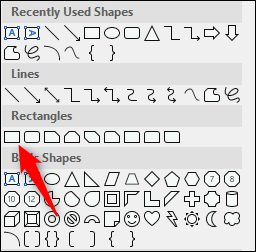
Draw a rectangle so that it covers the top half of the slide.
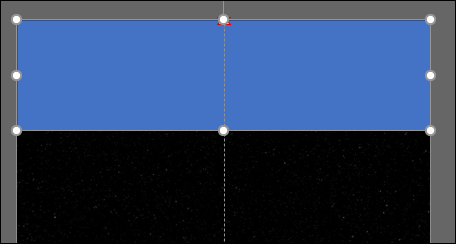
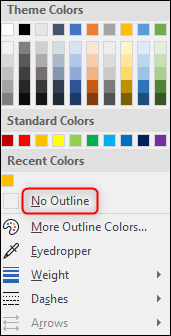
Now we need to remove the outline of the rectangle, make sure to select the image and access the Home tab, click on Shape Outline .

From the drop-down menu that appears, select No Outline .
Next, we need to add the same background image to this shape. To do so, access the Drawing group and select Shape Fill .
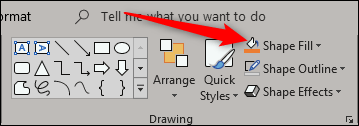
From the drop-down menu, select Picture , browse to the location of the image used for the background and select it.
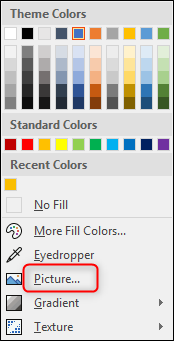
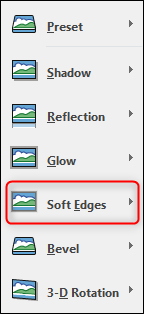
Now it looks like your background, now just let the text appear behind it. If you run the slide now, the text will suddenly disappear at the end. To avoid this, select the image and access the Format tab and select Picture Effects from the Picture Styles group.

Select the Soft Edge s type from the drop down menu.
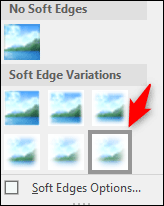
In the Soft Edge Variations group, select the last option.
That's it, you will have an intro similar to this video.
I wish you all success!


 Instructions to block ads on Smart TV
  Kutools for Excel Download, install and use instructions for new users
  How to blur images in Word
  How to delete notes, comments in Excel
  How to create a crossword game on PowerPoint
  How to circle answers in Word, Excel, PowerPoint