How to clear blurred images quickly and effectively
In the era of technology development today, the need for sharp images is an indispensable thing. But for some reason, your photos are blurred and blurry, so how to sharpen them. Actually interfering with image quality with software is only a "fire" method, but it still brings certain effects. In this article, Software Tips will guide you on how to clarify blurred images quickly and effectively.

1. Make photos clear with Photoshop
Photoshop is a well-known image editing software from Adobe, so we don't have to argue. But using Photoshop is a bit complicated for beginners so you will find it a bit difficult.
Download Photoshop CC: https://www.adobe.com/sea/products/photoshop.html
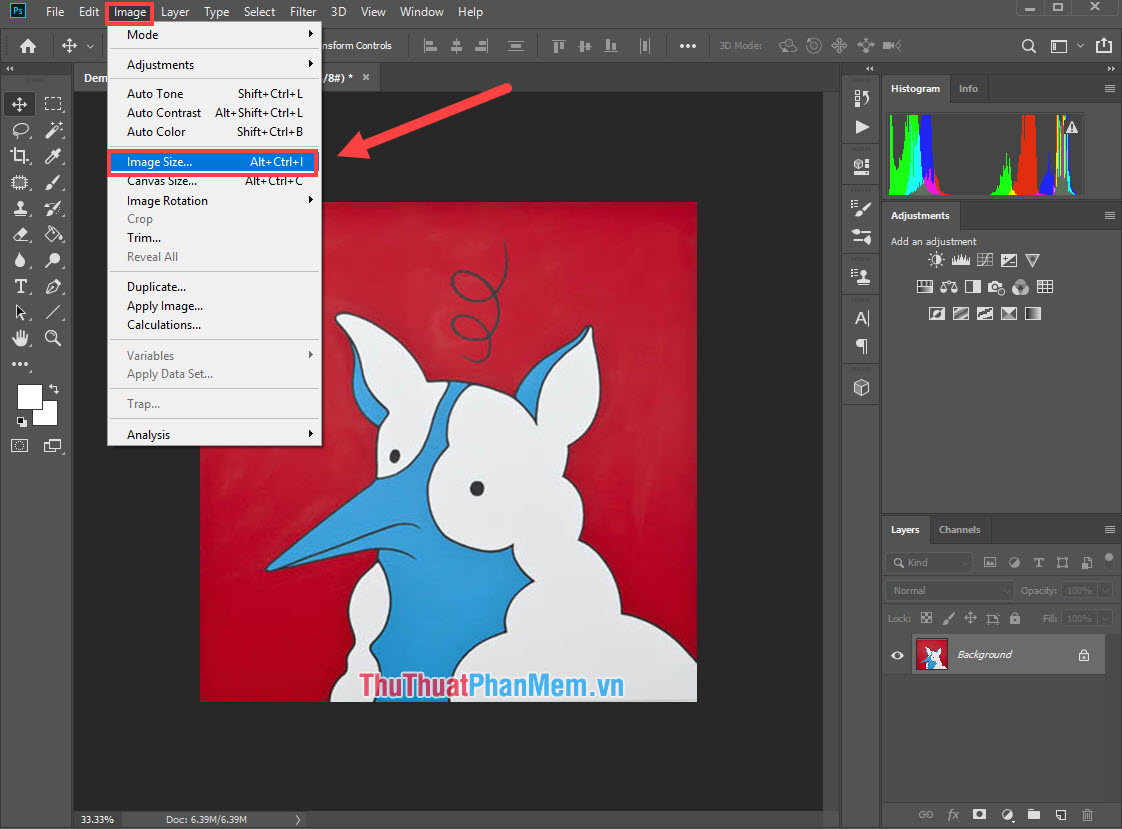
Step 1: You proceed to open the image to increase sharpness, clarification in Photoshop. Then choose Image -> Image Size or press Alt + Ctrl + I.
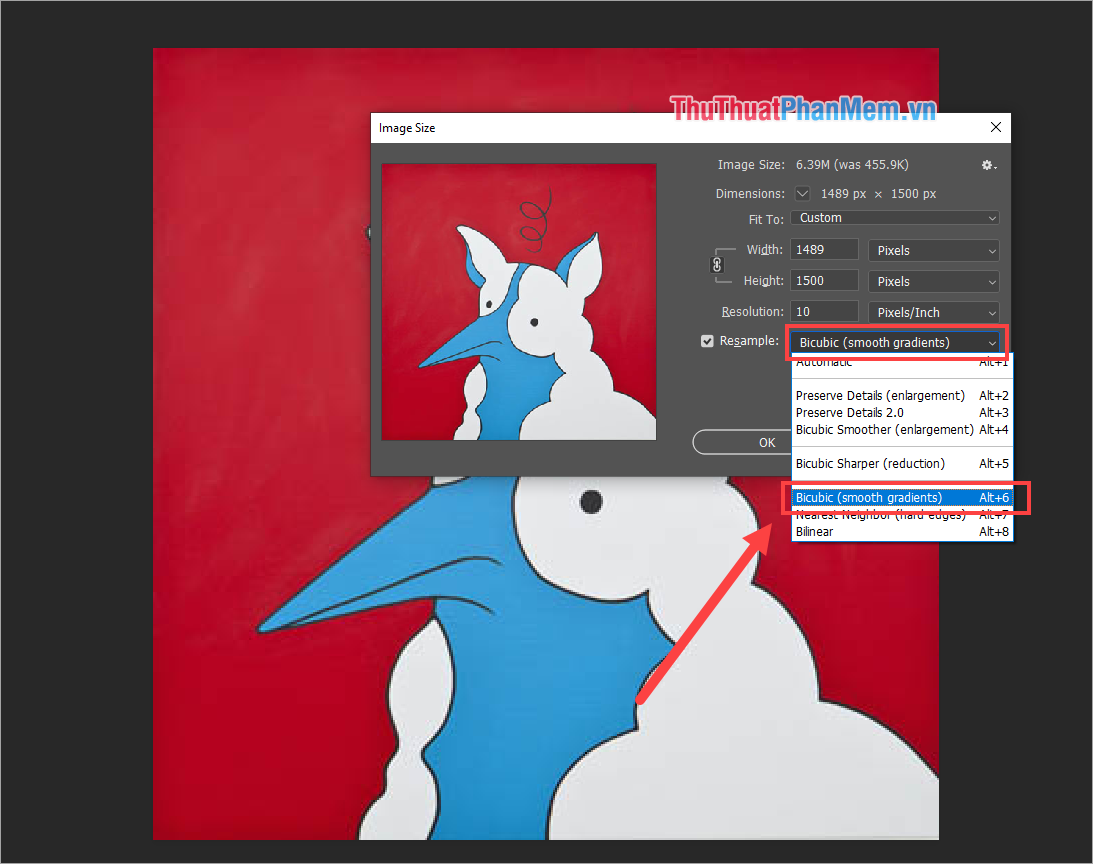
Step 2: Image Size window will appear, now you go to the Resample line to proceed to edit. The default of Resample is Auto , friendsBicubic (smooth gradients) or press Alt + 6.
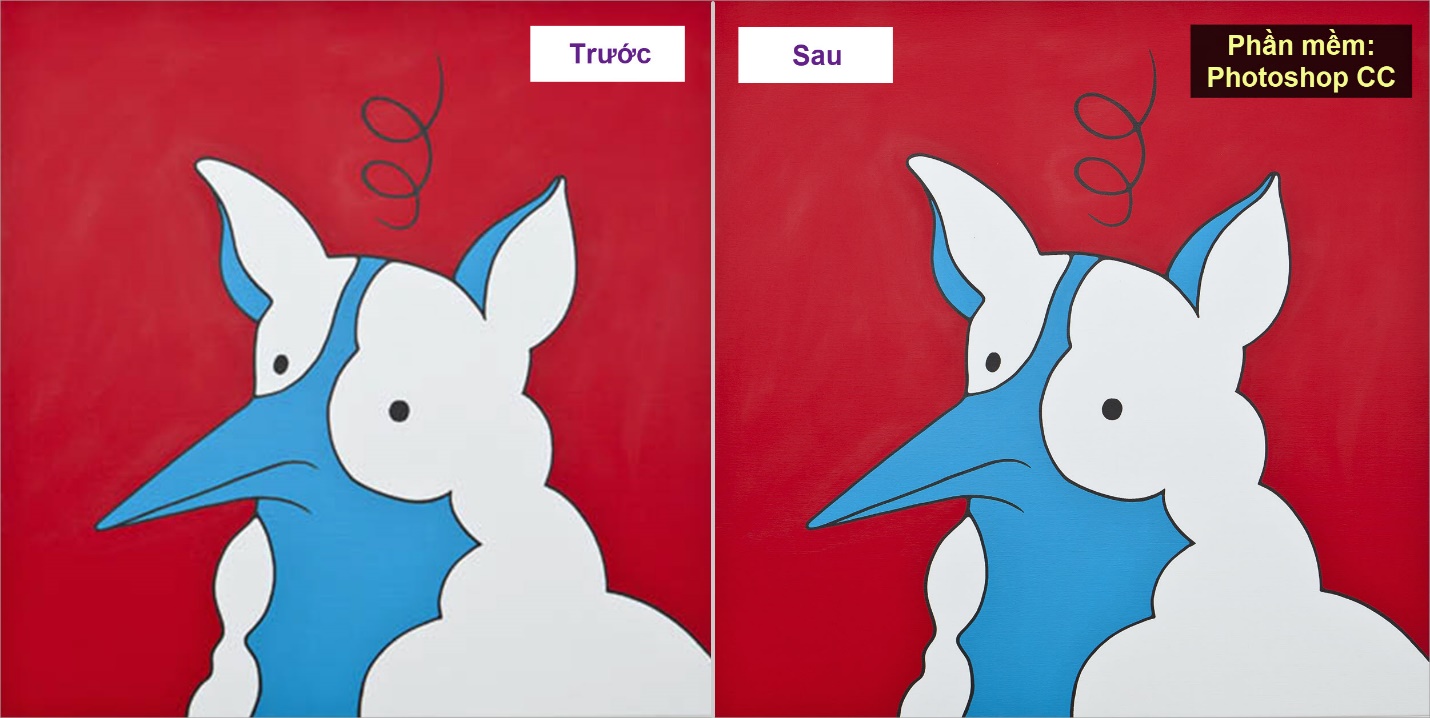
Step 3: Then, you save the image again using Ctrl + S combination . Finally, open the image to check after increasing the sharpness.
2. Clarify blurred photos by Fotophire software
Fotophire is also a useful and handy image editing tool on the computer. Fotophire software is currently free for 1-month trial users, so take advantage of it.
Link Download: https://photo.wondershare.com/
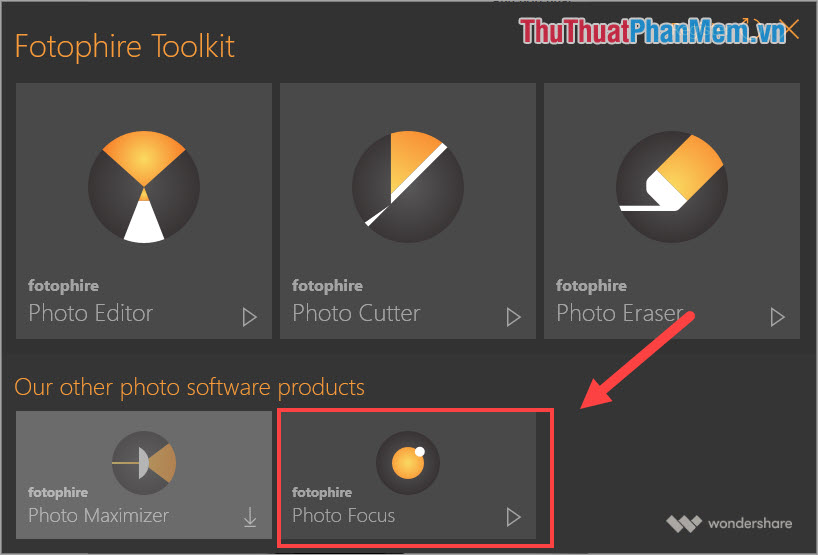
Step 1: You proceed to download the software to your computer and open to use. At the main interface, you select the Photo Focus mode .
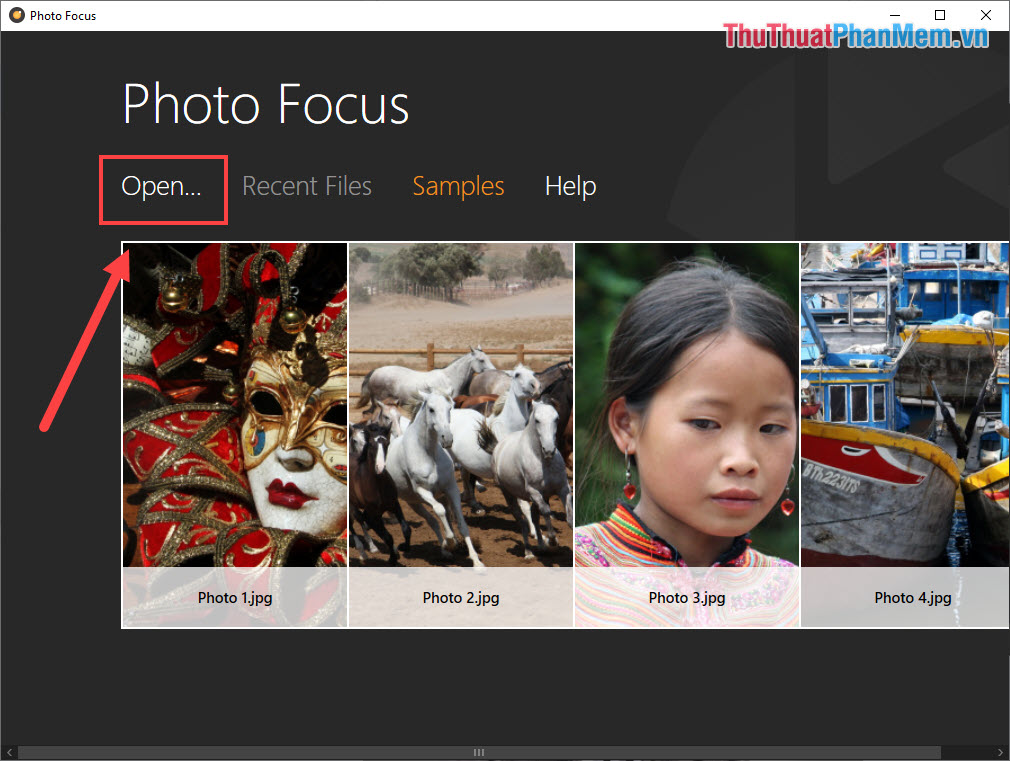
Step 2: Next, you select Open to proceed to select the image to increase sharpening and clarification.
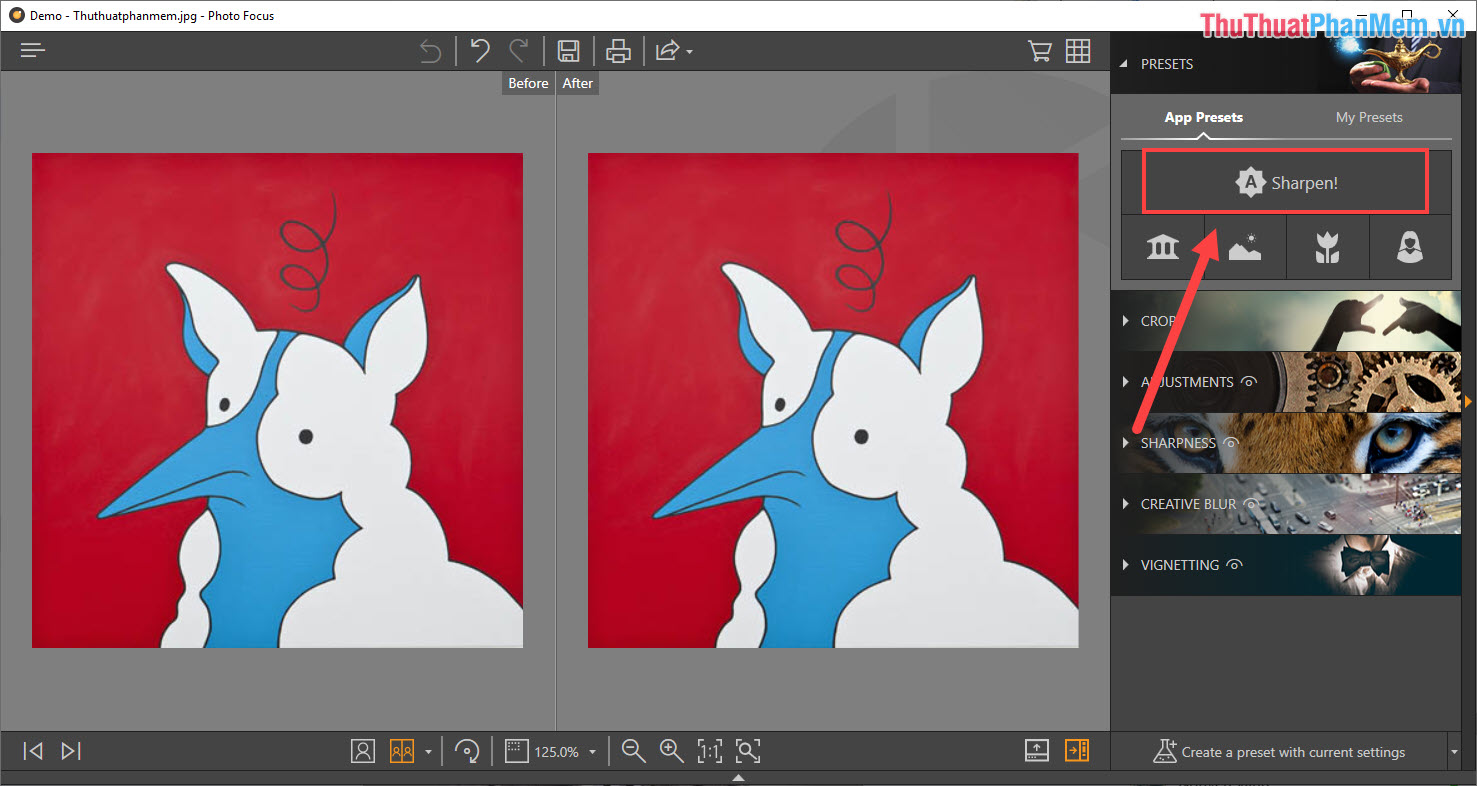
Step 3: At the interface of Photo Focus, select Sharpen to preview the results of the self-correcting system.
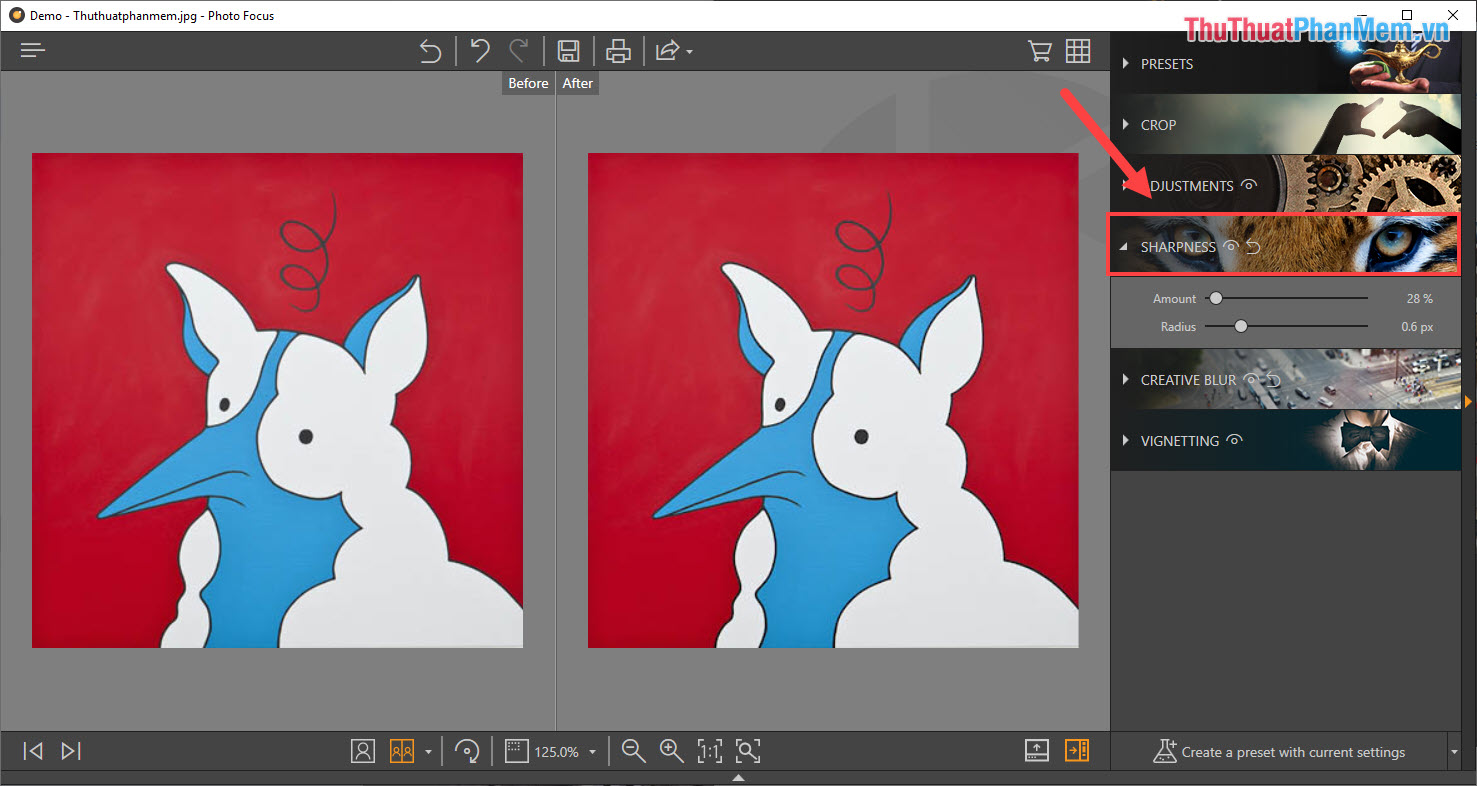
Step 4: Next, select Sharpness for more advanced editing.
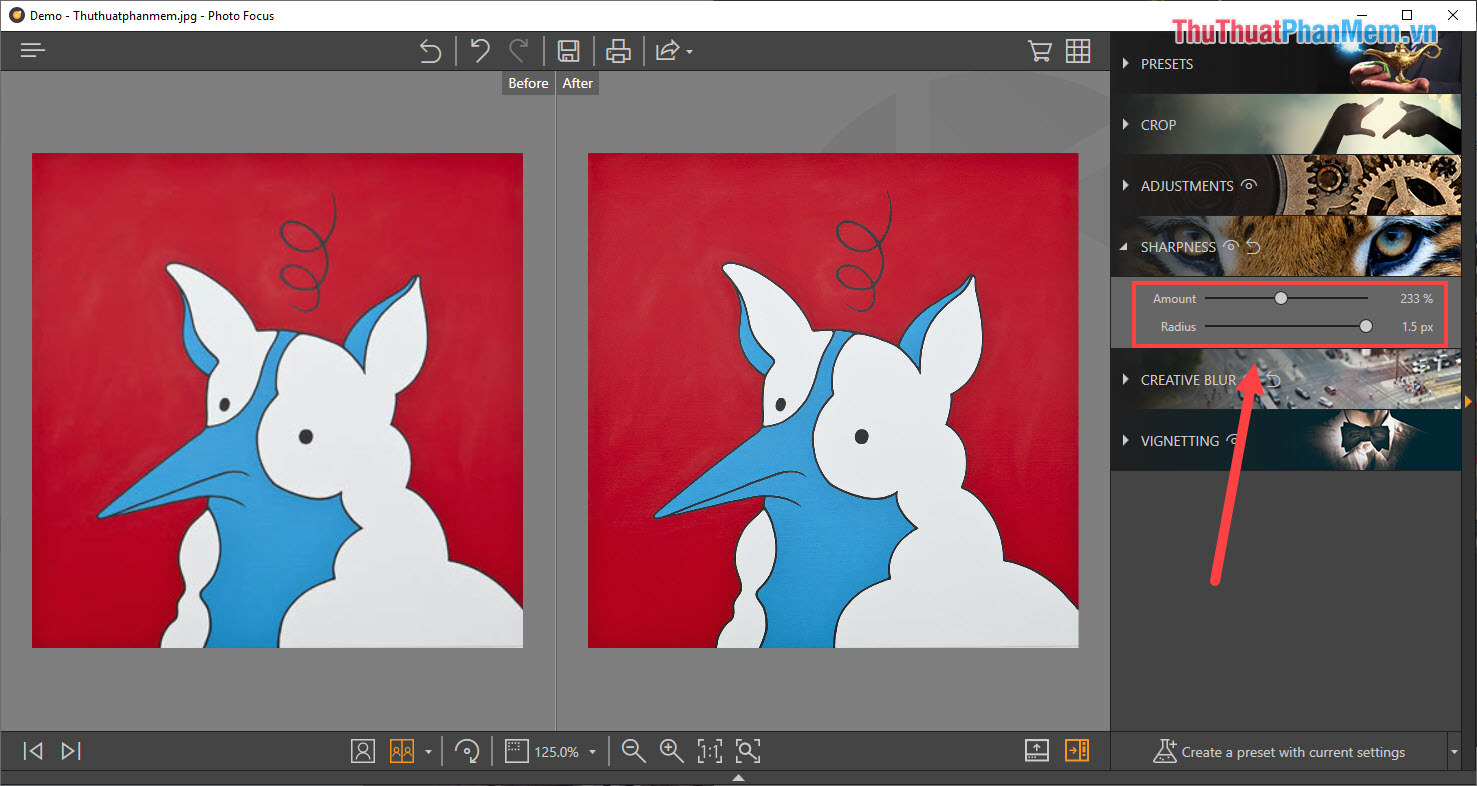
Step 5: You turn to drag the index bar to create the clearest picture.
- Amount: Enhancing the details, the higher the picture sharp
- Radius: Adjust the size of the Pixel, the higher the pixel the clearer the Pixel
Step 6: After editing is complete, we save the image by selecting Save . or Ctrl + S combination .

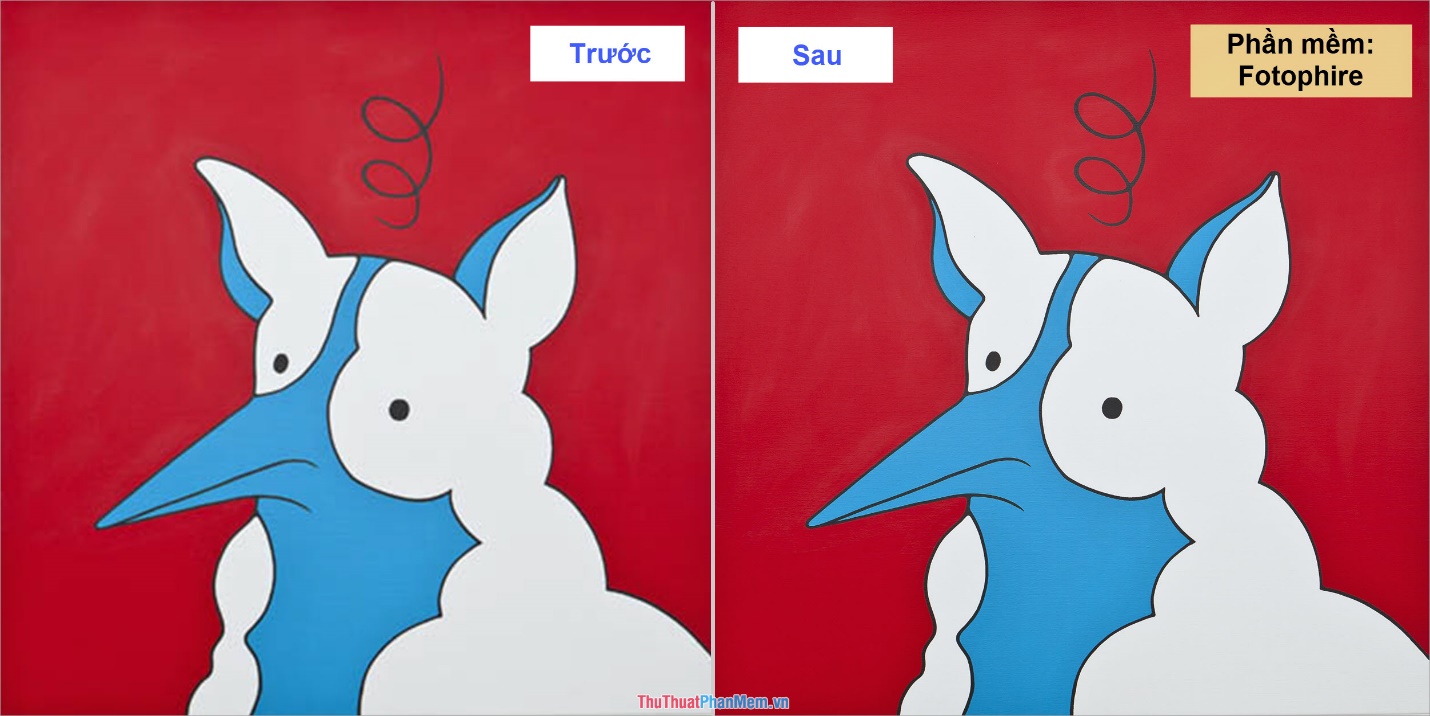
And here are our results after using Fotophire for sharp image editing.
Thus, in this article, Software Tips have shown you how to clarify images, increase sharpness for images quickly and effectively. Have a nice day!