Table of Contents
This guide explains how to create a Logo in Photoshop, with clear steps, practical tips, and important checks before you begin.
Today TipsMake. com will show you how to draw a beautiful logo in Photoshop. Please refer!
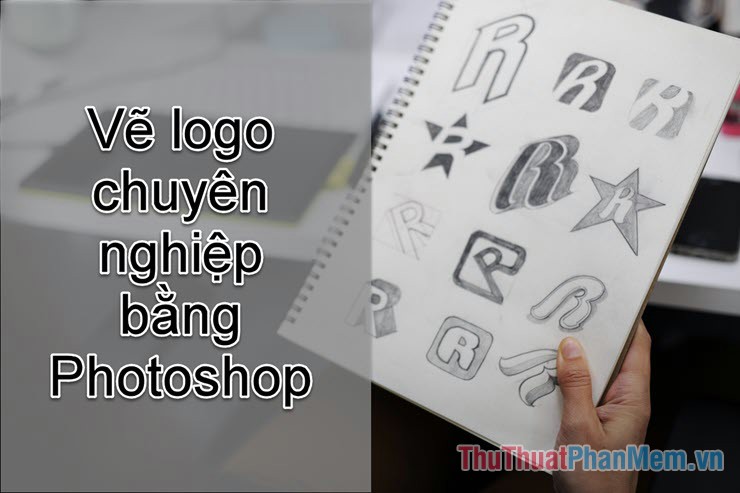
Standard logo drawing rules
1. Consistency
Make sure customers feel that your logo and brand fit together. Brand is very important in business. If you build a good brand, when customers think of you, you will immediately remember the service you do, the quality of it. Let the logo also play the role of the brand.
2. Easy to remember
Making a logo is eye-catching. Logo should be simple and attractive, giving too much information on the logo is not a wise choice.
3. Easy to identify
Unique logo. Customers just need to look to know it's you instead of thinking 'whose is this that someone's used to?' 'Do you or a business have a design similar to yours?', Nobody has time to find out..
4. Actual
Logo must be closely related to your business service. Use specific illustrations, the right objects and avoid abstractions.
5. Brings interesting experience

Author: http://www. roysmithdesign. com/
This is the logo design of a Yoga club in Australia. If you pay close attention, you will see that the back arm combined with a raised leg of the character will form the territory of Australia. It is interesting to discover this, right?
Even if you do not have such an innovation, at least bring something exciting to your customers, make them impressed with your brand.
6. Sense of experience
Create special things behind the logo. This can be a story about a brand, a guide for customers. Make guests feel new and satisfied with it. The impact instills them in your values and vision.
Above are 6 important criteria to design a logo to achieve the highest efficiency. Maybe you are just a newbie, do not have many professional techniques, so it is impossible to do as an expert with all criteria.
This article I will guide you to create a simple logo, enough with beautiful and professional criteria without too much skill.
Create logo with photoshop
1 - Text design
Text elements are rarely omitted when designing logos. Slogan will be the fastest way to reach customer awareness. When your level of drawing design is not standard, forget the abstract ideas, let's simply use the text!
In my mind, I had an idea of a transportation company, I temporarily named ' Truck Drivers ' as the focus of the logo.
Create a nice typeface as follows:
Download the font
Step 1 : Visit https://www.1001fonts. com/.
This is a website that provides beautiful fonts, can take advantage of it effectively in the design.
Step 2 : Enter the text you want to design into the search bar

Step 3 : Continue scrolling down to find matching results, choose one of the filters to get better results.
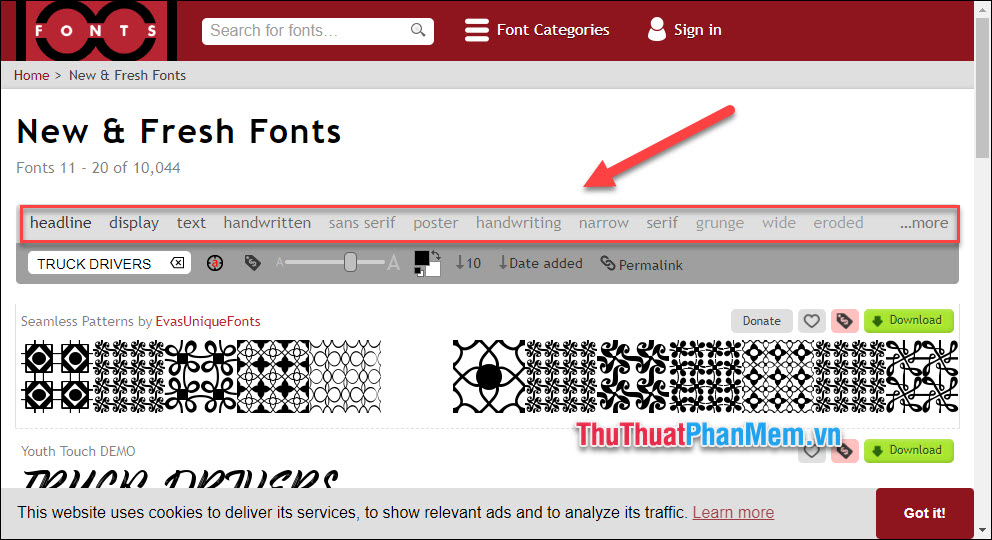
When you see the font like that, click Download .

Step 4 : In the downloaded directory, open the file ending in . tff .
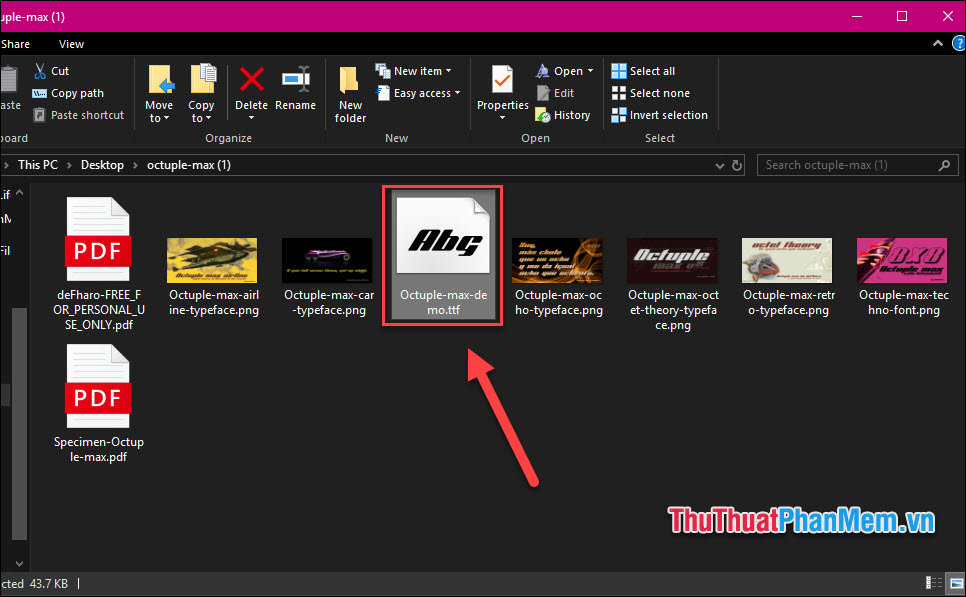
Step 5 : Click Install to install the font.

Write text in Photoshop
Step 1: In the main interface of Photoshop, press Ctrl + N to create a new artboard, set the background to your desired color.
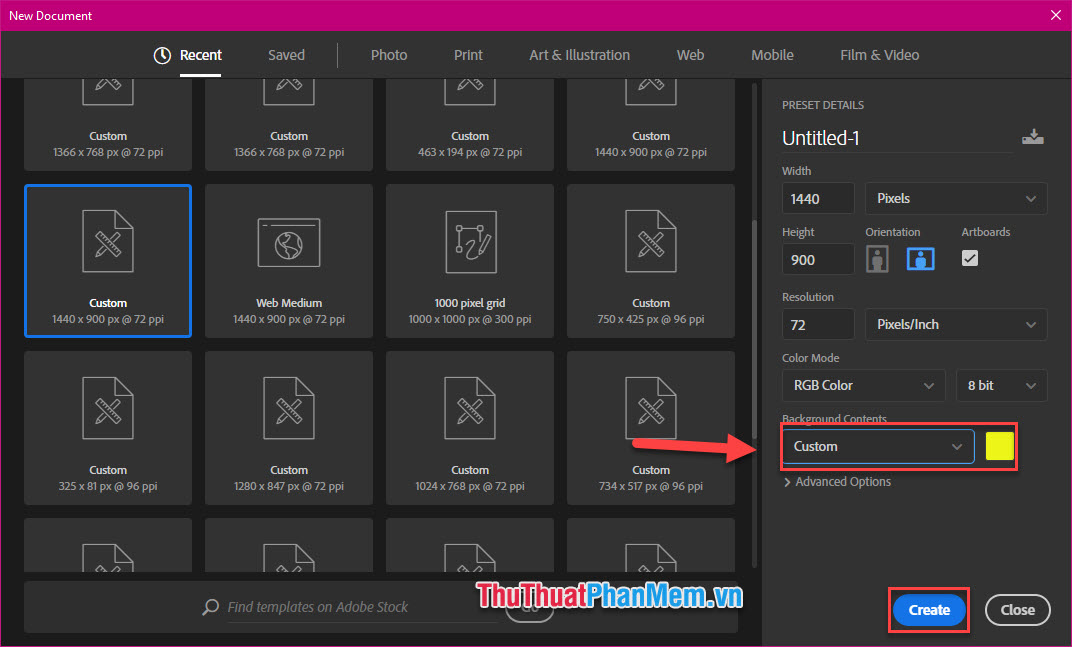
Step 2: Select the Type Tool, select the font that you just installed, the font size and font color.

Step 3: Click on any point on paper, enter the text you want.

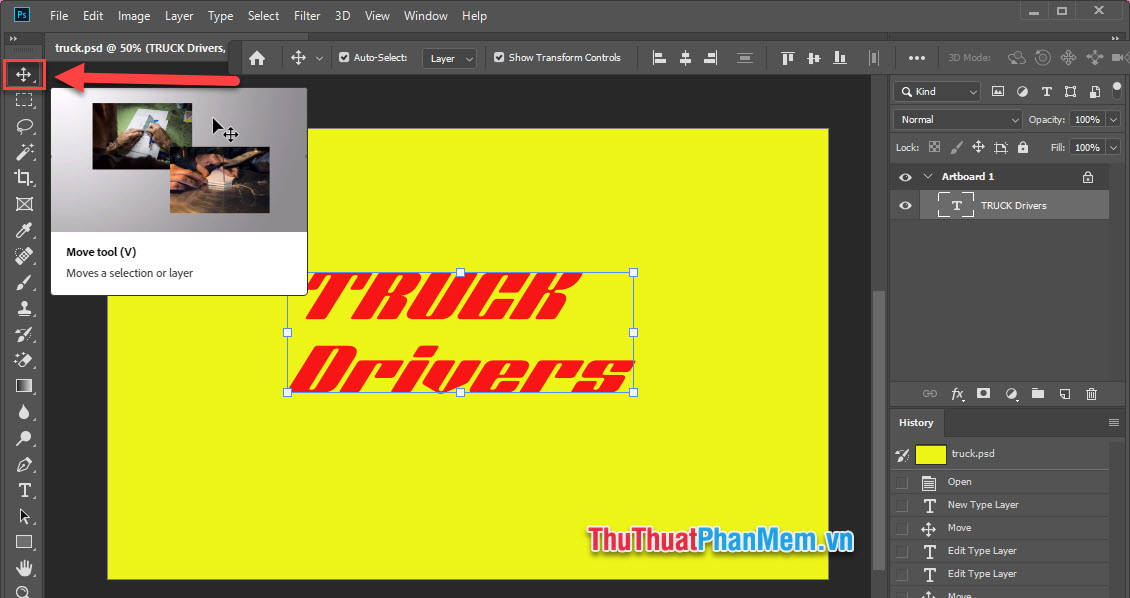
Step 4: Change the position of the object, select the Move Tool, hold on the object and drag to the position you want.
Resize, tilt, rotate or flip objects: Select Edit >> Transform .
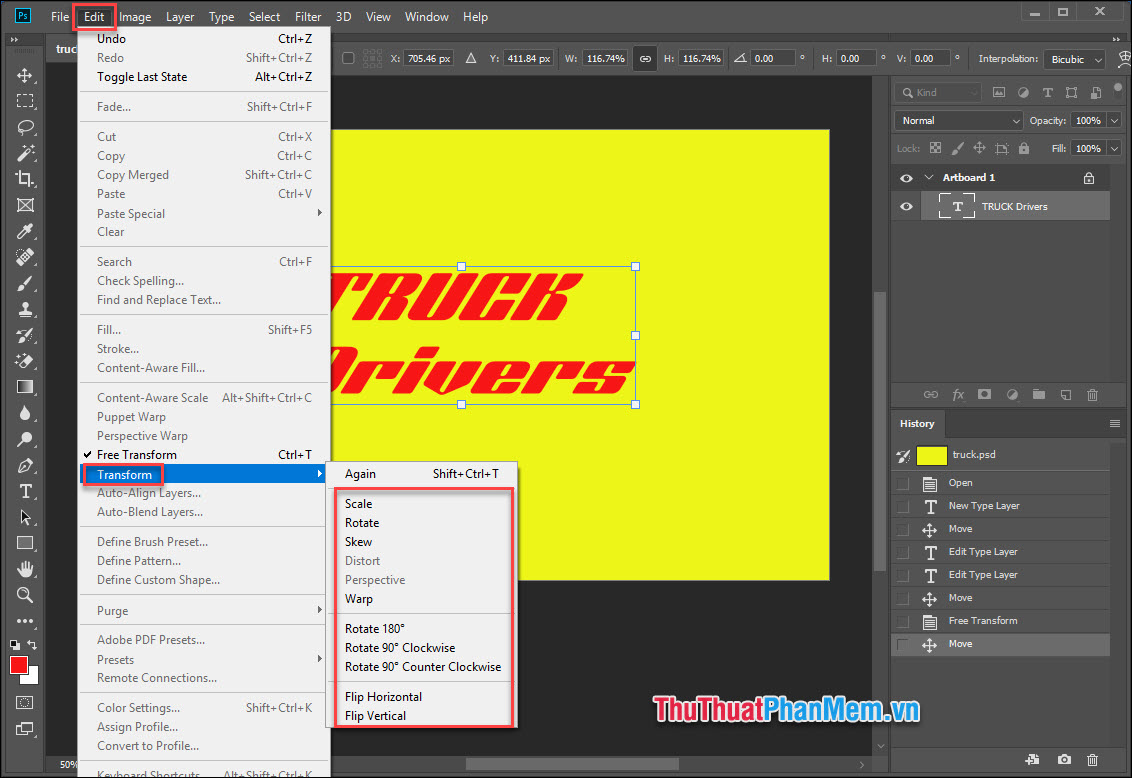
- Scale: Fix the size
- Rotate: Rotate the picture
- Skew: Fix the tilt
- Flip: Flip the picture
2 - Effect design
Change background color
Step 1: If you now want to change the background color, just create a new layer, drag it below the Text layer.
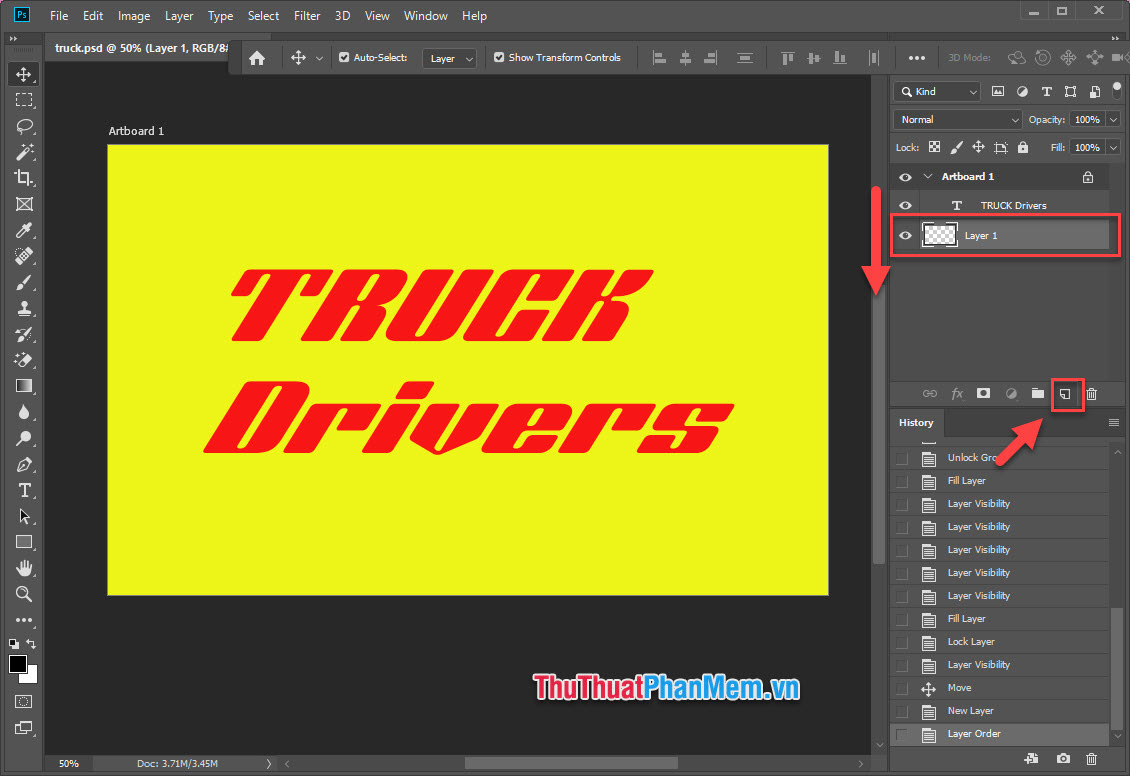
Step 2: Choose a new color.

Step 3: Press the combination of Alt + Backspace and your new background color is applied.

Change the font color
Step 1: Select the Type Tool, highlight the text and click on the color palette in the upper corner of the screen.

Step 2: Select the color you want and click OK.
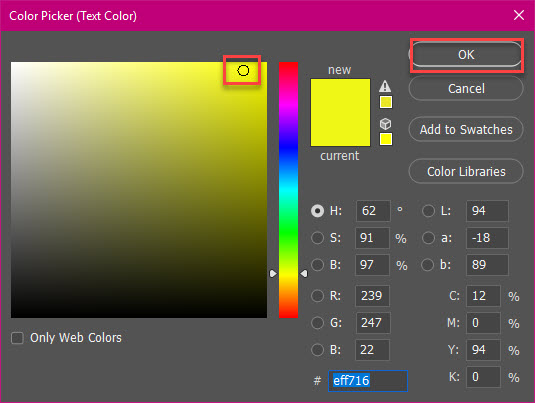
After the two color changes above, I decided to choose the background and text color as follows:

Create shadow effect of object
Step 1: Select the Text Layer, press Ctrl + J to create Layer Copy.
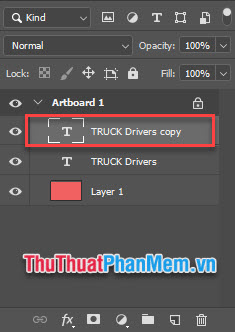
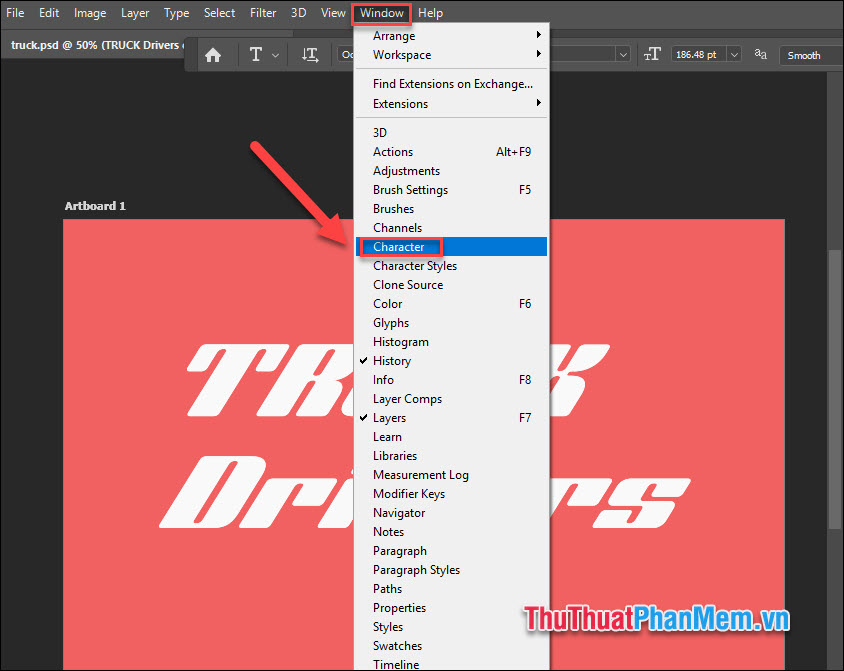
Step 2: Open the Character window: Select Windows >> Character.
Step 3: Select the Text Layer, in the Character window, open the palette, choose black.

Step 4: Press Ctrl + T, adjust the tilt to 45 degrees.
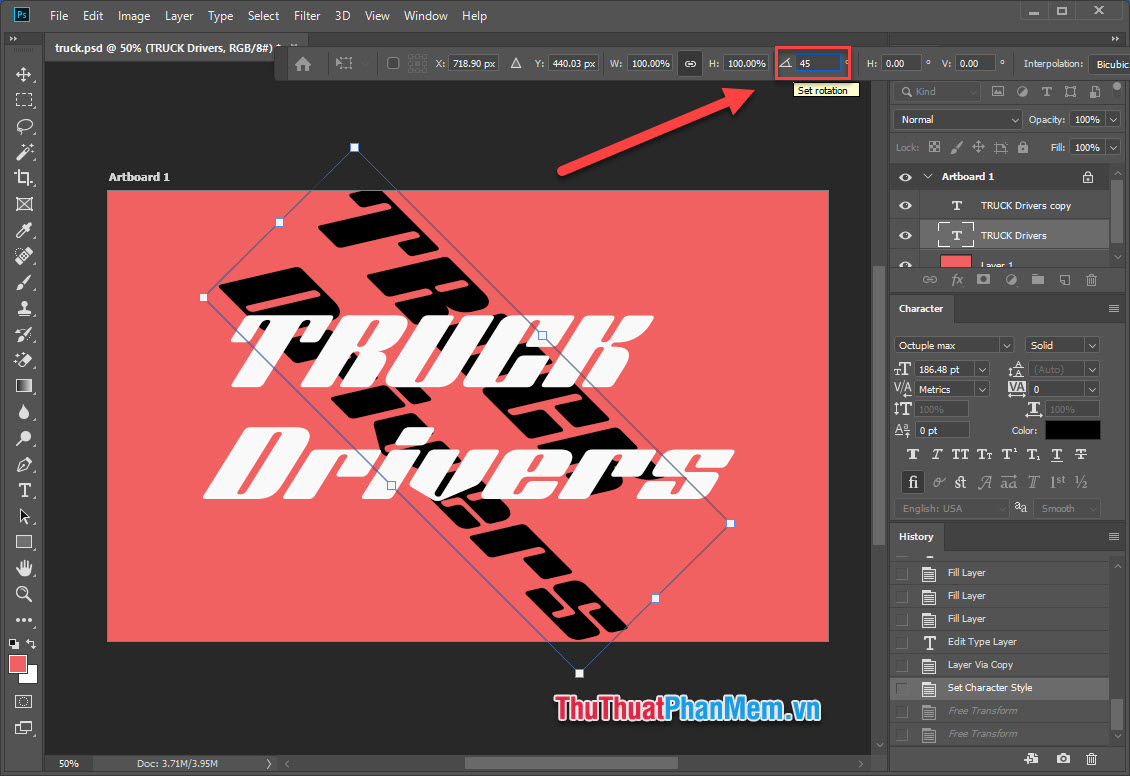
Step 5: Create a shadow effect by repeatedly pressing ' ALT + ← '

Step 6: Select all the new copy layers (from number 2 onwards) and press Ctrl + E to combine them into 1.
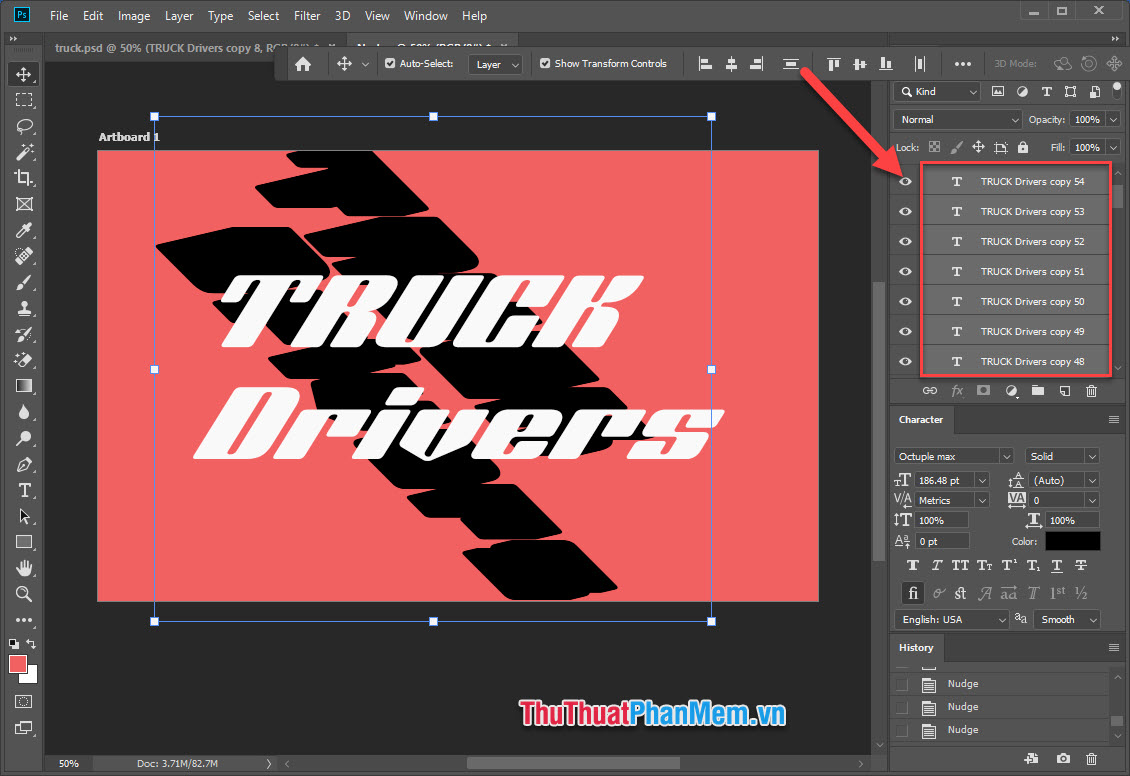
Step 7: Use the Move Tool and rotate the shape as guided above to put the ball in position.
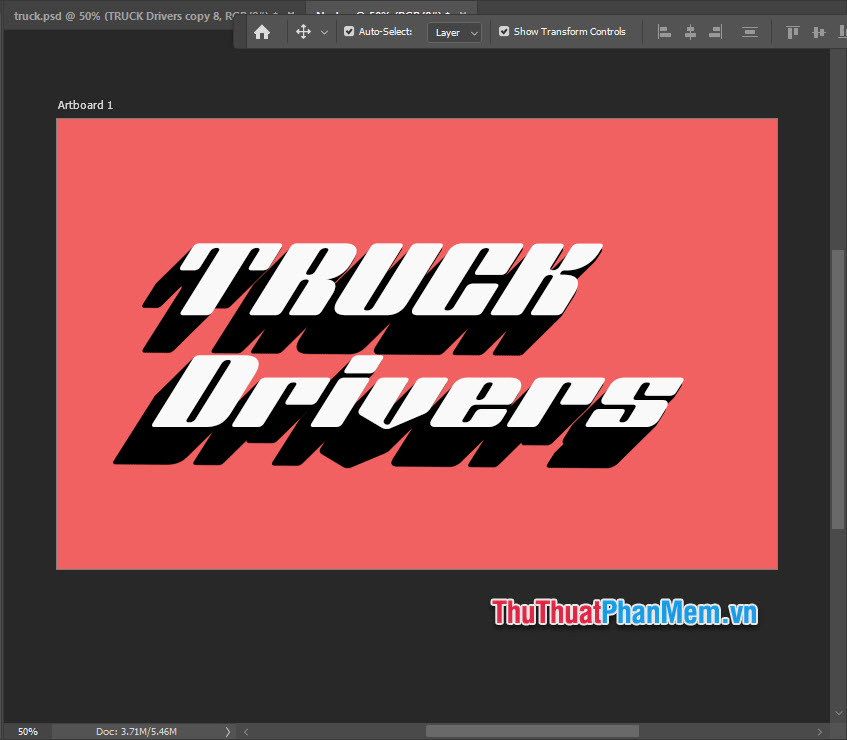
Step 8: Adjust the opacity with Opacity.

Other effects
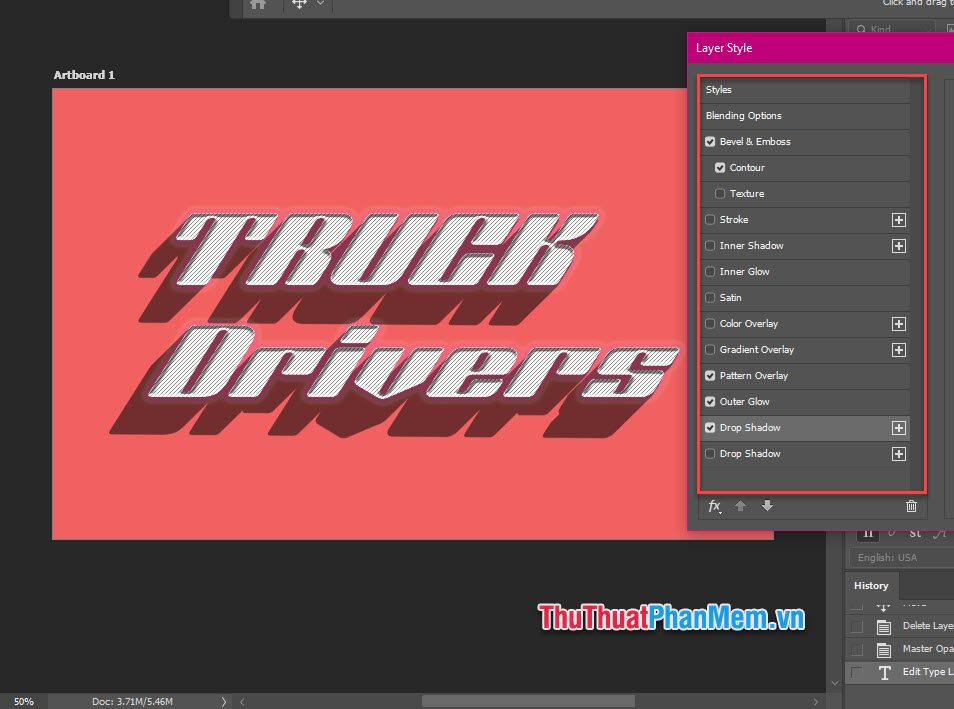
Double-clicking on the Text Layer gives you a selection of different text effects. Discover this amazing function by checking the different types of effects.
3 - Export the file
After creating the desired logo, you begin to export the file so you can use it, following these steps.
Step 1: Select file >> Export >> Export As.

Step 2: Select the PNG file format, enter the size according to your needs >> Export All.

Verify your results:

Conclusion
So above TipsMake. com has shown you how to create a simple but professional logo with Photoshop. This way you don't need to be very familiar with Photoshop and still be able to do it.
Wishing you a successful practice!
FAQ
What should I know about Create a Logo in Photoshop?
Focus on the key features, requirements, limitations, and practical use cases explained in this guide.
How do I get the best results with Create a Logo in Photoshop?
Follow the recommended steps, use current software or information, confirm compatibility, and review settings before major changes.
Are there any risks or limitations?
Potential limitations depend on compatibility, data quality, cost, privacy, support, and how the product or method is used.
Related Articles
 How to Design a Simple Logo in Photoshop8 minutes read
 How to Create a Logo with Midjourney: Clear Instructions8 minutes read
 How to Insert a Logo into a Photo in Photoshop3 minutes read
 How to Create the RSS Feed Logo with CSS3: Step-by-Step5 minutes read
 6 Simple Steps to Design a Logo Using Photoshop9 minutes read
 Using AAA Logo Professional Logo Design6 minutes read
Reader Comments 0
Sign in with email or Google to join the discussion.