How to create Hyper-V virtual machine with Macrium Reflect System Image
Macrium viBoot (Virtual Image Boot) allows you to use the system image of the computer as a Hyper-V virtual machine. It allows you to add files and even install software for your images, update and even upgrade it. After creating the image, you can install Microsoft Office 2016 on the system image, if it is not already installed when you create the image. Using any other image creation software, you need to install Office 2016 on your PC, then re-create the image. But with Macrium viBoot, you just need to create a virtual machine for your image, Office 2016 installation on that virtual machine, then apply the changes to the image.
Next time, you can restore the installed Office 2016 image, even though it is not installed when the original image was created.
Tips:
Perhaps the most practical use for viBoot virtual machines is to update and upgrade Windows in Macrium system images.
This article will show you how to create a Build 14316 image, create a virtual machine for it, install some additional software and eventually upgrade it to Build 14352. By the way, even though the image is made from Build 14316, it will become 14352 when the image is restored to the computer.
This tutorial will show you how to use Macrium viBoot. It was officially released on Friday, July 15, 2016. If you have any questions about Macrium viBoot, you can leave a comment in the comment section below.
Because Macrium viBoot requires Hyper-V activation, it cannot be used in Windows 10 Home edition. Hyper-V is only available in Pro, Education and Enterprise versions.
Part 1: Install Macrium viBoot
1.1) Macrium viBoot requires Hyper-V activation and at least one external virtual switch is created to connect to the network.
1.2) Download Macrium viBoot from: http://www.macrium.com/viboot.aspx . Run the installer
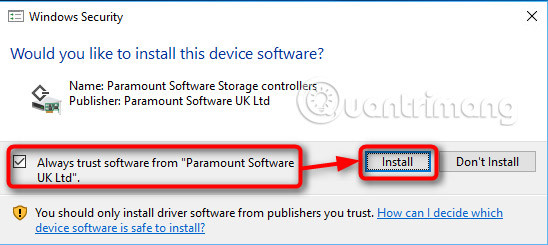
1.3) Launch Macrium viBoot. Note that when running for the first time, viBoot needs to install a virtual SCSI adapter. Select Always trust software from Paramount Software , click Install .
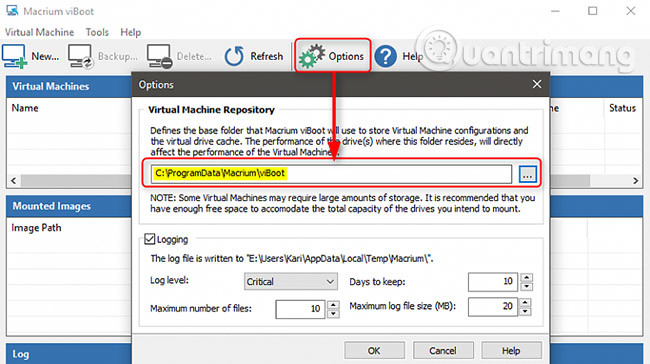
1.4) Launch Macrium viBoot, click Options and change the Virtual Machine Repository location . By default, it is set to C: ProgramDataMacriumviBoot . Turn it into a drive that has enough space to store your virtual machines.
IMPORTANT INFORMATION : Please read before continuing!
If the repository has chosen not enough space to mount the image as a virtual machine, the process will fail.
For example, you have created a system image with Macrium Reflect containing the system drive, with the MBR or EFI system partition and the Windows C system partition:. This drive is a 256 GB SSD or SSD hard drive.
Most of these drives are empty, Windows and your installation software plus personal files only account for 100 GB on 150 GB for free. Your Macrium system image is about 75 GB, but when you mount this image as a virtual machine, the system will view it as a machine with a 256 GB drive.
To mount this image with Macrium viBoot, you will need at least 256 GB of free space in the virtual machine storage, plus some free space for it to work properly. That is the size of the captured drive or important drives, the space used on that drive or the size of the Macrium Reflect system image completely unrelated.
Another example is that you have 1 TB HDD that you partitioned, including 100 GB for Windows ( C: drive), 250 GB for personal files (drive D:) and the rest over 650 GB for games (drive E:) . You will create a Macrium Rreflect system image containing the MBR / EFI system partition plus C: and D: drive .
In this case, your viBoot repository will need more than 1 TB of free space to mount the image as a virtual machine, even if the total capacity of the system partition, C: and D drive : only 350 GB . When this Macrium image is mounted as a virtual machine, the system will see HDD / VHD as a 1TB drive.
Part 2: Create a new virtual machine
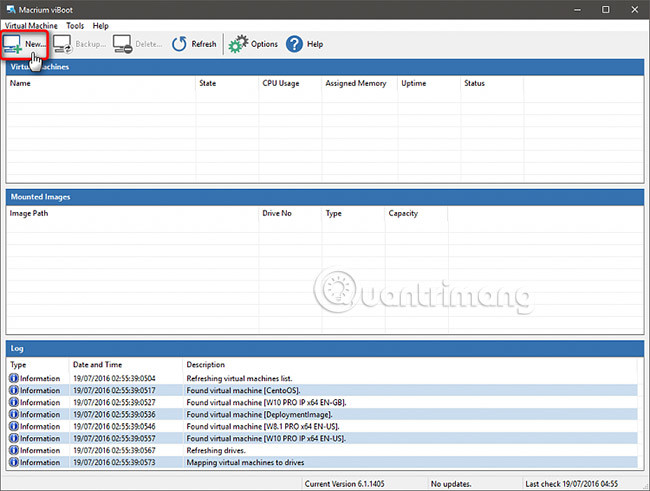
2.1) The user interface is divided into four main sections, including menus and control panels at the top, Virtual Machines window is currently setting up virtual machines, images are mounted to display the current Macrium Reflect image and frames Log
2.2) Select New Virtual Machine .
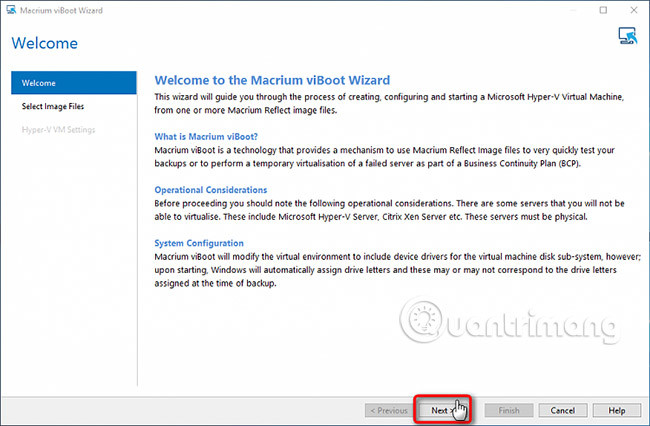
2.3) Click Next .
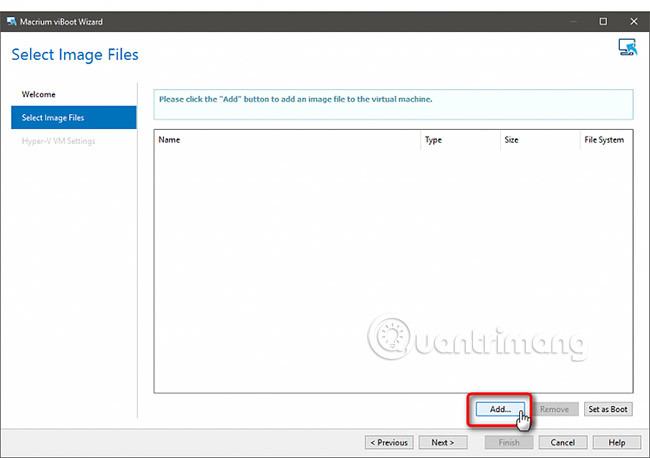
2.4) Click Add , browse to and select any Macrium Reflect image.
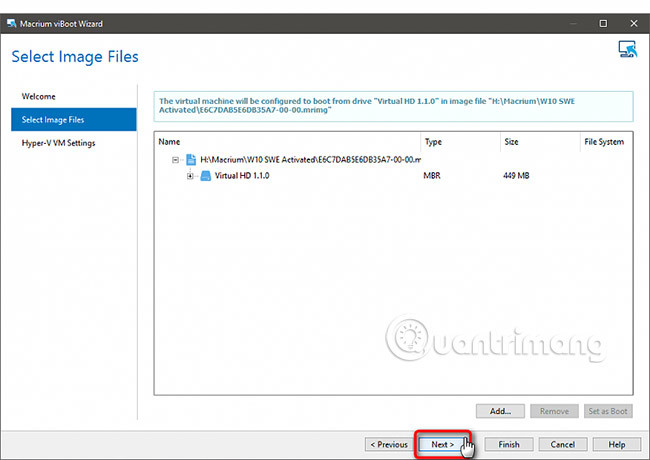
2.5) The selected Macrium image will be displayed in viBoot manager. Click Next .
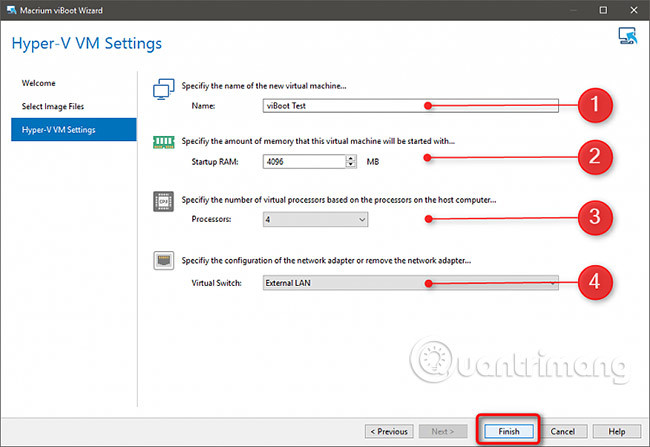
2.6) Name the virtual machine you want (# 1), assign RAM (# 2), determine the number of virtual processors (# 3, you should accept the default value) and select the virtual switch outside from the list (# 4). Click Finish .
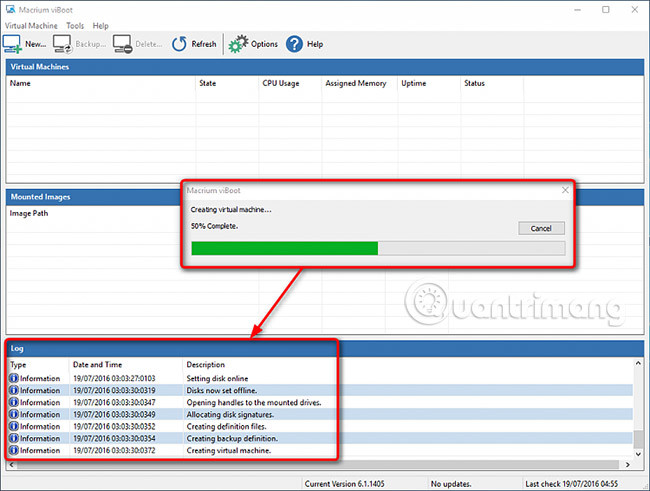
2.7) viBoot will now create a virtual machine using the system image as a virtual hard drive. This will only take a while.
2.8) When finished, the newly created virtual machine will start automatically. Its status can be monitored both by using Hyper-V Manager and Macrium viBoot Manager.
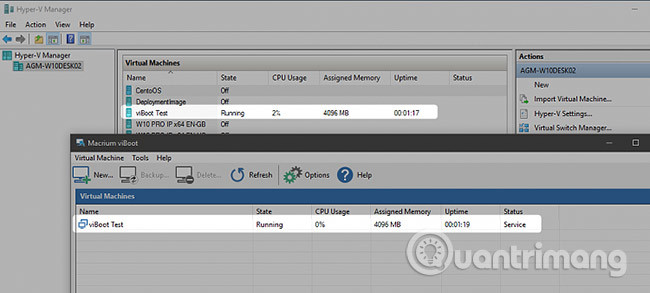
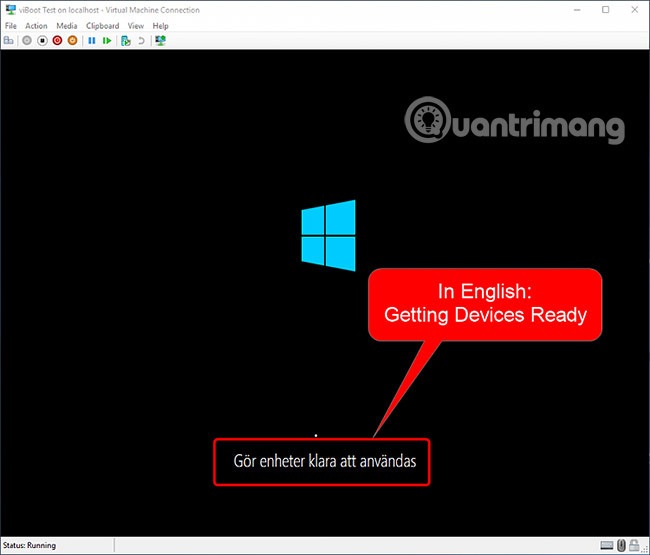
2.9) As with any image that is restored or imported into another hardware, in this case simulating Hyper-V hardware, Windows takes some time to make the device and drivers ready. Below is a screenshot from a Swedish Windows 10 image on the virtual machine viBoot.
2.10) In the future, as long as you want to keep this virtual machine, you can run it from viBoot Manager or Hyper-V Manager. When not in use, viBoot will be in the Notification area, taking up only a few megabytes of RAM.
Part 3: Install software and Windows updates on images
3.1) Example of this Macrium system image is created directly after installing Windows 10 Education Build 14316 and installing some basic software.
Before restoring this image to multiple computers, the author wanted to install additional software for it and upgrade it to 14352, the main reason why the author first used viBoot to create a virtual machine from his image. . This way, the author will not have to install the same software every time the image is restored to the computer, nor does it need to be upgraded.
Now, install Office 2016 and PowerDirector 13 LE now for the virtual machine viBoot.
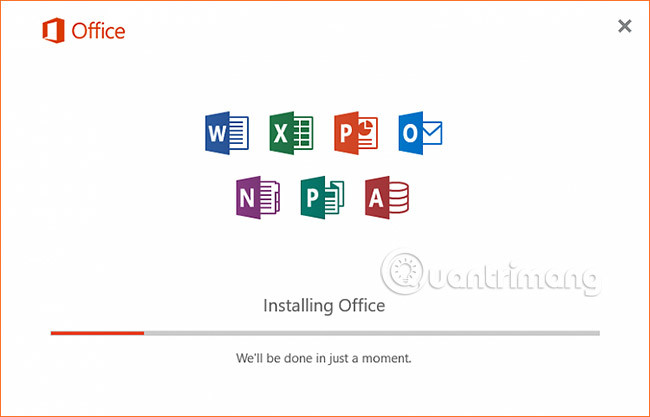
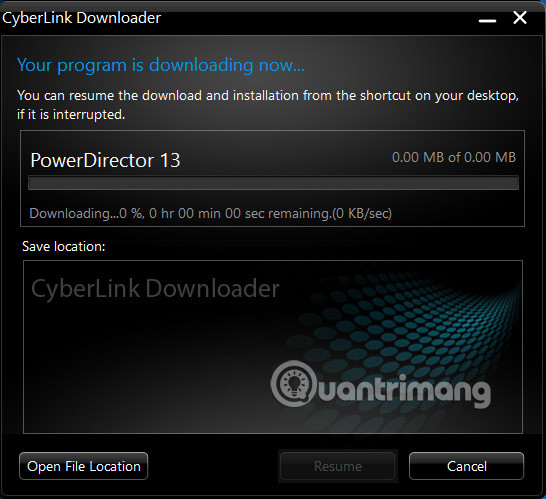
3.2) You can also add individual files and folders to images. Simply copy the files and folders you want to add from the server to the virtual machine.
3.3) Even if you don't need to add any other software or content to your images, the virtual machine also allows you to regularly update Windows with images. In this example, the system image was created from Windows 10 Education Build 14316, a few previous build builders.

Because images in all other aspects are what you need, the image upgrade is easier and faster than the Build 14352 installation (the latest build up to the time of writing) on the PC, customized and installed. Put all software and finally create new updated images.
Part 4: Apply changes to the system image
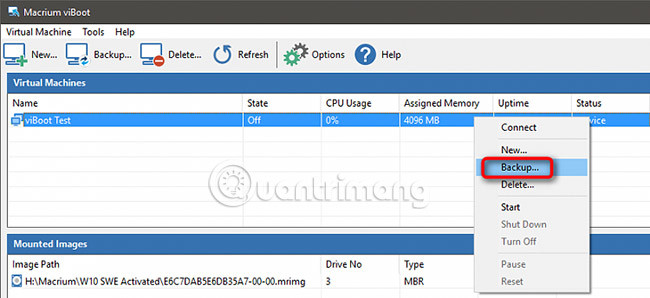
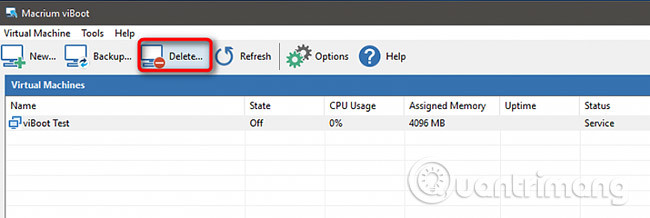
4.1) To apply changes to the image, turn off the virtual machine, right-click it and select Backup in case you want to keep it in viBoot available for later use, or press Delete if you want to apply it instead Change and then delete, unmount the image. Do not delete the virtual machine using Hyper-V Manager!
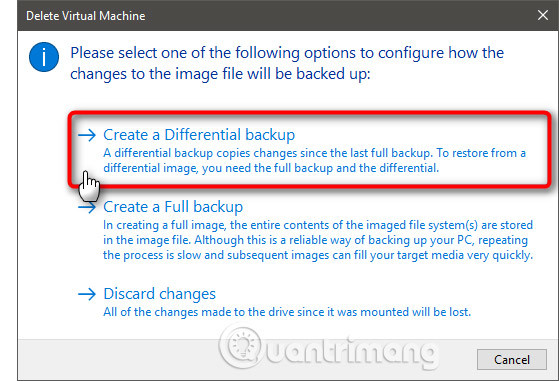
4.2) Select Create a Differential backup (in the paid version, you can also use Incremental backup) to apply the changes you have made to the image (small file, fast process). Select Create a Full backup if you want to create a new image (it takes longer with a larger file size). If you only check everything and nothing to save, select Discard changes . Click OK .
4.3) The image file will be created, you will receive a message like this:

4.4) Install some updates for Windows 10 images, only a minute and a half to create the differential image.

You will receive some notifications on the screen during the process. Below is a screenshot from creating a full backup from one of the Windows 10 settings.


Tips:
ViBoot virtual machine will work without problems, as long as you do not delete it. When turned off, virtual machines will naturally not use any of your host resources.
You can create a viBoot / Hyper-V virtual machine as soon as you create a Macrium system image, then update it constantly, install the software, add personal files and folders, and finally, when you need it Restore to the computer, apply the changes and restore it.
This way, you can always have updated images with all Windows updates and updates.
4.5) Macrium records newly updated images in the same folder where the original images are stored. If you make a full backup from the virtual machine viBoot, you can either keep the original or delete the original and only keep the updated image. It depends on you.

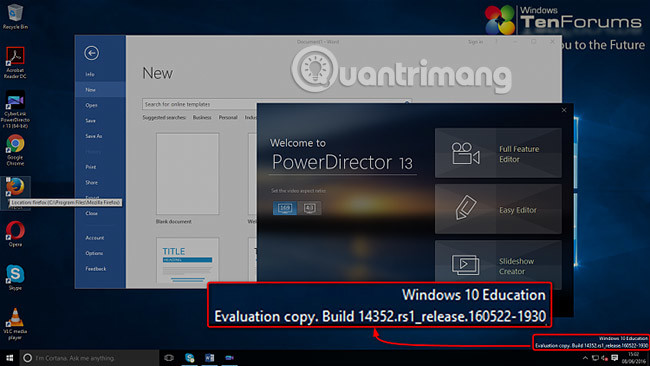
4.6) Everything is done! You can use updated images to restore Windows to any device. All additional software in this case is Office 2016 and PowerDirector, Windows has been upgraded from Build 14316 in the original system image to Build 14352.
See more:
- How to create and restore System Image Backup with Macrium Reflect
- Create virtual machines with Hyper-V on Windows 8 and Windows 10
- Instructions for using Hyper-V to run Linux Distro on Windows 10