Table of Contents
This guide explains how to convert a CSV File to Excel, with clear steps, practical tips, and important checks before you begin.
How to open a CSV file directly in Excel and save as Save As
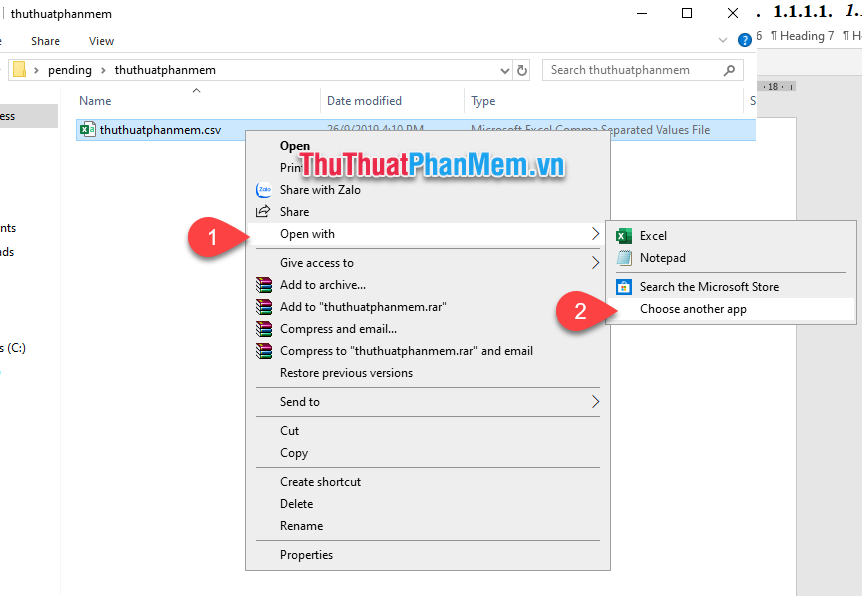
Step 1: In the directory to save the CSV file, right-click and select Open with (1) , select Choose another app (2) . If your computer already has the Excel option available as shown in the image below, click Excel.
Step 2: The selection window appears, select the item to open using Excel software (1) => click the OK button (2) .

Step 3: The CSV file is opened by Excel software but the format remains the same.

Step 4: Choose File (1) => Save as (2) => Select the folder where you need to save the Excel file (3) .

Step 5: Save As window appears, in the Save as Type section select the file format that you need to convert. xls or. xlsx.
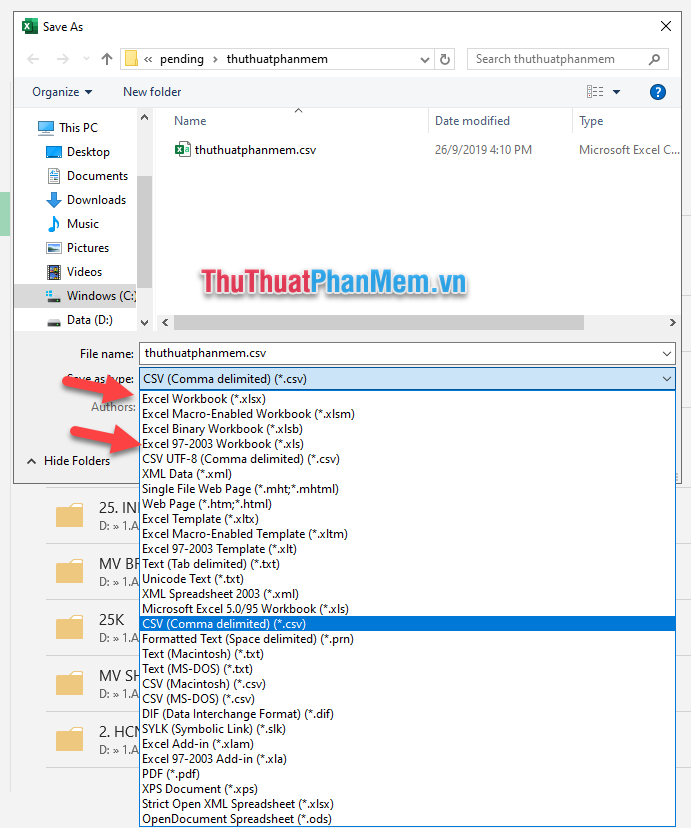
The result is an extra Excel format file:

Convert CSV file in Excel as external data
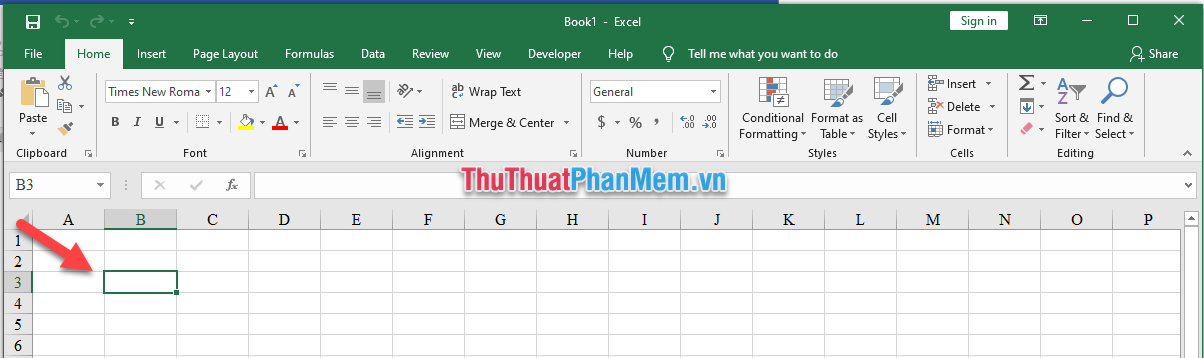
Step 1 : You open a new Excel spreadsheet. You select any cell that you want to import data from CSV or TXT.
Step 2 : Select Data tab (1) -> select Get External (2) -> and then select From Text (3) .

Step 3: The Import Text File window appears, navigate to the CSV file to be converted, select the file and click the Import button.

Step 4: The Import Text Wizard window appears.
Select Delimited and Start import at row 1 if Excel does not select it first. If your data has a title then select My data has headers , otherwise uncheck it.
The window below will show before the first items in the CSV file. Click the Next button.

Step 5: You choose Delimiters (can select multiple items) as the characters that convention to split columns. For example, Ad select comma (comma) as a convention character separating content separated by commas into cells. You check the data preview in the bottom window has met your requirements, then press the Next button.
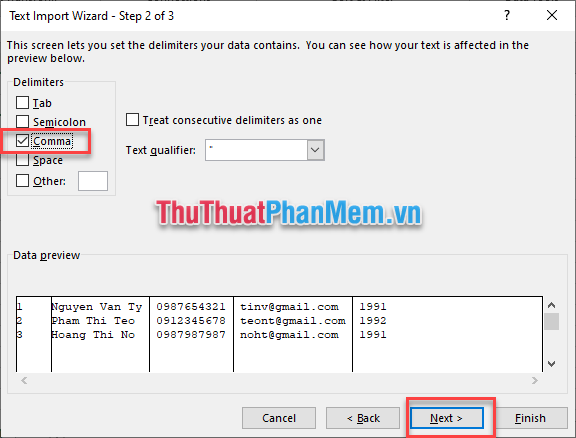
Step 6: You can adjust the format of each data column by clicking on each column and selecting Column data format .
- General : the default format;
- Text : text format;
- Date : date format;
- Do not import column (skip) : do not move this column to Excel table.

After adjusting, click Finish .
Step 7: The Import Data window appears to select the location for the imported data. Since I have chosen from Step 1 , now I just press OK to confirm.

And this is the result:

Column B, C, D format Text, year of birth is not converted into Excel files because I choose Do not import column. You can now use Excel's built-in tools to handle spreadsheets.
Note: Excel cannot convert values to exact dates.
In addition to the above two ways, you can use the online converter to follow the link: https://onlineconvertfree. com/vn/convert-format/csv-to-xls/
You only need to upload the CSV file and after the conversion is finished, you can download the Excel file to your computer Good luck!
FAQ
What should I know about Convert a CSV File to Excel?
Focus on the key features, requirements, limitations, and practical use cases explained in this guide.
How do I get the best results with Convert a CSV File to Excel?
Follow the recommended steps, use current software or information, confirm compatibility, and review settings before major changes.
Are there any risks or limitations?
Potential limitations depend on compatibility, data quality, cost, privacy, support, and how the product or method is used.
Related Articles
 Simple Way to Convert Excel Files to PDF: Exel to PDF8 minutes read
 How to Convert a Word File to Excel5 minutes read
 Convert Word File to Csv File: How to Convert Word to a Csv File4 minutes read
 How to Convert Excel Files to PDF Online Using Google Drive2 minutes read
 How to Convert Excel Files to PDF for Free, Extremely Simple5 minutes read
 How to Convert Excel to Dat3 minutes read
Reader Comments 0
Sign in with email or Google to join the discussion.