Table of Contents
This updated guide examines Click: How to Clear the Thumbnail Cache in Windows and organizes the essential facts, background, and practical takeaways in clear American English.
Method 1of 3:
Using Disk Cleanup (All Windows Versions)
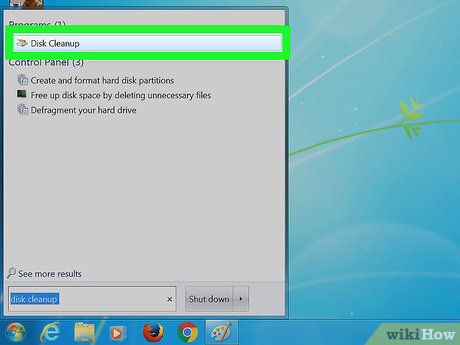 Open Disk Cleanup. Click the Start
 button, typedisk cleanup, and then select the matching result. The Disk Cleanup application will open.
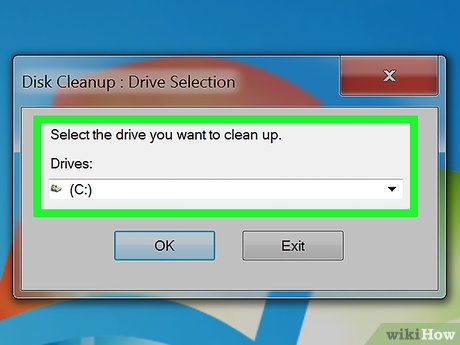 Select the current hard drive that Windows is installed on, if prompted.
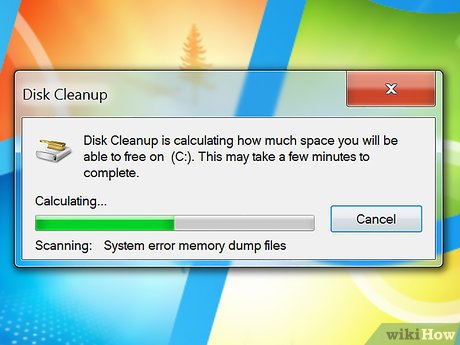 Wait for Disk Cleanup to analyze your computer. Your computer will be assessed for what type of files can be removed and the amounts of each file type on your computer.
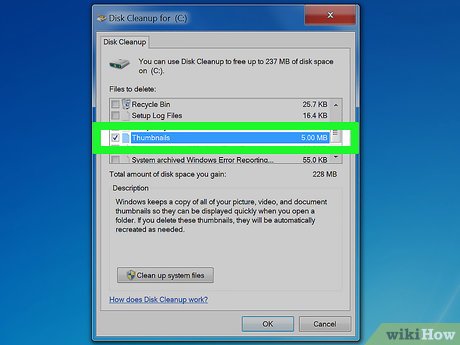 Opt to remove the thumbnail cache. Check the "Thumbnails" checkbox in the list.
 Initiate Disk Cleanup. Click theOKbutton at the bottom.
 Confirm the warning. ClickDelete Filesin the warning message. Doing so will initiate the file cleanup process.
Method 2of 3:
Manually Clearing in Windows 10 and 8
 Open File Explorer. Click the File Explorer
 taskbar icon. It looks like a file folder.
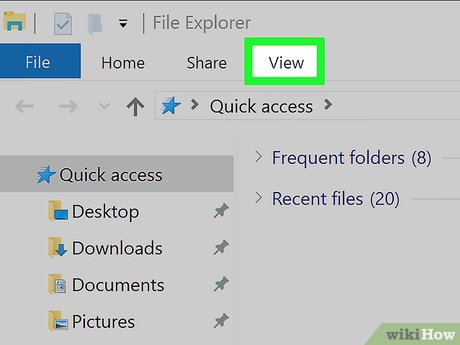 Go to theViewtab at the top of the ribbon.
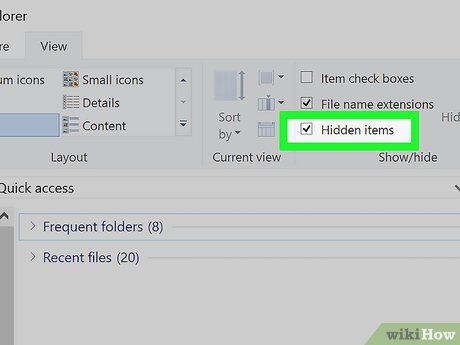 Show hidden files and folders. Check the box next to "Hidden items". It'll be in the "Show/hide" portion of the ribbon.
- You may also want to enable item checkboxes for easier file selection.
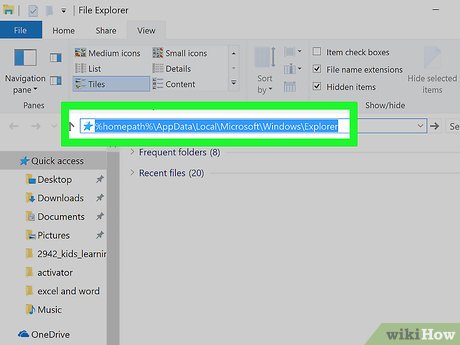 Go to%homepath%AppDataLocalMicrosoftWindowsExplorerusing the address bar. Click the address bar, copy and paste the code, and then hit the↵Enterkeyboard key.
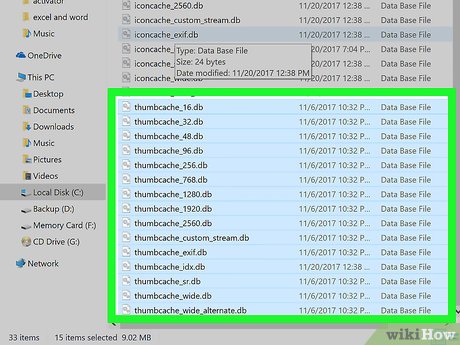 Select all files with names that begin with "thumbcache". Check the boxes next to any file that begins with the word "thumbcache". If you don't have checkboxes enabled, press and hold theCtrlkey while clicking on multiple file listings.
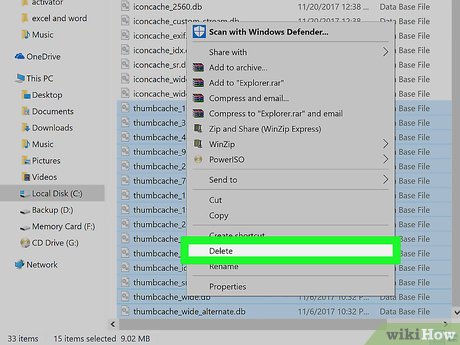 Delete the files. Right-click anywhere over a highlighted file and clickDelete.
- Alternatively, click theHometab in the ribbon and then choose the "Delete" option.
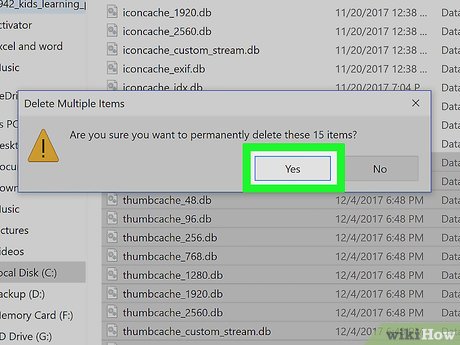 Confirm the warning message, if prompted. Click theYesbutton.
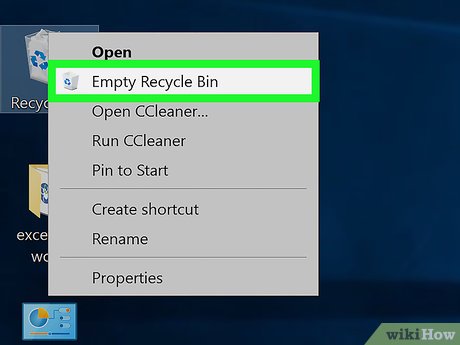 Empty the Recycle Bin. If you've set your deleted files to go to the Recycle Bin before being permanently deleted, you'll need to empty the Recycle Bin to permanently delete the thumbnail cache.
Method 3of 3:
Manually Clearing in Windows XP
- Show all hidden files and folders.
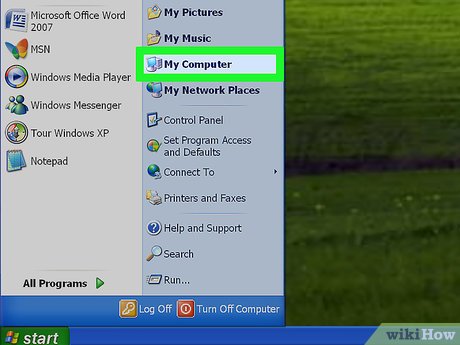
- Open Windows Explorer. Click the start button at the bottom-left and then click "My Computer".
- Click the "Tools" menu at the top of the window.
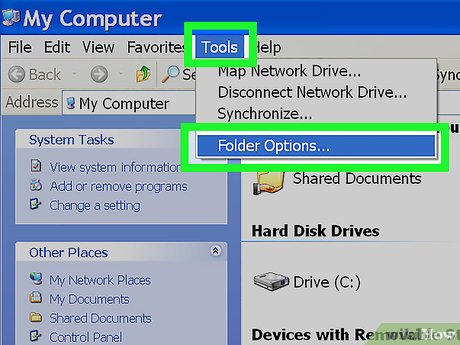
- Go to theViewtab.
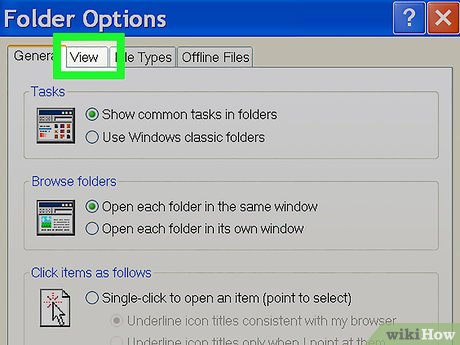
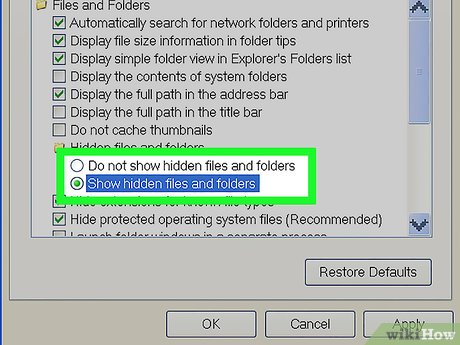
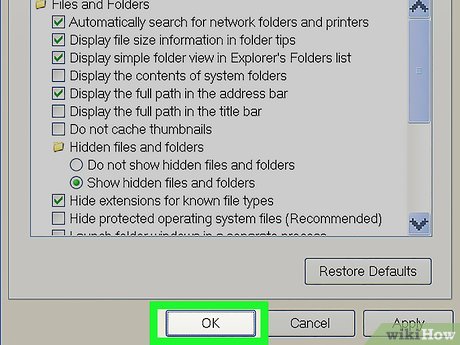
- Enable viewing of hidden items. Click the radio button next to "Show hidden files and folders".
- Show protected operating system files. Uncheck the box next to "Hide protected operating system files".
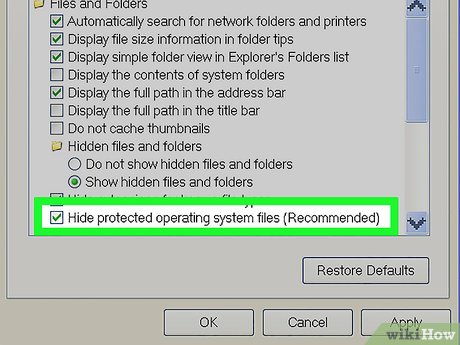
- Confirm the warning prompt. Click theYesbutton.
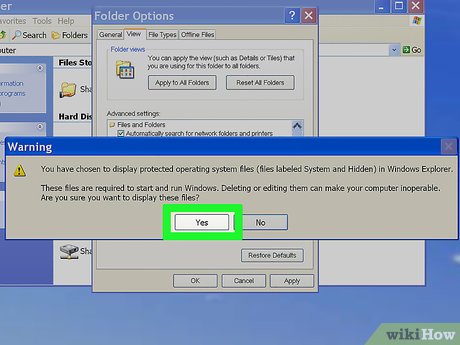
- Save your changes. Click theOKbutton to close the Folder Options box and save your new file viewing settings.
- Open Windows Explorer. Click the start button at the bottom-left and then click "My Computer".
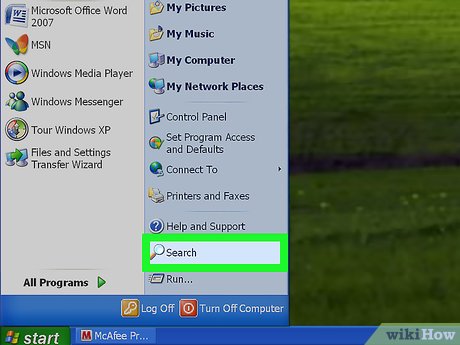 Launch the search feature. Click the start button at the bottom-left and click "Search". It has a magnifying glass icon to the left of it.
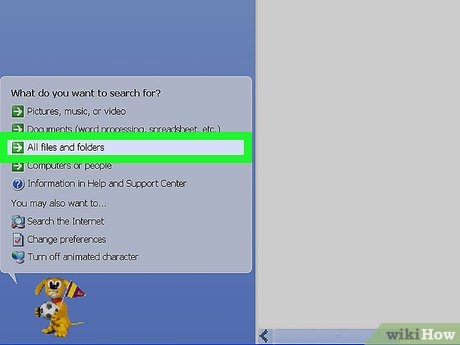 Click the "All files and folders" option. This is under the "Search Companion" section in the left pane.
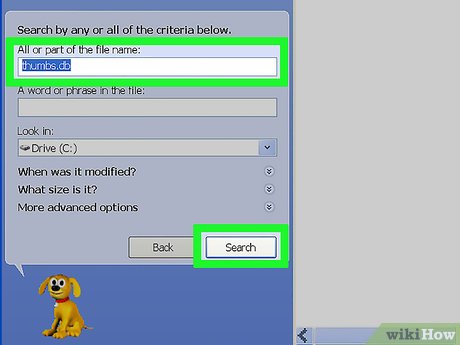 Search for Thumbs.db. TypeThumbs.dband click theSearchbutton to begin the file search.
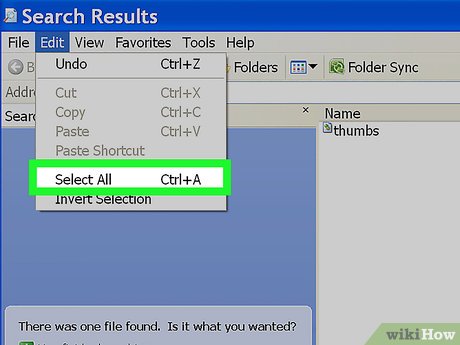 Select all items. Click the "Edit" menu at the top and then click "Select All".
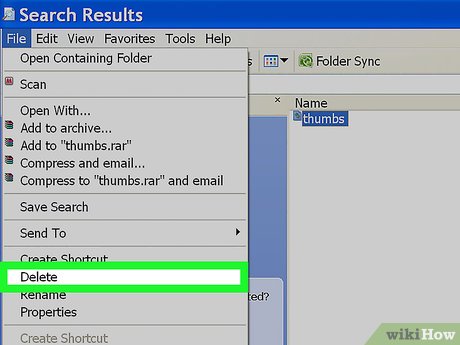 Delete all of the selected files. Click on the "File" menu at the top-left and click "Delete".
- The files will be sent to the Recycle Bin based on your deletion settings. Make sure to check it and empty it if the files have been moved there.
FAQ
What is Click: How to Clear the Thumbnail Cache in Windows about?
It provides a structured overview of click, explains the main context, and highlights practical takeaways for readers.
Why does this topic matter?
Understanding the main concepts helps readers evaluate the issue, avoid common mistakes, and make better-informed decisions.
How should readers use this information?
Use the guidance as a practical starting point, confirm details that may have changed, and follow current product, safety, or security recommendations.
Related Articles
 minutes read
 How to Delete and Reset the Cache Thumbnail on Windows 106 minutes read
 Cache: What It Is and How to Clear It in Windows 104 minutes read
 Prevent Windows 10 from Deleting the Thumbnail Cache4 minutes read
 Cleaner for PC Pro Clear Cache: Complete Guide4 minutes read
 What Is RAM Cache?6 minutes read
Reader Comments 0
Sign in with email or Google to join the discussion.