How to Clear Temp Files in Windows 10
Windows 10 creates temporary files while you use certain apps (such as Microsoft Word) to improve your experience. However, your PC can create hundreds of temporary files in a day, which may fill up your hard drive. If you have a document...
Table of Contents
Method 1 of 3:
Using Disk Cleanup
-
 Open Disk Cleanup. You can search 'disk cleanup' in the search bar in the taskbar and click the first result, which is the app. This is the easiest and least involved method for cleaning up temporary files on your Windows 10 computer.
- You can also press the Windows key+S to open the search function if you can't find it in the taskbar.
-
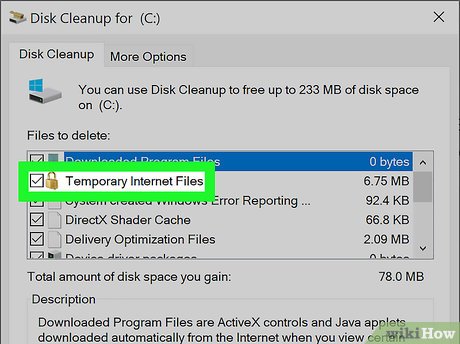 Click to check the boxes next to "Temporary Internet Files" and "Temporary Files." You'll see how much space they will free up along the right side of the columns.
- Suggested boxes to delete are checked by default; you can leave these checked and delete these files or you can click to uncheck the box and not delete these files.
-
 Click Delete Files. Click 'OK' to confirm the action when a box pops up. When you continue, that box will disappear and you'll see a progress bar of the deletion, which will disappear when it's done.[1]
Method 2 of 3:
Using Settings
-
 Open your Windows Settings. You can click on the Start icon and then the gear to open Settings.
-
 Click System. It's the computer icon.
 -
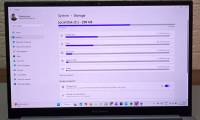
 Click Storage. This is near the bottom of the menu on the left.
 -
 Click the drive where Windows 10 is installed. It usually has a Windows logo over the drive icon and might be called 'This PC.'
 -
 Click Temporary Files. The number here represents how much space the temporary files are taking up. The next page shows you all the files that are considered temporary files, including files in the Downloads folder, files in the Recycling Bin, and thumbnails.
 -
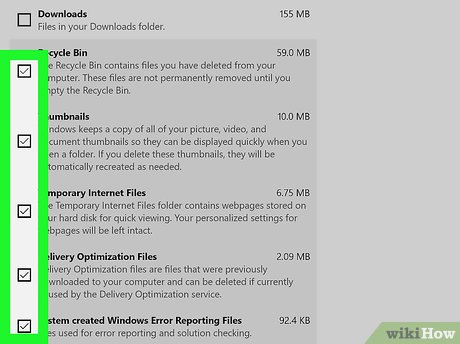 Click to check the boxes next to the files you want to delete.
 -
 Click Remove files. You'll see a progress bar of the deletion.[2]
Method 3 of 3:
Clearing Temporary Files Manually
-
 Press ⊞ Win+R to open the Run box. This is the most involved method of clearing your temporary files.
 -
 Type '%temp%' in the Run box and press ↵ Enter. You'll be directed to the folder that contains all the temporary files.
 -
 Select all files and folders. You can click the first file, press and hold ⇧ Shift and click the last file, or you can click the first file and press Ctrl+A to select them all.
 -
 Right-click anywhere in the file and click Delete. You will need an administrator account to do this.
- All those files are moved into the Recycle Bin and can be restored if needed.
Was this article helpful?
Your feedback helps us improve.
Related Articles
 Core Temp - Computer CPU temperature monitoring tool5 minutes read
 How to Clear System Cache on PC or Mac2 minutes read
 Delete these temporary Windows folders to reclaim precious storage space7 minutes read
 How to Delete Temporary Files and Delete Prefetch Files from Your Computer3 minutes read
 How to Clear Cache on Mac4 minutes read
 Clear the Dropbox cache Windows and Linux to free up memory space7 minutes read
Reader Comments 0
Sign in with email or Google to join the discussion.