How to restrict access to Settings and Control Panel Windows 10
To change the system and interface customizations on the computer, we will access Settings and Control Panel. The problem here is that, in case you lend your computer to another person or a system administrator, it is necessary to prevent making system changes or unauthorized interfaces. .
To do that, we can completely block access to Settings and Control Panel, and can only open with Administrator rights. The following article will show you how to do it in detail.
Method 1: Restrict access to Settings using Group Policy
Step 1:
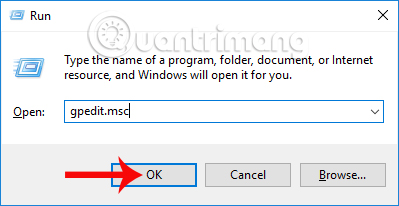
Press Windows + R key combination to open the Run window, then you enter the keyword gpedit.msc click OK to access.
Step 2:
In the Local Group Policy Editor interface, we access the User Configuration path > Administrative Templates> Control Panel .
Then click on the Prohibit access option to Control Panel and PC setting s (Block access to Control Panel and PC Settings).

Step 3:
The Prohibit dialog interface access to Control Panel and PC settings appears. Select here on Enabled . Then click Apply> OK to save.
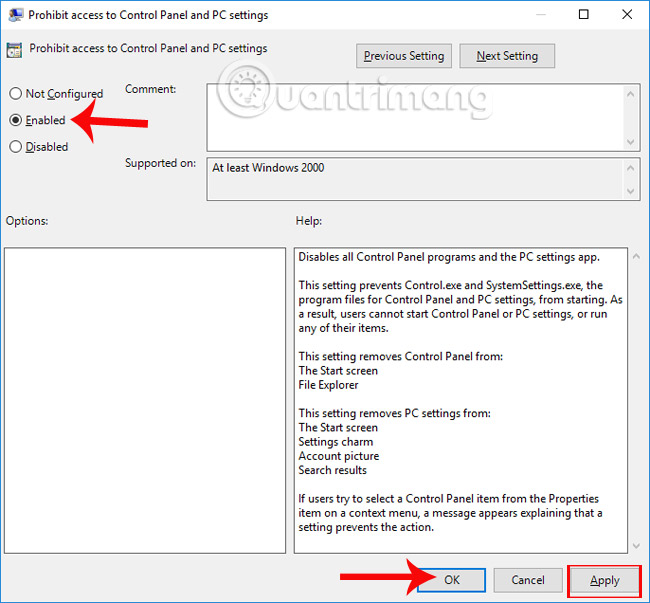
So we have enabled the feature to block access to Settings or Control Panel on Windows 10. When users return to the main interface and click on Settings, you will get the message as shown below.
It can be temporarily understood that this action is canceled by the right to restrict the impact on the computer. Please contact the system administrator to resolve the issue.

In case you want to cancel the setting above we just need to switch from Enabled to Disabled .
Method 2: Block access to Settings via the Registry
This is applicable to Windows 10 Home versions, Single to Pro.
Step 1:
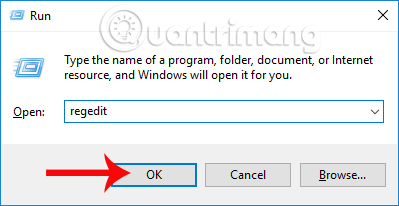
Open the Run dialog box with the Windows + R key combination, then enter the regedit keyword, click OK to access.
Step 2:
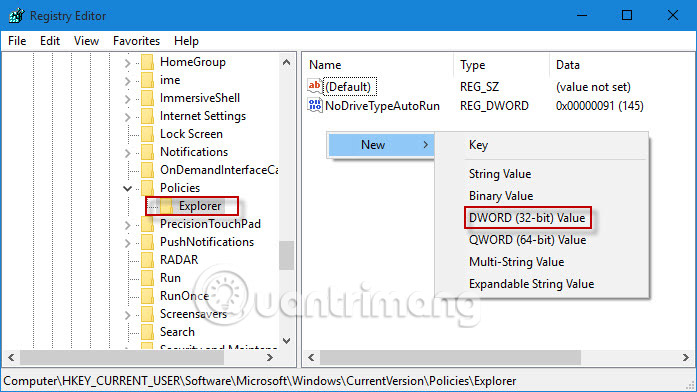
In the Registry Editor interface, we access the directory path below.
HKEY_CURRENT_USERSoftwareMicrosoftWindowsCurrentVersionPoliciesExplorer
Here, right-click on the Explorer folder and select New> DWORD (32-bit) Value .
Step 3:
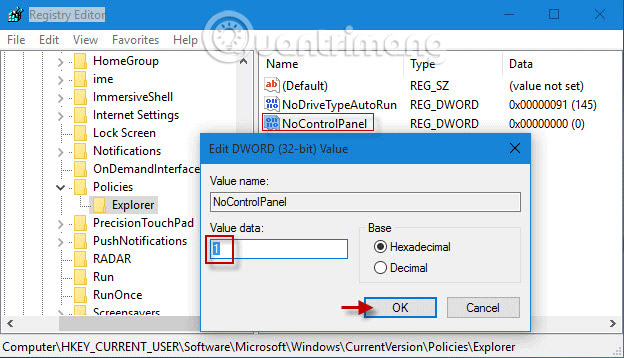
Next, the user renames NoControlPanel and press Enter to save. Finally, double-click NoControlPanel and change the value from 0 to 1 at Value data as shown below.
When you exit the Registry Editor interface and access the Settings, you will also receive a message like the one above.
To cancel the blocking , the user follows the above actions but will return to the original value 0.
A small trick that helps you prevent actions to change system settings, applications in Settings and Control Panel. The way to cancel blocking is also very simple, as long as we move the current setting back to the old setting, follow the above article to finish.
I wish you all success!