How to enable Enhanced Anti-Spoofing Windows 10?
The problem of attacking computer systems, stealing data is always a concern for anyone. With Windows 10 computers, big tech Microsoft has enhanced security features such as using Windows Hello, or using fingerprint scans on Windows 10, . But with today's advanced system hacking technology It seems that these features are not enough to make sure your computer does not fall into the sights of snoopers.
Therefore, to enhance the security of the Windows 10 operating system, the manufacturer has provided additional features that are Enhanced Anti-Spoofing. As soon as the user activates this feature, it will require regular users on the computer to use face detection on supported devices. So how can I enable this feature? Please follow the detailed instructions of the Network Administrator below.
Note, this feature is only suitable for devices running Windows 10 that support face recognition.
1. Turn on Enhanced Anti-Spoofing via Registry Editor:
Step 1:
Press the Windows + R key combination to open the Run dialog box. After that, we enter the keyword regedit and then click OK to access.

Step 2:
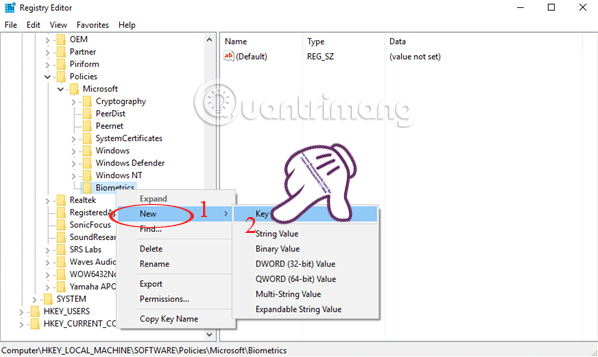
The interface of the Registry Editor window appears. We find the directory under the path below:
HKEY_LOCAL_MACHINE> SOFTWARE> Policies> Microsoft> Biometrics
Then, right-click on Biometrics select New> Key .
Step 3:
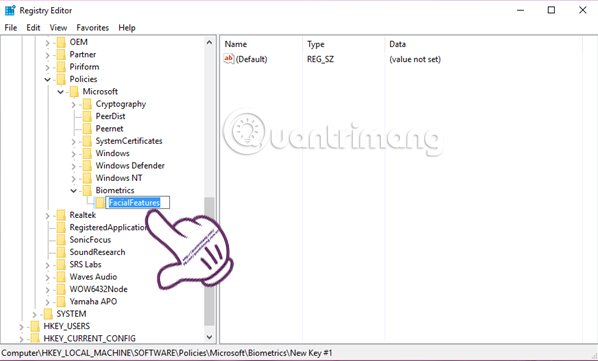
We will name the new Key, FacialFeatures .
Step 4:
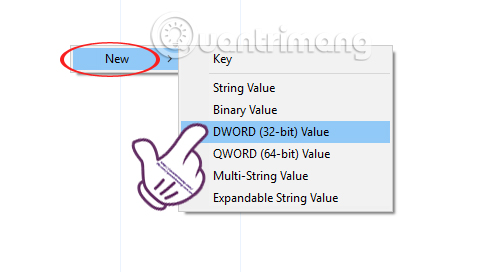
Next, click on FacialFeatures . On the left interface, right-click and choose New> DWORD (32-bit) Value .
Step 5:
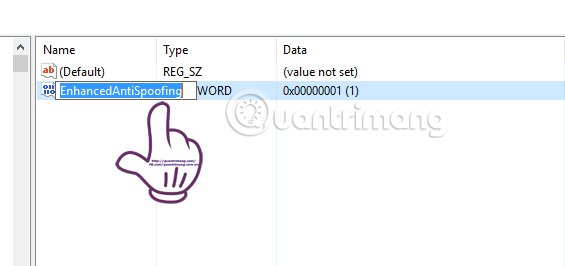
Then you name the DWORD value EnhancedAntiSpoofing .
Step 6:
After creating, we double click on that value to change Value Data value from 0 to 1 and then click OK to save.
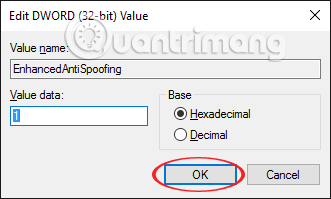
Finally, restart the system so that Enhanced-Anti Spoofing is enabled. If you do not want to use this feature, entering EnhancedAntiSpoofing changes the value from 1 to 0.
2. Enable Enhanced Anti-Spoofing via Group Policy:
If you are using Windows 10 Pro or Windows 10 Enterprise operating system, we can also enable Enhanced Anti-Spooting with Group Policy.
Step 1:
You also press the Windows + R key combination to open the Run dialog box. Then enter the command gpedit.msc and click OK to access.

Step 2:
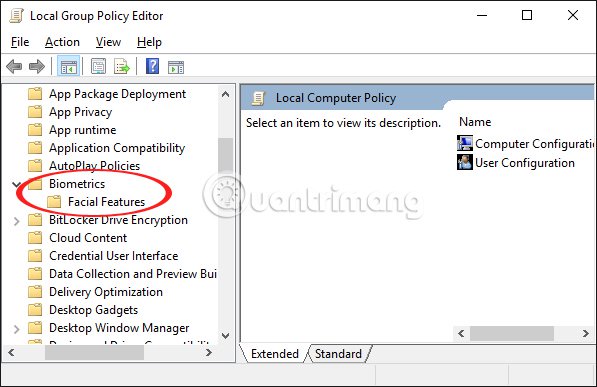
In the Local Group Policy Editor interface , we proceed to open the folder according to the following path:
Computer Configuration> Administrative Templates> Windows Components> Biometrics> Facial features
Step 3:
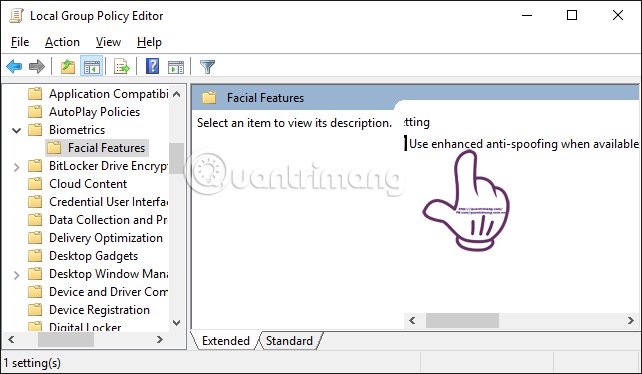
Click on the Facial Features section and look at the interface on the right. Double click on the Use enhanced anti-spoofing when available line .
Step 4:
Soon a new dialog box appears. Select the Enabled item, click Apply, then OK to save.
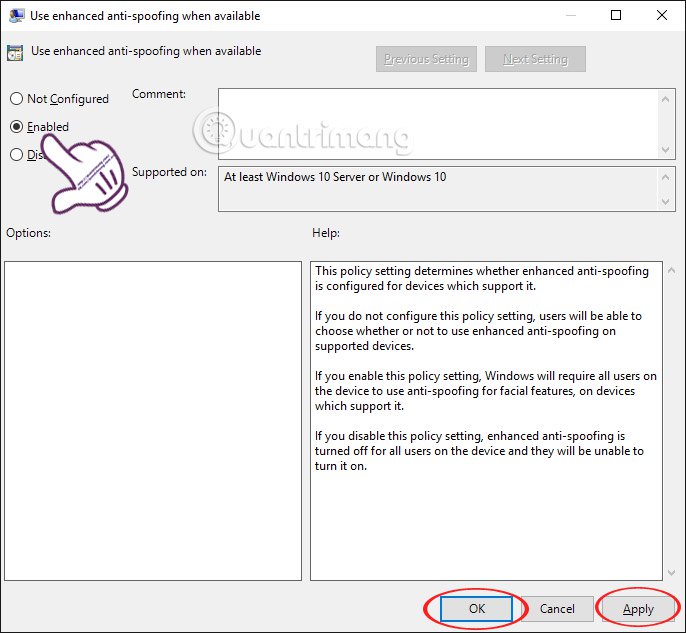
Finally, we just need to restart the computer to use the Enhanced Anti-spoofing feature. To disable, follow the above actions but click Disabled.
The above is a step-by-step detailed guide on how to enable Enhanced Anti-Spoofing on Windows 10 through Registry Editor or Group Policy. Depending on the line of computers Windows 10 supports facial recognition that you follow in 1 of 2 ways to suit each machine.
Refer to some of the following articles:
- When and how to defragment hard drives on Windows 10?
- Instructions for activating and using Remote Desktop on Windows 10 computers
- Fix Windows 10 error with just one click with FixWin
I wish you all success!