How to create USB BOOT standard UEFI - GPT standard
Create a rescue USB, USB boot helps us to use the computer and access in case of computer failure win or virus. However, for booting Windows to succeed, the job of creating a USB boot is very important and we must determine whether the USB Boot is a UEFI - GPT or Legacy - MBR standard before proceeding to create an archive.

In the following article, TipsMake.com guides you how to create the UEFI - GPT standard USB Boot quickly and easily.
Method 1: Create USB UEFI Standard Boot - GPT manually
In this way, we create usb boot by formatting and setting the usb to UEFI - GPT standard and copy the Windows installer to the computer. Proceed as follows:
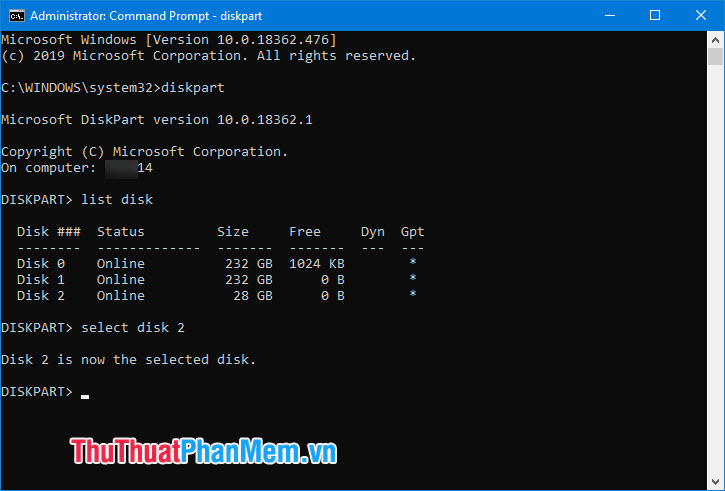
Step 1: You connect the USB to the computer and run CMD with Administration permission. On Windows 7, press Windows + R => cmd and Enter, and on Windows 10, search and search for the keyword cmd => right-click and select Run as administrator .

Step 2: You continue to enter the following command and press Enter .
diskpart

Step 3: Enter the following command and press Enter .
list disk
You select your correct USB device in the list of drives as shown below. In my article I use 32 GB USB so the list is a device with the name Disk 3 with a capacity of 28 GB. Then enter the following command to select the drive:
select disk X (where X is the serial number of your USB drive)

Step 4: You continue to enter the following commands.
clean (this command to format usb)
con gpt (used to convert usb format MBR to GPT)
create partition primary (create boot partition for USB)
format quick fs = fat32 label = TENUSB (USB format with FAT32 format. TENUSB is the name you set).
assign (save settings for USB boot)
exit (exit DISKPART)

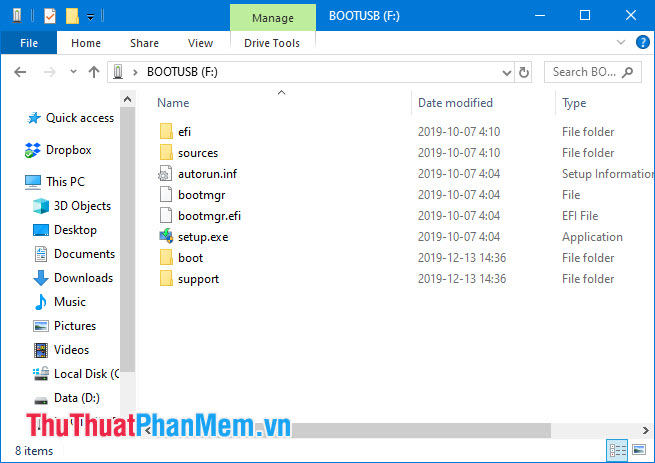
Step 5: You proceed to extract the Windows installation, Hiren Boot rescue disk . with ISO format and copy the entire extracted file to USB Boot and you're done.

Method 2: Create a UEFI - GPT USB Boot with Rufus
Step 1: Download the Rufus software at https://rufus.ie/

Step 2: Open Rufus and select the USB device to install Boot in Device (1) . Next, select the path to the USB Boot installer in the SELECT (2) section .

Select the downloaded installer on your computer (1) and click Open (2) to open it.

Step 3: You set up additional parameters such as GPT (1) , UEFI (2) to create Boot with UEFI - GPT standard. To name the USB, change it in the Volume label (3) section . The File System (4) section you should leave default is FAT32 and Cluster size (4) is 16 kilobytes. After setup is complete, press START (5) to begin.

Step 4: A warning to delete all USB will appear, click OK to delete.

USB creation process will begin. The time it takes to create quickly or slowly depends on the writing speed of the USB stick and the size of the Boot to USB flash drive.

Step 5: After creating the successful Boot installer, exit the software and disconnect the USB. Your USB Boot is completed and can be plugged into another computer to boot.

With the guide to create a standard UEFI - GPT USB Boot in the article, readers can easily create an extremely convenient USB boot to use in times of need. Good luck!
You should read it
- ★ Concept of UEFI standard in computers
- ★ How is GPT and MBR different when partitioning a drive?
- ★ How to check and access UEFI settings on Windows 10
- ★ Create USB Boot with 1 Click MultiBoot v5.0, Boot both UEFI and Legacy standards
- ★ New USB 4 standard specifications: 8 times the speed of USB 3.0, 5GB / s data transfer