How to Change Themes on Ubuntu with Gnome Tweak Tool
Part 1 of 3:
Installing GNOME Tweak Tool and Shell Extensions
-
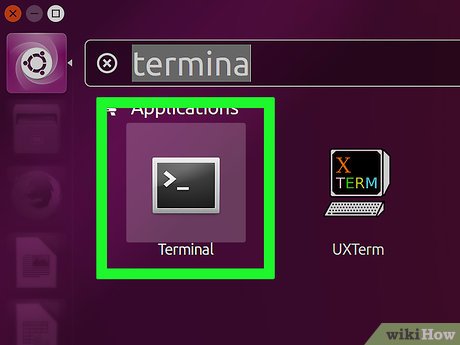
 Press the Control+Alt+T keys together to open the terminal.
- Linux keyboard shortcuts are the same using a Mac or PC keyboard.
-
 Type sudo apt-get install gnome-tweak-tool into the Terminal, then hit ↵ Enter. This will contact the official repository to download the GNOME Tweak Tool package. When prompted, enter your account (current) password and the download and installation will proceed.
- The "sudo" command grants security privileges of the super user. The apt-get command handles the Advanced Packing Tool (APT) to install the package.
- Installing packages requires an active network connection. Do not disconnect from the network until installation is complete.
-
 Type sudo add-apt-repository ppa:webupd8team/gnome3 into the Terminal, then hit ↵ Enter. This will give you access to the PPA (Personal Package Archive) to access GNOME Shell Extensions and its themes since they cannot be downloaded through the official repository.[1]
 -
 Type sudo apt-get update into the Terminal, then hit ↵ Enter. This will make sure the PPA content is up-to-date.
 -
 Type sudo apt-get install gnome-shell-extensions-user-themes into the Terminal, then hit ↵ Enter. This will install the GNOME Shell Extensions with user theme support enabling you to download and install custom themes to use with the Tweak Tool.
 -
 Restart your computer. The GNOME Tweak Tool requires a restart for extensions installed to the tool.
Part 2 of 3:
Acquiring GNOME Shell Themes
-
 Press the Control+Alt+T keys together to open the Terminal.
 -
 Type in gnome-shell --version and press ↵ Enter.[2] This will display the version of GNOME Shell that is installed.
 -
 Search for and download compatible shell themes. Sites like GNOME-Look will host user-created themes that can be used with the Tweak Tool.
- Make sure the theme is compatible with the version of GNOME installed on your computer. Theme creators will post compatibility information along with the theme details.
-
 Double click the downloaded .zip to extract the folder containing the theme. Note, not all theme downloads will be a zip file. Installation processes for themes will vary depending on how they are built. Theme download pages will list specific instructions on how to install the theme.
- Some themes will have dependencies that must be installed to use the theme properly. A dependency is a script or piece of software utilized by the theme, but not included in its own installation.
-
 Copy or move the theme folder into your '.themes' directory. This directory is located in 'home > [USERNAME] > .themes', where [USERNAME] is the name of the account you are logged into.
- If this folder does not appear, create it by right-clicking and selecting New Folder. The '.themes' name is important as that is where the Tweak Tool will search for available themes.
Part 3 of 3:
Setting Themes with GNOME Tweak Tool
-
 Launch GNOME Tweak Tool from the Applications menu.
 -
 Click the 'Shell Extensions' tab. This button is on the left side of the window and will open a list of options for the GNOME Shell Extension.
 -
 Set 'User Themes Extension' to ON. This will enable the GNOME Shell Extension to use custom themes.[3]
 -
 Click the 'Themes' tab. This button is below the Shell Extensions button and displays a list of Theme option.
 -
 Select the dropdown menu next to 'Shell Theme' and choose a theme from the list. The menu will display the themes you have installed to your '.themes' folder. The theme will change with your selection.
Share by
Kareem Winters
Update 04 March 2020


