How to Become Root in Ubuntu
To run administrative tasks in Linux, you must have root (also known as superuser) access. Having a separate root account is common in most Linux distributions, but Ubuntu disables root by default. This prevents users from making mistakes...
Table of Contents
Method 1 of 2:
Running Root Commands with Sudo
-
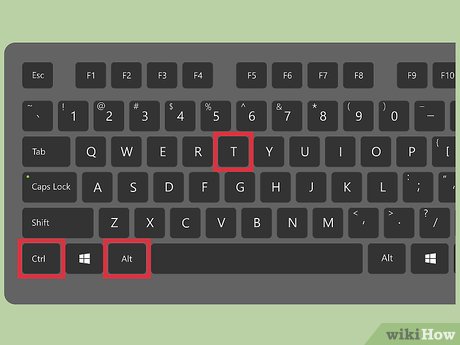
 Press Ctrl+Alt+T to open a terminal window. Because Ubuntu locks the root account by default, you cannot use su to become root as you would in other Linux distributions.[1] Instead, start your commands with sudo.
 -
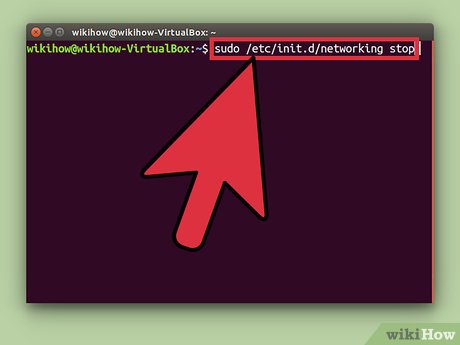 Type sudo before the rest of your command. 'Sudo' stands for 'substitute user do.' When you add sudo to the beginning of a command, the command will run as root.
- For example: sudo /etc/init.d/networking stop stops the network service, and sudo adduser adds a new user to the system. Both of these tasks require root access.
- You will be prompted to enter your password before sudo runs the command. Linux stores your password for 15 minutes so you won't have to keep typing it.
-
 Type gksudo before running a command that opens a program with a Graphical User Interface (GUI). For security reasons, Ubuntu does not recommend using 'sudo' to open programs with GUIs.[2] Instead, type gksudo before the command that launches the program.
- For example: type gksudo gedit /etc/fstab to open the "fstab" file in GEdit, an editing program with a GUI.
- If you're using the KDE Window Manager, use kdesudo instead of gksudo.
-
 Simulate a root environment. If you are an advanced user who needs access to an actual root shell to run specific scripts, simulate a root shell with sudo –i. This command will give you superuser access with root's environment variables.[3]
- Enter the command sudo passwd root. This will create a password for root, essentially 'enabling' the account. Don't forget this password.
- Type sudo -i. Enter the root password when prompted.
- The prompt will change from $ to #, indicating you have root access.
-
 Give sudo access to another user. If you are setting up an account for someone who does not currently have root access, you will need to add their username to the sudo group. To do this, type usermod -aG sudo username (but replace 'username' with the correct username).[4]
Method 2 of 2:
Enabling the Root User
-
 Press Ctrl+Alt+T to open a terminal window. For security purposes (and to avoid damage), the root user account is locked by default. To safely run commands as root, you should use
sudoorgksudoinstead. If you absolutely must have a separate root user (if it's required by a program used by your business, or this workstation will only be used by a single user), you can enable the root user with some simple commands.- Enabling the root user can put your system at risk and is not recommended by Ubuntu.[5]
-
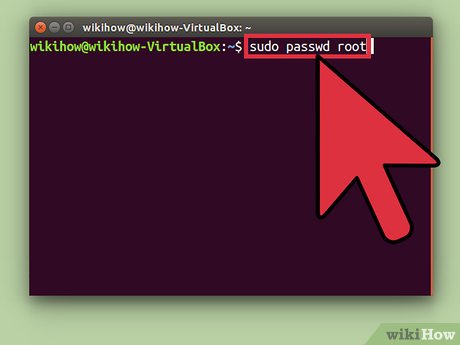 Type sudo passwd root and press ↵ Enter. You will be prompted to set a new password for the root user.[6] Don't lose this password.
 -
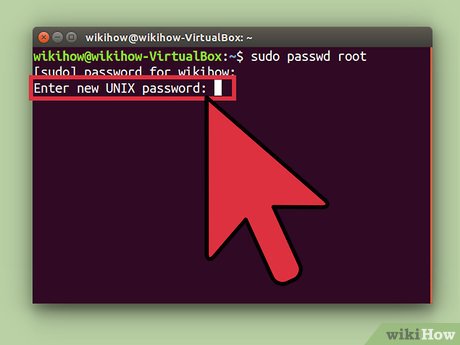 Enter a password, then press ↵ Enter.
 -
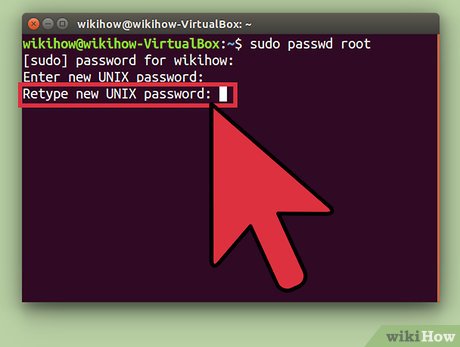 Retype the password when prompted, then press ↵ Enter. The root user should now have a password.
 -
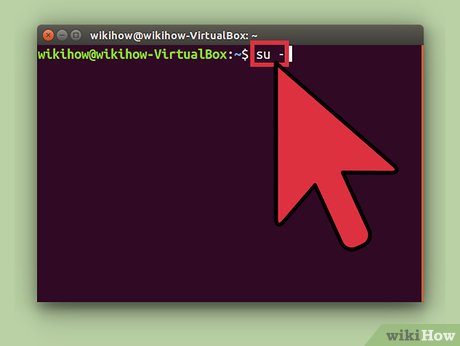 Type su - and press ↵ Enter. Enter the root password when prompted to arrive at the root prompt.
- To disable the root account, type sudo passwd -dl root.[7]
Was this article helpful?
Your feedback helps us improve.
Related Articles
 How to reset forgotten root password in Ubuntu 24.044 minutes read
 How to Get Root Rights on Ubuntu4 minutes read
 Enable Root account in Ubuntu2 minutes read
 What's New in Ubuntu 21.10?6 minutes read
 What is the root directory?6 minutes read
 How to Solve Incorrect Password ...Try Again Error in Ubuntu2 minutes read
Reader Comments 0
Sign in with email or Google to join the discussion.