Table of Contents
This updated guide explains how to Change Icons in Gnome 3 through clear steps, practical examples, and important checks that help prevent common errors.
Note : Although this tutorial is for GNOME 3, the same trick can be done on other Linux file managers and desktop managers.
Start by activating your favorite file manager to find files or folders whose icons you don't like.
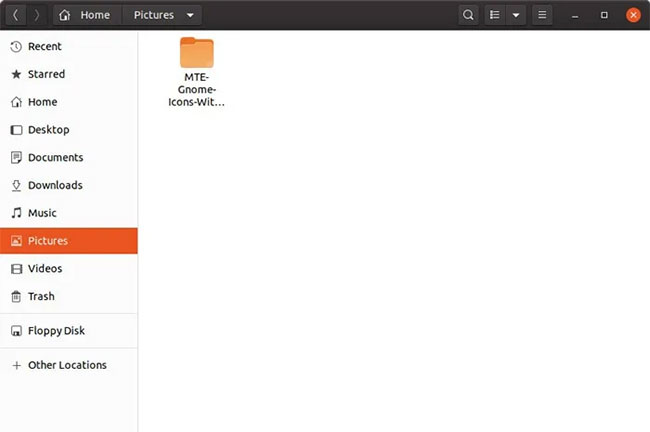 Start by activating your favorite file manager
Right-click the folder and select Properties . Although it's unclear, the image in the upper left is not only a preview of the active icon, but also the point where you can change the icon, since it acts like a button. Click the image, and a file requester will appear.
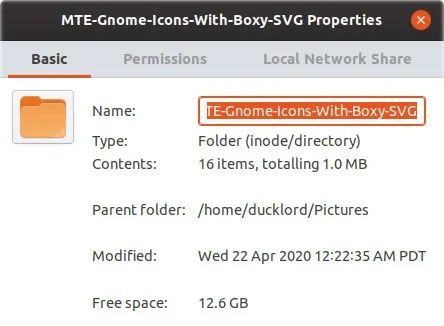 Right-click the folder and select Properties
Point the file dialog to the image you may need to use as an icon. It is worth noting that GNOME officially supports the XPM format, in addition to SVG and PNG files. However, Gnome still recommends that you avoid this format as it is only supported for backward compatibility reasons.
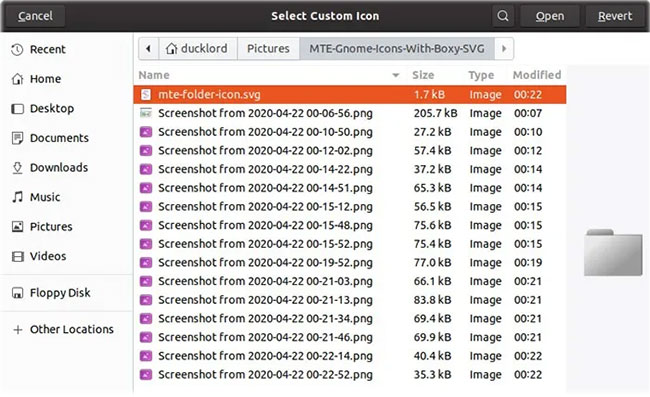 GNOME still recommends that you avoid the XPM format
When you return to the main Properties window, the icon preview at the upper left of the property sheet will be updated, displaying the image you selected in the previous step.
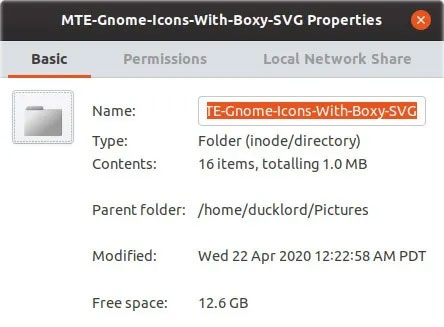 The icon preview at the upper left of the property sheet will be updated
Close the Properties dialog box and from now, your file or folder will display with a custom image as an icon.
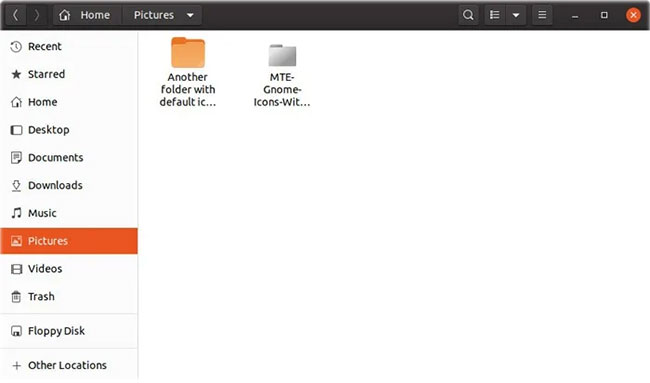 Your file or folder will display with a custom image as an icon
It's simple to change icons in Gnome 3, right?
FAQ
What is the easiest way to Change Icons in Gnome 3?
Start with the requirements in this guide, then follow each step in order. Check the result after every major change so problems are easier to identify.
Can beginners follow these instructions?
Yes. The process is organized into practical steps, and you can repeat any step before moving forward.
What should I check if the method does not work?
Confirm your software or device version, permissions, settings, file format, and internet connection when the task depends on online services.
Related Articles
 9 Useful Little-Known GNOME Extensions: Practical Guide7 minutes read
 What's Remarkable About the Newly Released GNOME 42?4 minutes read
 How to Change Themes on Ubuntu with Gnome Tweak Tool5 minutes read
 The Latest Features of GNOME 4010 minutes read
 How to Change or Create Desktop Icons on Windows: Clear Instructions13 minutes read
 How to Disable Automatic Workspace in GNOME4 minutes read
Reader Comments 0
Sign in with email or Google to join the discussion.