How to change Quick Access on File Explorer in Windows 10
In this article, we will learn tips on how to change the Quick Access menu to suit your needs.
How to change the Quick Access menu on Windows 10
Most Windows 10 users are familiar with the Quick Access menu, because File Explorer opens it by default. Quick Access is found in the left pane of the File Explorer window. This menu shows files and folders you use often or recently opened.

Although it is very easy to use, you may not know that this menu can be customized to display just what you need/
Add/Remove folders and files in Quick Access
To pin a folder to the Quick Access pane, simply right-click the folder you want and select Pin to Quick access.
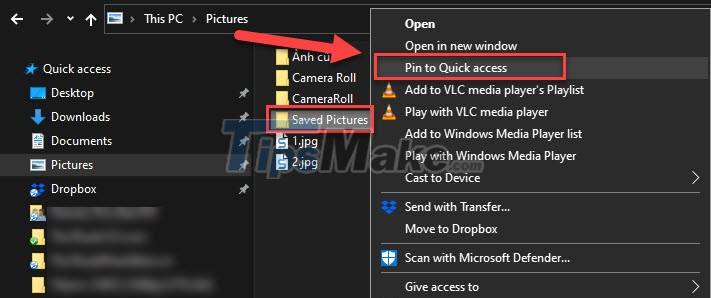
Alternatively, you can also drag and drop folders into the Quick Access menu, pinned folders will then show a pin icon next to them.

You can also remove a folder from the Quick Access pane easily, just right-click the shortcut in Quick Access, then select Unpin from Quick access.

Show only pinned folders in Quick Access
In addition to the pinned folders, Quick Access also shows the most visited and frequently accessed folders. If you want it to only show the pinned folder, do the following:
Select View in the top horizontal menu >> Options.

In the Folder Options window, uncheck Show recently used in Quick Access and Show frequently used folders in Quick Access.
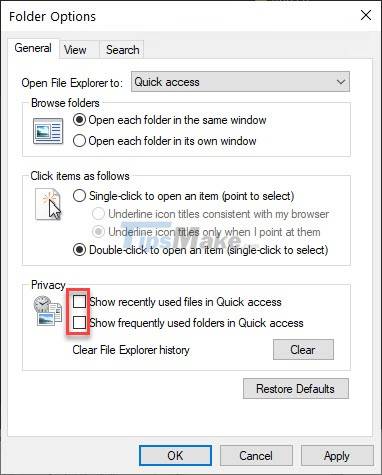
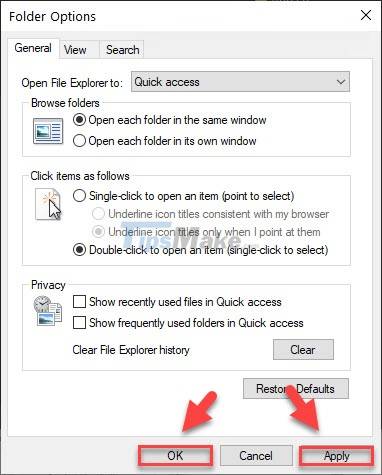
You continue to click Apply and OK to save the changes.
Customize Quick Access Toolbar
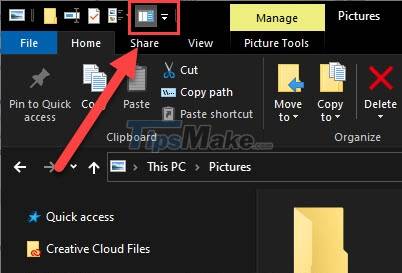
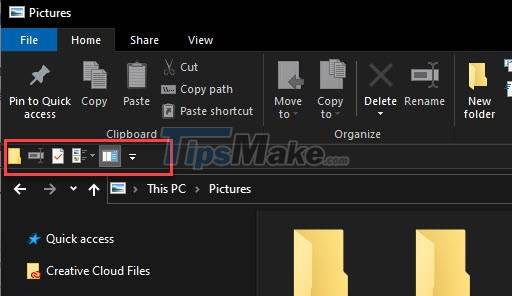
In addition to the Quick Access menu on the left, you also have a Quick Access Toolbar for easy access to essential functions in File Explorer. This toolbar is represented by down arrows and icons in the upper left corner of the window.
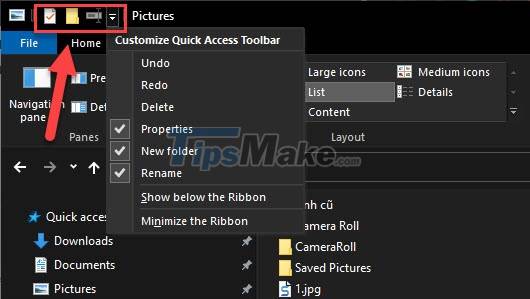
To add a setting or command to the Quick Access Toolbar, simply right-click the command and select Add to Quick Access Toolbar. In the example below, I want to add the Details pane settings view to the Quick Access Toolbar:
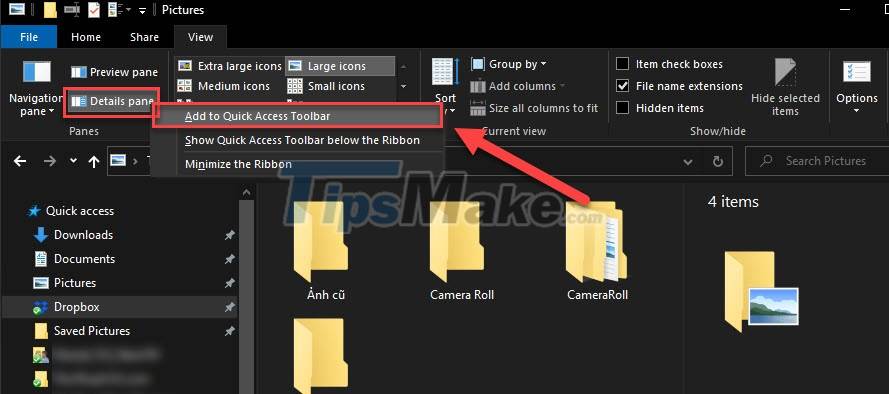
The Details pane will appear in the upper left corner of the window.
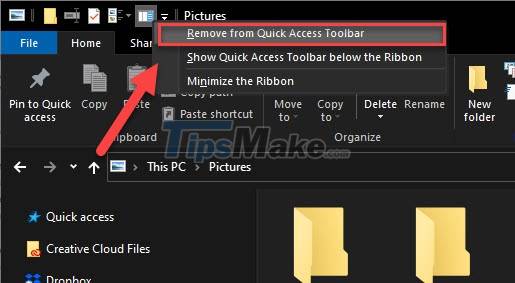
If you no longer want to pin the feature, just right-click it and select Remove from Quick Access Toolbar.
In addition, you can also change the position of the Quick Access Toolbar to suit your hand. Only two options:
- Quick Access Toolbar appears in the top left corner
- Quick Access Toolbar appears below the ribbon (title bar)
Click the down arrow and select Show below the ribbon.
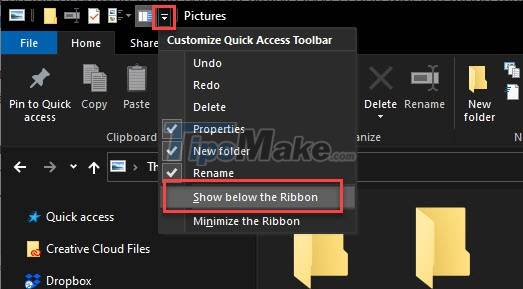
The Quick Access Toolbar will now appear under the title bar.
Conclusion
Here's what you can do with the Quick Access menu and the Quick Access Toolbar in File Explorer. Hopefully this little tip will make your job faster.
You should read it
- ★ Learn about the Quick Access Toolbar on Windows 10
- ★ How to fix Working On It on File Explorer Windows 10
- ★ How to add / remove Quick Access in the File Explorer navigation pane on Windows 10
- ★ How to change the default opening location of File Explorer on Windows 10
- ★ Quick access to files and folders on your computer