Steps to use Screen Mirroring (Miracast) in Windows 10
This article explains how to set up the Screen Mirroring feature on a Windows 10 computer, along with how to make sure it's turned on and updated properly..
How to set up Screen Mirroring on a PC running Windows 10
Using Miracast, you can connect your Windows 10 PC to another computer, wireless device, and compatible smartphone. By following these simple steps, you can start projecting your screen quickly.
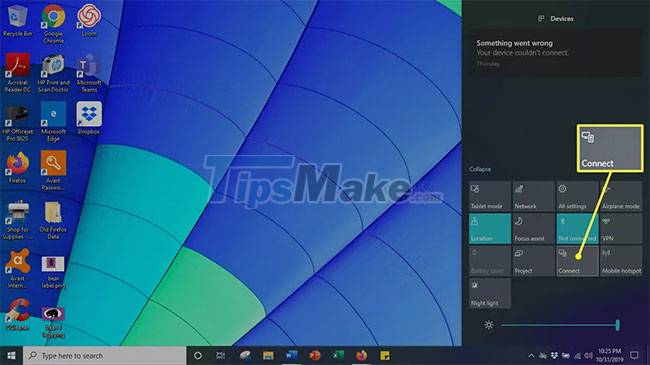
Step 1. Open Action Center by clicking on the speech bubble icon in the lower right corner of the screen.

Step 2. Select the Connect button .
Step 3. A list of compatible computers and other devices is displayed. Select the device you want to project your screen on.

Step 4. A window appears on the receiving device, asking if you want to allow the computer to connect. Click Accept to connect the computer.
Step 5. When you're done, click Disconnect to end the screencast.
How to check if Miracast is enabled on a Windows 10 PC
While Miracast is a standard feature on most Windows 10 PCs, it can never be superfluous to ensure that the software is ready to go. Fortunately, checking if Miracast is on your computer is very easy to do.
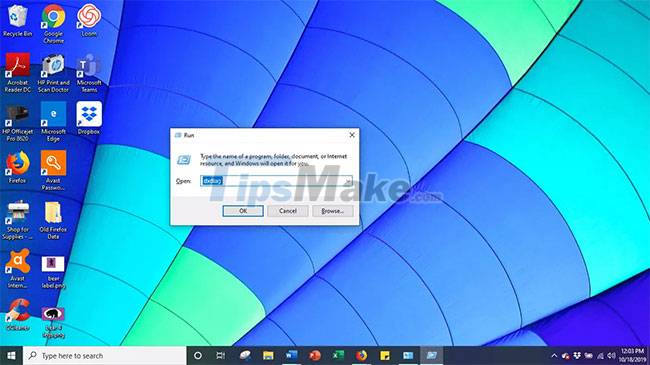
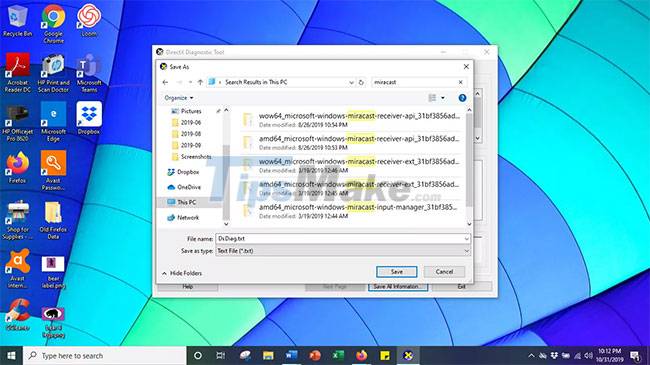
Step 1. Press Windows key + R on your keyboard to open the Command window .
Step 2. Type dxdiag in the box and press Enter key .
Step 3. Click the Save All Information button located at the bottom of the window. Save the text file to the desired location.
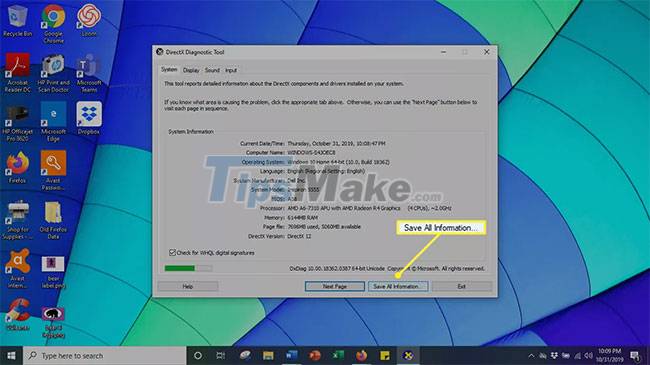
Step 4. Open the text file and find Miracast. The current availability is displayed next to it.
How to ensure that Miracast version is fully updated
Although a Windows 10 PC comes with Miracast pre-installed, it needs to be updated to the latest version for it to work properly. The easiest way to deal with this is to download a driver utility tool that automatically reviews and updates your drivers to the latest version.
If you find that your Miracast drivers are out of date, follow these steps to update them.
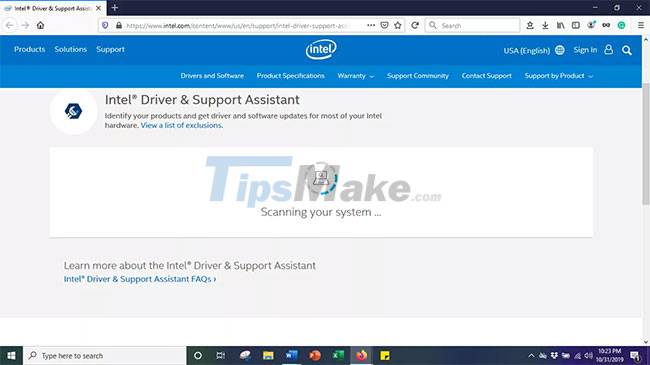
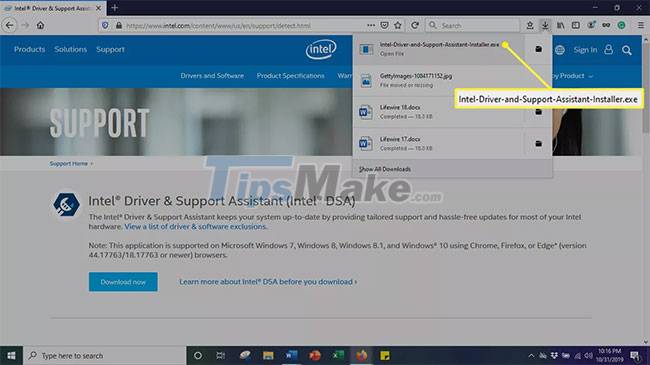
Step 1. Download Intel Driver And Support Assistant Tool.
Step 2. Find the download folder and click on the .exe file to run it.
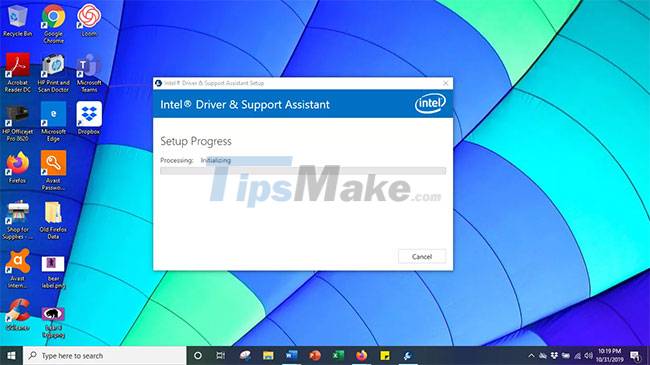
Step 3. Accept the license terms and conditions on the page that opens and click Install.

Step 4. The system displays the progress bar. Wait for the installation to finish.
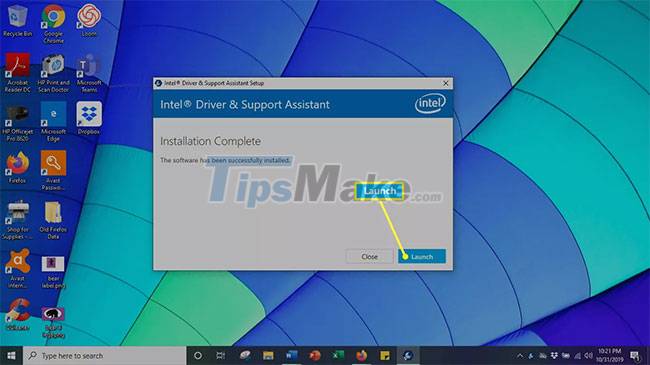
Step 5. When the installation is complete, select Launch.
Step 6. Click Start scan . Scan the entire system for available drivers. After that, all available drivers that need updating will be listed and updated.