Learn about the Quick Access Toolbar on Windows 10
If you don't remember all the shortcuts to manipulate File Explorer, you can use the Quick Access Toolbar. By default the Quick Access Toolbar is displayed in the title bar of File Explorer, but you can reset the Quick Access Toolbar to display above or below the Ribbon..
The Quick Access Toolbar is a small toolbar that provides a number of options, enabling users to quickly and easily manipulate the File Explorer window.
If you don't remember all the shortcuts to manipulate File Explorer, you can use the Quick Access Toolbar.

Explore more:
-
How to open the virtual keyboard in Windows 10
-
4 ways to make Windows 10 boot faster
-
To enable or disable Sleep mode in Windows 10
1. Learn Quick Access Toolbar
By default, the Quick Access Toolbar appears in the title bar of File Explorer, but you can reset the Quick Access Toolbar to display under the Ribbon.
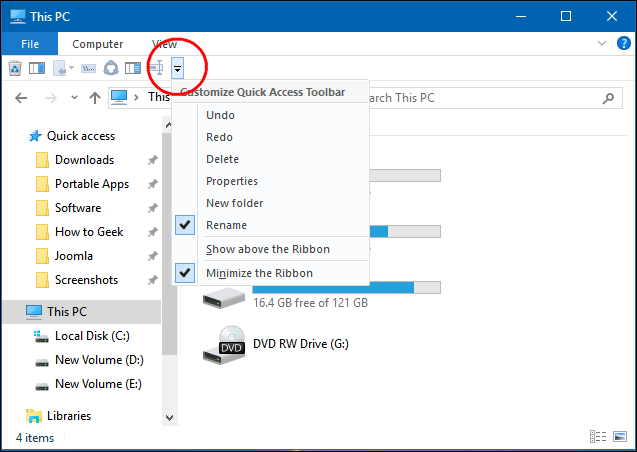
In addition, the Quick Access Toolbar also includes a drop-down menu containing sections depending on the default commands (display or hide) and Ribbon options. The Quick Access Toolbar contains up to 20 different commands specified by applications or user-selected.
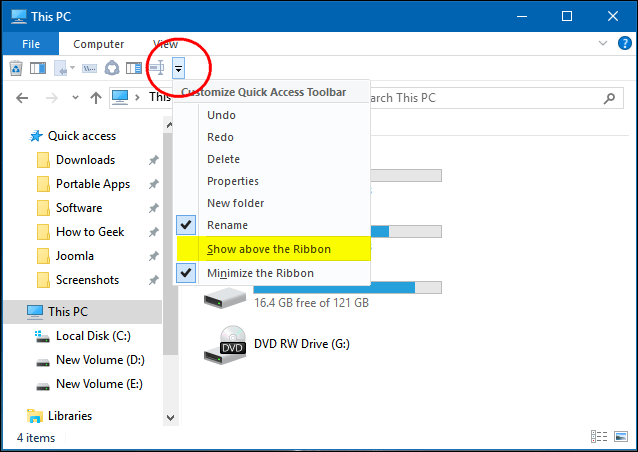
2. Change the location of the Quick Access Toolbar
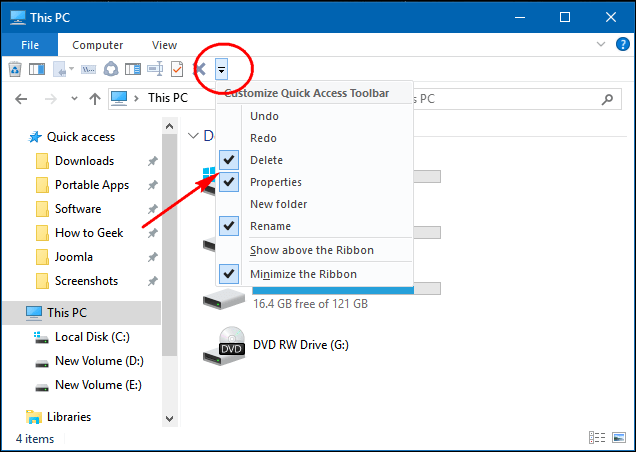
By default, Quick Access Toolbar is displayed in the title bar of File Explorer window. However, you can also change the location of this toolbar above or below the Ribbon, by clicking on the down arrow icon or right-clicking on the bar and selecting Show above the Ribbon or Show below the Ribbon .

3. Add or delete commands on the Quick Access Toolbar
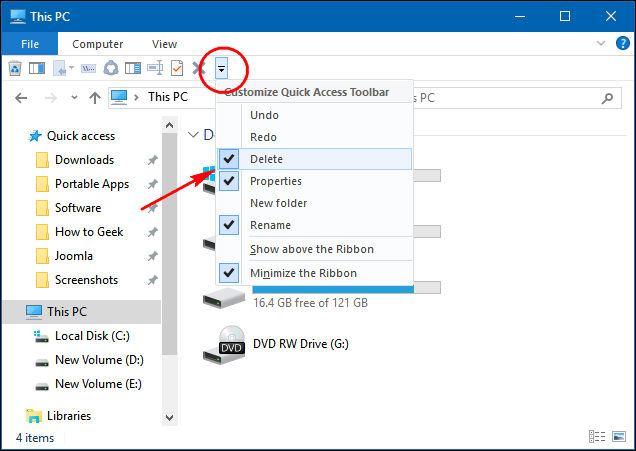
Click the down arrow icon on the Quick Access Toolbar to uncheck the commands you do not want to use and tick the commands you want to add on the Quick Access Toolbar.
Alternatively, you can right-click any command / button on any Ribbon tab, then select Add to Quick Access Toolbar.
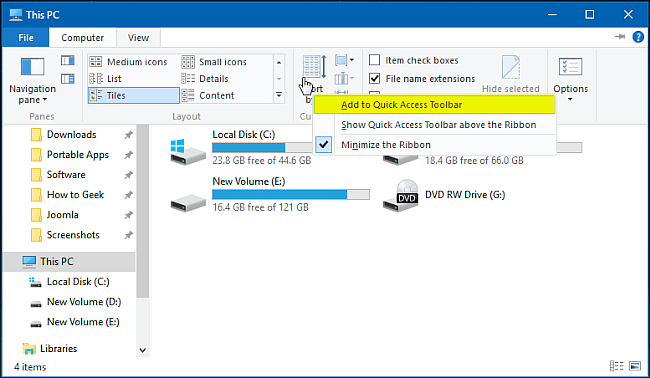
If this option is gray, the command has been added.
Click on the down arrow on the Quick Access Toolbar, uncheck the statements you want to delete.
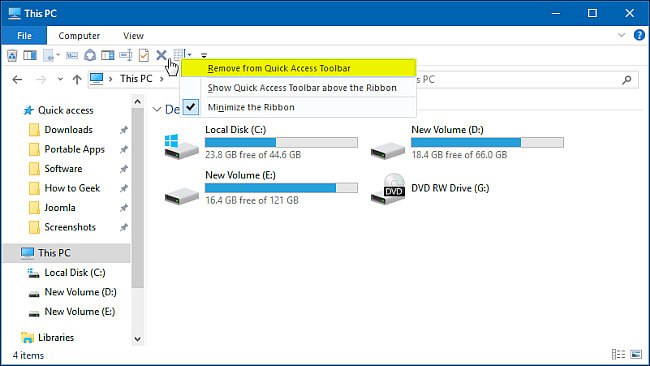
Alternatively, you can right-click on previously added commands on the Quick Access Toolbar, click Remove from Quick Access Toolbar.
4. Add commands to the Quick Access Toolbar
By default the Empty Recycle Bin icon is preinstalled on the Ribbon. You can add this icon to the Quick Access Toolbar to quickly delete and clean Recycle Bin files with just one click.
First, open the Recycle Bin, then click on the Manage option at the top of the Ribbon.
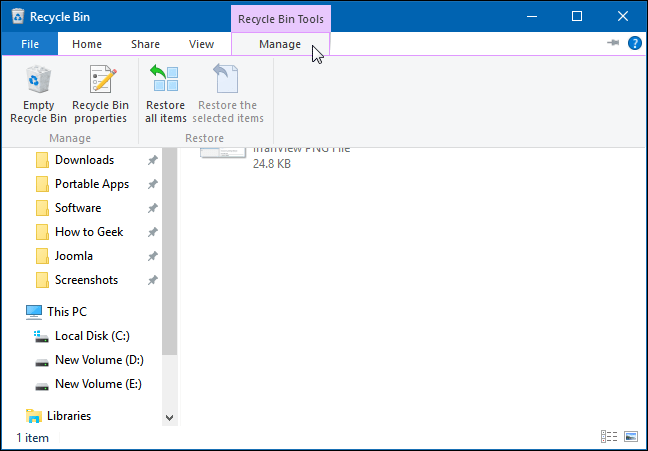
Next right-click the Empty Recycle Bin icon, then select the Add to Quick Access Toolbar command and you're done.

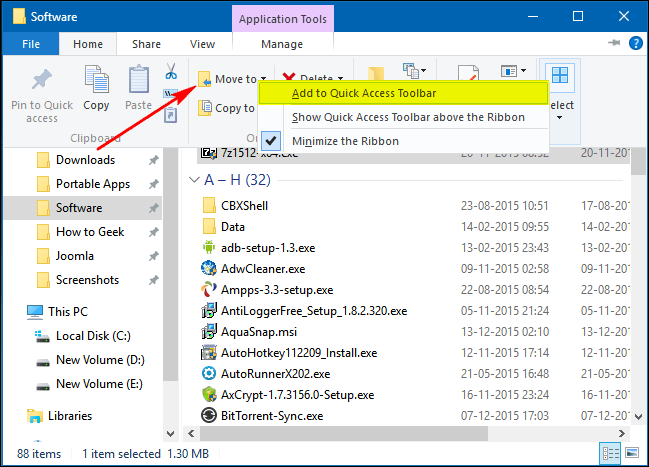
Alternatively, you can add the "Copy to" and "Move to" options to the Quick Access Toolbar by clicking on a folder on the directory tree and clicking on a folder in the sidebar. . Then the Move to and Copy to big options will appear.
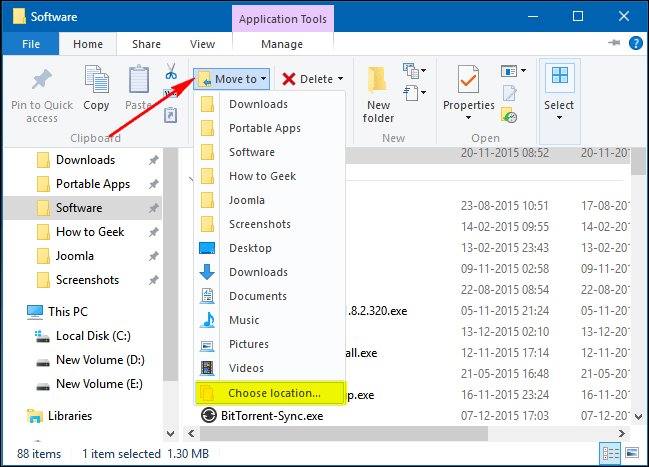
Now simply right-click on these two options and select the Add to Quick Access Toolbar command.
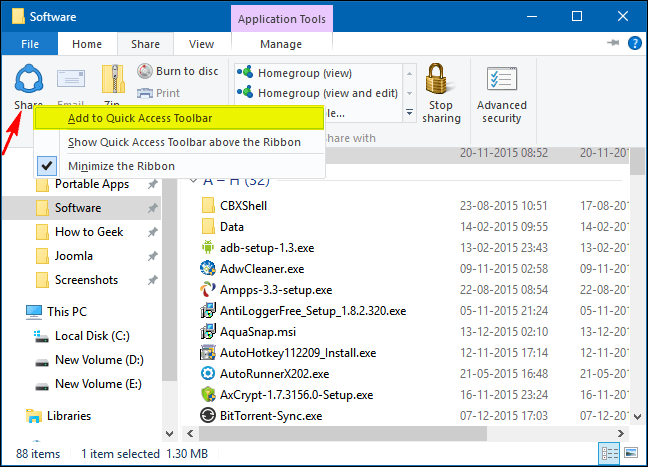
Sharing feature (Share) has been integrated on Windows. On Windows 10 you will see 3 options that are integrated: Share (Share), Email, and Zip.
Right-click on the Share icon and select Add to Quick Access Toolbar. Now you can share files from your computer with just one click.
5. Reset the Quick Access Toolbar (default restore)
If you want to restore the Quick Access Toolbar to default, you can follow the steps below:
Press WIN + R key combination to open the RUN dialog box. Then enter the RUN dialog box "regedit" and press ENTER to open the Registry Editor. Then navigate to the following path:
HKEY_CURRENT_USERSoftwareMicrosoftWindowsCurrentVersionExplorerRibbon
In the Ribbon, you will see a DWORD value named QatItems.

Your task is to right click on QatItems and select Delete . Restart your computer to restore the Quick Access Toolbar to default.

Good luck!