How to change the indicator position on the Windows 11 screen
When adjusting volume brightness and airplane mode with keyboard shortcuts, the on-screen indicator appears in the bottom center. Here's how to change the indicator position on your Windows screen.
Table of Contents
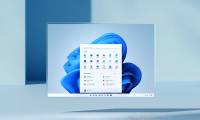
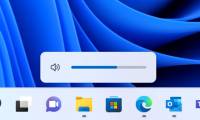
When you adjust screen brightness, volume, and airplane mode using keyboard shortcuts, an on-screen indicator appears in the bottom center by default to show that action. Microsoft is exploring a new hidden feature in the latest build of Windows 11 that lets you move the hardware indicators for brightness, volume, airplane mode, and other indicators to different locations on the screen. Here's how to change the indicator location on the Windows screen.
Change indicator position on Windows 11 screen via ViVeTool
Step 1:
First you need to download the ViVeTool tool and then install it according to the instructions below.
- What is ViVeTool? How to use ViVeTool to enable hidden features on Windows
Then, open ViVeTool using the Windows Terminal application. Run the command below as administrator to turn on and restart your computer.
vivetool /enable /id:48103152Step 2:
Open Settings then select System then look to the side, click Notifications . Now we scroll down to Position of on-screen indicators .
Select the new location you want for the indicator on your Windows 11 screen.

Change the position of the indicator on the Windows screen via Registry Editor
Step 1:
You open Registry Editor on Windows, then access the path.
ComputerHKEY_CURRENT_USERSoftwareMicrosoftWindowsCurrentVersionSystemSettingsConfirmatorPositionStep 2:
Right- click ConfirmationPosition > New > DWORD (32-bit) Value and name the new value PositionIndex .
Then you adjust the value to:
- 1 to display the on-screen indicator at the bottom.
- 2 to display the on-screen indicator in the upper left corner.
- 3 to display the indicator on the screen in the upper center.
We choose the location we want, then enter the number in the box and press OK to save.

Was this article helpful?
Your feedback helps us improve.
Related Articles
 How to change the Taskbar position on Windows 11 to the left, right, top, or bottom.4 minutes read
 How to Change the Position of the Taskbar in Windows 74 minutes read
 How to change the position of the Taskbar on Windows 114 minutes read
 How to change the position of columns in Excel4 minutes read
 Judge the error on Sony TV via flashing indicator6 minutes read
 Microsoft adds macOS-like hardware indicators to Windows 112 minutes read
Reader Comments 0
Sign in with email or Google to join the discussion.