How to change DNS on Windows 11/10/8/7 and macOS to surf the web and speed up the network
Changing DNS on Windows 11/10/8/7 and macOS is an important method to improve internet access speed and protect privacy. By changing DNS, you can optimize the process of accessing websites and minimize problems related to slow or blocked web surfing. Learn how to change DNS on Windows 11/10/8/7 and macOS to experience a faster and safer Internet.
Table of Contents
Changing standard DNS can help you access the web at a faster speed by reducing DNS Lookup time (finding the website's IP). In some other cases, you can access Facebook as well as blocked websites. The following article will guide you. Shows you how to change your DNS to increase the speed of accessing other websites on Windows 11/10/8/7/XP.
DNS is a server system that resolves domain names into IP addresses. Without the DNS system, the computer cannot understand which name server the domain names belong to, so the use of DNS is stable. Very important, they help you access websites much easier and faster.
Article Table of Contents:
I. Benefits of changing DNS on Windows and MAC.
II. Note that before and after changing DNS to Facebook, the website is blocked.
1. Note before changing DNS on computers and MACs.
2. Note after changing DNS on Windows and Mac computers.
III. How to change DNS on Windows 11.
IV. How to change DNS to access Facebook and blocked websites on Windows 10.
1. Quick guide.
2. Detailed instructions to change DNS on Windows 10.
V. How to change DNS to access Facebook and blocked websites on Windows 7/8.
1. Quick guide.
2. Detailed instructions for changing DNS in Windows 7 & 8.
VI. How to change DNS to access Facebook and blocked websites on Win XP.
1. Quick guide.
2. Detailed instructions for changing Windows XP DNS.
VII. How to change DNS on Mac.
1. Quick guide.
2. Detailed instructions for changing MAC OS DNS.
VIII. List of the most popular DNS IPs today.
I. Benefits of changing DNS on Windows and MAC
- Helps speed up web browser.
- Know what DNS is, notes when changing DNS
- Access some blocked websites like Facebook.
- Increase accuracy and reliability.
- Has better security.
II. Note that before and after changing DNS, accessing Facebook and the Web is blocked
1. Note before changing DNS on computers and MAC
- For those who are preparing to change DNS on Windows 11/10/8/7/XP, otherwise an error will appear.
+ You should use Administrator rights to do this, the User account is granted Administrator rights .
+ For User (guest) accounts that have not been assigned Administrator rights, when changing DNS on the computer, a message will be displayed as shown below.
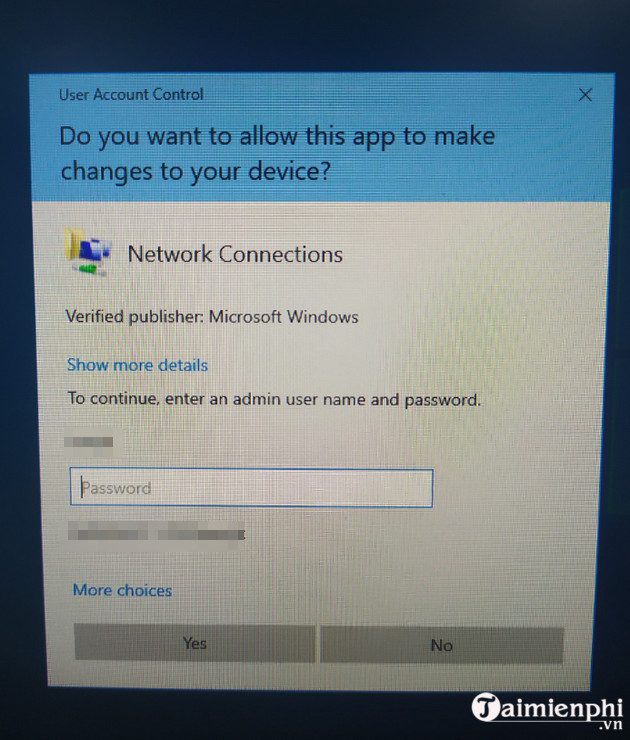
2. Note after changing DNS on Windows and Mac computers.
After you edit the new DNS, if you try again to access the website you want to access and it still doesn't work , your computer may still have cached old information. Therefore, you should restart the computer and perform the following steps :
- Reset the DNS client service: Press the Windows + R keys simultaneously => the RUN command window appears, type services.msc , continue pressing the key ENTER go to Services => Find DNS Client => Right click and select Restart .
- Clear Chrome's DNS Cache: In the chrome address bar, enter " chrome://net-internals/#dns " => Click the " Clear host cache " button.
- Delete operating system Cache: Press Windows+R keys simultaneously => RUN command window appears, type ipconfig/flushdns and press Enter key .
III. How to change DNS on Windows 11 to speed up web access
Windows 11 is currently the newest operating system today. If you have installed Windows 11 and are using it, you can refer to how to change Windows 11 DNS server here to increase Internet access speed and better security.
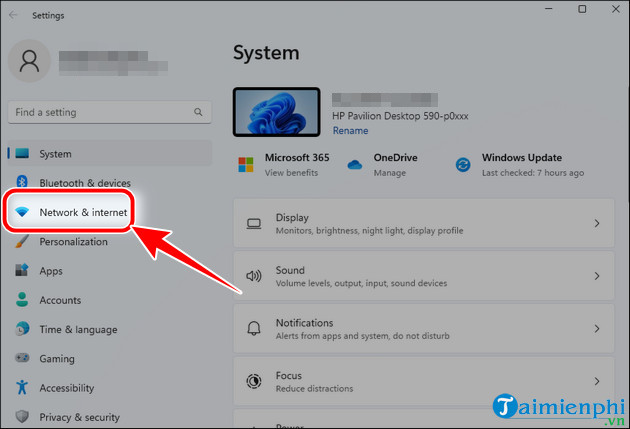
Step 1: Press the Windows+I key combination on the keyboard, select Network & internet
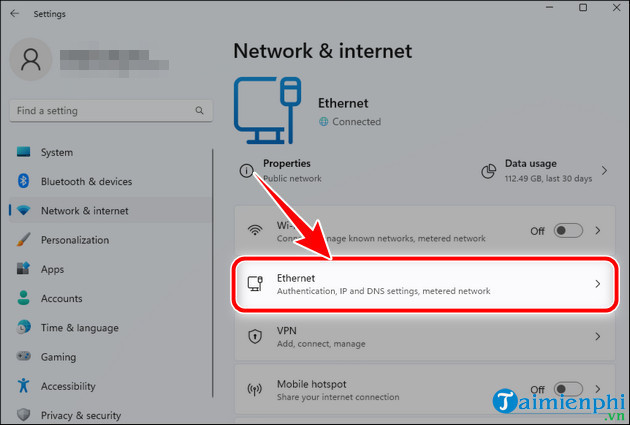
Step 2: Select Ethernet .
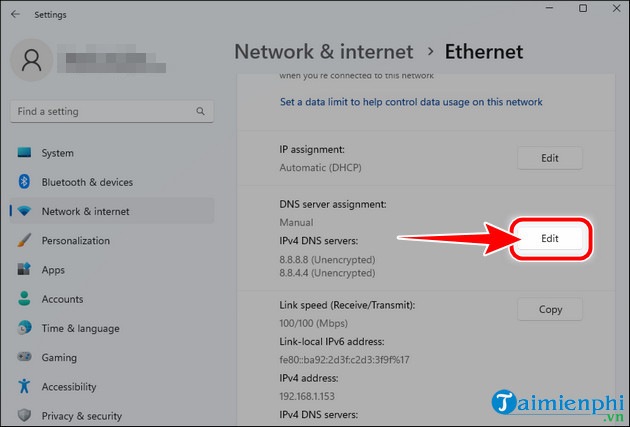
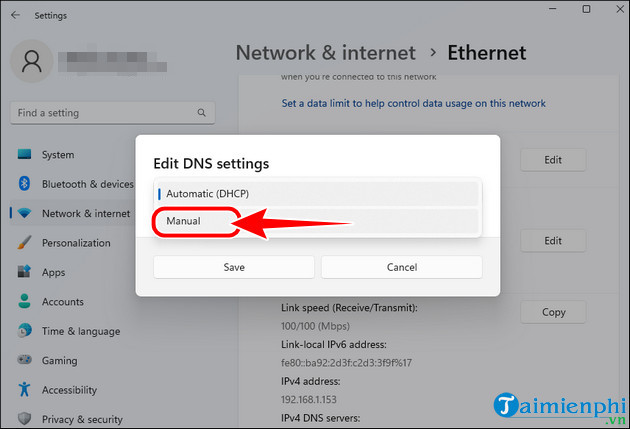
Step 3: Select Edit at DNS Server Assignment .
Step 4: Select Manual .
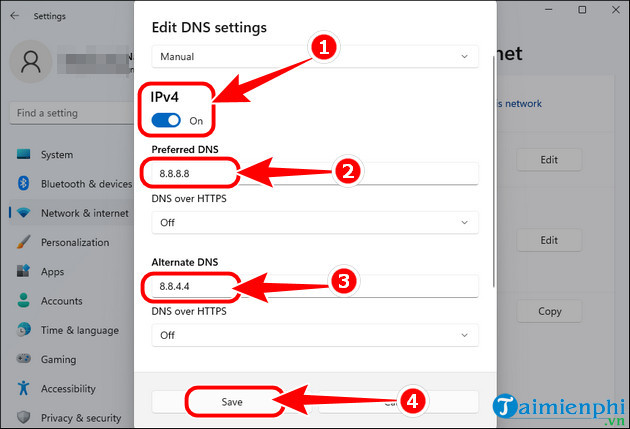
- Select IPv4 On , enter DNS into Preferred DNS and Alternate DNS => click Save .
+ Here Taimienphi enters Google DNS
- Google DNS
+ Preferred DNS server: 8.8.8.8
+ Alternate DNS server: 8.8.4.4
IV. How to change DNS on Windows 10 to access blocked websites
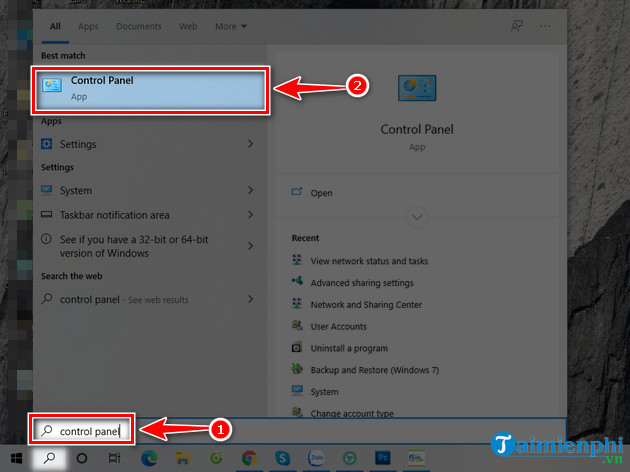
Step 1 : From the search bar on Windows 10 , enter the keyword Control Panel in the empty box => select Control Panel in the list that appears.
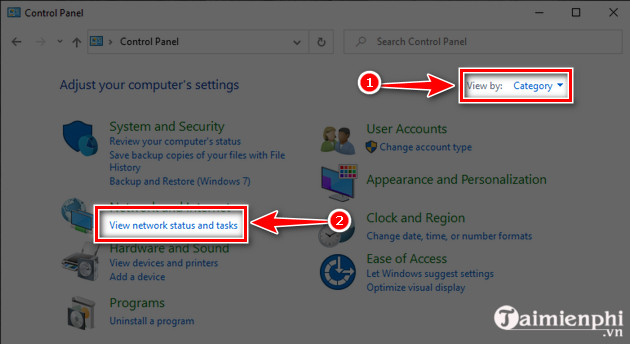
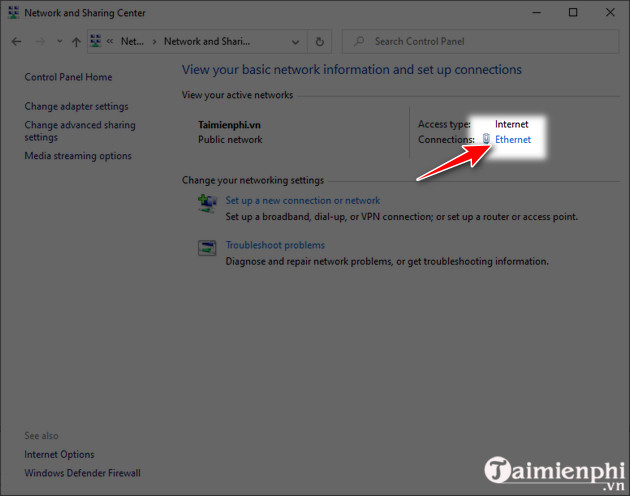
Step 2: In the next table, in the View by section select Category => click View network status and tasks below.
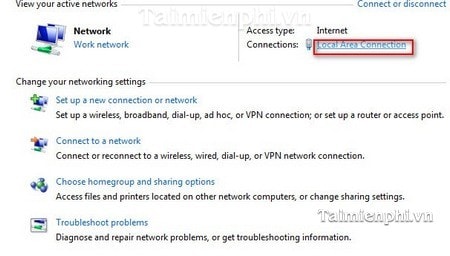
Step 3: At the View your active networks tab => click Ethernet (for wired networks) or Wi-Fi (for Wifi networks) at the Connections tab .
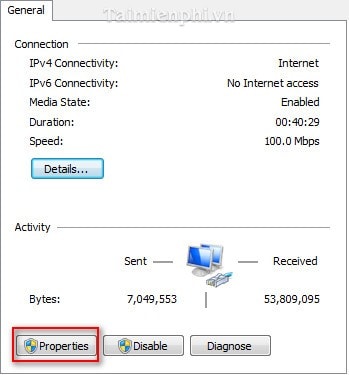
Step 4: In the network status interface, click Properties .

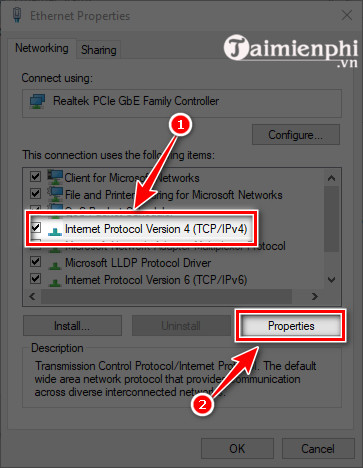
Step 5: At the network parameter adjustment interface, find the Internet Protocol Version 4 (TCP/IPv4) section. Click to select this protocol and continue to click Properties .
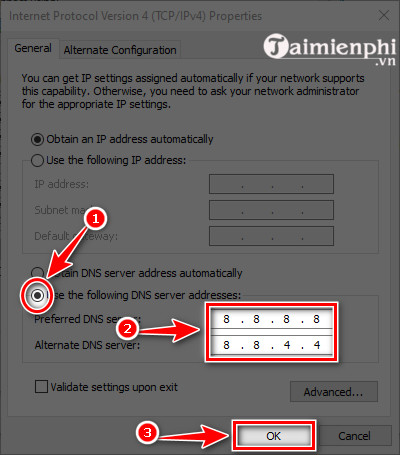
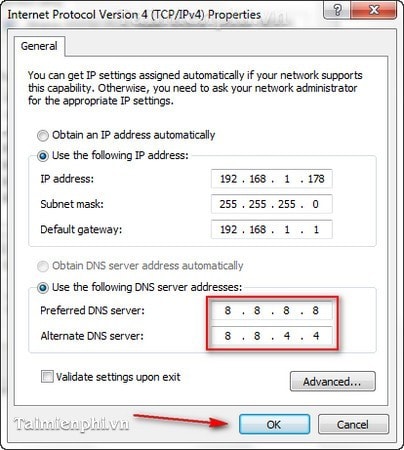
Step 6 : By default, the computer will always automatically get any DNS address so users do not need to customize it, but for some reason, that DNS can be the reason why users cannot access Facebook. due to DNS blocking. Thus, changing DNS will have the effect of re-establishing access to Facebook. In the General tab , click Use the following DNS server addresses and enter DNS below => click OK => OK to confirm the DNS change on the computer.
- Google DNS
+ Preferred DNS server: 8.8.8.8
+ Alternate DNS server: 8.8.4.4
- Cloudflare DNS:
+ Preferred DNS server: 1.1.1.1
+ Alternate DNS server: 1.0.0.1
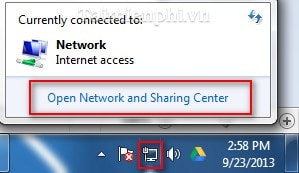
Step 1: First, tick the Internet icon in the right corner of the screen and select Network and sharing Center
How to change DNS on Windows 7, Windows 8, XP on Facebook
Step 2: Next click on Local Area Connection Status .
Instructions to change DNS on Facebook Windows 7 & Windows 8
Step 3: When the Local Area Connection Status window appears. Select Properties .
How to change DNS on Windows 7, 8, XP
Step 4: Then click on Internet Protocol Version 4 (TCP/IPv4) and click Properties .

How to change DNS on Win 7, 8, Win XP to access Facebook and blocked websites
Step 5: A new window appears, check Use Following DNS server Addresses and fill in the DNS that is being used by most people today, change to Google or Cloudflare DNS => click OK .
- Google DNS
+ Preferred DNS server: 8.8.8.8
+ Alternate DNS server: 8.8.4.4
- Cloudflare DNS:
+ Preferred DNS server: 1.1.1.1
+ Alternate DNS server: 1.0.0.1
Instructions to change DNS to access the latest blocked Facebook
Step 1: First, click the Start button in the lower left corner then select Control Panel.
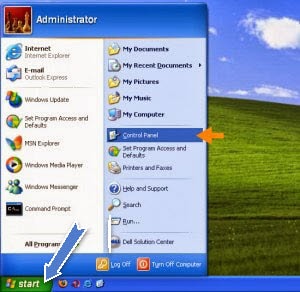
Instructions for using Google DNS to access Facebook when blocked
Step 2: In the Control Panel window , find the Network Connections icon. double click on it.
Step 3: In this window select Network Connections (If there are multiple network icons => select the network icon you are connecting to, they have a light indicator and no slashes)
Step 4: A new window appears, click on the Properties button .
Step 5: Then Select Internet Protocol (TCP/IP) and click the Properties button
Step 6: Select the Use the following DNS server addresses button and enter the DNS below => click OK to complete the steps to change DNS on Windows XP
- Google DNS
+ Preferred DNS server: 8.8.8.8
+ Alternate DNS server: 8.8.4.4
- Cloudflare DNS:
+ Preferred DNS server: 1.1.1.1
+ Alternate DNS server: 1.0.0.1

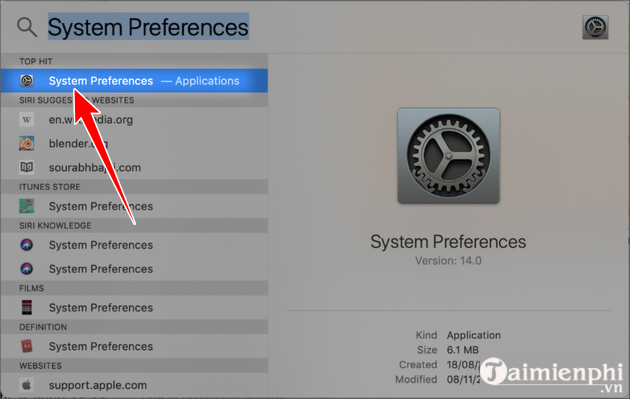
Step 1: To change DNS on Mac , first go to System Preferences from the Apple menu . Or you can also open System Preferences by entering System Preferences into Spotlight and pressing Enter .
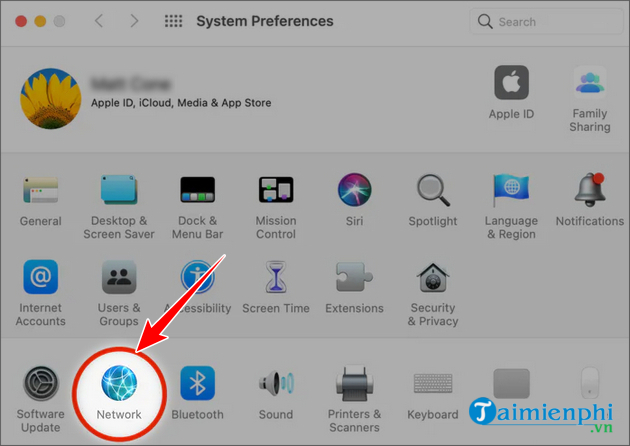
Step 2: In the System Preferences window , click Network .
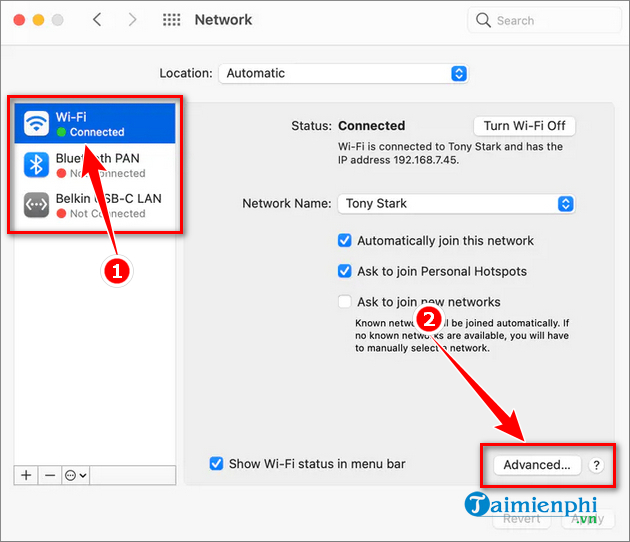
Step 3: Select the type of network you are using from the list on the left panel, such as Wi-Fi or Ethernet . Then, click the Advanced button in the lower right corner of the Network window.
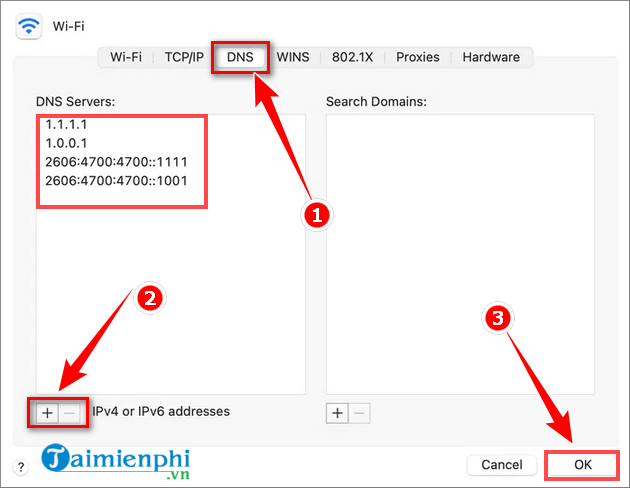
Step 4: Click on the DNS tab to edit, add or remove DNS.
- Delete existing DNS: Select the DNS IP address and then click the minus symbol [-] or press the Delete key.
- Edit existing DNS: Double click on the DNS IP address and edit.
- Add new DNS: Click on the plus icon [+] and enter a new IP address from the list of popular DNS IPs shared in the article.
Step 5: Finally, click OK => Apply to complete the process of changing DNS on Mac .
- DNS Google
8.8.8.8
8.8.4.4
- DNS Cloudflare
1.1.1.1
1.0.0.1
- Singapore DNS
165.21.83.88
165.21.100.88
- VNPT DNS
203.162.4.191
203.162.4.190
- DNS Viettel
203.113.131.1
203.113.131.2
- FPT DNS
210.245.24.2
210.245.24.22
- DNS OpenDNS
208.67.222.222
208.67.220.220
- Norton DNS
198.153.192.1
198.153.194.15
- DNS Verizon
4.2.2.1
4.2.2.2
4.2.2.3
4.2.2.4
4.2.2.5
4.2.2.6
- DNS Dnsadvantage
156.154.70.1
156.154.71.1
- DNS NetNam
203.162.7.89
203.162.6.71
203.162.0.181
203.162.0.24
203.162.22.2
203.162.7.131
203.162.21.114
203.162.7.89
203.162.7 .71
- VNNIC DNS
203.162.57.105
203.162.57.107
203.162.57.108
- DNS Hi-Teck
209.126.152.184
216.98.138.163
209.126.152.185
In addition to the DNS above, we also have a comprehensive list of the fastest and best DNS from Google, Singapore. if interested readers can get them by visiting the link below. If you encounter any problems during the implementation process, please contact Taimienphi via the comment section below, all readers' questions will be answered as soon as possible.
Was this article helpful?
Your feedback helps us improve.
Related Articles
 How to change DNS to surf faster, speed up Internet18 minutes read
 How to change DNS on Windows 11, surf the web, watch movies faster6 minutes read
 Speed up Internet connection by VPN virtual private network solution4 minutes read
 How to change DNS on Windows and Mac computers3 minutes read
 How to change DNS in Windows 10, increase network speed, access blocked websites3 minutes read
 The best, fastest DNS list of Google, VNPT, FPT, Viettel, Singapore2 minutes read
Reader Comments 0
Sign in with email or Google to join the discussion.