How to change DNS on Windows and Mac computers
Changing DNS on your computer is to change the DNS servers of the area you set up, so the network connection will be more stable. So how to change DNS on the computer? Let's find out how!
Benefits of changing DNS on a computer :
- Help speed up web browsing.
- Increased accuracy and reliability.
- Have better security.
1. Instructions on how to change DNS on a Windows computer
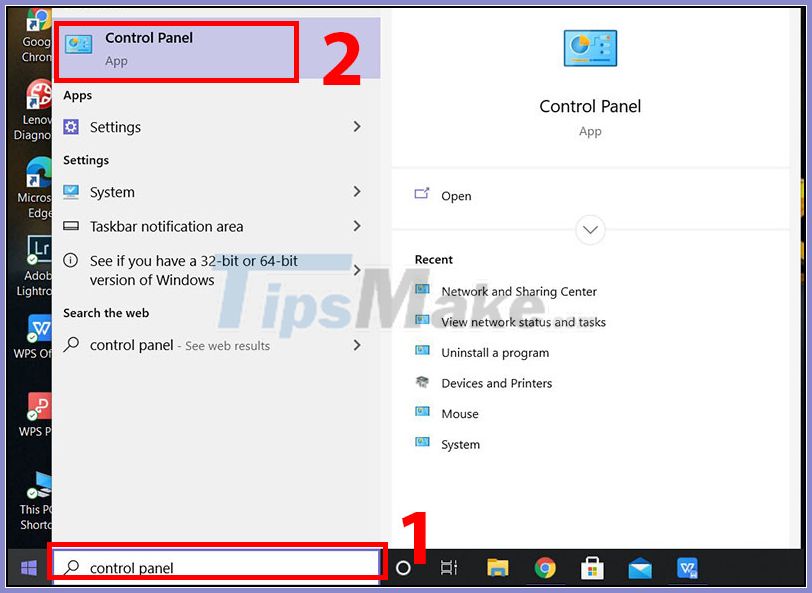
Step 1 : From the Windows search bar> Type the keyword " control panel "> Select Control Panel .
Step 2 : Control Panel window opens, in View by > Select Category > Select View network status and tasks .

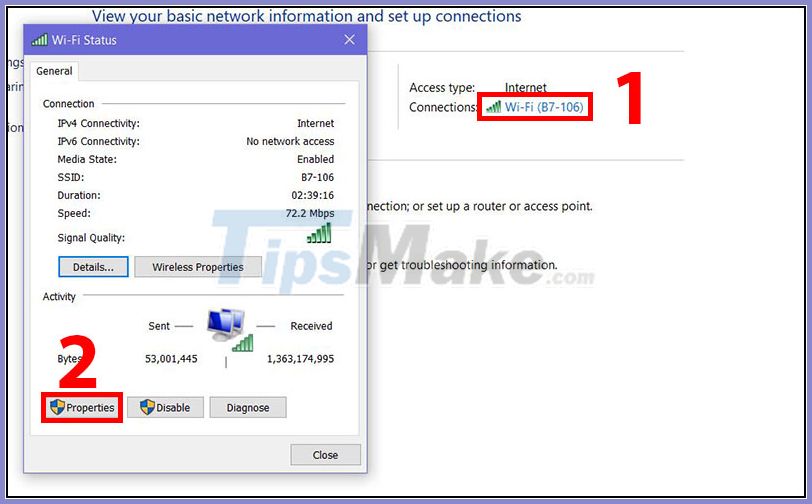
Step 3 : Select Wi-Fi under connections , Wi-Fi Status window appears> Select Properties .
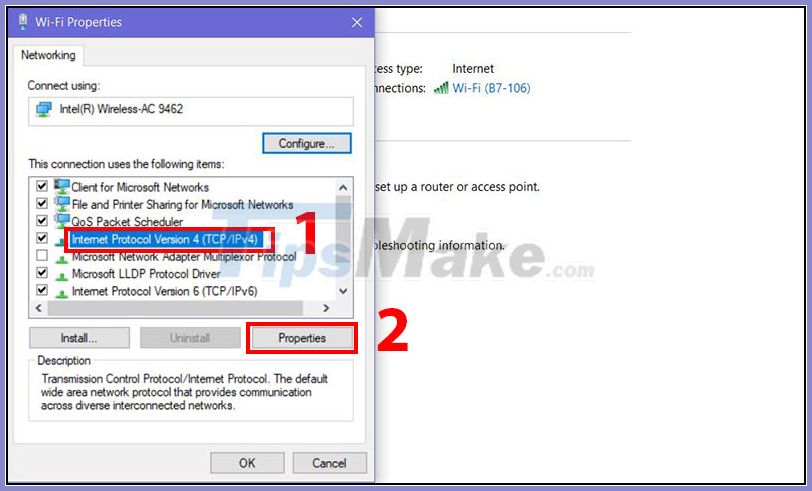
Step 4 : Click on Internet Protocol Version 4 (TCP / IPv4) > Click Properties .
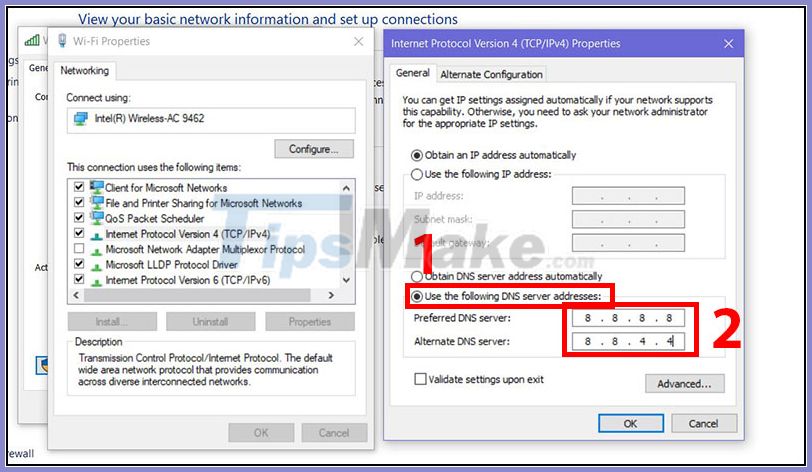
Step 5 : You check the box Use the following DNS server address (if not checked)> Change DNS manually by entering Preferred DNS and Alternate DNS .
Some DNS references :
Preferred DNS server: 8.8.8.8
Alternate DNS server: 8.8.4.4
- OpenDNS
Preferred DNS server: 208.67.222.123
Alternate DNS server: 208.67.220.123
- DNS Advantage
Preferred DNS server: 156.154.70.1
Alternate DNS server: 156.154.71.1
Step 6 : Restart to complete the process.
2. Instructions on how to change DNS on a Mac computer
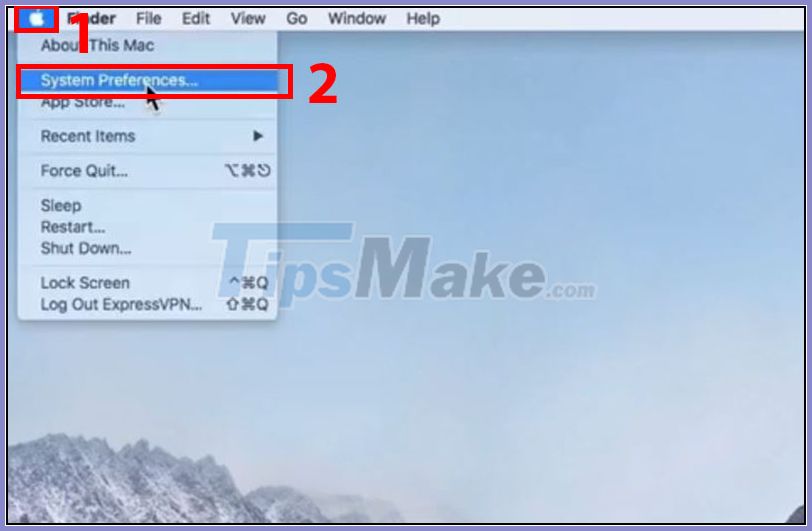
Step 1 : Choose Apple menu (apple logo) on the top left corner of the screen> Select System Preferences .
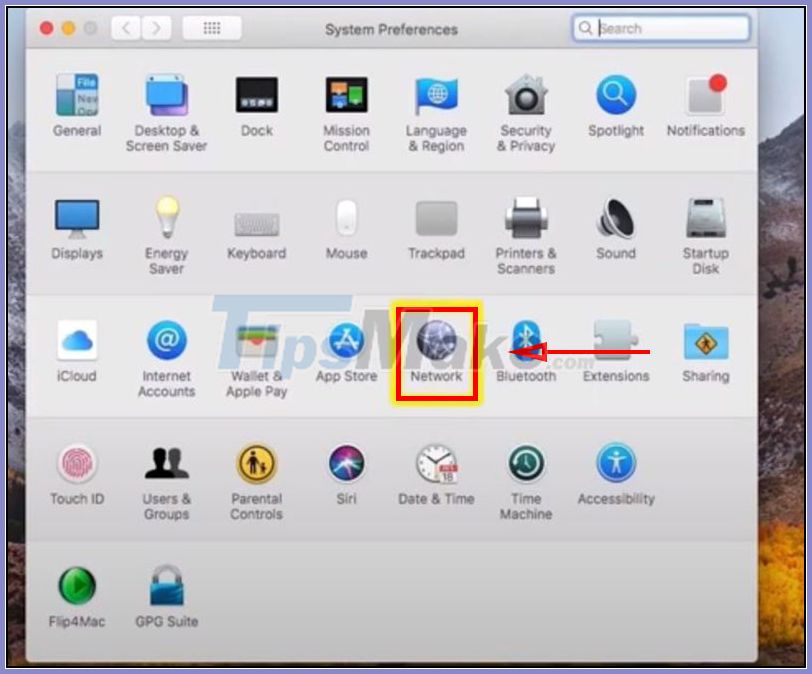
Step 2 : The System Preferences window appears, select the Network section .
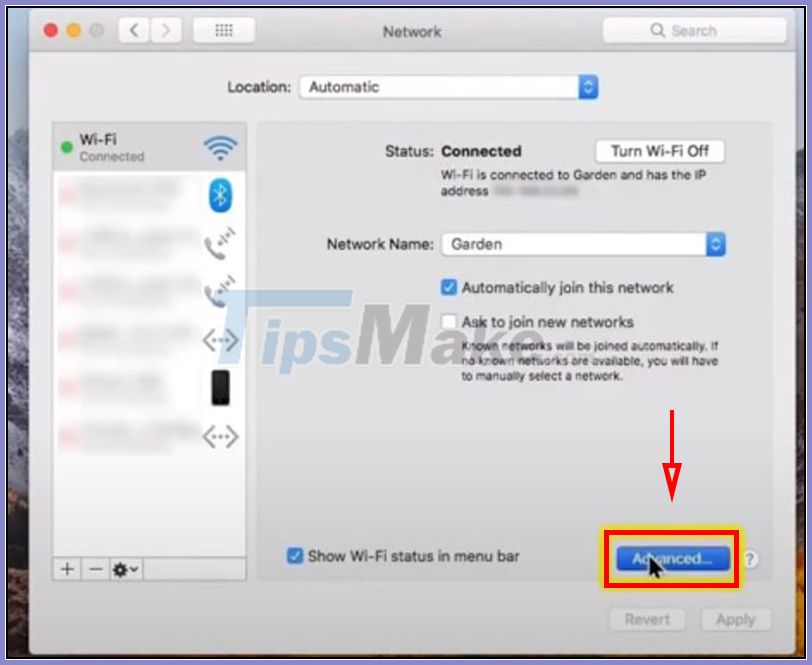
Step 3 : Open advanced options for Network by clicking on Advanced… .
Step 4 : Switch to the DNS tab , select the plus symbol " + " for the first time to add Preferred DNS .
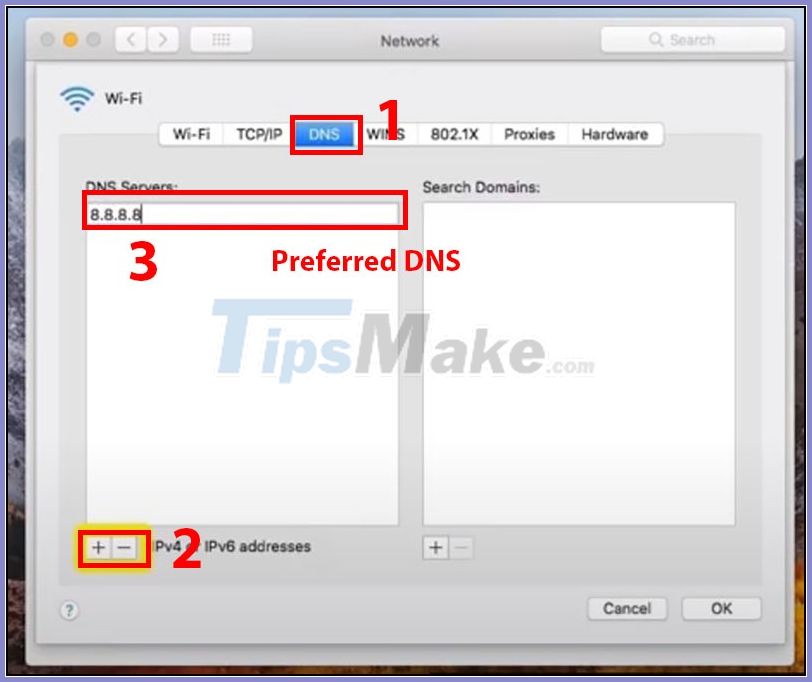
Step 5 : Select the plus symbol "+" again to add Altemnate DNS > Click OK and Apply to save the changes.
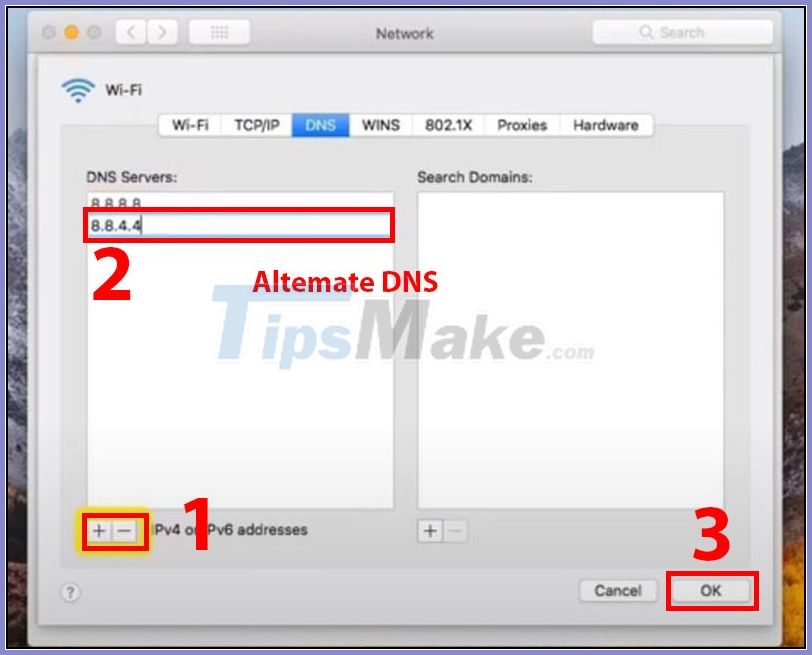
Some DNS references :
Preferred DNS server: 8.8.8.8
Alternate DNS server: 8.8.4.4
- OpenDNS
Preferred DNS server: 208.67.222.123
Alternate DNS server: 208.67.220.123
- DNS Advantage
Preferred DNS server: 156.154.70.1
Alternate DNS server: 156.154.71.1
Step 6 : Reboot to complete.
Above is the guide to change DNS on Windows and macOS, hope this article can help you, wish you success!