How to batch resize photos in Photoshop
Resize – batch resizing photos is not a difficult task to do. Especially when you use the 'Image Processor' tool in Photoshop.
Table of Contents
Resize – batch resizing photos is not a difficult task to do. Especially when you use the 'Image Processor' tool in Photoshop. Please scroll down to the content of the article below to see how to do it.
Batch resize photos in Photoshop
In this article, TipsMake will guide you in using the 'Image Processor' tool to batch resize images. This feature can be applied to many photos with different horizontal and vertical orientations, without requiring an 'action'. Sounds great, right?
Step 1: Prepare your files
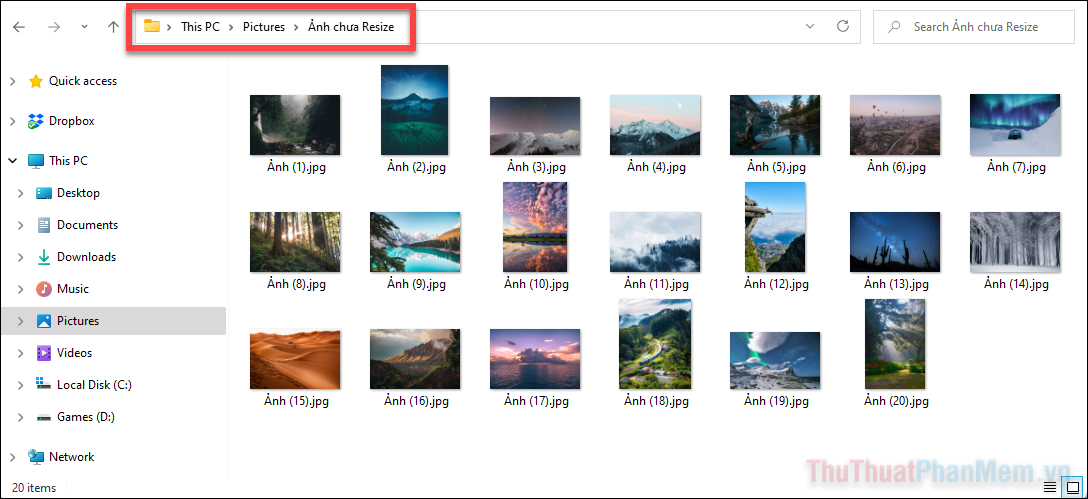
First, prepare all the images you want to resize in the same folder.
Continue to create a second folder - which serves as the output for resized images. On a Mac, in the Finder application, select File >> New >> Folder to create a new folder. For Windows Explorer, you create a new folder using the Control + Shift + N combination .

Step 2: Start Image Processor.
Open Photoshop, right from the main page of the software, select File >> Scripts >> Image Processor…

Step 3: Select folder
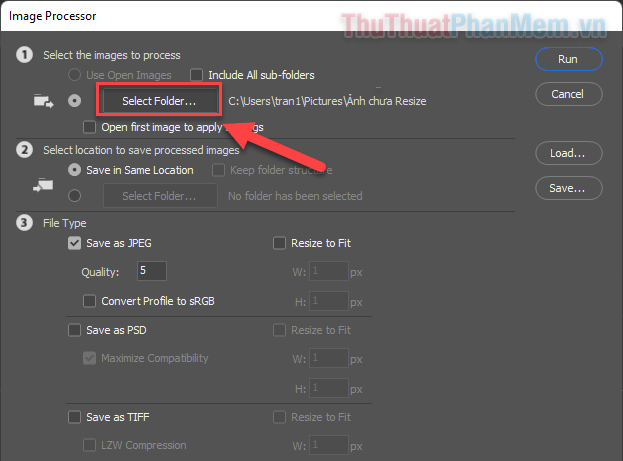
In part 1 of Image Processor, use the Select Folder… button to select the folder where you saved all your images.
Note : If your photo folder has subfolders, select Include All sub-folders .
Step 4: Choose a folder to save the file after resizing
In part 2, click Select Folder. to select the newly created empty folder to save the resized images.
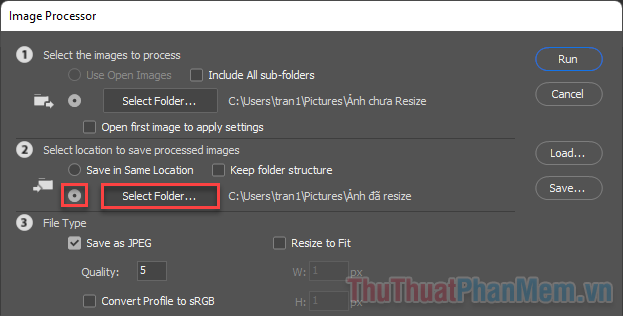
Additionally, if you select Save in the Same Location , the new images will overwrite the original images after resizing. So please consider this option.
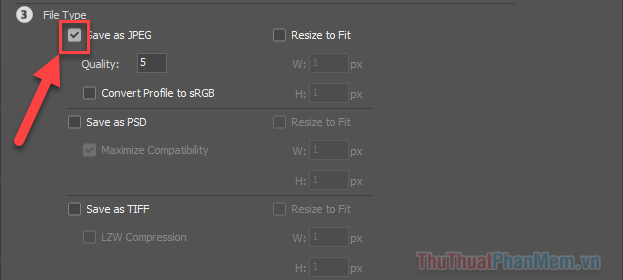
Step 5: Choose file type
In section 3, select the file type to which you want to export the photo (JPEG is the most common). Please check the box in front of the file type of your choice: JPEG, PSD or TIFF.
Step 6: Set size parameters
Select Resize to fit . Then you enter new dimensions for all images with the W (width) and H (height) boxes . The unit of calculation is Pixel.
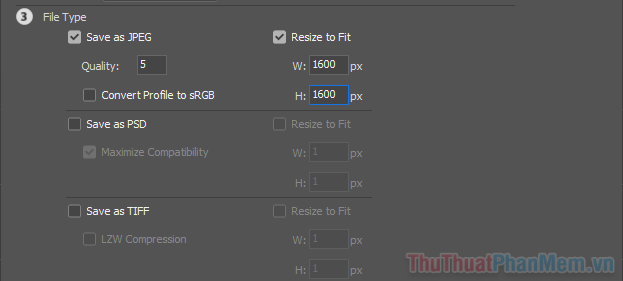
You must fill in both the width and height boxes. But don't worry because the software will preserve the original aspect ratio. That means it will resize the image based on the longest edge of the image.
For example, if you want to size all images to 1600 pixels, set 1600 pixels in both the width and height boxes. Then, the longest side of each image will be 1600 pixels. The shorter side will be adjusted automatically to maintain the same aspect ratio.
Additionally, in the Quality section , you can also enter the number 10 to maintain the image quality.
Step 7: Run batch resize in Photoshop
When you're ready for Photoshop to resize the image, just click Run. The process will start with each image in turn.

If you have a large number of images, this process will take some time. You will find the full number of processed images in the export folder.
Conclude
The Image Processor feature in Photoshop helps you process large numbers of images quickly. So, please take advantage of this feature often. Remember that you can also use this feature to convert images from one file type to another, for example RAW to JPEG.
Was this article helpful?
Your feedback helps us improve.
Related Articles
 How to batch resize photos with XnConvert6 minutes read
 How to resize photos in Photoshop3 minutes read
 The fastest way to batch resize photos with Microsoft's Power Toy software3 minutes read
 How to resize images properly in Photoshop9 minutes read
 How to resize photos on iPhone mass4 minutes read
 Guide to resize a batch of photos on Mac using Automator3 minutes read
Reader Comments 0
Sign in with email or Google to join the discussion.