Table of Contents
This guide explains how to resize photos on iPhone mass using a clear, step-by-step process. It also highlights the settings and checks that can help you avoid common errors.
To resize images, you can use photo resize services online. With Android and iOS devices, different photo editing applications are needed. However, if you only need to change the image size, you can use Siri Shortcuts application on iPhone.
Siri Shortcuts will install Resize Image shortcut to resize one or more photos at once in the photo album. This will greatly reduce the size of the image, increase the storage capacity on the iPhone. You only need to do it once and can change the size of a series of photos. The steps below explain how to resize photos on iPhone.
- How to mass edit photos on iPhone?
- In this way, resizing images in bulk will not take much effort as before
- Instructions for resizing images in Windows 10 series
Instructions for resizing multiple photos on iPhone
Step 1:
Users install Siri Shortcuts application according to the link below.
- Download Siri Shortcuts
Next go to the address below to install Resize Image .
https://www.icloud.com/shortcuts/14bc1867cdad42ab97c95fdef00a0a48
Step 2:
In the first interface, click Select Get shortcut . Back to Library section On Siri Shortcuts application will see shortcut Resize Image. click The 3 dots icon To change the shortcut configuration
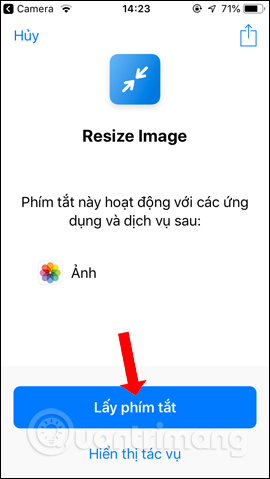
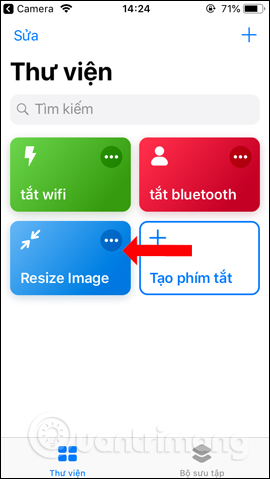
Step 3:
Switch to the configuration view to Select Picture Select . when needed to adjust and select multiple photos at once, enable Select multiple items .
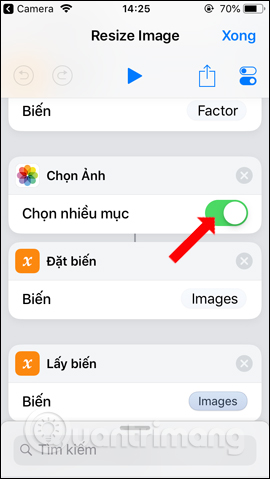
Step 4:
Continue dragging down The Resize Section to have the Width And Height section . Click select and will display the activation menu, press Ask when running .
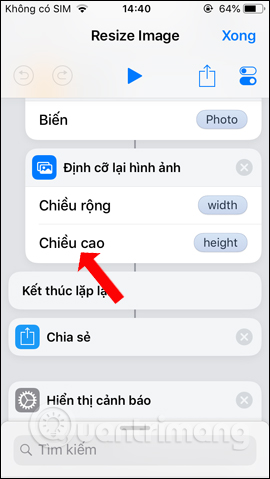

Next click The installation icon In the top right corner. Here users can change the shortcut name, shortcut icon if desired. Finally when setting up the shortcut for Resize Image press The Done button To save it.
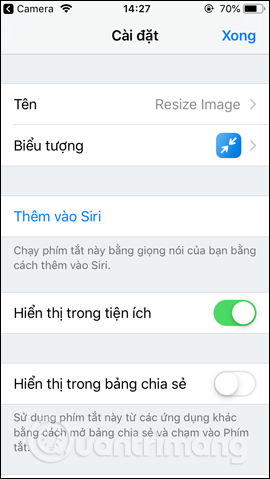
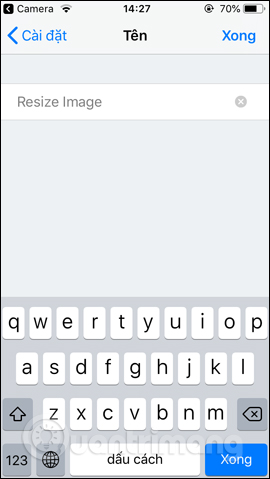
Step 5:
To use Resize Image, you can run it right from The widget interface , or you can open Siri Shortcuts application. Press 2 And Click OK To run Resize Image.
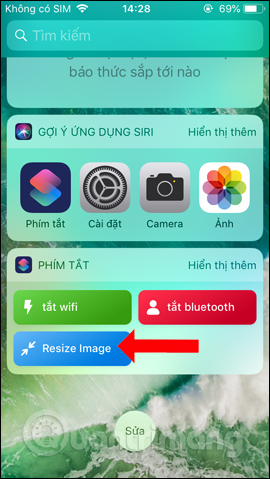
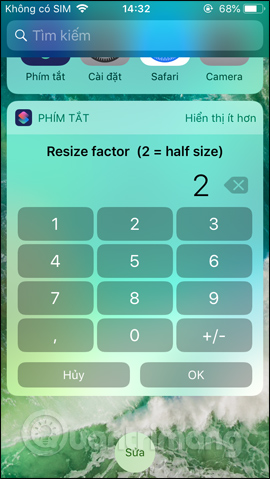
Step 6:
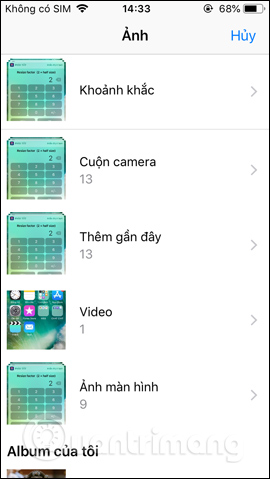
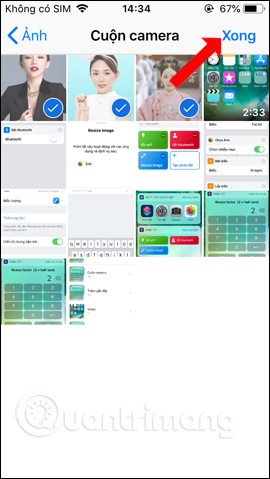
Now users will be asked to Select the image In the library. Select the images you want to resize and Click Done Above.
Step 7:
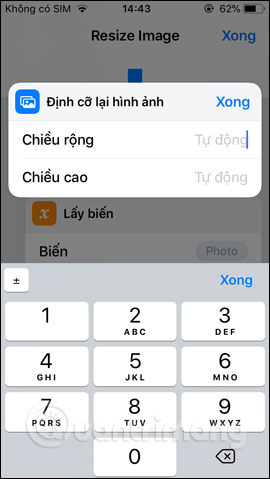
Display interface resizing image. Enter the image size In the Width and Height section. Press The Done button To apply. Click Save image Below to proceed with resizing and saving photos.
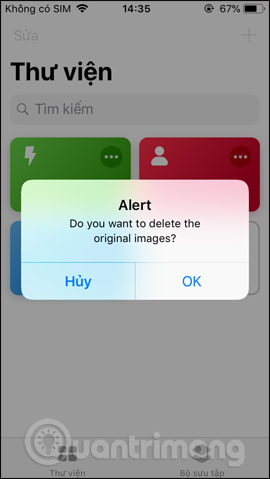
Now the shortcut will ask when needed to delete the original original image, click OK. If you press Cancel, the original image will still be retained in the gallery.
The new image will be added to the photo album on the device and the old size photo will be deleted, if users chooses not to keep the original image.

Reducing the image size on the iPhone will reduce the amount of storage images, partly increasing the capacity for the device. However, users should note, select images with the same size to reduce at the same time, avoid the case that some smaller images will be blurred when zoomed out.
- The best free photo editing software on your computer
- 15 best photo editing apps for Android
- These framed art apps for phones
I wish you all success!
FAQ
What should I prepare before I resize photos on iPhone mass?
Review the requirements in the guide, confirm that your device or software is compatible, and save important work before changing settings related to resize photos on iPhone mass.
Why might resize photos on iPhone mass not work as expected?
The most common causes are incompatible versions, missing permissions, incorrect settings, or an interrupted internet connection. Recheck each step and restart the app or device when appropriate.
Can beginners follow these resize photos on iPhone mass steps?
Yes. Follow the steps in order, avoid skipping confirmation screens, and compare your interface with the screenshots because labels may differ slightly between versions.
Related Articles
 How to Resize Photos in Photoshop4 minutes read
 How to Resize Images Properly in Photoshop9 minutes read
 How to Batch Resize Photos with Xnconvert6 minutes read
 Output: How to Resize Photos with Image Resizer for Windows4 minutes read
 Click: How to Easily Resize Photos in Windows Xp6 minutes read
 Guide to Resize a Batch of Photos on Mac Using Automator5 minutes read
Reader Comments 0
Sign in with email or Google to join the discussion.