How to automatically delete Zip files after extracting on Mac
There are many ways to reduce clutter and keep your Mac neat. You can use powerful software like Clean My Mac, or take advantage of Apple's existing features to keep your hard drive neat.
There are many ways to reduce clutter and keep your Mac neat. You can use powerful software like Clean My Mac, or take advantage of Apple's existing features to keep your hard drive neat.
- Simple ways to speed up your Mac
However, one of the easiest and easiest ways to keep your computer 'tidy' is to automatically delete the zip files after you've extracted them. By default, when downloading a ZIP file and opening it, the Mac will extract the contents in the same location as the compressed file. And you will have both the original Zip file and the extracted folder, so there is no reason to keep that zip file to increase the device memory.
Instead of manual deletion, you can change a setting in the Archive Utility of Mac to make sure that Zip file will be automatically deleted as soon as the file is extracted.

Here's how to turn it on:
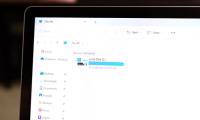
Step 1 : Open Archive Utility by searching on Spotlight. Alternatively, you can access this application by going to HD> System> Library> Core Services> Applications> Archive Utility .
Step 2 : Open the Archive Utility preferences using the shortcut Cmd + Comma .
Step 3 : In the After expanding drop-down menu, you have two options: move archive to trash or delete archive . If you select delete archive , Archive Utility will skip the trash and this file will be permanently deleted.
I wish you all success!
See more:
- How to extract Zip files directly on Google Drive
- How to recover a corrupted zip file with ZIP Repair from DiskInternals
- Top software to extract files and compress files today
Was this article helpful?
Your feedback helps us improve.
Related Articles
 How to schedule automatic file deletion in the folder Download Windows 104 minutes read
 How to turn off self-extracting files on macOS Safari2 minutes read
 How to Automatically Delete Temporary Files on Windows 113 minutes read
 Top software to extract files and compress files today11 minutes read
 Automatically 'clean up' the Recycle Bin on Windows 104 minutes read
 Delete the most 'stubborn' files on Windows12 minutes read
Reader Comments 0
Sign in with email or Google to join the discussion.