How to Advanced Compress Files with 7zip
This is an article on how to compress ZIP files to the smallest size using a Windows or Mac computer. Although the built-in file compression tool on Windows and macOS can compress files quite well, there is no option to add a higher compression level. Fortunately, you can use the free and easy-to-use 7-Zip application on Windows for a variety of options to control the final size of your files. While you can't use 7-Zip on macOS, you can use the Keka app with similar functionality to achieve similar results. You should note that files that are already compressed, such as MP3, AVI, MPG and JPG files, are not smaller than their actual size after being compressed into a ZIP file.[1] X Research Source
Table of Contents
7-Zip Program on Windows

Install 7-Zip for Windows. The 7-Zip application is a free file compression tool that offers more compression options than the standard Windows compression/decompression tool. You can download the app for free from https://www.7-zip.org.
After downloading the program, simply double-click the installer program and follow the on-screen instructions to install 7-Zip.

Right-click the file or folder you want to compress. If you want to compress multiple files into one Zip folder, you can either add them to the folder and right-click, or Control-click each file, and right-click the highlighted area.

Select 7-Zip on the menu. A few options will show up here.
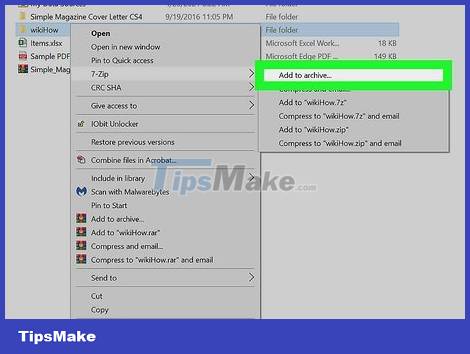
Click Add to archive… . The 7-Zip program immediately appears the Add to Archive screen.
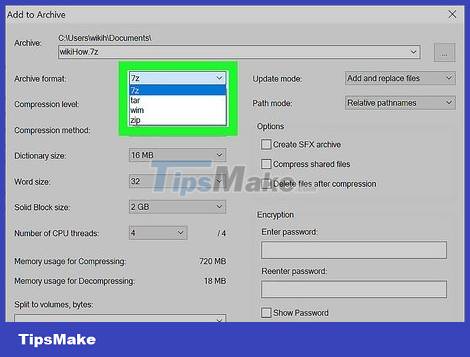
Select an archive format. The ZIP format easily opens on many other platforms, but if you choose the 7z format, the ZIP file will be smaller in size.
If you want to send the 7z file to someone else, they can extract the file without installing additional software on the Mac. If they use Windows, they need to install 7-Zip, WinZip, or an archive program that is compatible with the 7z format.
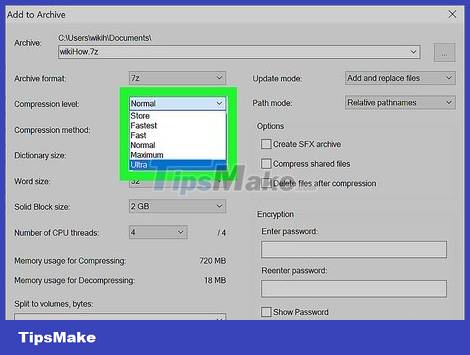
Select Ultra from the "Compression level" menu. This option gives you the smallest file size.
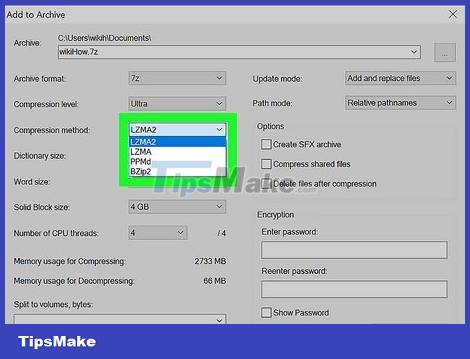
Select LZMA or LZMA2 from the "Compression method" menu. LZMA2 is the latest update of LZMA. Both of these options provide a higher level of compression than the others.
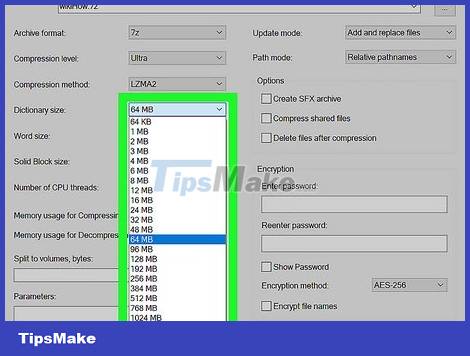
Choose the size of the compressed folder (optional). The 7-Zip program will choose the default compressed folder size based on the compression level you have selected. If it is a large file, you can increase the compressed folder size higher than the default 64MB to reduce the file size, but the compression time will be longer. The maximum size of the compressed folder is 256MB.
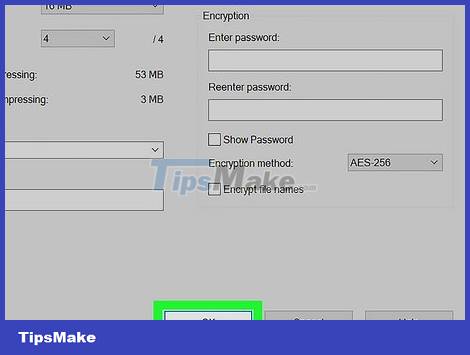
Click OK to compress the file. After the 7-Zip program finishes creating the archive, the file will show up in the same folder as the original file - that is, a .zip or .7z file.
To see the size of the compressed ZIP file, you will right-click the .7z or .zip file and select Properties.
The Keka Program on macOS

Install Keka. This is a free and open source file compression tool for macOS that offers more compression options than the built-in zip archive utility. To download Keka, you would open the App Store on your Mac (white "A" icon on a blue background) and search for keka. Once you find the program, you need to click the GET button to install the application.
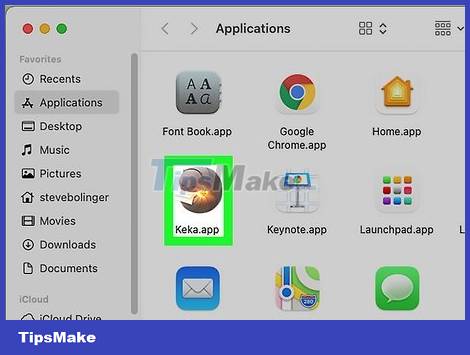
Open Keka. After you install Keka, you'll find the program in the Launchpad and Applications folder.
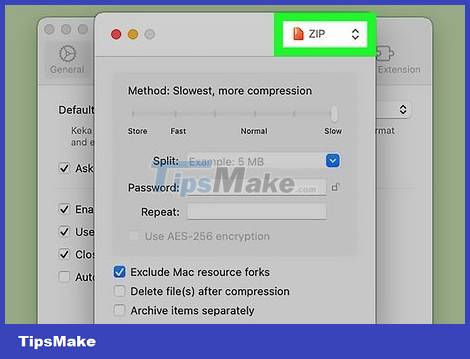
Select a compression format. For the highest compression level, you need to choose ZIP, 7z or GZIP. The ZIP format is the most popular and can be opened on any platform without the need to install additional tools, but based on comparative tests the 7Z format will actually compress ZIP files to a smaller size than other formats. other formats, and at a faster rate.
You need to install special software on your Mac to extract 7z files, but Windows users need to install 7-Zip (free).
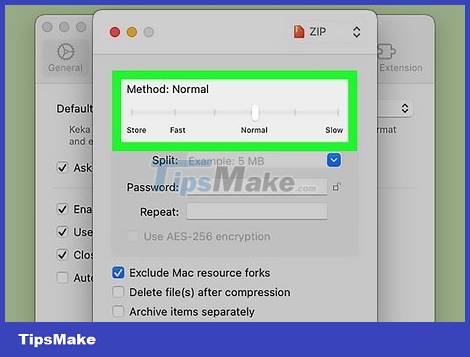
Drag the slider to the right. When the slider is in the "Slow" position, Keka will compress the file to the smallest possible size. Since it is a high compression process, the compression time will be long and the word "Slow" is displayed here.
Leave the default settings for the rest of the options to get the highest compression in the shortest amount of time.
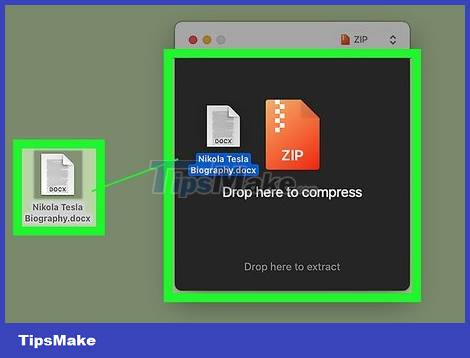
Drag the file you want to add to the zipped ZIP folder. If you want to compress multiple files into a ZIP folder, you can add them to the folder and drag the folder into the application. Or, you can press the Command key while clicking each file, and then drag the highlighted file onto Keka. This will compress the file to ZIP or 7z format, depending on your choice.
To see the file size, you would click on the file in the Finder, and press Command + I to view the file's information.
Was this article helpful?
Your feedback helps us improve.
Related Articles
 Test evaluation of 2 WinRar and 7Zip compression tools2 minutes read
 How to compress and decompress files on iPhone2 minutes read
 How to reduce PDF file size by software6 minutes read
 How to compress and decompress files with WinRar?3 minutes read
 How to compress and decompress files and folders on a Mac3 minutes read
 The way to Compress large files is very easy20 minutes read
Reader Comments 0
Sign in with email or Google to join the discussion.