How to compress and decompress files with PowerShell on Windows
How to compress and decompress files with PowerShell on Windows. Besides compressing and decompressing files with Winrar software, we can also compress and decompress files with Powershell.
Table of Contents
Besides compressing and decompressing files with Winrar software, we can also compress and decompress files with Powershell. In today's article, we will learn how to do this extremely unique operation.
1. Compress files and folders with PowerShell
To compress files in the PowerShell file, we will use the following command:
Compress-Archive -Path file path, root directory -DestinationPath file path, destination directory
Inside:
file path, root directory: Is the file path, root directory with the file extension name.
file path, destination directory: Is the file path, compressed directory + compressed file/folder name that you set.
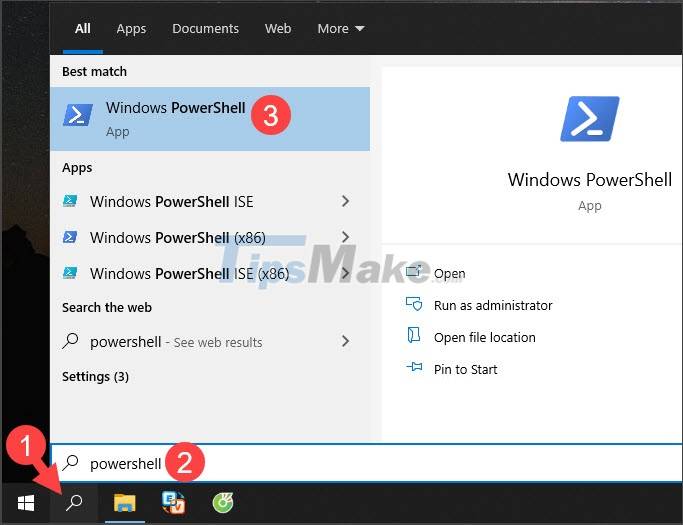
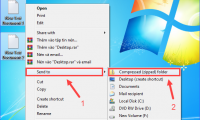
Step 1: You open PowerShell by going to the Search menu (1) => search with the keyword PowerShell (2) => Windows PowerShell (3).
Step 2: You enter the following command.
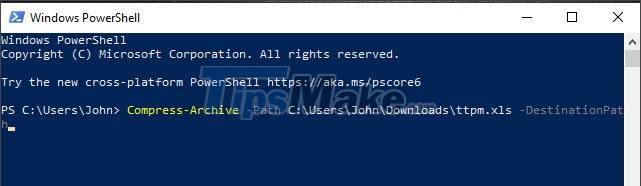
Compress-Archive -Path

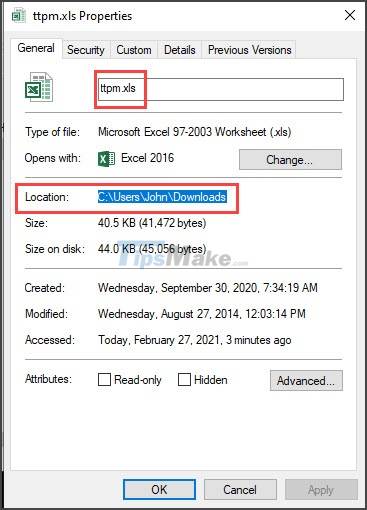
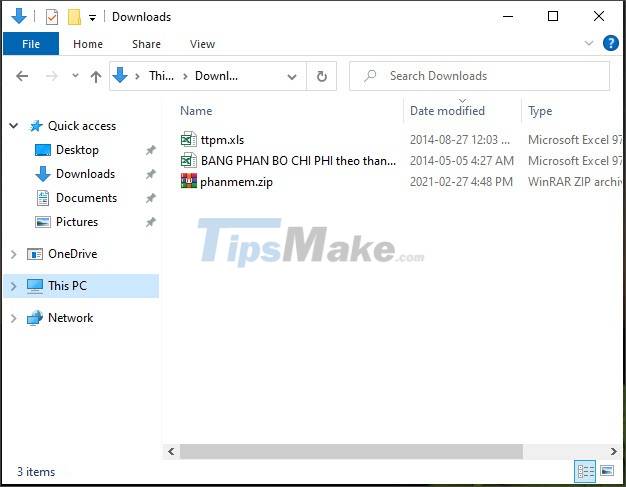
Next, you can get the file path to compress by right-clicking on the file (1) => Properties (2).

Next, memorize the file address, file name (circled in red) or highlight the address and file name and press Ctrl + C to copy.
Then, you enter or paste (press Ctrl + V) the address and file name into PowerShell.

Step 3: Paste the command line behind.
-DestinationPath
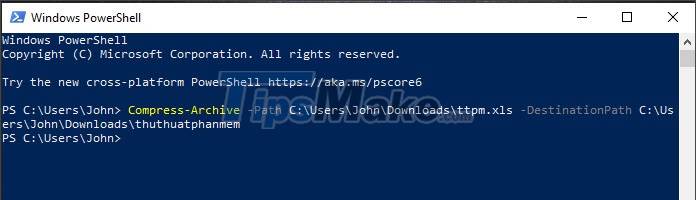
Next, enter the destination folder address after extracting the file and insert the file name and press Enter to compress the file.

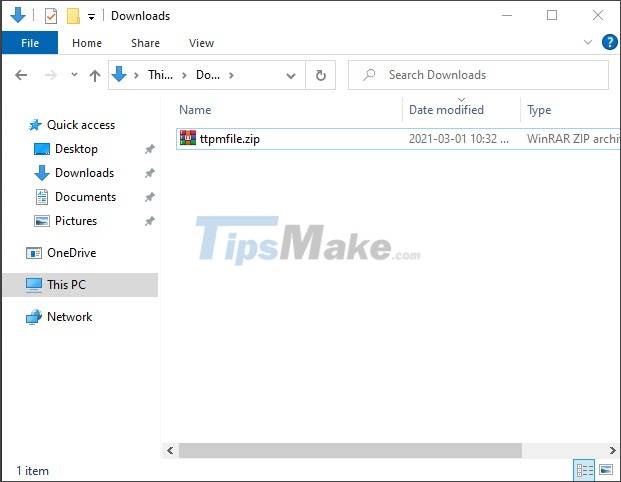
After done, the PowerShell command does not report an error.
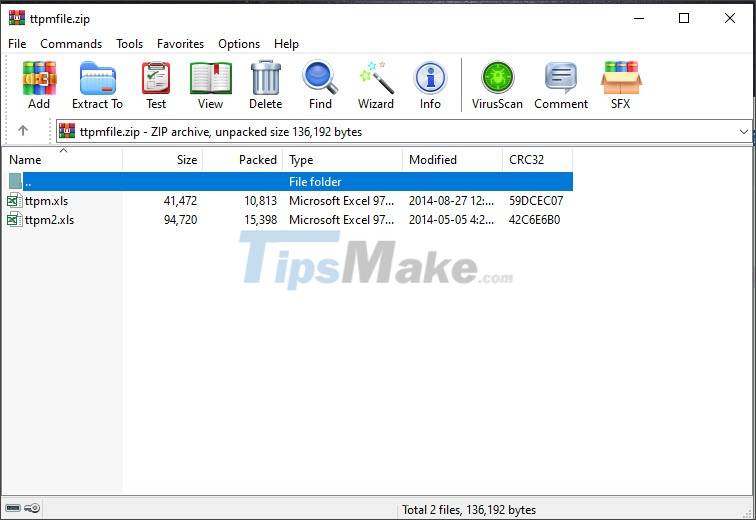
Step 4: Then, you open the folder and check the compressed file.
Compressed file works fine and shows full archive as success.

2. Compress multiple files with PowerShell
Compress multiple files with PowerShell, use the following command:
Compress-Archive -LiteralPath file path 1, file path 2, file path n -DestinationPath directory path, compressed file
Inside:
file path 1, file path 2, file path n: is the file path you need to compress.
folder path, compressed file: is the path to the compressed folder + the file name you set.
Step 1: After determining the path and name of the compressed file to create.
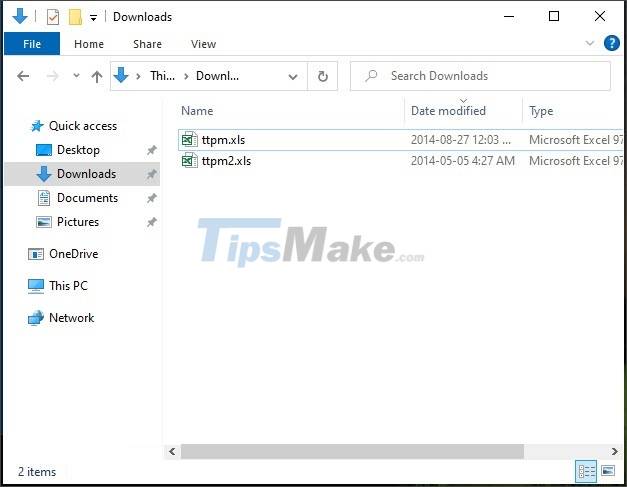
Step 2: You enter the command with the syntax presented above to create the compressed file.

Step 3: You check the compressed file after completion.

If the compressed file works well and has enough files as you requested, it is successful.
3. Extract files with PowerShell
Step 1: To decompress the file in this way, the compressed file must be in .zip format. Next, you specify the file name and directory containing the file.
Step 2: You open PowerShell and execute the command with the following syntax.
Expand-Archive -LiteralPath archive path -DestinationPath destination directory path
Inside:
zip file path: Is the path to the compressed .zip file to decompress.
destination directory path: The path to the directory after extracting the file.

Step 3: You check the file after extracting.

If enough files and files work fine then success!

With basic and easy to follow instructions with the command line in PowerShell, you can perform compression and decompression of files in a unique way. Good luck!
Was this article helpful?
Your feedback helps us improve.
Related Articles
 How to compress and decompress files on Windows 103 minutes read
 How to compress and decompress files on Windows 114 minutes read
 How to compress and decompress files and folders on a Mac3 minutes read
 How to compress and decompress files in Node.js6 minutes read
 How to compress and decompress ZIP files quickly5 minutes read
 How to compress and decompress files without installing additional software on Windows 103 minutes read
Reader Comments 0
Sign in with email or Google to join the discussion.