Table of Contents
Overview
This guide explains how to adjust audio balance in Windows 11 in clear, practical terms. It covers the key concepts, recommended steps, common limitations, and useful checks so you can make a better-informed decision.
The phenomenon of the left and right speakers on Windows being out of tune, one loud and one soft is not uncommon. Sometimes you just need to edit and change the settings in the computer, the sound will be balanced again. Below are some ways to adjust the sound balance in Windows 11.
How to Balance Windows 11 Sound via Settings
Step 1:
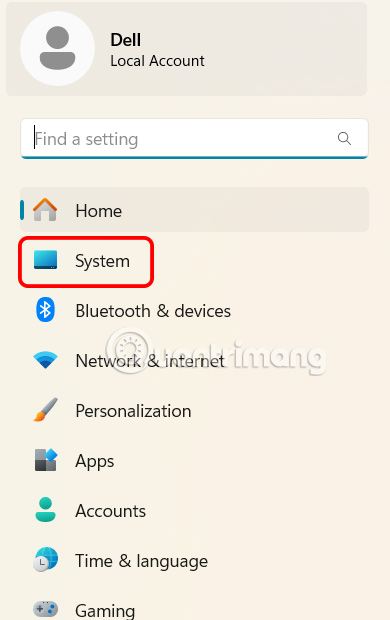
Press Windows + I to open the Settings interface. Next, select System in the list on the left of the interface.
Step 2:
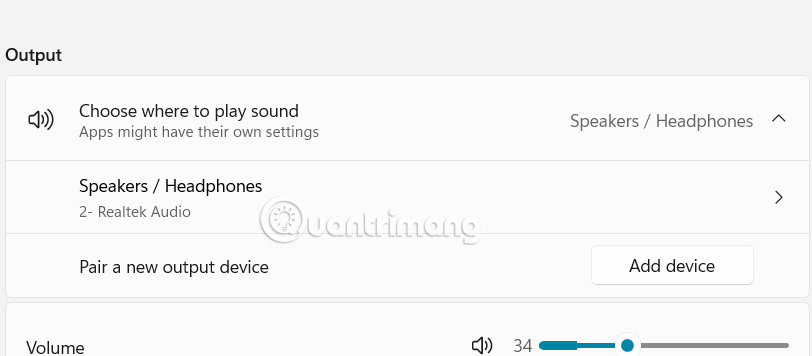
Looking at the interface next to it, click on Sound to adjust the sound on Windows 11.

Next, you choose the output audio device that needs to be adjusted, which can be headphones or speakers connected to the computer.
Step 3:
Then we see the left and right audio adjustment settings for Windows audio output.
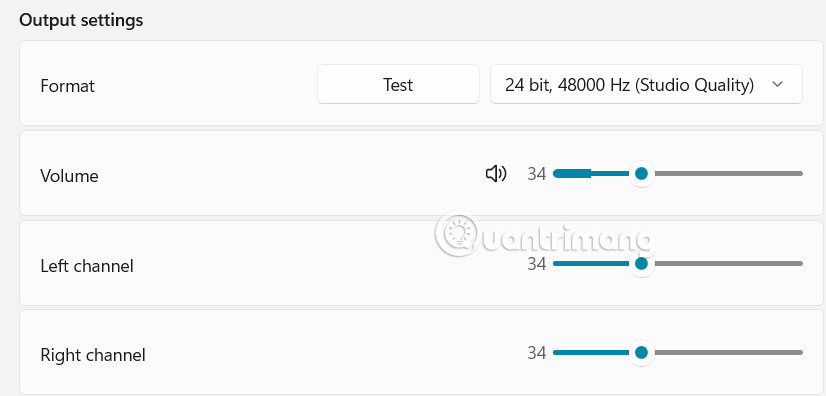
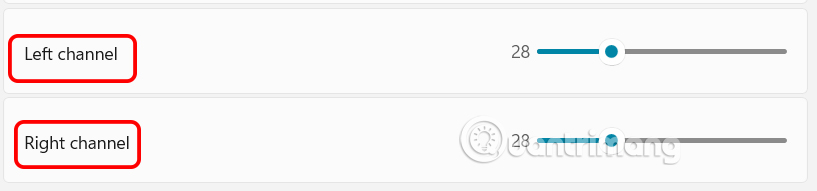
You need to drag the sliders for both left and right audio equally to balance the audio output.
How to balance Windows sound via Control Panel
Step 1:
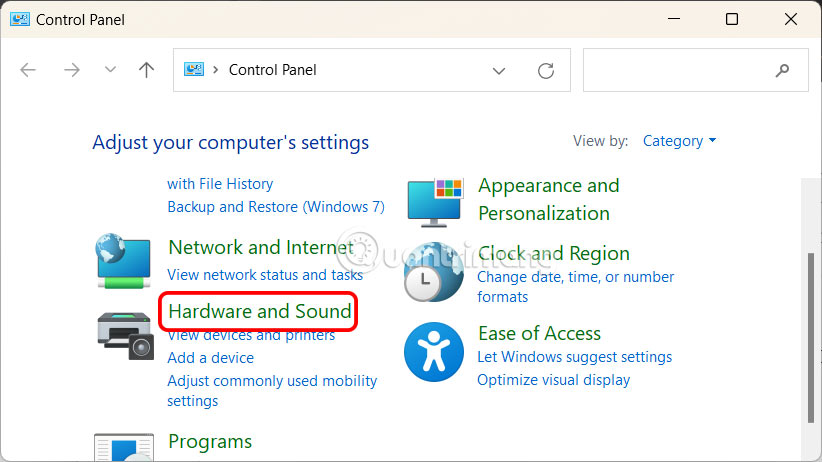
We access Control Panel on Windows 11, then click on Hardware and Sound management.
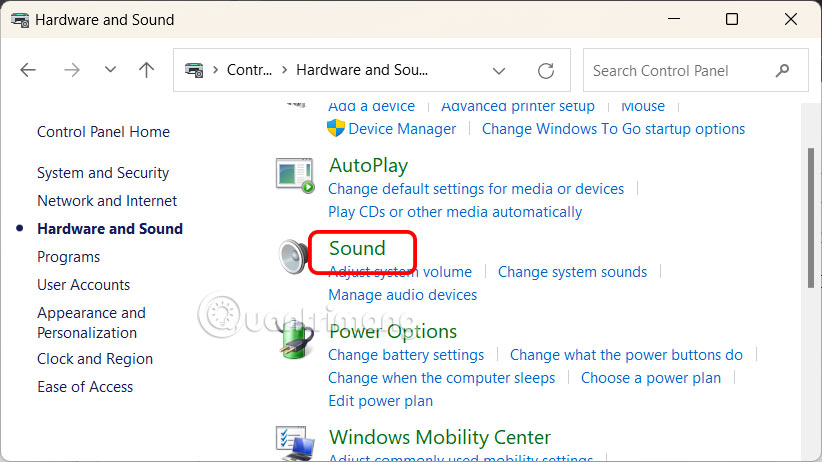
Go to the next interface, the user clicks on Sound to set up.
Step 2:
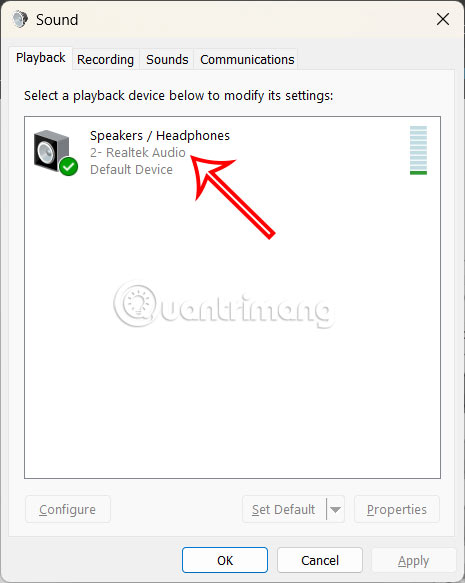
Display the audio output interface, double click on this device.
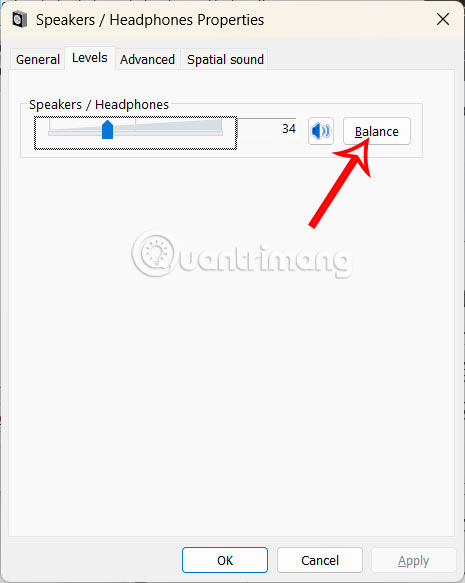
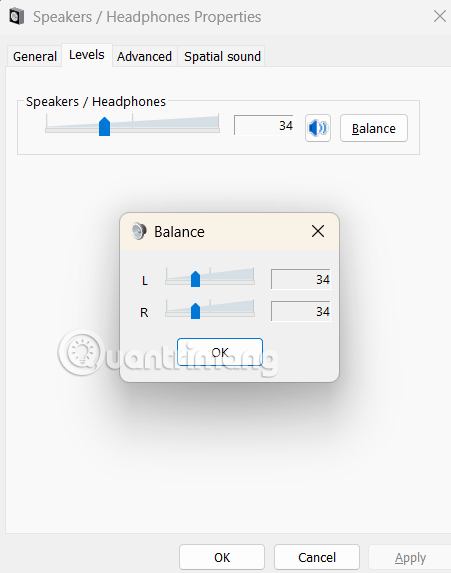
At this time, the user clicks on the Levels tab, then clicks on the Balance button to adjust the sound balance mode on the computer.
Step 3:
Finally, the user adjusts the left and right sound to be balanced.
Key Takeaways
Use the guidance above as a practical reference for adjust audio balance in Windows 11. Check compatibility, follow the steps carefully, and verify important details with official documentation when software, security, accounts, health, or purchases are involved.
FAQ
How do I adjust audio balance in Windows 11?
Follow the steps in this guide in order, confirm each setting before continuing, and save, restart, or reconnect the device when the instructions require it.
What should I check before I begin?
Confirm the correct device, account access, software version, compatibility, and a current backup whenever the process could affect files, settings, or security.
What should I do if the process does not work?
Repeat the steps carefully, check for model or version differences, install available updates, and consult the manufacturer's official support documentation.
Related Articles
 How to Adjust Audio and Subtitles on Netflix3 minutes read
 How to Adjust Windows Microphone Settings for Clearer Audio Calls6 minutes read
 Fix Windows Sound Loss: Ways to Troubleshoot Audio on Windows 1012 minutes read
 How to Manage and Improve Sound Quality in Windows 1011 minutes read
 How to Check the ACB Account Balance on Phones and Computers7 minutes read
 How to Check the Account Balance of BIDV Fastest6 minutes read
Reader Comments 0
Sign in with email or Google to join the discussion.