Table of Contents
This guide explains how to draw Basic Shapes in Adobe Illustrator, with clear steps, practical tips, and important checks before you begin.
Draw simple geometries with Adobe Illustrator
Let's learn how to create basic shapes using the Shape tool. You need to know the following information:
- Shape tool is located in the Tools panel
- To use the tool to draw other shapes, right-click and the tool and select the image you want to draw.

- When you draw a shape, Smart Guides will support display the size of the image, capture on other objects and indicate when the ellipse or square is perfect.
- Most images are live, meaning you can edit them directly without having to switch to another tool.
- Different images will have different utilities for editing angles, edges and other indicators.
Start drawing
First, you need to download the exercise file here to start practicing step by step.
bai-tap-ve-hinh-co-ban. zip
In this section, you will practice drawing each shape and then you can start drawing the robot on the right. Please follow the steps below.

First, you'll need to turn on Smart Guides to draw the desired shape, select View >> Smart Guides , if it's already enabled, skip this step.

Draw squares in Illustrator
Then select the Rectagle Tool (square drawing tool) on the toolbar:

Drag and drop to draw squares similar to the pattern on the operation of the Smart Guides. Skillfully draw so that the blue border matches the dashed line of the pattern.
Here you will see a small label to display the 2-dimensional size of the square with W being the width and H being the length, the unit of measurement in pixels.

When both sides have equal length or appear diagonal pink means square is perfect, release the mouse to apply.
Remember, you can always just fix a picture at any time instead of redrawing it. Using Shift while editing will keep the ratio of 2 edges.
To adjust the squareness of the square, you first need to turn on the Bounding Box, select View >> Show Bounding Box .

At this point, the corners of the square will appear with dots, the closer you drag them to the center, the larger the corner of the board will be.

Perform drag and drop and the corners will be boiled:

If you want to add only the corner you want, click on that corner and then drag.

Draw triangles in Illustrator
To draw a triangle, right-click on the Rectangle Tool and select to Polygon Tool .

You hold the mouse to the center of the triangle and start pulling to create a hexagon.

When you get the relative size, hold down Shift to rebalance the shape, then align so that the vertices of the triangle touch the midpoint of the three sides of the hexagon as follows:
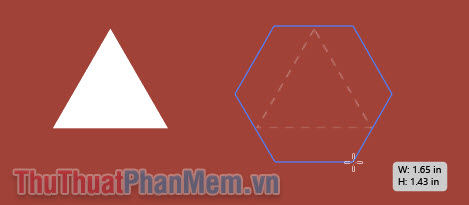
Then release the mouse:
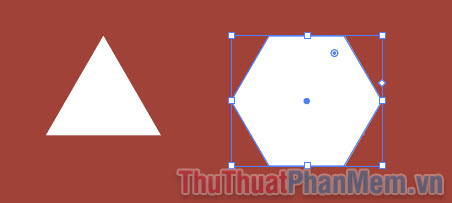
To change the number of corners of a polygon to 3, notice the control dot:

Drag it up and the number of corners will be reduced, you stop when it is only 3.

Resize it to fit the pattern.

Draw combination shapes
To draw the combination image below is also very simple.
To draw a circle in Illustrator, continue with the Ellipse Tool .

Hold Shift and drag and drop as you draw the square, you will have a perfect circle.

Triangles you do the same as above. Or, using the Selection Tool , click on the triangle and then press Ctrl + C and Ctrl + V to make a copy of it.
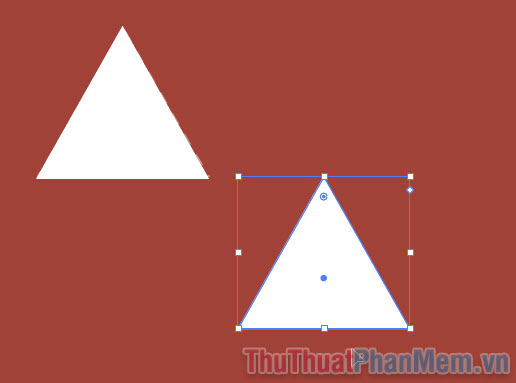
Then just recalibrate to the correct position and size.

Drawing 2 horizontal rectangles is nothing easier.

Practice drawing robots
Now that you practice drawing the robot, you may notice the following inadequacies: This circle has a white border and a red inner background, so how do you get the shape?

Don't worry and skip to the tutorial Coloring and changing colors in Adobe Illustrator, you'll get the answer here.
The first tutorial on drawing basic shapes in Adobe Illustrator has ended, wish you successful practice!
FAQ
What should I know about Draw Basic Shapes in Adobe Illustrator?
Focus on the key features, requirements, limitations, and practical use cases explained in this guide.
How do I get the best results with Draw Basic Shapes in Adobe Illustrator?
Follow the recommended steps, use current software or information, confirm compatibility, and review settings before major changes.
Are there any risks or limitations?
Potential limitations depend on compatibility, data quality, cost, privacy, support, and how the product or method is used.
Related Articles
 How to Cropping and Deleting Shapes in Adobe Illustrator4 minutes read
 Tutorial Drawing. 'Unicorn' in Adobe Illustrator11 minutes read
 Cropping and Deleting Shapes in Adobe Illustrator4 minutes read
 How to Draw a Straight Line in Adobe Illustrator6 minutes read
 Adobe Illustrator: Complete Guide: Download Adobe Illustrator 2021.26.04 minutes read
 Instructions for Combining Shapes and Cutting Images in Adobe Illustrator4 minutes read
Reader Comments 0
Sign in with email or Google to join the discussion.