Steps to insert images into AutoCAD

1. Insert images into Cad via Microsoft Word

With this way of inserting images, you do not need to convert the image format to BMP and still insert it into AutoCAD. Proceed as follows:

Step 1: Open Microsoft Word and insert the image you want to convert to Cad. Next, you right click on the image (1) => Copy (2).

Steps to insert images into AutoCAD Picture 1

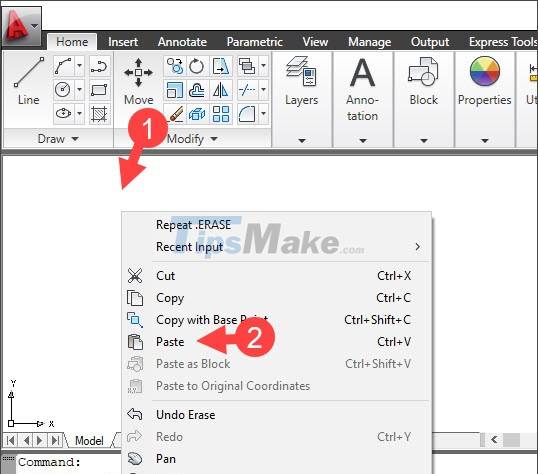
Step 2: Right-click on the Cad workspace (1) => Paste (2).

Steps to insert images into AutoCAD Picture 2

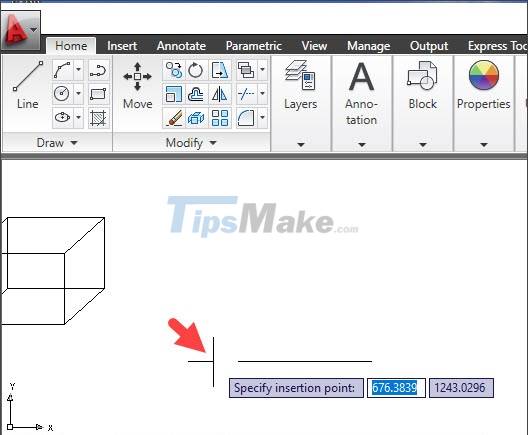
Step 3: You click on the point to insert the image on Cad.

Steps to insert images into AutoCAD Picture 3

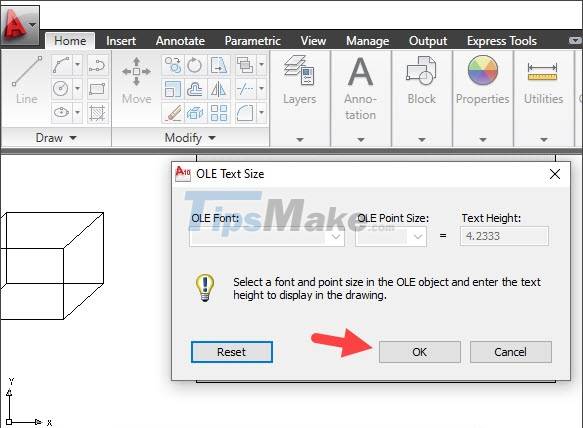
Step 4: Click OK to insert the image.

Steps to insert images into AutoCAD Picture 4

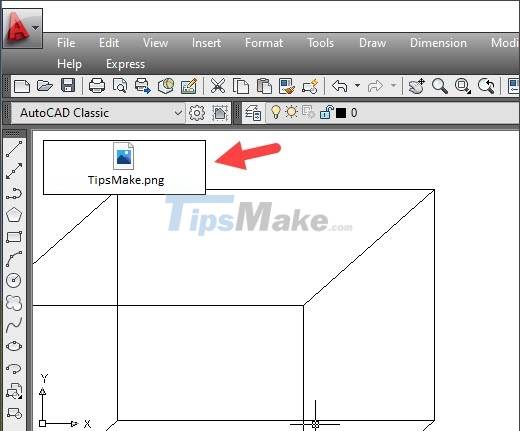
And then you have the desired image on Cad.

Steps to insert images into AutoCAD Picture 5

2. Other ways to insert images in Cad

If you do not change the image file to .bmp format, the image file after being inserted in Cad will not be fully displayed, but only displayed as an icon or image information as shown in the example below.

Steps to insert images into AutoCAD Picture 6

2.1. Convert image files to BMP . format

You can quickly convert image files to bmp format with the Paint tool available on Windows as follows.

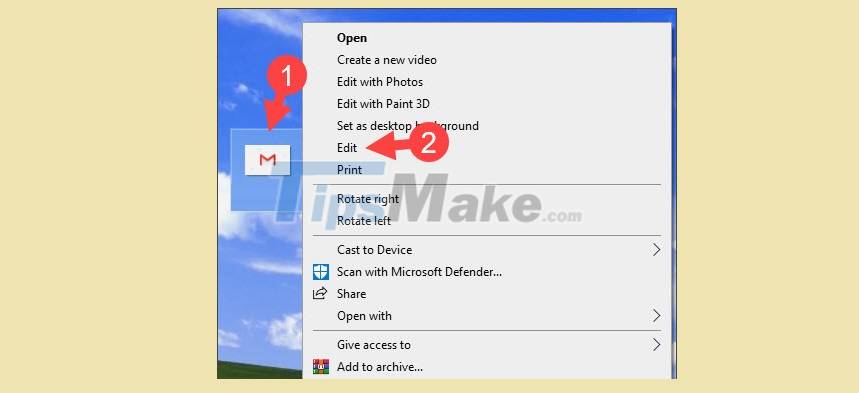
Step 1: Right-click on the image file (1) => Edit (2).

Steps to insert images into AutoCAD Picture 7

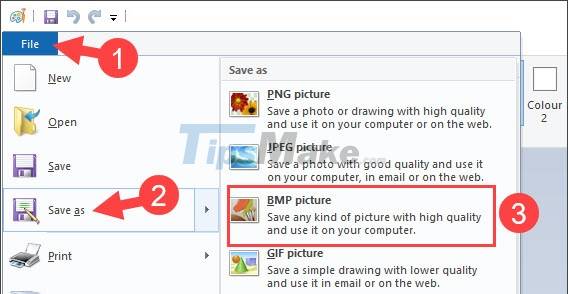
Step 2: You go to menu File (1) => Save as (2) => BMP picture (3).

Steps to insert images into AutoCAD Picture 8

Step 3: Next, save the image with the option name (1) => Save (2).

Steps to insert images into AutoCAD Picture 9

2.2. Insert images with the Attach . tool

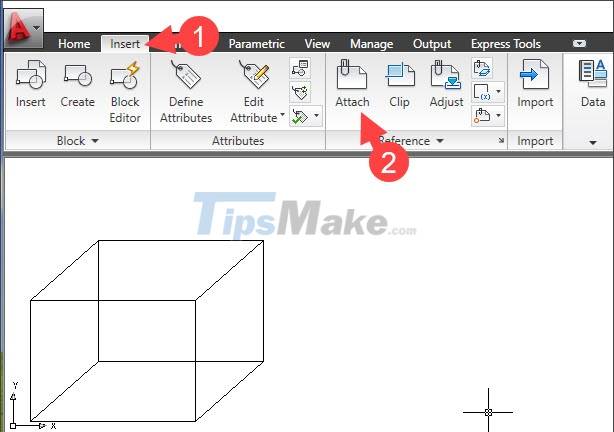
Step 1: You go to the menu Insert (1) => Attach (2).

Steps to insert images into AutoCAD Picture 10

Step 2: Click on the image file you want to insert (1) => Open (2).

Steps to insert images into AutoCAD Picture 11

Next, click OK to insert.

Steps to insert images into AutoCAD Picture 12

Step 3: You click on the point to insert the image.

Steps to insert images into AutoCAD Picture 13

Next, enter the scale parameter for the image and press Enter. The smaller the number, the smaller the displayed image size.

Steps to insert images into AutoCAD Picture 14

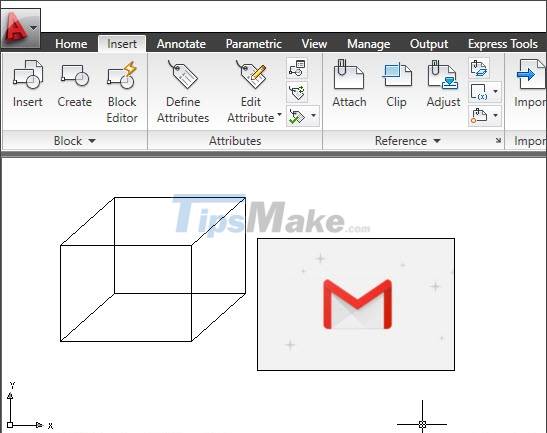
After the operation is complete, your image will be inserted in Cad as shown below.

Steps to insert images into AutoCAD Picture 15

Step 4: To resize the image, select the image and click on the 4 points on the image to enlarge / reduce the image.

Steps to insert images into AutoCAD Picture 16

Next, you move in the direction you need to zoom in/out to adjust the image as you like.

Steps to insert images into AutoCAD Picture 17

And then you will have the image you want.

Steps to insert images into AutoCAD Picture 18

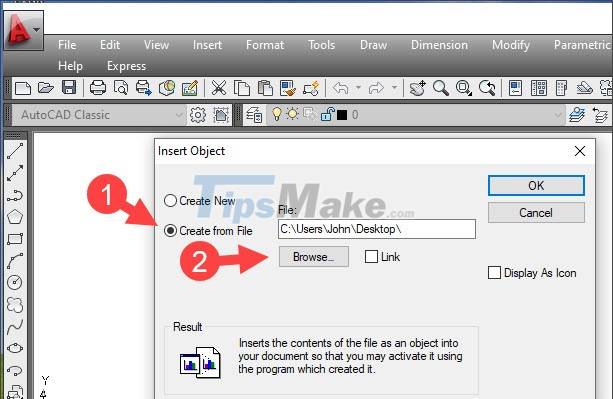
2.3. Insert images with OLE Object

OLE Object (Object Linking and Embedding) is a tool to help you insert attachment formats developed by Microsoft. In Cad this tool is integrated and you can use this tool to insert images.

Step 1: You go to Insert menu (1) => OLE Object (2).

Steps to insert images into AutoCAD Picture 19

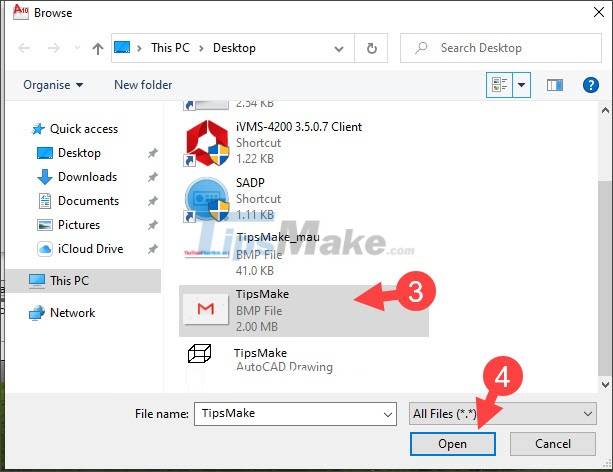
Step 2: Click Create from File (1) => Browse (2).

Steps to insert images into AutoCAD Picture 20

Next, you select the image file (3) => Open (4) to insert.

Steps to insert images into AutoCAD Picture 21

Step 3: Click OK to insert.

Steps to insert images into AutoCAD Picture 22

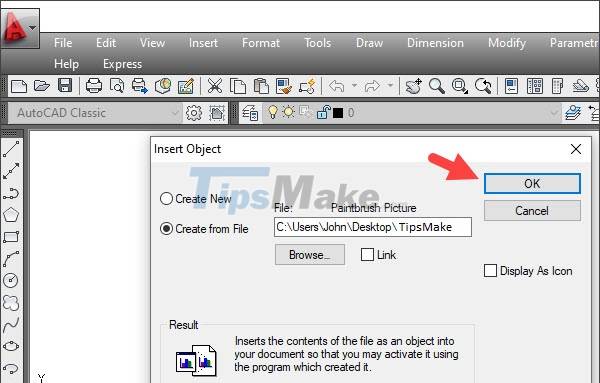
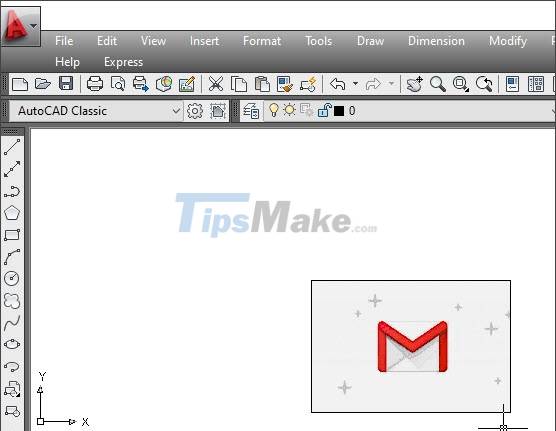
After the setup is complete, your image is inserted into the Cad file.

Steps to insert images into AutoCAD Picture 23

With the instructions in the article, you can insert any image into AutoCAD quickly and easily. Good luck!

4.5 ★ | 4 Vote

May be interested

  • Steps to count objects in AutoCADSteps to count objects in AutoCAD
    counting objects in autocad. you are curious to know how many lines, blocks, layers... in the following article, let's learn about simple and quick tips for counting objects in cad.
  • Steps to delete Layers in AutoCADSteps to delete Layers in AutoCAD
    layers help autocad users manage their drawings well and arrange components into layers for easy tracking and editing. so how to delete a layer? let's learn how to delete layers in cad through the following direction.
  • Steps to draw curves in AutoCADSteps to draw curves in AutoCAD
    for learners and users of autocad, drawing curves is one of the skills you need to master. in the following article, let's learn about how to draw curves in cad.
  • 150+ shortcuts and commands in AutoCad - use AutoCad professionally150+ shortcuts and commands in AutoCad - use AutoCad professionally
    share 90 commands in autocad and 45 shortcuts in autocad that you should know for more professional use. share all the commands and shortcuts in autocad 2004, 2007, 2015 .... to use autocad most effectively ...
  • The simplest way to insert images into Word on Android and iPhone phonesThe simplest way to insert images into Word on Android and iPhone phones
    instructions on how to insert images into word on your phone extremely quickly and effectively. you just need to follow a few steps below:....
  • How to insert a batch image into Excel boxHow to insert a batch image into Excel box
    to insert images into cells in excel, you have many different ways to perform them, manually or using formulas.
  • Combine all the most basic AutoCAD commandsCombine all the most basic AutoCAD commands
    using autocad shortcut commands helps to manipulate faster. if you do not know all the cad commands, please see the summary of autocad commands that we have done below.
  • How to Scale in AutoCADHow to Scale in AutoCAD
    this article will show you how to scale lines, objects, groups, blocks, or images in autocad in two ways. the first is scaling by a factor, the second is scaling with a reference. both methods are useful to autocad users and make life just...
  • 11 Best AutoCAD Alternatives11 Best AutoCAD Alternatives
    the 5 autocad alternatives in today's article can read the same files as autocad, easily integrate with autocad, and are intuitive to learn.
  • Steps to calculate area in AutoCADSteps to calculate area in AutoCAD
    in autocad, we can quickly calculate the area without having to apply formulas and calculate manually with the calculator. in the article below, let's explore how to calculate area in cad.